Azure storage account is an account that contains all Storage data objects, including containers, file shares, queues and tables. It provides a unique namespace for your Azure Storage data that's accessible from anywhere in the world over HTTP or HTTPS.
ChatGPT(Chat Generative Pre-trained Transformer) is a machine learning model that carries out natural language processing tasks driven by AI technology that allows you to have human-like conversations with a high level of accuracy. ChatGPT can answer questions, and assist with tasks such as composing emails - like the one in this demo -, essays, code etc.
Create a Storage Account:
Steps To Create Azure Storage Account:
Step 1:
I am assuming that by now, you already have your Azure Microsoft Account.
- Login into your Azure Portal
Step 2:
- Search and Click on Storage Accounts on your Portal
- Click Storage Account

Step 3:
- Create

Step 4:
- Subscription: Choose your subscription
- Resource Group: Choose resource
- Storage Account Name: Choose a unique name across all existing accounts in Azure
- Region: Choose your region
- Click Review
Step 5:
- Create
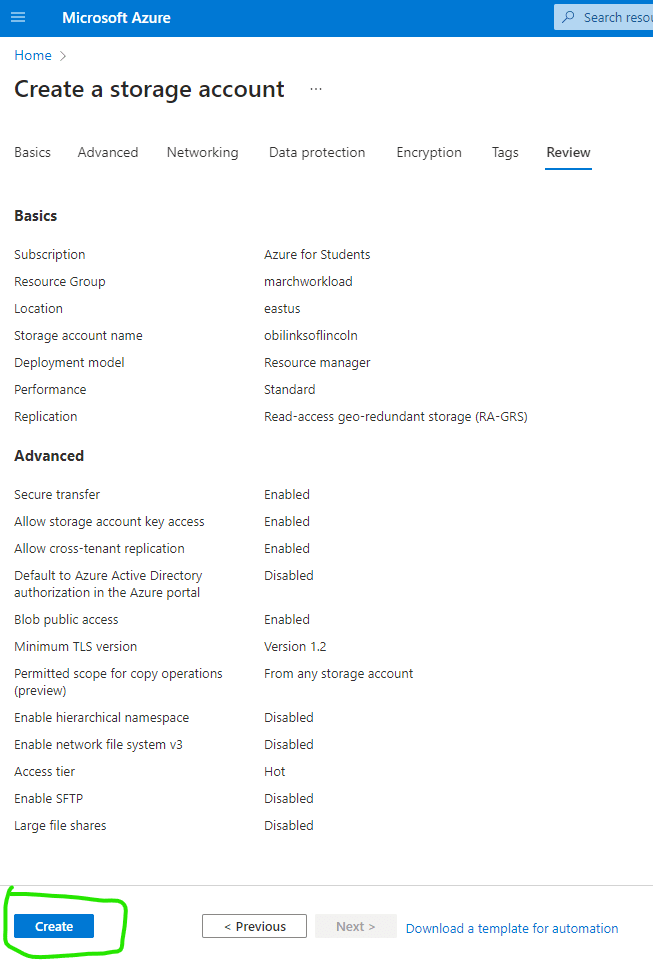
Step 6:
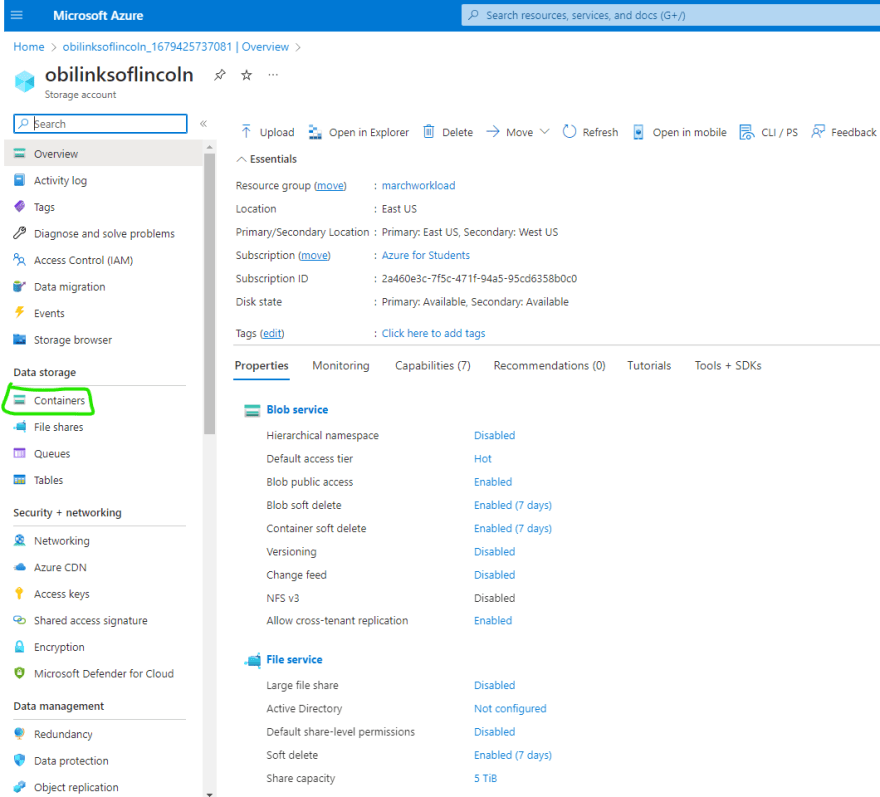
Storage account is created
- Click on 'Go to resource' to view

Step 7:
- Click on Containers
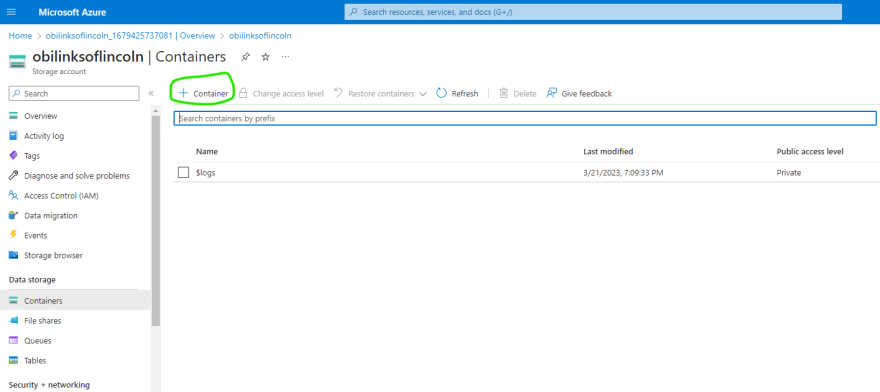
Step 8:
- Click on '+ Containers'
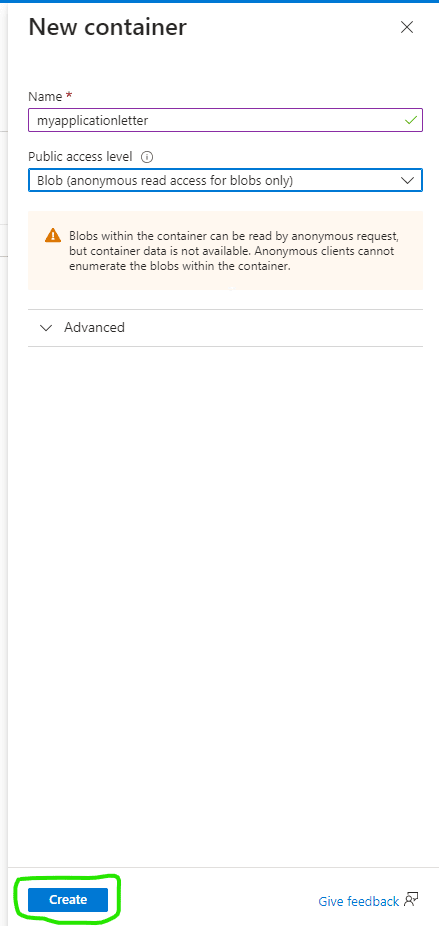
Step 9:
- Name: Choose the name of the kind of document you want to share. We will use myapplicationletter for this demo.
- Public access level: Change to Blob which allows you to share the document with anyone.
- Create
Step 10:
- Go to https://chat.openai.com/chat
- In the chat session, write what you want ChatGPT to do for you. - For this demo, we will use 'Write an application letter for a cloud computing role entry-role'. Note that you can write whatever you want.
- Press 'Enter' to view result

Step 11:
- Click on the file to access

Step 12:
- Copy the result of your entry in chatGPT to Microsoft Word and save data as PDF.
- Save document in any file. Eg download, desktop or document file in your computer.
- Go back to your Azure portal
- Click on Upload
- Drag and drop file or browse for file
- Choose any name for your container
- Upload
Step 13:
- Click on Upload and the 'Upload blob' on the right pops out
- Either drag and drop file or browse for file
- Upload

Step 14:
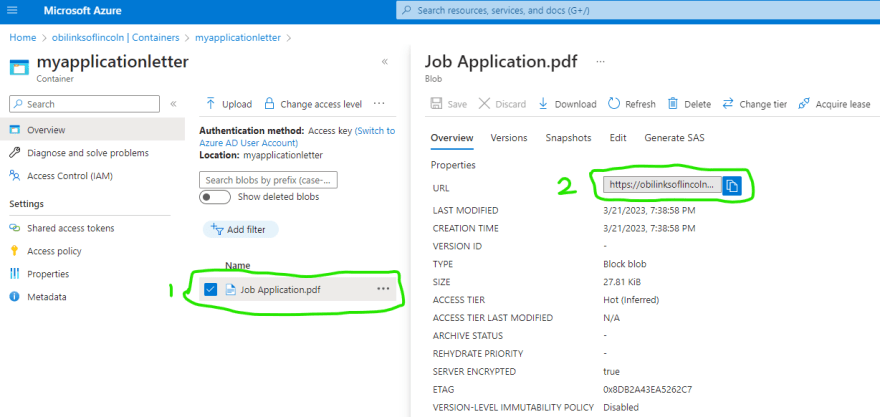
- Click on your file and the right side of the screen pops out
- Click and copy the link to share the URL
Congratulations!
You have successfully uploaded a letter to your Azure Storage Account and shared the linked.


Top comments (0)