
Last time we looked at per-poly and per-facet lighting. This time we'll look at the step that came between that and modern per-pixel lighting.
Refactor with materials
Things are starting to get a little hard to deal with. Each change in the shader requires code modification and I find myself commenting things in and out. What would be better is if we abstract those concepts so we have a library of effects to apply to meshes. To do so we'll create a new entity called a "Material." Since materials aren't really "actors", I feel I should rename that folder to entity. We'll also create a new folder in the root called shaders to house the glsl code for reuse. The convention will be {name}.vert.glsl or {name}.frag.glsl to differentiate the types of shaders.
One thing to point out here is that extracting to files will make loading slower as we need to make network requests. Ideally, we'd have some sort of build system that could bundle or inline these. I'm likely not going to look at that optimization anytime soon as I don't want to be dealing with build tools but for a production app you should.
In gl-helpers.js we can add a new utility to load a shader from the network and then use that to load a whole program:
export function loadShader(context, url, type){
    return fetch(url)
        .then(r => r.text())
        .then(txt => compileShader(context, txt, type));
}

export async function loadProgram(context, url){
    const [vertexShader, fragmentShader] = await Promise.all([
        loadShader(context, `${url}.vert.glsl`, context.VERTEX_SHADER),
        loadShader(context, `${url}.frag.glsl`, context.FRAGMENT_SHADER)
    ]);
    return compileProgram(context, vertexShader, fragmentShader);
}
loadProgram just needs the base path and can load both shaders. Now let's add some stuff to the Material class:
export class Material {
    #program;
    #textures;

    constructor(material){
        this.#program = material.program;
        this.#textures = material.textures ?? [];
    }

    get program(){
        return this.#program;
    }

    get textures(){
        return this.#textures;
    }
}
Update the mesh.js class to use a Material instead of a textureName (not shown).
bootGpu can now be completely gutted and the inline shaders can be moved to files:
async bootGpu() {
    this.context = this.dom.canvas.getContext("webgl2");
    this.context.enable(this.context.CULL_FACE);
    this.context.cullFace(this.context.BACK);
    //this.context.enable(this.context.DEPTH_TEST);
    this.context.clearColor(0, 0.5, 0.5, 1);
}
Then in connectedCallback we can call a new method right after bootGpu:
async createMaterials(){
    this.materials = {
        flatShaded: new Material({
            program: await loadProgram(this.context, "shaders/flat-shaded")
        })
    };
}
When making meshes we'll want to add the material:
createMeshes(){
    this.meshes = {
        sphere : new Mesh({
            ...facetSphere(20, { uvOffset: [0.5,0], color: [0.5,0.25,1]}),
            material: this.materials.flatShaded
        })
    };
}
And finally we add a bindMaterial which will make the shader program active and load the textures (we can delete bindTexture).
Since there is no longer a global program we're going to need to pass the mesh.material.program to a lot of different things. This post would be too hard to read to show every change, but I trust you can do it, or look at the code in github. If you just have the WebGL context you can use context.getParameter(context.CURRENT_PROGRAM) instead.
I also moved createTexture to gl-helpers.js and created a new helper that loads a whole texture from a url:
export function loadTexture(context, url){
    return loadImage(url)
        .then(img => createTexture(context, img));
}
We can now use completely different shading and texture by just changing some URLs:
async createMaterials(){
    this.materials = {
        flatShaded: new Material({
            program: await loadProgram(this.context, "shaders/textured"),
            textures: [await loadTexture(this.context, "./img/earth.png")]
        })
    };
}
Also note that this isn't terribly efficient. What if the same vertex shader was valid for a different fragment shader? We could break it up again into individual parts but I think for now this is fine, I'm only doing single objects anyway.
Multi-quad surface
I wanted to add another type of mesh that is a collection of quads that make up a flat surface. This will be useful later when looking at deforming. For now I'm calling it a terrainMesh until I find a better name because it'll be used for terrain generation (or so I think). Anyway it's a pretty easy thing to generate:
export function terrianMesh(height, width){
    const positions = [];
    const colors = [];
    const uvs = [];
    const normals = [];
    const triangles = [];
    const startX = -(width / 2);
    const startZ = -(height / 2);

    let attributeIndex = 0;
    for(let row = 0; row < width; row++){
        for(let col = 0; col < height; col++){
            positions.push(
                    startX + col, 0, startZ + row,
                    startX + 1 + col, 0, startZ + row,
                    startX + 1 + col, 0, startZ + 1 + row,
                    startX + col, 0, startZ + 1 + row
            );
            colors.push(
                1, 0, 0,
                1, 0, 0,
                1, 0, 0,
                1, 0, 0
            );
            uvs.push(
                0, 1,
                1, 1,
                1, 0,
                0, 0
            );
            normals.push(
                0, 1, 0,
                0, 1, 0,
                0, 1, 0,
                0, 1, 0
            );
            triangles.push(
                attributeIndex, attributeIndex + 1, attributeIndex + 2,
                attributeIndex, attributeIndex + 2, attributeIndex + 3
            );
            attributeIndex += 4;
        }
    }

    return {
        positions,
        colors,
        uvs,
        normals,
        triangles,
        textureName: "grass"
    };
}
We pass in how big we want the quad grid to be and then construct the polygons. This could also be done as a poly-strip for greater efficiency but I'm keeping things consistent with how are meshes are defined with explicit triangles so I don't have to make exceptions.

If you are making a game this is a great way to deal with the floor.
Per-vertex lights
So once things got a little fancier games started doing per-vertex lighting, so instead of coloring the polygon a single color, it could be a gradient.

Credit: https://www.marioboards.com/threads/38871/
Take a look at this Mario model from Super Smash Bros. The polygons are clearly marked here. Unlike the Virtua Fighter look where each polygon is clearly a single color here we can see some rudimentary texturing but if we look closer we can also see that polygons tend to be lit from one side. This is per-vertex lighting, or otherwise known as "Gouraud shading". Here we calculate the light value at each vertex and then linearly interpolate across the polygon. That second part probably rings a bell, we actually get this part for free and it's exactly what was happening in our previous multi-colored shapes.
The code is very similar to the per-facet lighting we had before. The only difference is that instead of calculating the lighting relative the the centroid which was shared between the vertices, we use the vertex position instead:
//vertex shader
uniform mat4 uProjectionMatrix;
uniform mat4 uModelMatrix;
uniform mat4 uViewMatrix;
uniform lowp mat4 uLight1;

attribute vec3 aVertexPosition;
attribute vec3 aVertexColor;
attribute vec2 aVertexUV;
attribute vec3 aVertexNormal;
varying mediump vec4 vColor;
varying mediump vec2 vUV;
varying mediump vec3 vNormal;
varying mediump vec3 vPosition;

varying mediump vec3 vToLight;
void main() {
    bool isPoint = uLight1[3][3] == 1.0;
    mediump vec3 normalNormal = normalize(vec3(uModelMatrix * vec4(aVertexNormal, 1.0)));
    mediump vec3 normalPosition = vec3(uModelMatrix * vec4(aVertexPosition, 1.0));

    if(isPoint) {
        mediump vec3 toLight = normalize(uLight1[0].xyz - normalPosition);
        mediump float light = dot(normalNormal, toLight);
        vColor = vec4(aVertexColor, 1.0) * uLight1[2] * vec4(light, light, light, 1);
        vToLight = toLight;
    } else {
        mediump float light = max(0.0, dot(normalNormal, uLight1[1].xyz));
        vColor = vec4(aVertexColor, 1.0) * uLight1[2] * vec4(light, light, light, 1);
    }

    gl_Position = uProjectionMatrix * uViewMatrix * uModelMatrix * vec4(aVertexPosition, 1.0);

    vUV = aVertexUV;
    vNormal = normalNormal;
    vPosition = normalPosition;
}
I cleaned it up a little bit to account for some edge cases. Notably the max to prevent lighting colors from going negative. The fragment shader is the exact same, a color passthrough.
Here's how it looks lighting a simple quad (light at (1, 0, -1.5):
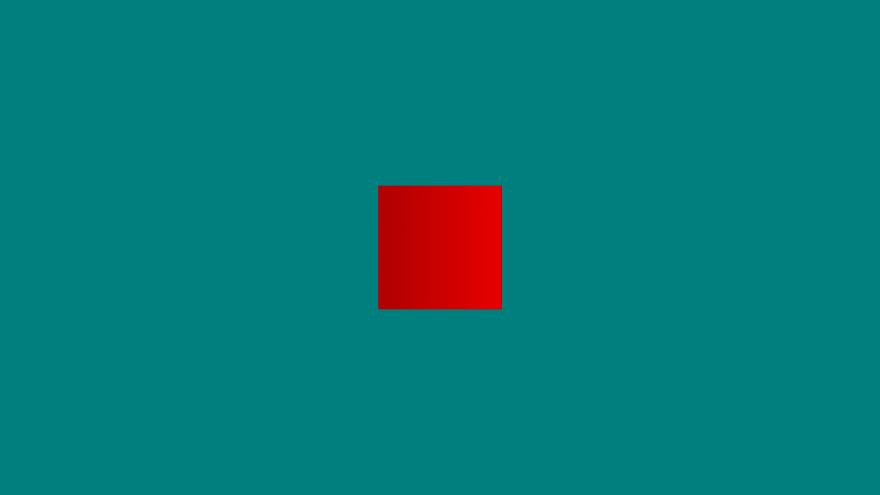
As you can see it's lit from the right side. Let's try something else like a uvSphere:
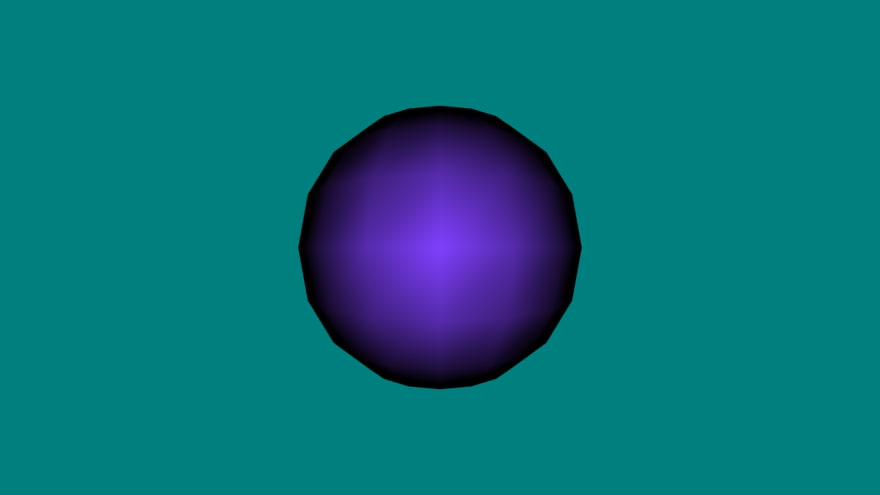
You can see the artifacting now. When the polygons are a little chunkier you can see the edges because they interpolate linearly instead of along a curved surface. It's clearly more realistic which is why it was popular for a long time. We can also look at it using our new terrainMesh (though not used for terrain today).
light at (0.5, 0, -1):

This makes the artifacting really noticeable. The edges tend to get brighter. Try looking for this in older 3D games!
Last time we tried per-fragment/per-pixel lighting (same thing but done in the fragment shader). Applying this we can see what modern hardware nets us:

The lighting gradient smoothly blends even across polygon edges.
Extra: Camera Zoom
I actually forgot to add this feature back when we did the camera but looking at big polygons up close makes me want to re-orient myself. Let's looks at how we might do zooming. We start by registering the event.
attachEvents() {
  this.dom.canvas.addEventListener("wheel", this.onWheel);
}
onWheel(e) {
    const delta = e.deltaY / 1000;
    this.cameras.default.orbitBy({ radius: delta });
}
Not much interesting here. It's a wheel event that passes a scaled delta value into the method zoomBy. A single snap-point on my mouse corresponds to 100 units so by multiplying by 1000 we move 0.1 unit toward or away from the object. We can build zoomBy in the camera:
orbitBy({ lat = 0, long = 0, radius = 0 }){
    const [r, currentLat, currentLng] = this.getOrbit();
    const newLat = clamp(currentLat + lat, -Math.PI/2, Math.PI/2);
    const newRadius = Math.max(0.1, r + radius);
    this.#position = latLngToCartesian([newRadius, newLat, currentLng - long]);
}
We can add a new component for the radius to the orbitBy. We need to clamp the new radius so it doesn't go negative but also it should not really be 0 either. At 0 the positions collapse and we don't know what our rotation is anymore so rather that do complex tracking of the previous lat/long we can just say you need to be at least slightly away from the center.
We can also do multiples. I'm choosing to do this with the numberpad plus and minus keys. In onKeydown we setup the events:
case "NumpadAdd": {
    this.cameras.default.zoomBy(2);
    break;
}
case "NumpadSubtract": {
    this.cameras.default.zoomBy(0.5);
    break;
}
And the zoomBy on the camera:
zoomBy(value) {
    const [r, currentLat, currentLng] = this.getOrbit();
    const newRadius = Math.max(0.1, r / value);
    this.#position = latLngToCartesian([newRadius, currentLat, currentLng]);
}
Almost identical but we're multiplying instead of adding. Actually because "zoom" means to get closer we're actually doing the reverse and halving the radius for a 2x zoom and doubling it to zoom out 0.5x.
And now we have some more options to really see the detail on that lighting.

Top comments (2)
Apply your GLSL skills to the V Shader Hackathon, running until 22 May 2025!
Create unique Shader art to win up to $1000 – organized in partnership with Gamedevjs.com
How to join: medium.com/vsystems/13-26-april-cr...
Any questions? Join our community!
Nice series