Introduction
This is the second part of the Note Taker tutorial series where we will create a Firestore database. When I started using databases, my first choice was Firestore because it is a NoSQL database and I saw how to use it in a video by Traversy Media. It looked easy to set up and use.
But, the Firebase setup to create a Firestore database shown in the video was a little different than the one I had gone through. Inevitably, tools and libraries change, and Firestore is no exception to this.
Even if there was no change, I would still go back to that video and watch how the database was created, at least for the first few times. This part in the Note Taker series serves the same purpose. Anyone who needs a reference when creating a Firestore database can look for this article.
I will regularly update this article when I feel Firebase has changed a lot and the project creation steps are very different from the ones at the time of writing this article.
Creating a project in Firebase console
The first step in creating a Firestore database is to log in to your Google account and then visit this link. If you haven't created any prior projects, the page you visit will look something like this
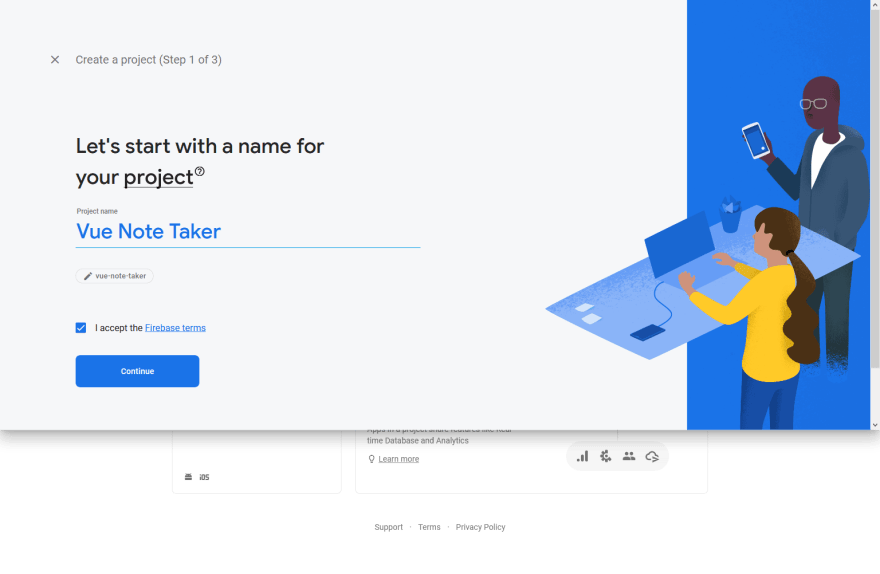
Click on Create a project to create a new project. Enter a name for your project and check the box to accept Firebase terms and conditions. For this series - I will name the project appropriately:
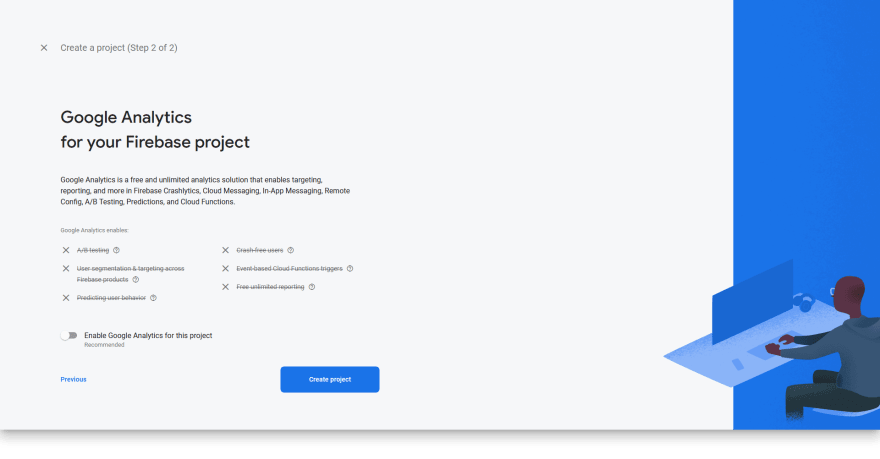
Clicking Continue, you will be shown a page for Google Analytics and what it brings along with it once you enable Google Analytics for your project. I don't usually use Google Analytics for my projects (I have in fact never ever used this 😂) so I will be turning off Google Analytics.
After you click Create Project, Firebase will take a while to create your project and notify you when it has finished.
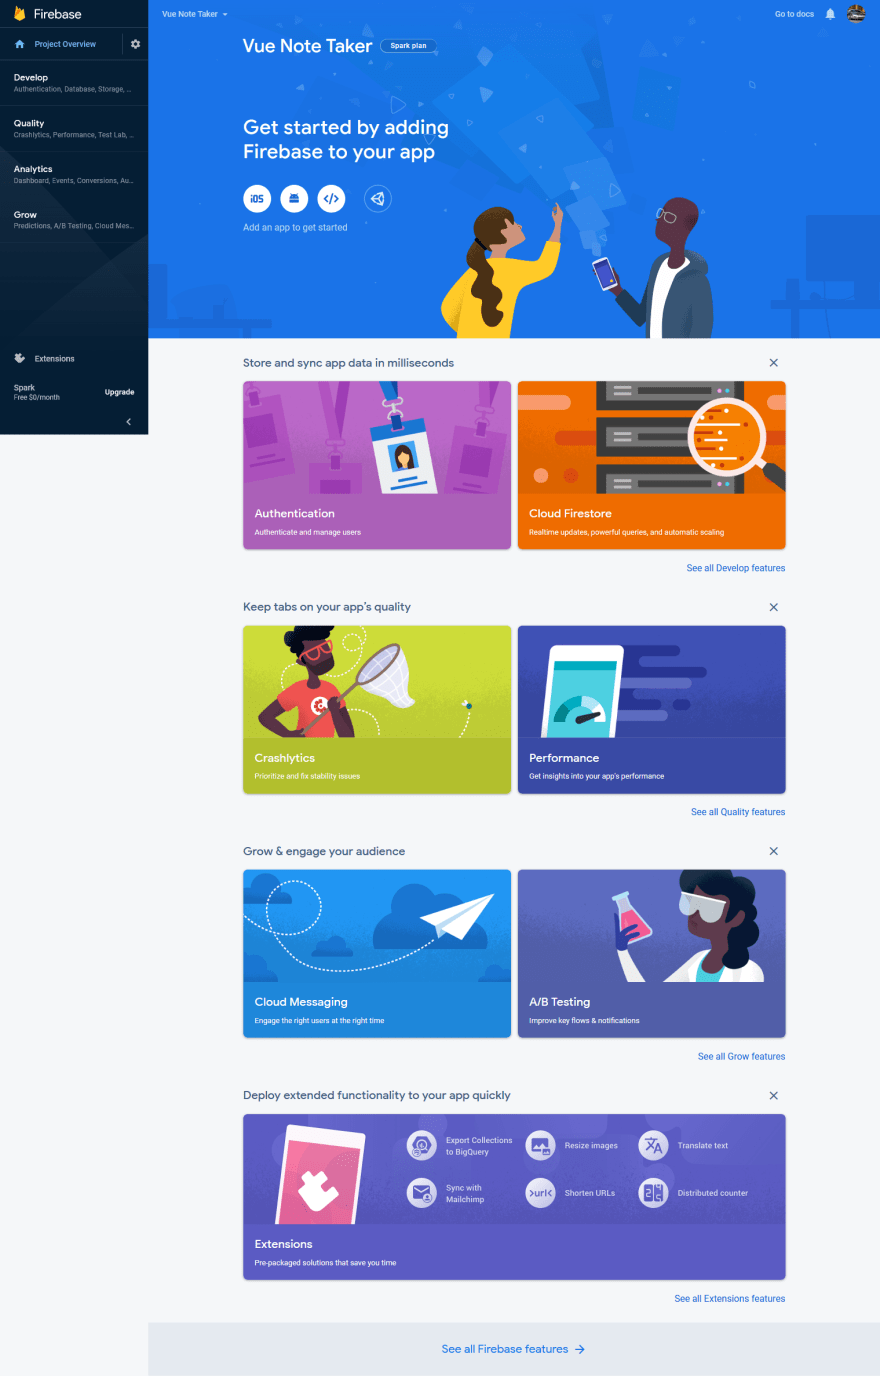
You will be greeted with the above page when your project has been created. This is your project overview. Your project has been created, but we still don't have our database. To create a new database, click on the Develop option in the dark blue sidebar to the left. A list of options will open. Select Database.
Creating a new database
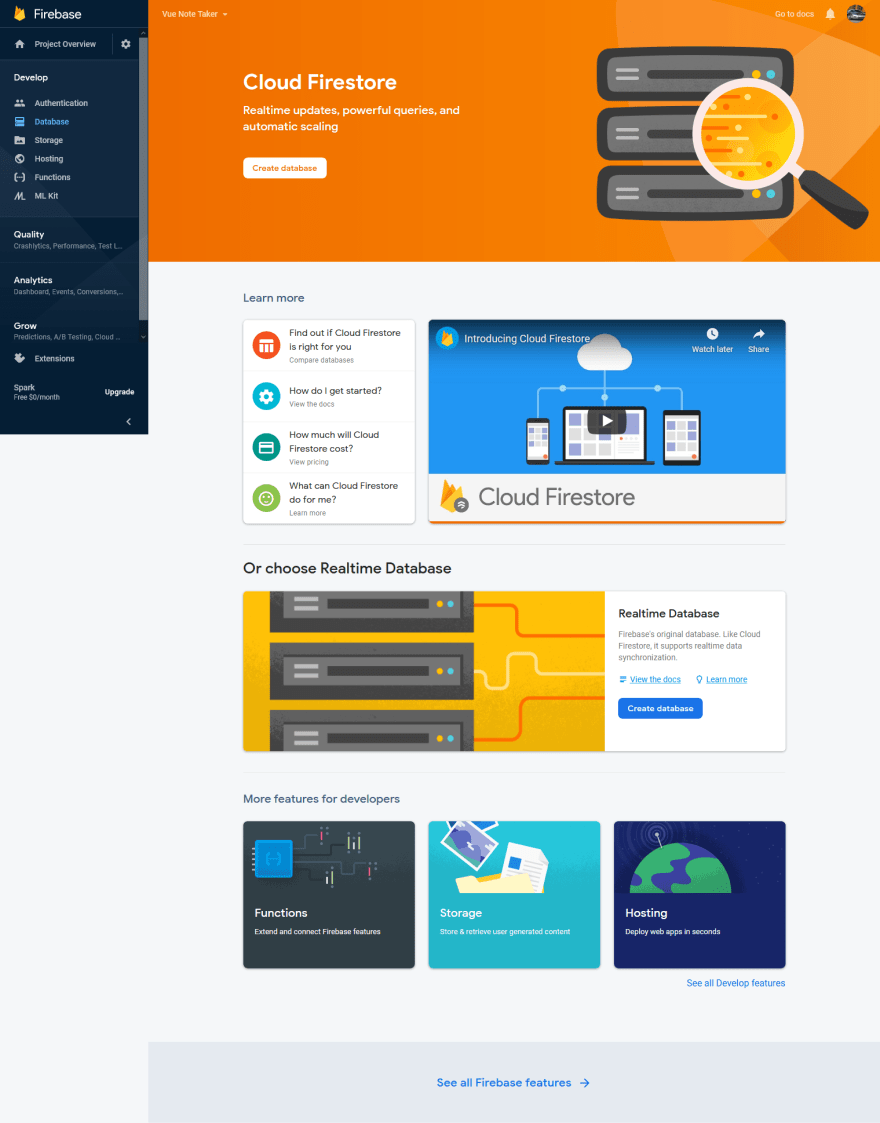
This is what you will see when you click on the Database option:
There are two buttons to create a database. The one at the top(white button) is for creating a Firestore database and the one below(blue button) is for creating Firebase's original real-time database. We want a Firestore database so click on the first button(the white one).
Before the database is created, we need to select two things - the security rules for the database and the location for the data. I've selected the test mode's rules instead of the production mode's rules because there is no need for an authentication system.
After this, we have to select the location where the data will be stored.
Click on the dropdown and select the location nearest to you. Some locations don't have certain features available. Because of this, you might see some lag during database operations. I always select the one in the image above even though I live in Southeast Asia and I have never encountered a problem.
After taking some time to create the database and apply the rules, we finally have our database:
Wrapping up
In this part of the series, we created our Firestore database. In the next part, we will connect this database to our Vue app, submit our notes to this database and even fetch existing notes from it.
Feel free to leave any questions and suggestions in the comments below.


Top comments (0)