
When I began my journey as a software engineer, one of my biggest questions was how to handle images in APIs. Along the way, I learned that it's considered best practice to store images in a storage service, such as Cloudinary or Amazon S3, and only save the URL of the image in our database.
In this article, we will use Cloudinary because it has a simpler registration process that doesn't require a credit card.
Project Setup
1. Creating a Spring Boot Project
To get started, we'll create a new Spring Boot project. You can do this using the Spring Initializr.
Configure the project with the following dependencies:
- Spring Web
- Spring Data JPA
- Spring Boot DevTools
- PostgreSQL Driver
- Lombok
You can generate the project and download the ZIP file. Then, unzip the file and open it in your preferred IDE.
I'm using Maven with Java 17 and Spring Boot 3.3.2.
2. Remember to add the Cloudinary Dependency to your pom.xml.
<dependency>
    <groupId>com.cloudinary</groupId>
    <artifactId>cloudinary-http45</artifactId>
    <version>1.39.0</version>
</dependency>
3. Write the docker-compose file
docker-compose.yaml
services:
  database:
    image: postgres
    ports:
      - "5432:5432"
    environment:
      - POSTGRES_DB=database
      - POSTGRES_USER=admin
      - POSTGRES_PASSWORD=admin
    volumes:
      - postgres_data:/var/lib/postgresql/data

volumes:
  postgres_data:
4. Configure application.properties
Let's configure the application.properties file to connect to PostgreSQL and Cloudinary. Add the following configurations:
# PostgreSQL configuration
spring.datasource.url=jdbc:postgresql://localhost:5432/database
spring.datasource.username=admin
spring.datasource.password=admin

spring.jpa.hibernate.ddl-auto=update
spring.jpa.show-sql=true

# File with sensitive data, such as keys.
# Don't commit this file to Github/BitBucket
spring.config.import=classpath:env.properties

# Enable a multiPartForm to send data to SpringBoot
spring.servlet.multipart.enabled=true
5. Create env.properties file
NEVER commit this file to github because they have sensitive information like your api key from Cloudinary.
Make sure to create this file inside the directory src/main/resources :
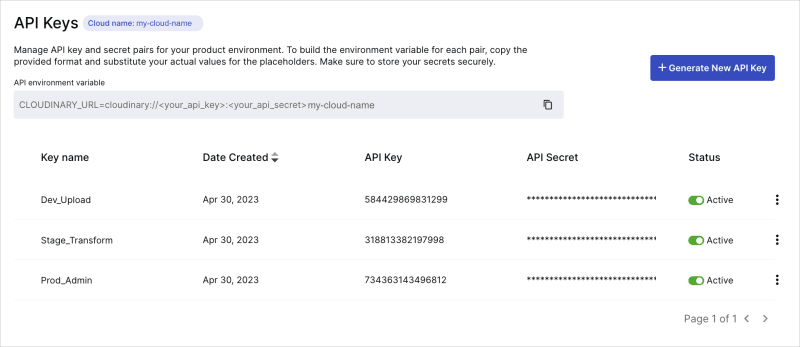
CLOUDINARY_URL=cloudinary://<your_api_key>:<your_api_secret>@<your_cloud_name>
Code
1. Configuring Cloudinary
Create a directory called configs and inside that a configuration file for Cloudinary. Create a class CloudinaryConfig in a configuration package:
package com.yourproject.config;

import com.cloudinary.Cloudinary;
import com.cloudinary.utils.ObjectUtils;
import org.springframework.context.annotation.Bean;
import org.springframework.context.annotation.Configuration;

@Configuration
public class CloudinaryConfig {


    @Value("${CLOUDINARY_URL}")
    private String cloudinaryURL;

    @Bean
    public Cloudinary cloudinary() {
        return new Cloudinary(this.cloudinaryURL);
    }
}
2. Create the Book entity/model
import jakarta.persistence.Column;
import jakarta.persistence.Entity;
import jakarta.persistence.GeneratedValue;
import jakarta.persistence.GenerationType;
import jakarta.persistence.Id;
import lombok.Getter;
import lombok.NoArgsConstructor;
import lombok.Setter;

@Entity
@Getter
@Setter
@NoArgsConstructor
public class Book {

    @Id
    @GeneratedValue(strategy = GenerationType.SEQUENCE)
    private Long id;

    private String name;

    @Column(name = "img_url")
    private String imgUrl;

}
3.Create the Book repository
import org.springframework.data.jpa.repository.JpaRepository;
import org.springframework.stereotype.Repository;

import cloudinary.upload.imageUpload.entities.Book;

@Repository
public interface BookRepository extends JpaRepository<Book, Long> {

}
4.Create the Book Service
package cloudinary.upload.imageUpload.services;

import java.io.File;
import java.io.FileOutputStream;
import java.io.IOException;

import org.springframework.beans.factory.annotation.Autowired;
import org.springframework.http.HttpStatus;
import org.springframework.stereotype.Service;
import org.springframework.web.multipart.MultipartFile;
import org.springframework.web.server.ResponseStatusException;

import com.cloudinary.Cloudinary;
import com.cloudinary.utils.ObjectUtils;

import cloudinary.upload.imageUpload.entities.Book;
import cloudinary.upload.imageUpload.repositories.BookRepository;

@Service
public class BookService {

    @Autowired
    private BookRepository bookRepository;

    @Autowired
    private Cloudinary cloudinary;

    public Book addBook(String name, MultipartFile imgUrl) {
        try {
            File convFile = new File(System.getProperty("java.io.tmpdir") + "/" + imgUrl.getOriginalFilename());
            FileOutputStream fos = new FileOutputStream(convFile);
            fos.write(imgUrl.getBytes());
            fos.close();

            var pic = cloudinary.uploader().upload(convFile, ObjectUtils.asMap("folder", "/bookCovers/"));

            var newBook = new Book();
            newBook.setName(name);
            newBook.setImgUrl(pic.get("url").toString());

            return this.bookRepository.save(newBook);

        } catch (IOException e) {
            throw new ResponseStatusException(HttpStatus.BAD_GATEWAY, "Failed to upload the file.");
        }
    }
}
5. Create the Book Controller
package cloudinary.upload.imageUpload.controllers;

import org.springframework.beans.factory.annotation.Autowired;
import org.springframework.http.ResponseEntity;
import org.springframework.web.bind.annotation.PostMapping;
import org.springframework.web.bind.annotation.RequestParam;
import org.springframework.web.bind.annotation.RestController;
import org.springframework.web.multipart.MultipartFile;

import cloudinary.upload.imageUpload.entities.Book;
import cloudinary.upload.imageUpload.services.BookService;

@RestController
public class BookController {

    @Autowired
    private BookService bookService;

    @PostMapping("/addBook")
    public ResponseEntity<Book> addBook(@RequestParam("name") String name,
            @RequestParam("imgUrl") MultipartFile imgUrl) {
        var res = this.bookService.addBook(name, imgUrl);

        return ResponseEntity.ok(res);
    }

}
Using Bruno HTTP Client
1.Make the api request
You can choose the HTTP client that you prefer (Postman, Insomnia, etc.). I'm using Bruno HTTP Client.
In the body, select a MultipartForm to send the name and the imgUrl.

The response will include a JSON object with the id of the book, the name, and the imgUrl of the image from Cloudinary, which you can easily access with a frontend app.

Top comments (0)