
So last time we explored the question: What are Linux distributions? Now that we know Linux distributions are different operating systems in their own right, and hopefully you've picked out which distribution is right for you, let's explore how you can install a distribution.
Before you install
Before we look at the installers themselves, let's address some confusing and intimidating topics. First, if the very concept of changing your operating system is foreign to you, i.e. you've done it, this will seem like a scary process. You will read words like, wipe disk, or All your data will be deleted, all of this true but doesn't have to be scary. It's a good idea to backup all of the files you'd like to keep on a separate USB drive. Windows also has a backup and restore utility built-in that can be used to create an full system image, for a complete operating system restore. In addition to terms like system image, you will also encounter terms like ISO, ISO file, bootable disk, bootable USB, or live USB. The ISO files are essentially just operating system files that can be used to create an operating system installation device. This device is referred as a bootable disk/USB, or live USB. That's essentially it. You will download an ISO and create live USB, you don't need to know anything else about this.
Second, there is a possibility of creating a setup with Windows and Linux on the same system, but, because of the complexity, it is out-of-scope for this article. This form of installation is called dual booting. We may cover this use case in a future article.
Finally, while there are many distributions out there, the installing experience is largely the same, with some notable exceptions. If a distribution has a graphical installer, it should mostly follow the same logical steps. So even you're not picking the distributions that I wrote about before, you should be able to get through the installation process with little to no issues.
Downloading the correct file
When you visit the download pages of the various distributions out there you will see several options, and maybe more than one download button. It's not a trap! Linux Distributions are just not great at making the experience accessible for the masses. Ubuntu does a better of job of this than most. You'll see pages like the ones below
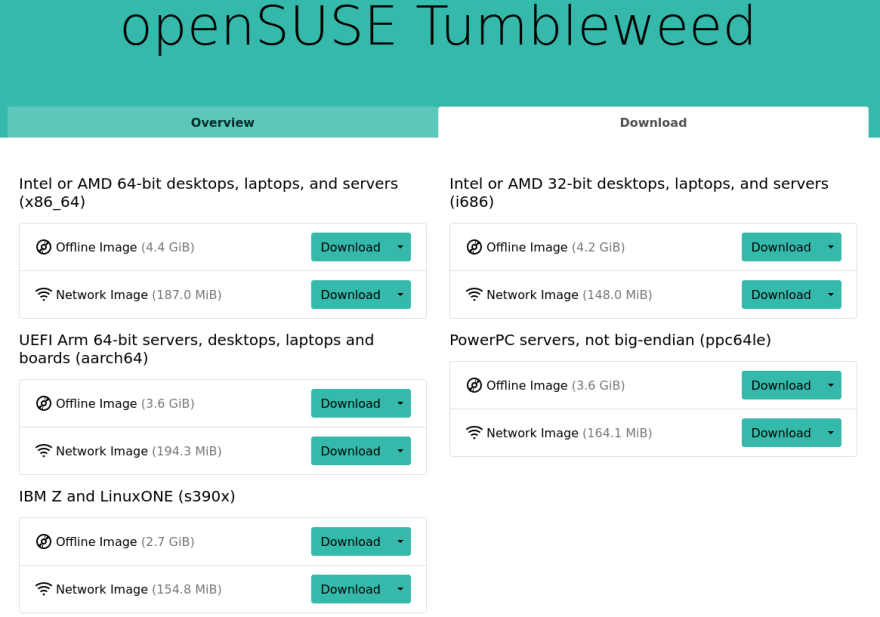
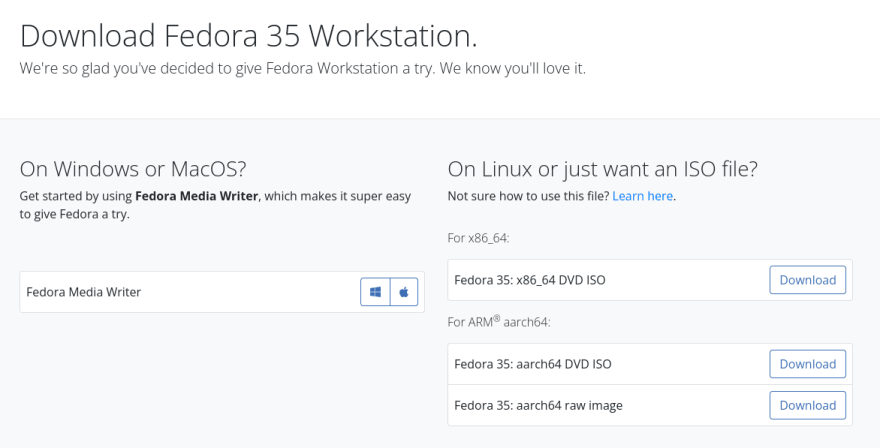

While the labels from openSUSE, and Fedora can be confusing, you don't have to worry about most of them. If you have a computer that you bought in the last few years, all you need to do is look for either x86_64 or AMD 64 and click that download button. openSUSE gives you two options for each architecture, that's what all the different labels are, the offline option is for when you don't have an active internet connection. Generally better to donwload that one. Fedora provides less options than openSUSE so there is less confusion. Again you just need to look for x86_64 and click that download button. Ubuntu provides even less options, but creates a different kind of confustion. At the top it prominently features the long term support (LTS) version of the operating system. This basically means you get security updates for fives years after release. The one below that is the latest release of Ubuntu. They follow a year and month based naming system so 21.10 was released in October 2021. For the latest and greatest software and hardware support, that's the one you want. If you have older hardware, LTS is the way to go.
You are by no means limited to these three options. I'm just using these as a diverse set of examples.
How to create a live USB
Now that you've selected your distribution, and downloaded the ISO. It's time to create live USB. Make sure to pick a good size USB. Greater than 4GB is recommended. Although there is no reason to buy a 4GB USB these days.
Etcher
Etcher is a simple tool that makes it quick and easy to create a live USB. You simply have to:
- Plug-in a USB
- Select the ISO file of your distribution
- Click flash
Etcher will do that rest.
Fedora Media Writer
Fedora Media Writer is also a great choice for creating a live USB. Obviously it has built-in support for downloading, and creating live USBs for Fedora. It also provides the ability to download the various Fedora "spins". And it has the option to create a live USB using a custom image. If you are creating a non-Fedora live USB, then just:
- click on the custom image option
- pick your custom image
- Make sure your USB is plugged in
- Select your USB from the drop down menu
- Click the write button
Shameless plug
If you like content on this content, I write more articles like this semi regularly on my blog.
Blog: https://hackandslash.blog
Installing Distributions
Now that you have a live USB, it's time to install.
- Shutdown your computer
- Plug in your live USB into your computer
- Press the power button on your computer
- As the computer is booting up, keep pressing the F12 key to enter the boot options menu (This may be different depending your manufacturer so check online if F12 doesn't work)
- Select you live USB from the boot menu
A note about newer machines. These computers have a security feature called Secure Boot. This may prevent you from booting off of your USB. Fedora and Ubuntu will work even with Secure Boot on. But other distributions may not. Look here if you wish to disable Secure Boot
We're going to be taking a look at three different installers from three different distributions. The installation experience is largely the same when it comes to other distributions so I'm only covering the three main different ones here. First up, Ubuntu.
Ubuntu Installation

Your first greeted by the above screen. You don't have to worry about the other options and if you wait about five seconds you will be taken to the default Ubuntu option anyway.

On the first screen you'll see a Try Ubuntu button. This will basically boot into a live environment which will be the same as the final installed operating system. At this point this is a great way to check if all your hardware will work with Ubuntu. There is an installation shortcut on the desktop in the live environment. Which take you through the same installation as when you press on the Install Ubuntu button.
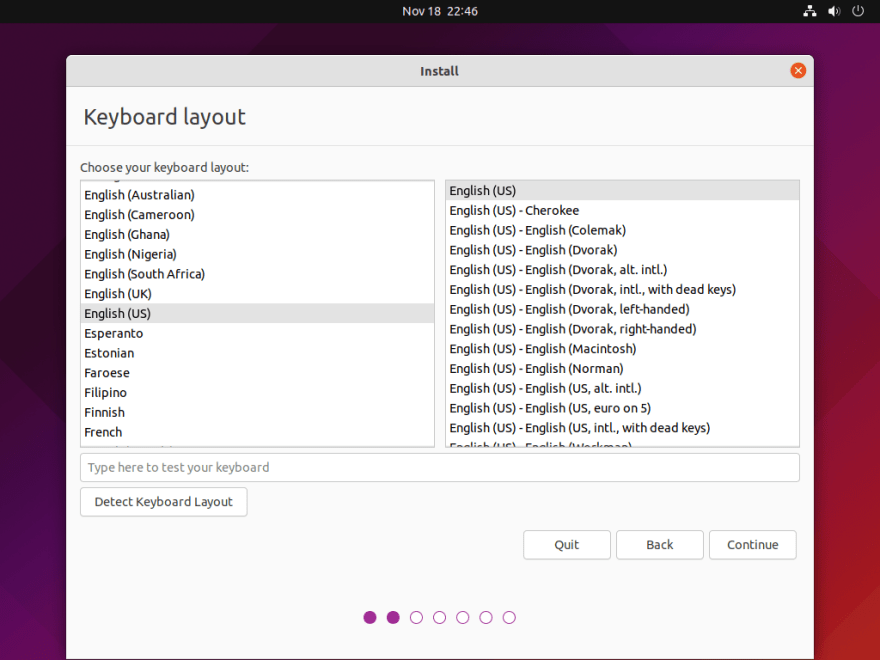
Next, you'll select the keyboard layout. Generally the installer is pretty good at detecting the keyboard layout. It provides a list of many different options which can be intimidating if you don't know what you're looking at. But if you have a standard QWERTY keyboard you can stick with the default selection. Make sure to test your keyboard in the text box.

Now comes the installation package. Normal installation will give you most things you need out of the box. Pick minimal only if you want to install specific software after installation. Also make sure to check the "Download updates while installing Ubuntu" and "Install third-party software..." check boxes. The later will be needed for the proprietary software.
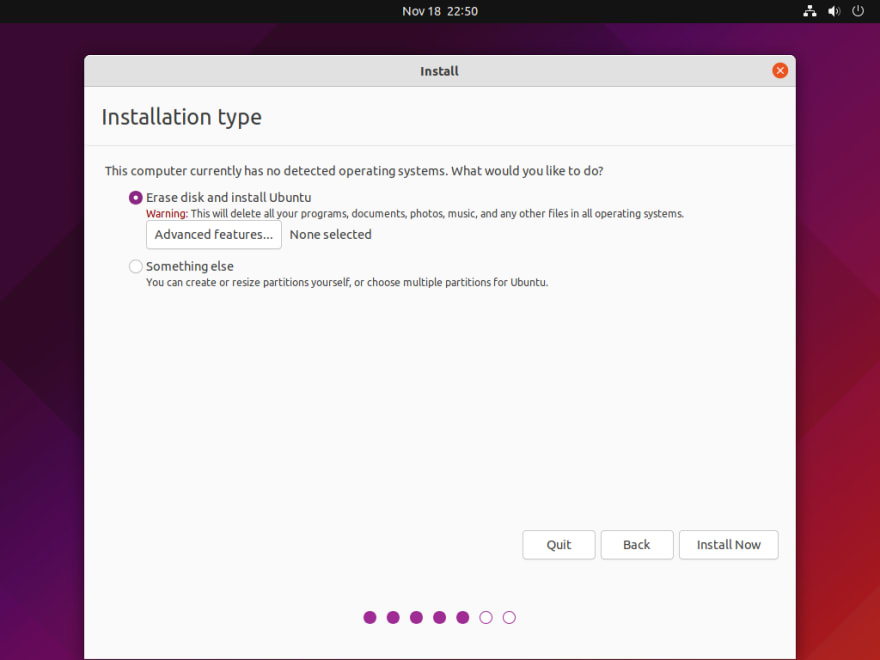
Now the installer, depending on your current setup, will give you some options. Above you see only two options because this is an installation on an empty SSD. If you have Windows already installed or another Linux distribution, this installer may give an option to install along side those operating systems. For our purposes we will just pick the erase everything option and continue. The "something else" option is for advanced users.

This screen is pretty simple. Just pick your timezone and continue.

Now the last screen is where you will create you user. Simply provide your full name and change the different generated options if you like. Make sure to create a strong password. You can select whether you want to login automatically. Active directory is for domain based login, most people don't have to worry about it.
Once you click on continue the installation will begin. You will get a slideshow of various features and apps that Ubuntu has. Once the installation is finished you will be prompted to reboot. If the installer prompts you to, remove the USB and hit enter on the keyboard. Once you reboot you will see a brand new Ubuntu install.
Fedora Installation
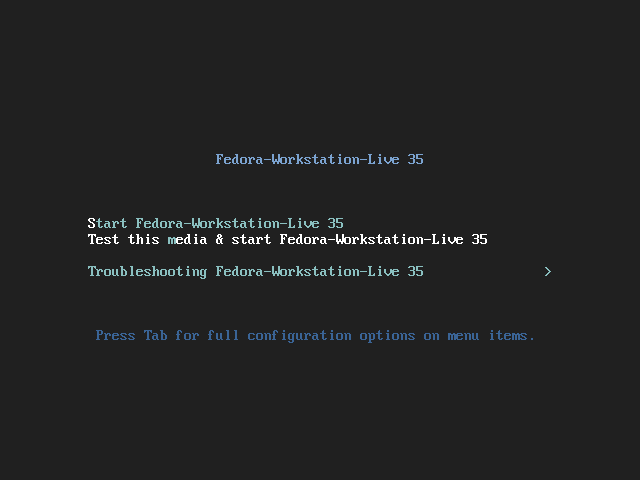
Fedora presents a similar screen to Ubuntu's. Simply wait five seconds and it will boot into the live USB. Fedora tests the media integrity before booting up as well.
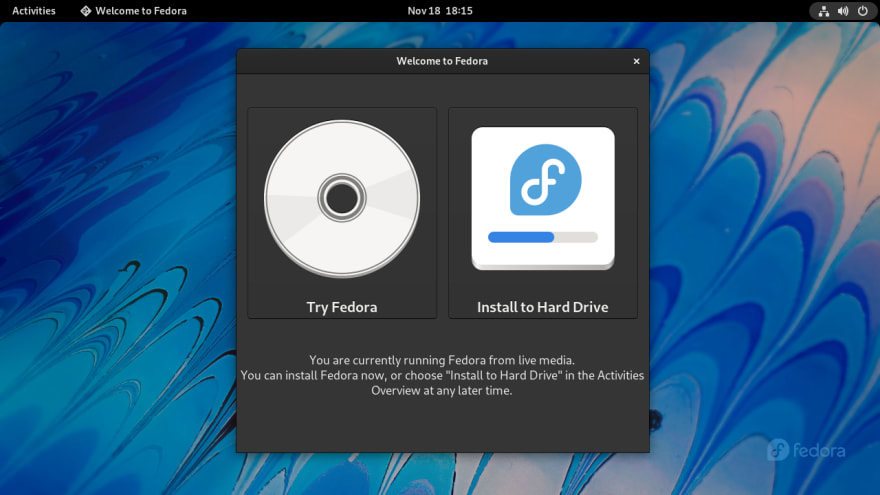
Similar to Ubuntu you a try before you buy option. Although Fedora does boot directly in the live environment. The "Try Fedora" button will simply close the open installer. There is a shortcut in the activities section at the top left corner to run the installer again.

The installer starts off with a similar language and keyboard selection screen as Ubuntu. Again usually pretty good at detecting the keyboard layout.

The Fedora installer is more parallel and streamlined than Ubuntu's. The keyboard and date/time are automatically selected. You can click on them and change them if you like. The main selection is for the disk.

After you click on the "Installation Destination" button, you'll be greeted with the above screen. This is where a lot of people get confused with the Fedora installer. If there is only one disk, that disk is automatically selected. If that is the case for you, you can simply click done here and the entire disk will be used for the installation.

Once you click on the "Begin Installation" button, the installation will start and about 10 to 15 minutes it should be finished. Fedora has a great post installation setup, for user creation, and acclimating the user to the desktop environment. You'll given a tour of the desktop features once you reboot.
openSUSE Tumbleweed Installation
The openSUSE installation is the most detailed of all three. It starts out similarly where you have pick the boot option. Make sure to select the boot from USB option.
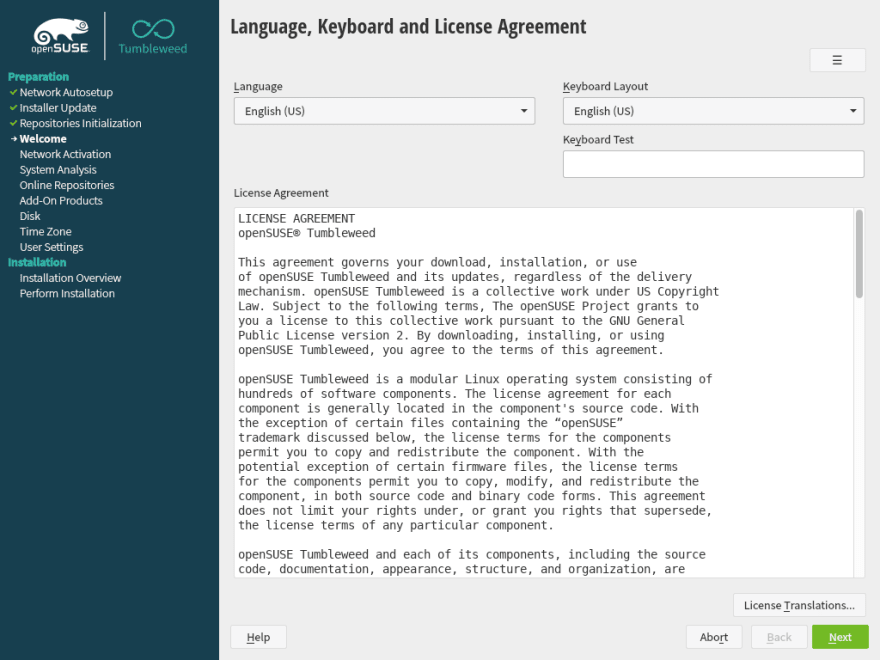
OpenSUSE's installer first performs some automatic tasks to update itself and make sure there is network connectivity. This can be a bit confusing as it starts very quickly just doing things. Once it's done you'll see the Welcome screen above.

Starting the installation it performs some automatic tasks again. Then it gives you a choice to add additional repositories. The repositories are the source of the software catalog for the software store.

You don't need to select the "Sources" or the "DEBUG" repositories. Just the first three options should be fine.

The installer will take some time to add these repositories.
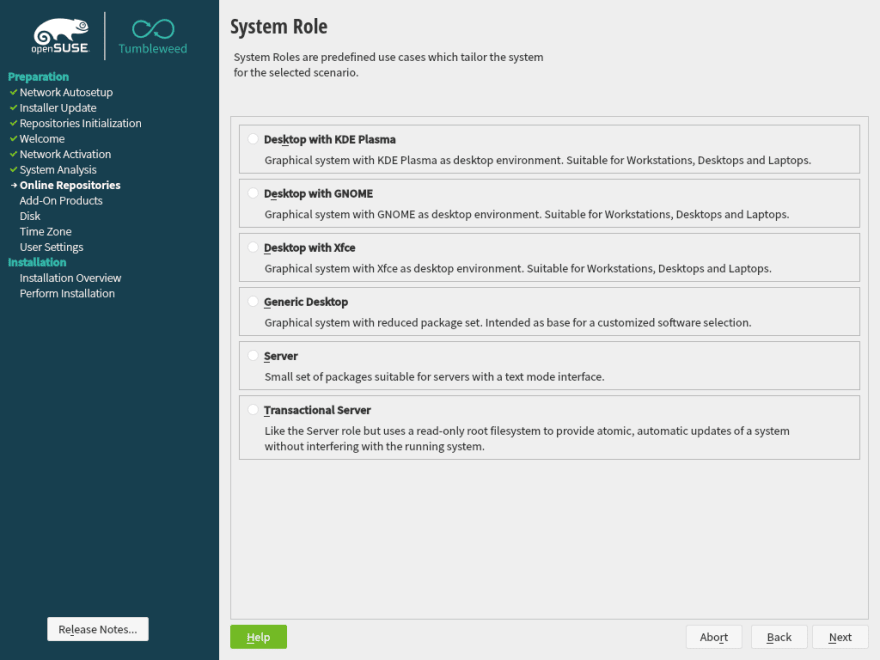
OpenSUSE is the only distribution on the list that provides you with different options for your desktop. We will explore these in detail in a later article. For now here is some simple guidance. If you're familiar with Windows, pick KDE Plasma, if you're more used to MacOS or if you want simple uncomplicated desktop, pick Gnome, and if you have an older computer with less RAM or CPU power pick Xfce. The rest you don't need to worry about.
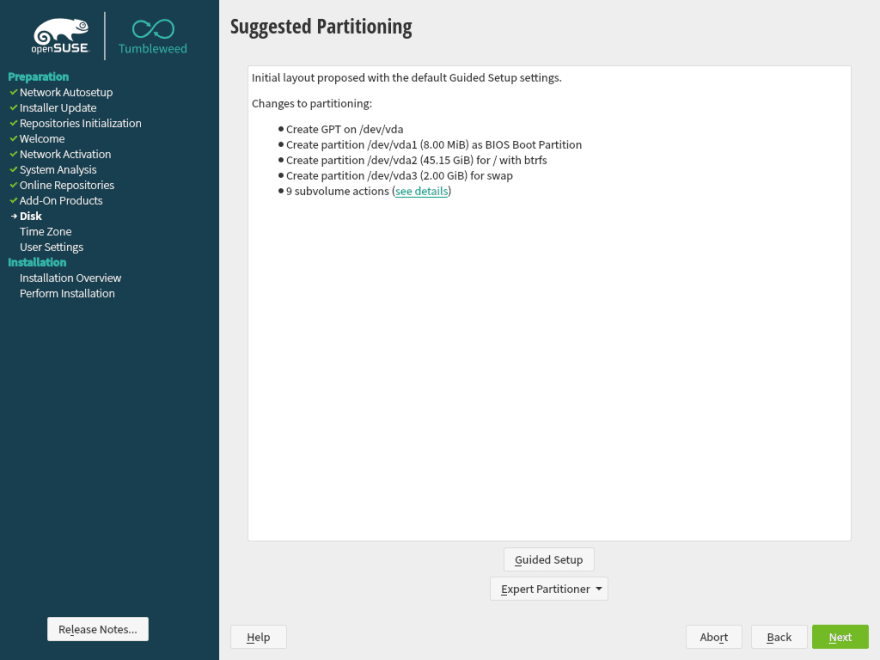
The Disk screen shows the suggested partition that the installer will create. If you're an advaced user, you can customize by picking from the drop down menu below. For now we'll keep the suggested setup.

Again pick your timezone.
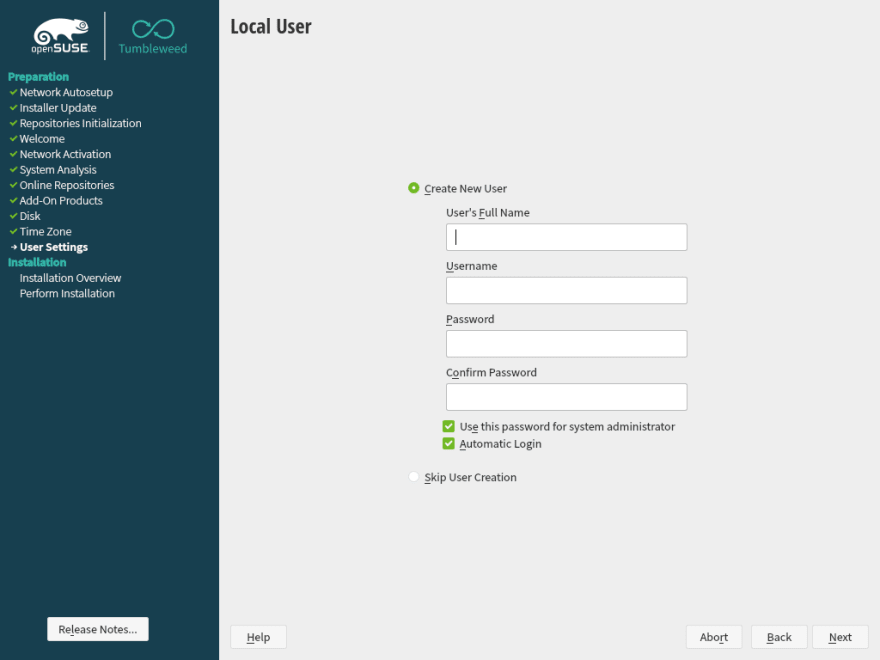
Create your user. The "Automatic Login" option is pre-selected. Uncheck it if you plan to have multiple users.
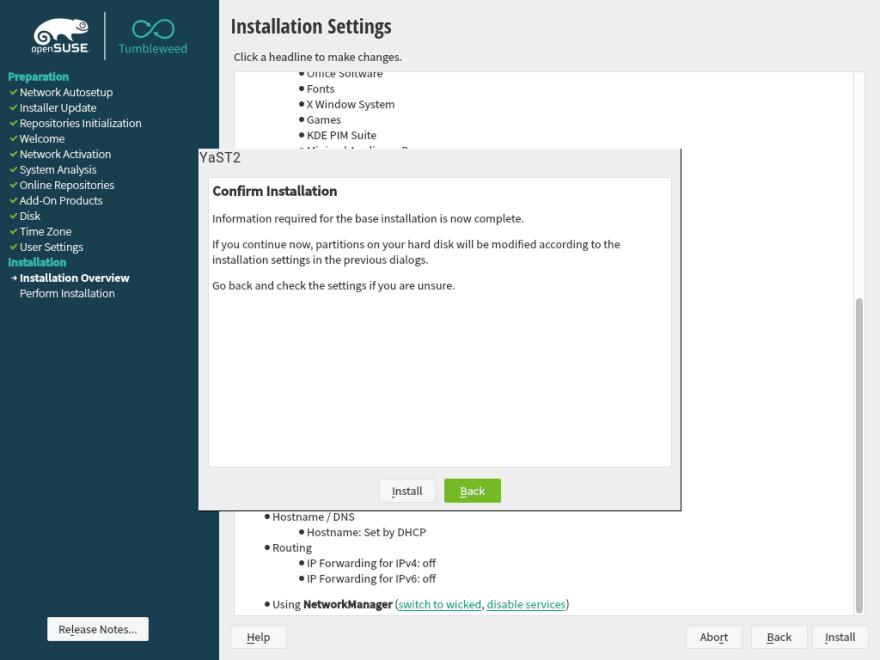
Finally, the openSUSE installer shows a summary of what will be installed and asks for confirmation one last time. After you click install and the process completes, you can boot into your new operating system that will be always up-to-date.
Well that about covers it for these three installers. Most other distributions you'll find will have some variation of the above steps. There are some notable exceptions. Arch Linux for example does not have a graphical installer. Arch provides command line tools to installer the distribution. I may cover that in a later article once we've covered the basics.
Subscribe
I write content like this and more so please consider supporting me by subscribing to my blog.

Top comments (0)