IAM stands for Identity Access Management, and it’s a service which helps you to manage the access to AWS resources in the account.
Upon creating your AWS account, you’ll sign-in as a super-user (root), with no restrictions when it comes to creating or using AWS resources. However, just using this super-user for everything is not considered a good practice. Instead, it is recommended that you just use to create your very first user with admin rights, and only use the root user when it’s unavoidable.
Fortunately IAM has a robust set of features that lets us configure fine-grained access to AWS services for users, groups of users, and even for AWS services themselves.

So how does it work?
Policies
Simply put, a Policy is a document that defines a set of permissions. It can allow or deny the access to specific AWS resources, and it can be attached to a user, group or role.
Policies documents are on JSON format, and can be categorized in:
- Managed Policies – IAM policies created and managed by AWS. These policies cover some of the more frequent use-cases, like granting read-only access to a storage service unit. You can attach these policies to as many entities as you want. You cannot really modify Managed policies, but you can use them as a starting point to create new policies.
- Customer Policies – IAM policies created and managed by the user. You can assign them to as many entities as you want, but only within the account that created them.
- Inline Policies – IAM polices that are intrinsically embedded into a user. This type of policy can only be attached to the user, group, role or application in which is defined. What’s more, should you delete its bearer, the policy will also be deleted. This type of policy is useful when you really One important thing to note. An entity could be under the influence of two different policies that contradict themselves, regarding the use of a resource.
Let’s say for example that policy A allows an entity to read the contents of all S3buckets. Policy B on the other hand, explicitly denies the access to a specific S3 bucket.
If a user would be under the effect of both policies (for example, getting Policy A due to belonging to a user group, and B directly attached to the user), then the user will be able to access all S3 buckets except the one that it’s explicitly denied in policy B.
This is pretty much a rule on AWS’s IAM. When a user is both allowed and explicitly restricted from a resource by different policies, the explicit restriction will always prevail.
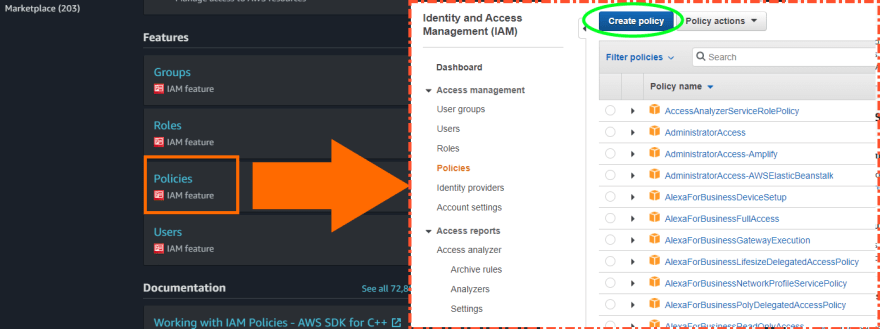
So how do we create a Policy?
We’ll start from the AWS console, search up “IAM” and then select Policies. After that we’ll select “Create Policy”.
There are two ways to create policies in the console. As we have already mentioned, policies are essentially JSON documents, so we can just write it up.
Optionally we can use the console’s excellent policy maker:

Here we can select:
• Service: Services included in the policy. You can specify multiple services
• Access Level: Here we can fine-tune the actions that the policy will be allowed (or denied!) regarding the services in question. In this example, the policy will only grant the ability to list the contents of s3 specific buckets.
• Resources: Here you can select which specific resources (or all of them) of the selected services to be covered by the policy. In this case, the policy will pertain to the use of a specific S3 bucket which I’ve created beforehand.
• Request conditions: Here you can include an additional security layer, by asking the entity who requests the resource to comply with additional conditions.
If we move to the JSON tab, we can see how the editor translates our instructions to a JSON document.

After this step, we can add tags to make it easier to find our policy, and give it a name.

So we have our policy. Now we just need to attach it to an entity. How do we do it?
We just need to select a user, in this case a DummyUser I created, and choose “Add Permission”
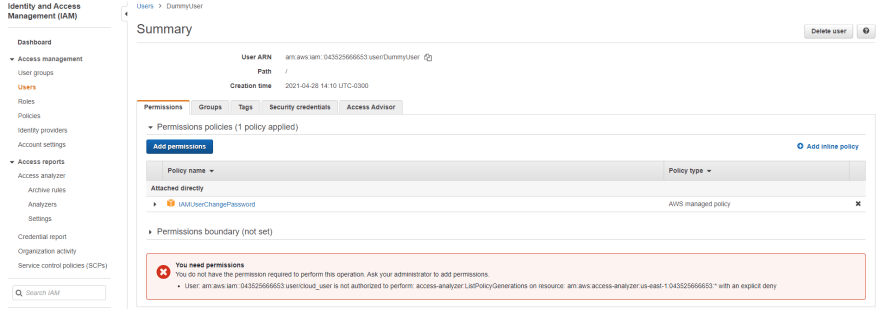
After that we just need to select “Attach existing policies directly” and continue. With that, the policy is attached to our user, and from now on, this identity will be able to list the contents of the bucket we’ve specified.

Of course, the use of policies is not limited to users. In future posts we'll delve deeper into IAM's potential to configure fine-grained access to our AWS resources, bolstered by the use of groups and roles.


Top comments (0)