If you already read it all:
The mobile world has evolved so much over the last couple of years. In the beginning, you wrote an Android app with the infamous Java and an iOS app with the unique Objective-C.
Now, history has changed, you can make both apps at once from a single codebase. Yes, it sounds like a huge waste of resources and probably poor performance. It is, but not with Flutter.
What is Flutter?
You can read a complete explanation in flutter.dev, but in a few words:
Flutter is a framework for UIs made by Google using a language called Dart.
What is Dart?
You can read a complete explanation in dart.dev, but in a few words:
Dart is a programming language (obviously) made by Google that first was thought as an alternative for JavaScript, and it can compile to JS, but its most important feature is that it compiles to native ARM machine code.
That capability actually makes Dart really efficient and the fact that Flutter is written in Dart, allows it to run in a lot of platforms like desktop, web and embedded devices.
What is FlutterFire?
I forgot, have you heard of Firebase? If not, it is one of Google's most amazing tools for managing the backend of your apps.
And FlutterFire is a group of plugins that allow Flutter to access a Firebase backend. So you can guess it's pretty awesome.
OK, with that said...
When I started with Flutter in a project of a mobile app at work, I wanted to setup crashlytics and analytics for it. So my option was the known Fabric but that cool service was acquired by Google and it became part of Firebase.
So we're gonna use Firebase and FlutterFire to show you how to make a great backend and add other services to your apps.
So let's start.
First things first, install Flutter here.
You probably have a Google account so, just head over to Firebase and go to console to create a new project.
Flutter part
OK, this is an example so with Flutter you should run flutter create <cool_name> if you're using a text editor and let your app build.
I'll use Android Studio because let's keep things Google, or JetBrains, I don't care.
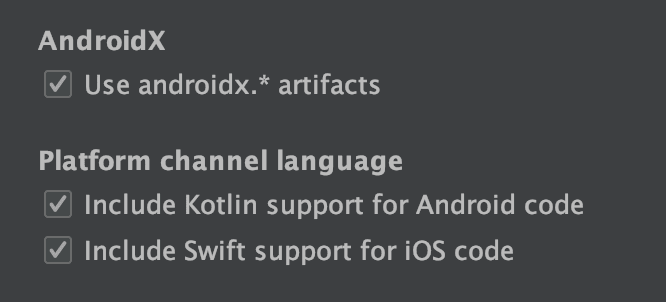
Make sure you check the following configurations if you're using Android Studio too:
Then we hit finish and we're going to leave that app as-is.
I know you might think this is the end of the Flutter part but we'll come back for more. Now let's play with fire.
Firebase part
When you go to the Firebase console, create a new project.
Call it whatever you want.
Don't enable analytics, yet.
Done.
Fresh new Firebase project. Easy, huh?
Let's keep going.
Android setup
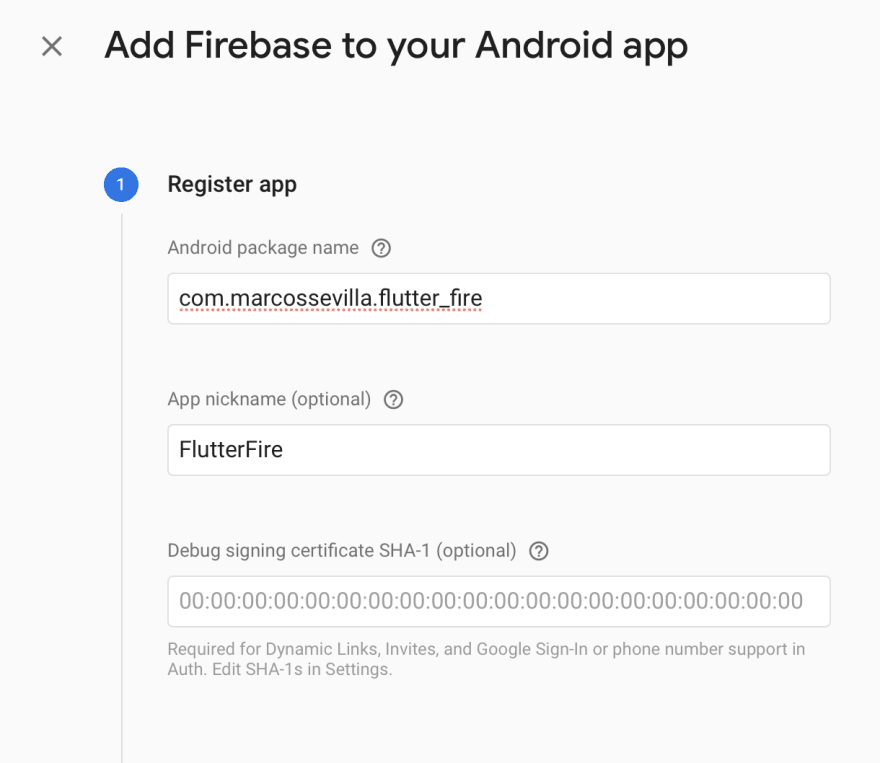
Starting with the Android app, we're going to fill this info:
One by one:
- The first is found in the Android folder of your Flutter app. You go this way:
android/app/src/main/AndroidManifest.xml
There you'll find the package name like com.<company>.<appName>
- A nickname, optional.
- This is your debug SHA-1, it is optional but my personal recommendation is to put it. If you click the interrogation button it shows a guide to get it.
Next, download that google-services.json and put it in the app module of your android folder, like this:
On the third step, you have to setup add Firebase in the Android app, I'll tell you the file you're going to edit and what to put.
But before that, open the AndroidManifest.xml if you closed it, and click on the upper right the Open for Editing in Android Studio button.
That opens a new Android Studio window with the Flutter's Android app as a single Android app. Easier to work with.
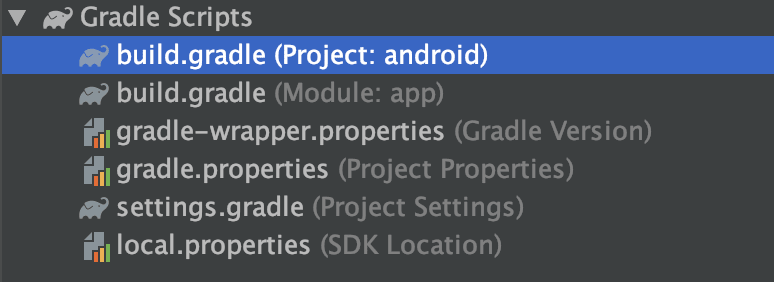
If you clicked the button I told you, you now have this view:
Now, these are the files and the lines to add:
-
build.gradlethe one that says (Project: android), add inbuildscriptpropertydependenciesunder$kotlin_versionthe Google Services line:
classpath 'com.google.gms:google-services:4.3.2'
Your version may vary, check what Firebase suggests.
-
build.gradlethe one that says (Module: app), check if it has theapply plugin: 'com.android.application'under all the Flutter SDK, versionCode and versionName configuration.
Then add at the very bottom of that file this line: apply plugin: 'com.google.gms.google-services'. That actually applies the Firebase SDK.
Then, let's sync gradle.
By the way, probably as you travel through the Android project some warnings will show up. Just refactor and let the IDE do its job.
Go back to the Firebase console and click Next, then Go to console and your Android app is setup. 🥳
Now let's set up the other app.
iOS setup
iOS it's actually easier I might say.
If you don't have a Mac, this is probably useless, skip here.
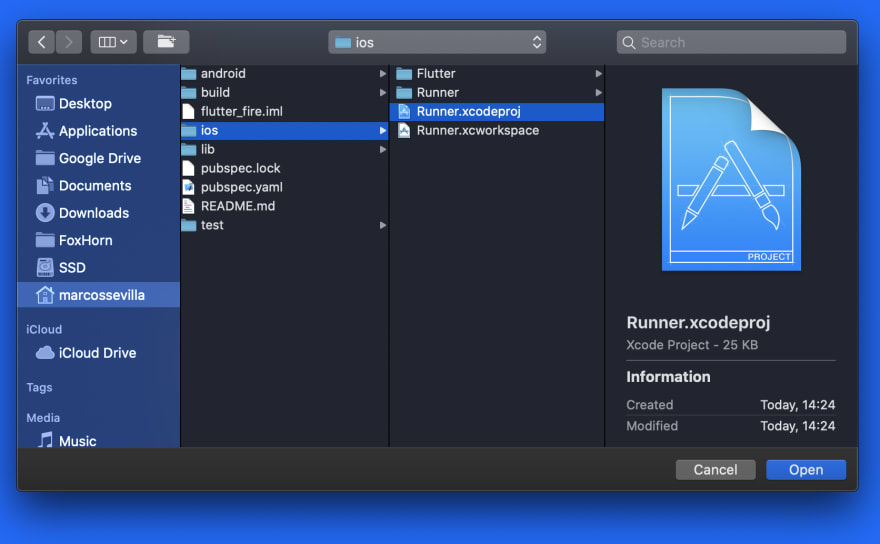
Let's open the iOS app with Xcode, obviously, you need to have Xcode installed with its components and other stuff configured.
Now that you've opened it, we need to fill this info:
- The first you can find it selecting the project in Xcode, then the
Targetand heading to theGeneraltab.
Here's a visual guide:
- Again, optional app nickname.
- If you already published your iOS app in the AppStore, fill the URL with the AppStore URL.
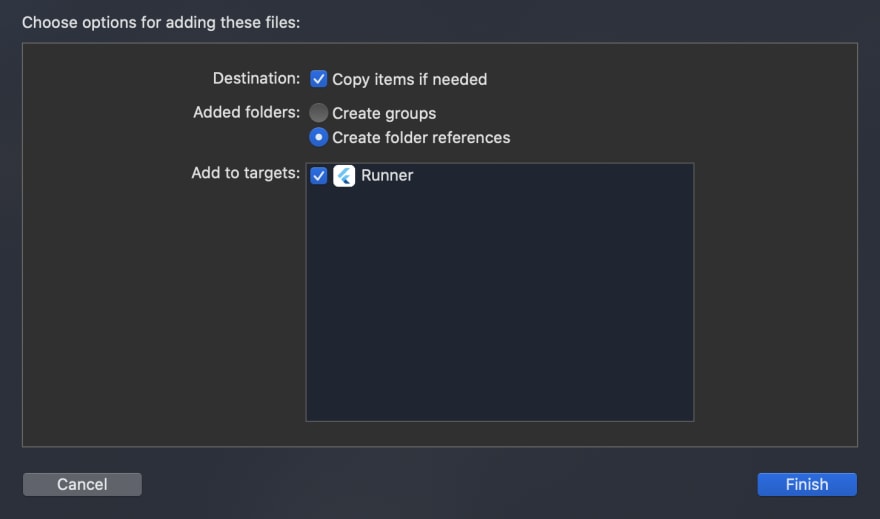
OK, now download the GoogleService-Info.plist (the equivalent of Android's JSON file) and put it under the info.plist in Xcode.
ATTENTION. Do that dragging it to Xcode, not in Finder.
You will see this modal:
And hit Finish. Done.
Then skip all the next steps in Firebase configuration. Flutter gets in charge of those.
FlutterFire
Let's use the plugins!
YOUR APP MUST NOT BE RUNNING RIGHT NOW.
Open the pubspec.yaml in your Flutter app and add the Firebase Core:
firebase_core: ^0.4.0+9, that's the version I'll use but you can use a newer one. Should look like this:
Then run flutter packages get.
And now that the core of Firebase is in our app, let's install plugins.
I am lazy, so I'll use the analytics one because it's actually the easiest to test. Here you have a list of all the plugins you can add.
Under the firebase_core you can add firebase_analytics: ^5.0.2, that's the version I'm going to use.
Analytics can be used like any other Flutter package. I'm going to use the sample in pub.dev because again, I'm a lazy dev.
My main.dart looks like this:
import 'package:firebase_analytics/firebase_analytics.dart';
import 'package:firebase_analytics/observer.dart';
import 'package:flutter/material.dart';

void main() => runApp(MyApp());

class MyApp extends StatelessWidget {
  @override
  Widget build(BuildContext context) {
    FirebaseAnalytics analytics = FirebaseAnalytics();

    return MaterialApp(
      title: 'Flutter Demo',
      theme: ThemeData(
        primarySwatch: Colors.blue,
      ),
      home: MyHomePage(title: 'Flutter Demo Home Page'),
      navigatorObservers: [
        FirebaseAnalyticsObserver(analytics: analytics),
      ],
    );
  }
}

class MyHomePage extends StatefulWidget {
  MyHomePage({Key key, this.title}) : super(key: key);

  final String title;

  @override
  _MyHomePageState createState() => _MyHomePageState();
}

class _MyHomePageState extends State<MyHomePage> {
  int _counter = 0;

  void _incrementCounter() {
    setState(() {
      _counter++;
    });
  }

  @override
  Widget build(BuildContext context) {
    return Scaffold(
      appBar: AppBar(
        title: Text(widget.title),
      ),
      body: Center(
        child: Column(
          mainAxisAlignment: MainAxisAlignment.center,
          children: <Widget>[
            Text(
              'You have pushed the button this many times:',
            ),
            Text(
              '$_counter',
              style: Theme.of(context).textTheme.display1,
            ),
          ],
        ),
      ),
      floatingActionButton: FloatingActionButton(
        onPressed: _incrementCounter,
        tooltip: 'Increment',
        child: Icon(Icons.add),
      ),
    );
  }
}
Now RUN, FORREST, RUN that app.
You can see if it actually worked in your Firebase console, go to analytics dashboard and if you ran your app in both devices, there should be an Android and an iOS device in the daily active users, like this:
That should be it, you've configured Firebase for a Flutter app and also used one of the FlutterFire plugins! 🎉
Last words
If you're a lazy dev like me, you probably love Firebase as much as I do. Also, Flutter makes mobile development really fast and Google has put so much effort into making both work seamless together.
Go hack some stuff with this stack!
Also, if I didn't mention something and you have doubts about some part in this post, remember this meme:







Top comments (0)