
I was in the market for a printer that was cheap to buy and cheap to run. I did not print in color, so I concluded that a dot matrix laser printer would be a good choice.
I looked up a couple of units and decided on Brother DCP-1510 as it was on sale for ~$100 with replacement toners running for $8 apiece. Not a bad deal. It had one caveat - no ethernet port, no WiFi support, and no Internet Printing Protocol.

I did not need all the features, but an ethernet port would be nice
Courtesy of XKCD
That did not put me off. I have never been printing much and could live with the cable. I also knew I could attach it to a print server such as CUPS and add networking capabilities to the network-impaired printer. I had a Raspberry Pi Zero sitting around, and I wouldn't hesitate to use it. This post is a story about the journey I experienced setting it up.
The driver support or lack thereof
I flashed Arch Linux ARM onto my RPi and went driver hunting. It turned out the manufacturer does not support the ARM architecture.
After a couple of DDG searches, I found brlaser - a community-driven Brother driver.
Perfect! I installed CUPS, compiled the driver, and shared the printer over the network.
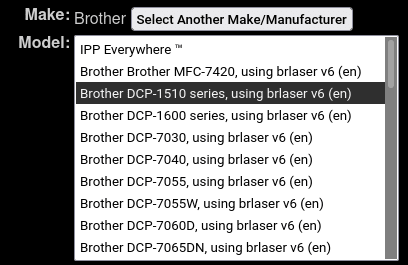
Brlaser as seen in the driver selection prompt.
I clicked the Print button.
Why does it take 45 seconds to print a single page‽
My eyes turned towards the printer anticipating the first sheet of paper to appear quickly, but nothing happened. Not until I tried to ssh into the Pi and started debugging. After a couple of seconds I began to hear the brrr printer noise while it was spitting out the page. I tried to print a second one as I thought it needed some priming, but it also took well over half a minute.
I clicked Print again and began observing the CUPS interface. It took 30 s to get through the Processing Page state. Something was off.
As it turns out, Raspberry Pi Zero is not that powerful. The driver uses ghostscript which pegged the CPU usage to 100%. Back to the drawing board.
Can I share an arbitrary USB device over the network? Sure I can!
I wasn't aware of the RAW queue mode in CUPS at the time, but I heard about usbip, which sounded like a compelling solution to the problem, or so I thought.
I followed a great Arch Wiki tutorial on usbip and sure enough, I had my printer attached.
The need to load a kernel module was a bit unsettling, but I installed the drivers and configured the printer using CUPS successfully.
I hit Print and almost immediately had the page handy. Whoa, that was easier than expected!
It's not all roses 🌹
I rebooted my laptop the next day and tried to print again, a real document this time.
It wouldn't work - the device was gone - I couldn't detach the device, I couldn't attach a new one, I tried reloading the kernel module, and it wouldn't work either, nada.
At that point, I concluded I'm not in favor of running a kernel module that's misbehaving
I also had some security concerns around the whole architecture and therefore I uninstalled it.
Learning about RAW queues
I came back to the problem after a couple of days, but now I had a powerful tool under my belt: knowledge about CUPS RAW queues.
A RAW queue is
[...] a queue where the filtering system is not involved and the print job goes directly to a printer or another queue:
https://wiki.debian.org/CUPSPrintQueues"
This seemed promising for my use case. The idea was to set up a RAW queue on the Pi and then do the heavy lifting (filtering) on significantly more powerful user machines.
.----------------.         .--------------.        .---------.
|       PC       |         | Raspberry PI |        .         .
|   (filtering)  +-------->|  (raw queue) +------->| Printer |
| (brlaser + gs) |         |(no filtering)|        '         .
'----------------'         '--------------'        '---------'
I quickly compiled this setup and it worked out perfectly.
Note: CUPS plans to deprecate drivers and raw queues in the future because of how wide-spread IPP has become. I don't consider this to be a big issue, you can always pin the CUPS version. There's still a ton of old hardware out there, and that won't change quickly (and doesn't have to).
The SD card gives up
After a few weeks, the SD card running the CUPS server gave up.
I bought a new one and tried to quickly reinstall everything, but Arch Linux ARM abandoned armv6 architecture in the meantime. I decided to use Raspberry Pi OS and automate the setup.
Automating the build process
I like to have my infrastructure defined in code and I maintain a number of Ansible playbooks and Terraform workspaces to control my servers.
Packer seemed like the perfect tool for the job.
I have never used it before and wanted to get familiar with the tool.
It doesn't come with ARM support out of the box, but there are two community projects to fill that niche.
I tried the packer-builder-arm first, but it couldn't run my Ansible playbook due to a bug. I applied a patch but quickly ran into other issues.
At that point, I decided to use packer-plugin-arm-image instead. The setup did not work out of the box, but after a simple PR, it built my first empty image and proved it's possible to build an ARM image locally.
Defining goals
I wanted an end-to-end setup with the following functionality:
- OS installation (Raspberry Pi OS)
- WiFi setup
- Autodiscovery via mDNS & DNSSD
- CUPS installation
- Printer configuration
I developed two Ansible playbooks to accomplish that. I will skip the technicalities and maybe write about the details another time.
Run it yourself!
The final solution with a comprehensive README can be found under the maciekmm/printer-rpi-image github repo.
Building, flashing, and running the image yourself is as simple as running:
# build the base image
WIFI_SSID=<SSID> WIFI_PASSWORD=<PASSWORD> SSH_PUBLIC_KEY=$(cat ~/.ssh/id_ed25519.pub) vagrant up
# flash the image onto the sd card
dd bs=4M if=./output-raspberry_pi_os.img of=<sdcarddevice> && sync
# NOTE: this runs on the live Pi. Connect it first with printers attached!
# configure the printer and firewalls
ansible-playbook -i hosts live.yaml
What's left is configuring the driver and discovering the printer locally. This can be done by installing CUPS locally and running through the wizard.
Closing thoughts
I accomplished several things:
- I made my wired printer wireless,
- I learned how to use Packer,
- I learned a bit about CUPS queues,
- I published an open source project for you to be able to do the same.
Overall, this was an interesting project and I'm happy to share this story.

Top comments (0)