Introduction
This article demonstrates how to install and configure Syncfusion Essential Studio for Xamarin in Visual Studio 2017. Syncfusion provides the Visual Studio toolbox for your Xamarin project (Xamarin.Android, Xamarin.Forms, Xamarin.IOS). It supports only Visual Studio 2015 and above versions. In this Syncfusion toolbox, there are 130+ free controls, which can be used without coding (drag and drop the controls) in the Xaml designer. More details
Target User – Beginners
Let’s start!
Step 1:
Download Syncfusion Essential Studio for Xamarin.
|  |
|
| Download |
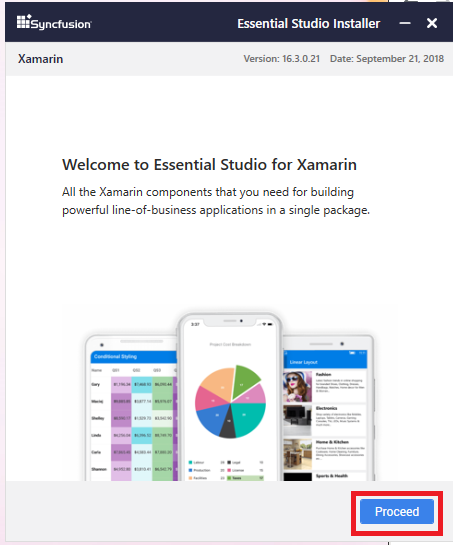
First you can download Syncfusion Essential Studio for Xamarin, then double-click to open the executable file and run it.
|  | | | |
| Proceed |
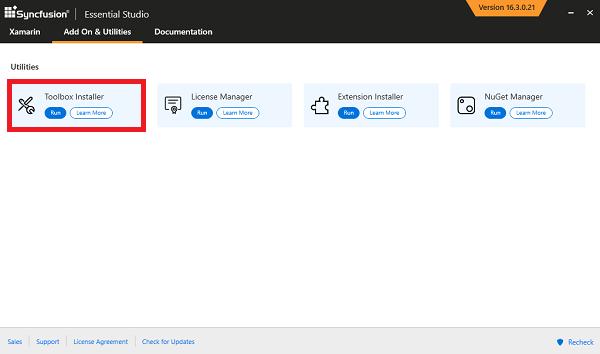
After a few seconds, a new window will appear. In this window, click the Proceed button; then click the Next and Install buttons. After installation, open Syncfusion Xamarin Control Panel and go to the Add-On & Utilities tab.
|  |
|
| Toolbax Install |
|
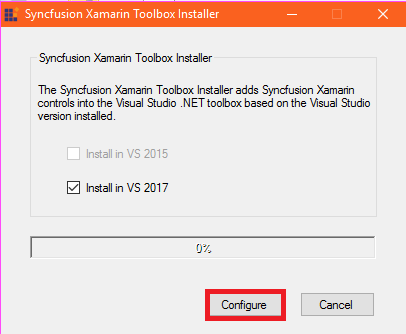
Next, run the Toolbar Installer. In the new window, select your Visual Studio version and click the configure button. Ater configuration, restart Visual Studio.
|  | |
| |
| ToolBox |
Step 2:
Add Syncfusion Xamarin Controls in your project. We have two ways to add the controls to your project. The first one is creating a new project with Syncfusion Template controls and the second one is adding Syncfusion controls to your existing projects.
*Step 2.1: * Syncfusion Xamarin Project Template
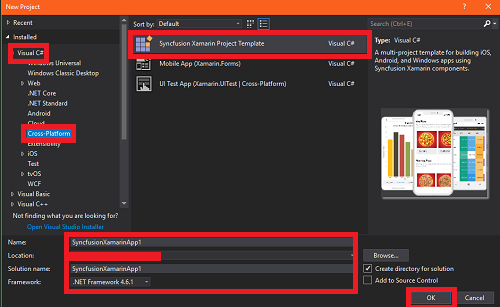
You can create a new Syncfusion Xamarin Project Template by going to File >> New Project >> Visual C# >> Cross-Platform >> select Syncfusion Xamarin Project Template and give the app's name and the Solution name and select the Framework version. Then click OK.
|  |
|
| New Project |
|
Now, select minimum and target versions for Android, and the iOS Target Device and Version >> choose checkboxes for the controls you want to design for the home page and press Create.

Step 2.2: Add the Syncfusion controls through the Visual Studio Toolbox
Create the Xamarin Project. The following steps are used to add the Syncfusion controls through the Visual Studio Toolbox.
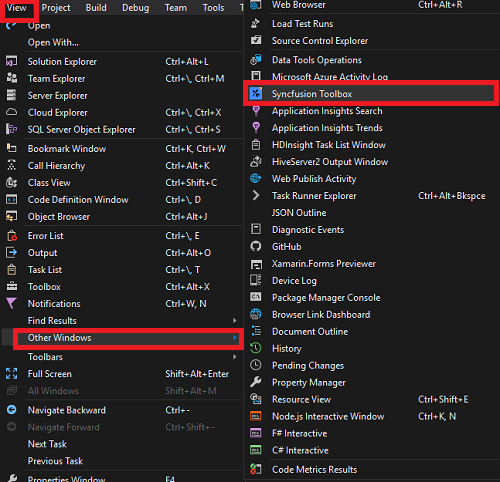
- Open Visual Studio, Choose View menu >> Other Windows >> select Syncfusion Toolbox.
|  |
|
| Syncfusion ToolBox |
|
|
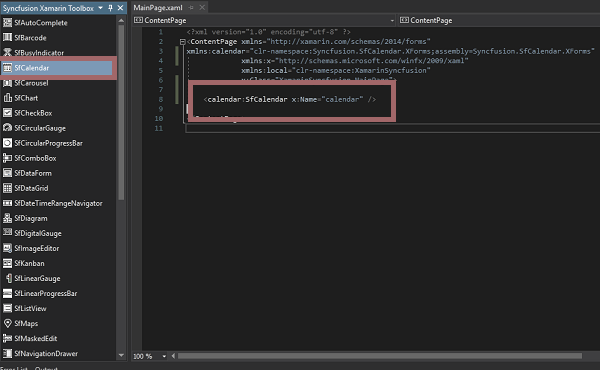
- Open the Syncfusion Toolbox. The Syncfusion controls are only enabled in the Xamarin.Forms designer page (.xaml page).
- Drag and drop the required Syncfusion Controls into the .xaml page. The dropped Control code is automatically generated.
|  |
|
| Drag and Drop |
|
|
Install the Nuget Packages based on the controls in your project.
Conclusion
We have learned how to install and configure Syncfusion Essential Studio in Visual Studio 2017


Top comments (0)