Introduction:
In this article demonstrates, what is Constraint Layout and how to use it in Xamarin.Android and Xamarin.iOS to improve your page performance and the response of UI. There is no default package for constraint layout in Xamarin.Android. So, we need to install a plugin for this.
What is Constraint Layout?
** ** Constraint helps to reduce the hierarchy of views and increase the layout performance and flexibility of views. It helps to design based on positing, size, dimension, and alignment of different views. Constraint Layout has different attributes to set views in the layout. You can set the view of any position of the layout easily rather than Relative Layout. It will support Android and iOS platform. Constraint layout comes under ViewGroup.
Advantages of Constraint Layout?
- Flat View Hierarchy and no nested view.
- Better performance and high responsiveness.
- Align position, size, and alignment of the screen.
- Support Android (API 9) and iOS Platform.
Some Important Constraint Layout Properties and Attributes?
These attributes take only id or parent. Align view from any side of the target view.
layout_constraintLeft_toLeftOf - align left of the desired view is left of the target view.
layout_constraintLeft_toRightOf - align left of the desired view is right of the target view.
layout_constraintRight_toLeftOf - align-right of the desired view is left of the target view.
layout_constraintRight_toRightOf - align-right of the desired view is right of the target view.
layout_constraintTop_toTopOf - align the top of the desired view is top of the target view.
layout_constraintTop_toBottomOf - align the top of the desired view is the bottom of the target view.
layout_constraintBottom_toTopOf - align the bottom of the desired view is top of the target view.
layout_constraintBottom_toBottomOf - align the bottom of the desired view is the bottom of the target view.
layout_constraintBaseline_toBaselineOf - align the baseline of the desired view is the baseline of the target view.
layout_constraintStart_toEndOf - align the start of the desired view is the end of the target view.
layout_constraintStart_toStartOf - align the start of the desired view is the start of the target view.
layout_constraintEnd_toStartOf - align the end of the desired view is the start of the target view.
layout_constraintEnd_toEndOf - align the end of the desired view is the end of the target view.
Margin Attributes - These attributes take only positive values.
layout_marginStart - Margin from start side of the desired view.
layout_marginEnd - Margin from the end side of the desired view.
layout_marginLeft - Margin from the left side of the desired view.
layout_marginTop - Margin from the top side of the desired view.
layout_marginRight - Margin from the right side of the desired view.
layout_marginBottom - Margin from the bottom side of the desired view.
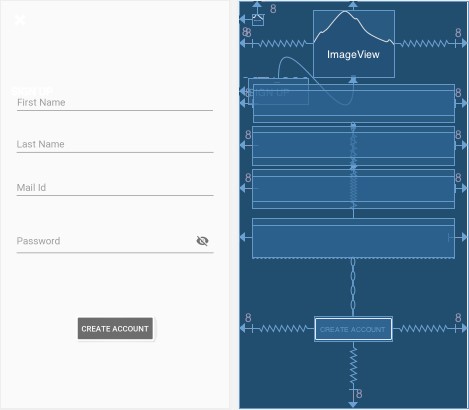
Let's start how to use Constraint Layout to design or align views in Xamarin.Android?
Android output:
Follow these steps to archive the above view using Constraint Layout.
Let’s Start
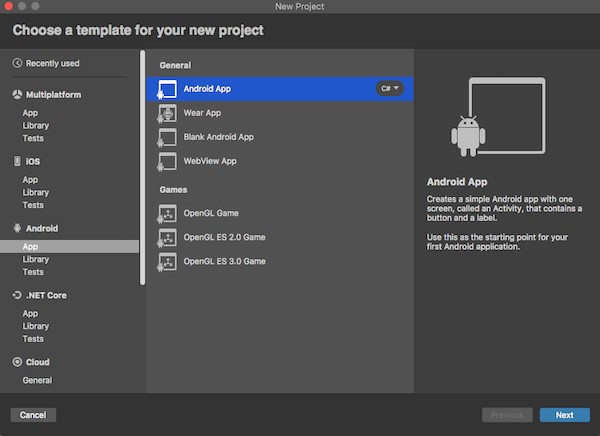
Step 1: Create new Project
You can create Xamarin Android app by going to File \>\> New \>\> Android under select App \>\> In the General section select Android App then click Next \>\> In the new window, enter and select your application name, theme and compatibility followed by click Create project.
Step 2: Add Constraint Layout Plugin
After project creation add the following NuGet package to your project
- Xamarin.Android.Support.Constraint.Layout
- Material Design.
For that, Right click packages and select add packages >> New dialog appear, right top corner search “Xamarin.Android.Support.Constraint.Layout” and click Add Packages button.
Step 3: Design Instruction
Now, design Sign up page. For that, Go to Solution Explorer \>\> Resource \>\> layout \>\> double click to open content\_main.xml. First, we need to set the root of the layout is Constraint layout and declare app namespace.
_<android.support.constraint.ConstraintLayout _
_ xmlns:android="http://schemas.android.com/apk/res/android" _
_ xmlns:app="http://schemas.android.com/apk/res-auto" _
_ xmlns:tools="http://schemas.android.com/tools" _
_ android:id="@+id/container" _
_ android:background="@drawable/gradientcolor_rose" _
_ android:layout_width="match_parent" _
_ android:layout_height="match_parent" _
_ android:paddingBottom="@dimen/activity_vertical_margin" _
_ android:paddingLeft="@dimen/activity_horizontal_margin" _
_ android:paddingRight="@dimen/activity_horizontal_margin" _
_ android:paddingTop="@dimen/activity_vertical_margin" _
_ android:hapticFeedbackEnabled="false"> _
</android.support.constraint.ConstraintLayout >
Now, start your design. Set the image button in the left top corner of the page. The below Constraint attribute used to set the image button based on parent view.
app:layout_constraintLeft_toLeftOf = “parent”
app:layout_constraintTop_toTopOf = “parent”
Logo Image – This view set by the right of the image button and centre of the parent. The top, end, start attribute of image set based on parent view and another one attribute set based on another view id.
app:layout_constraintTop_toTopOf="parent"
app:layout_constraintStart_toEndOf="@+id/imageView2"
app:layout_constraintStart_toStartOf="parent"
app:layout_constraintEnd_toEndOf="parent"
Text View – This view set below the image and left the side of the parent. This below Constraint attributes used to set the text in the correct position. The first left attribute set based on the parent but other attributes set by different id.
app:layout_constraintLeft_toLeftOf="parent"
app:layout_constraintTop_toBottomOf="@+id/imageView"
_app:layout_constraintBottom_toTopOf="@+id/txtFirstName" _
As well as, you can set other child views using different attributes.
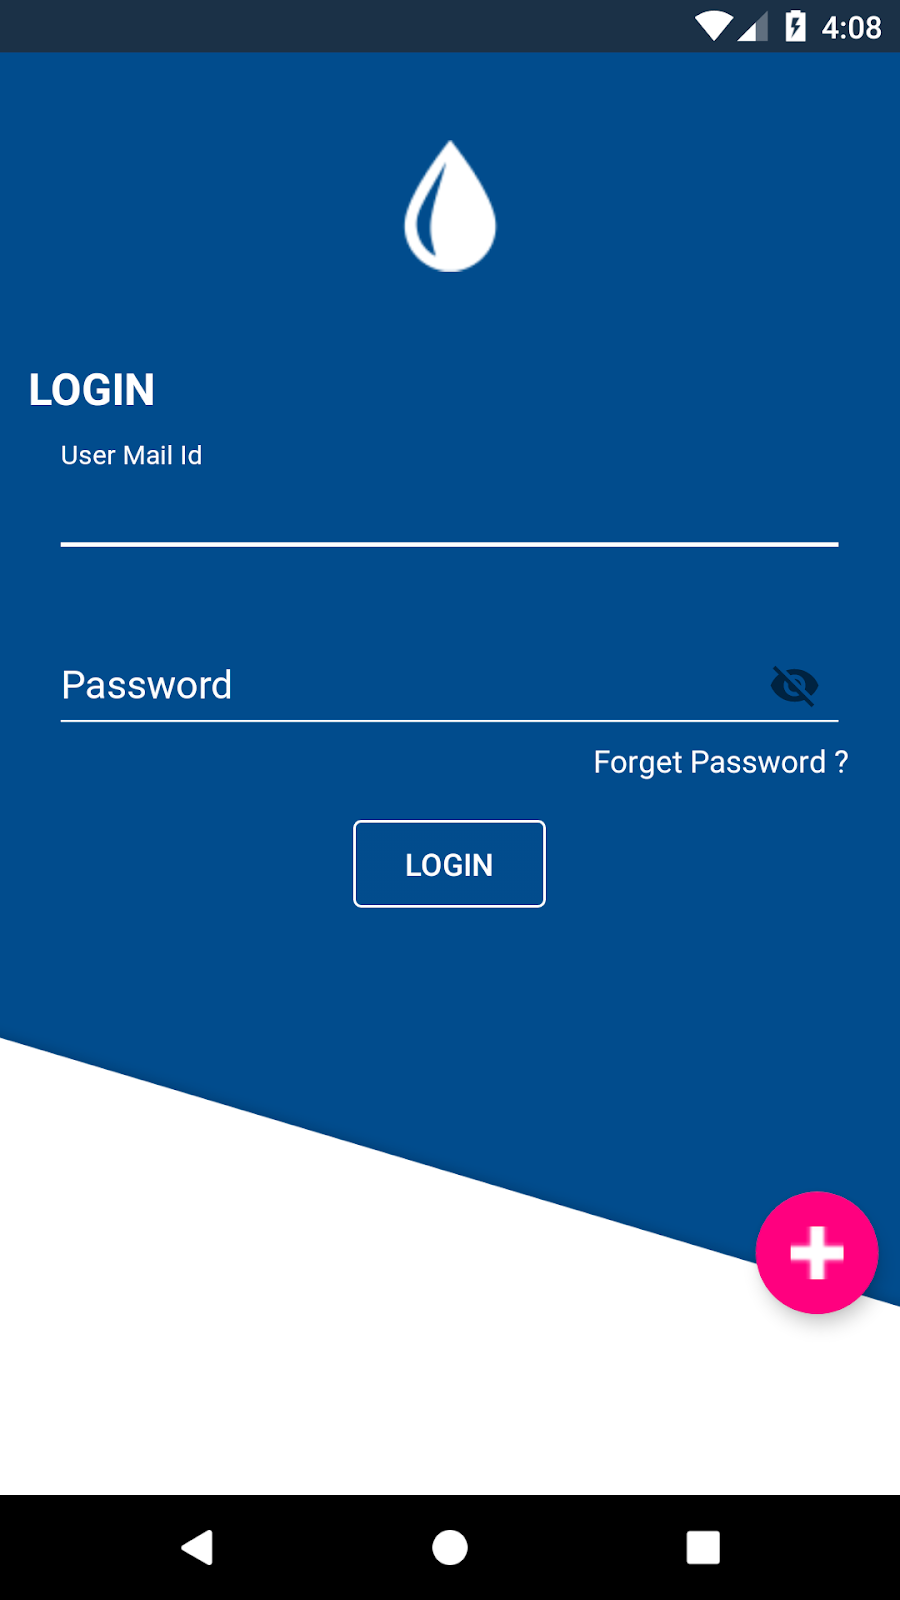
Step 4: Login Page Design
Now, Design LoginPage. For that, Go to Solution Explorer >> Resource >> layout >> double-click to open login_activity.xml. This page code given below.
Step 5: Signup Page Design
Now, create a background colour of Signup page named as grandientcolor\_rose.xml. Add new XML page by going to right-click drawable folder \>\> Add new File \>\> Left bar select Android \>\> next followed by select XML file \>\> give the name as grandientcolor\_rose.xml. Copy and paste the below code.
Step 6: MainActivity.cs Code
Next open MainActivity.cs(Login Activity) and add the following code to validate the user input. When you click login, it will validate and check the user is available or not. If credentials are correct it goes to the main page. If you want to sign up click a floating button.
Step 7: SignupActivity.cs Code
Add another activity for the sign-up page. For that, Go to Solution Explorer \>\> Resources \>\> activities \>\> Add a new activity named as signup\_activity.cs. Full source code is given below. Entered data will be validated and stored in Intent.
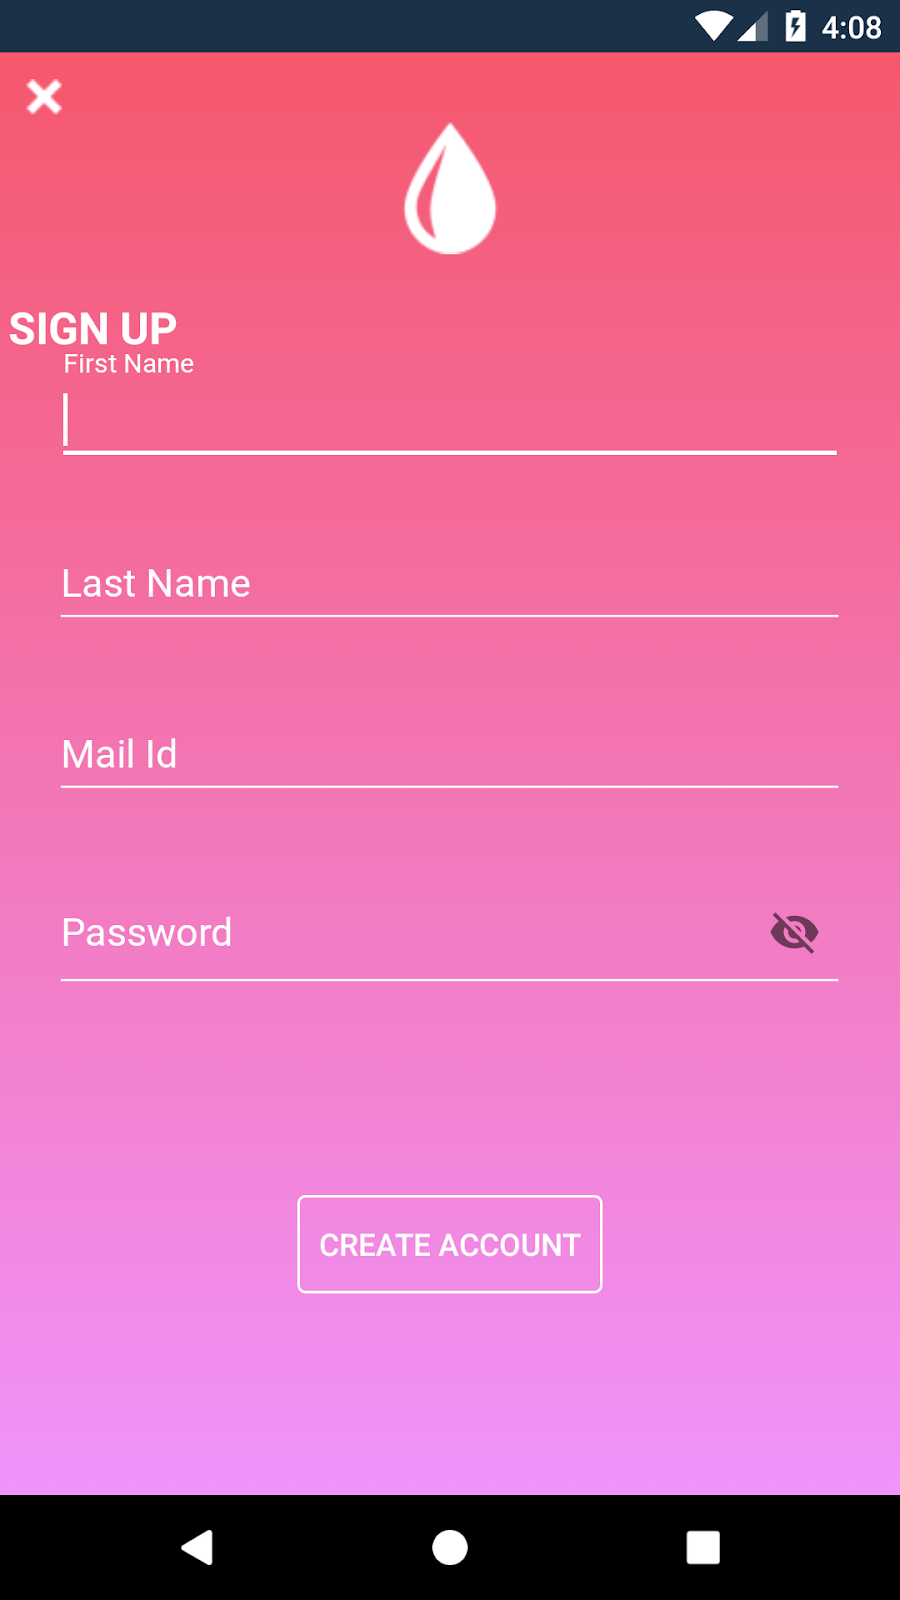
Step 8: Output
Now, Rebuild and run your application. You will have the result like below.
Android Output:


Note: Import images, string, colour, theme.
Full Source Code Source: https://github.com/logeshpalani98/XamarinAndroid-LoginSignupConstraintDemo
Thank for reading and if you have any suggestions command below.
Reference Android Guide: https://developer.android.com/reference/android/support/constraint/ConstraintLayout

Top comments (0)