
Kubernetes in the leading Container Orchestration platform that allows you to apply fast and streamlined infrastructure workloads using a declarative API.
In the following tutorial, the Platform9 technical team shows you how to follow a step-by-step guide for signing in with Platform9 Managed Kubernetes Platform, creating a new cluster and deploying an example application. Then we will see how to scale-up/down our application instances and how to roll out a new updated instance of our app.
Let’s get started.
Sign-up
To gain the benefits of Platform9, we need to register a new account.
Head over to Sign up Page located here: SignUp Page
Fill in your details in the Form:

You will be asked to provide a verification code sent to your email, and a secure password:

Platform9 Managed Kubernetes (PMK) provides us with a pure-play open source Kubernetes delivered as a SaaS managed service.
Once there, you will be presented with the Dashboard Screen. Initially, we have no cluster configured, so we need to create one.
Setting up A Cluster
First, let's get familiarised with the possible pages as shown on the sidebar section:
- Infrastructure: This section lists an overview of all the clusters, nodes and cloud providers.
- Pods/Deployments/Services: This section lists all pods, deployments and services.
- Storage Classes: This section lists all the storage classes.
- Namespaces: This section lists all cluster namespaces.
- RBAC: This section shows information about configured RBAC roles, and role bindings.
- API Access: This section indicates information about API access tokens and kubeconfig settings.
- Users/Roles: This section displays information about users and defined roles.
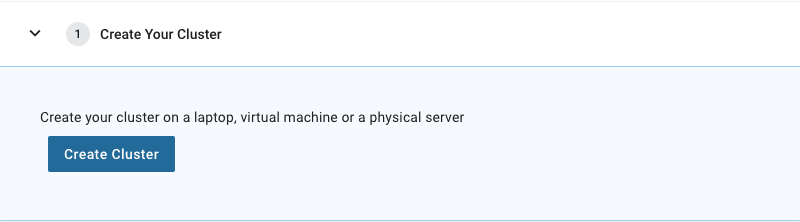
Now that you are familiar with the UI Dashboard, let’s create a new K8s cluster where we are going to deploy an example application container.
Click on the Dashboard Link and then click on Create Your Cluster:
On the next screen, choose the Cloud Provider. Here we can select BareOS, which can be a local or remote VM:
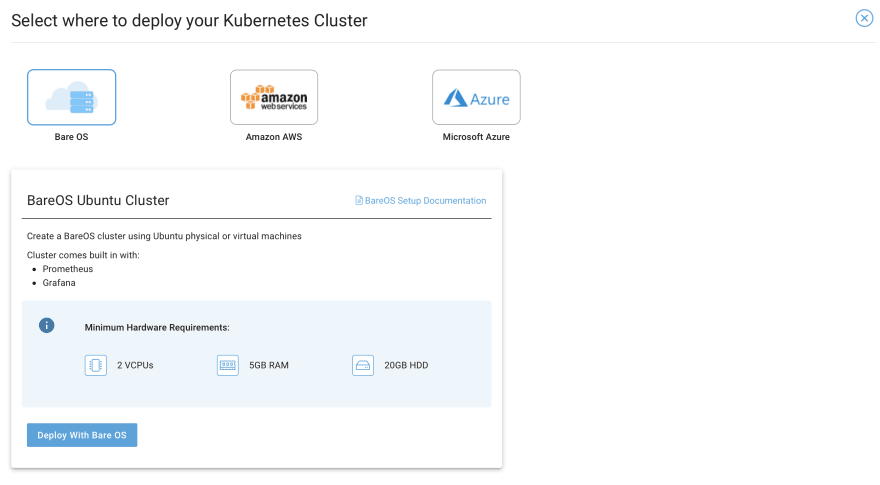
Follow the instructions to prepare some Kubernetes nodes. Pay attention to the following:
- For this tutorial, I used two Scaleway Instances and bootstrapped a cluster node on each VM.
- We can do the same process using VirtualBox using Ubuntu Xenial images. Just make sure you have the hardware requirements.
- We used the following commands to prep each node:
$ pf9ctl cluster prep-node -u root -i <NodeIP> -s <sshKey>
Note: If the node preparation progress gets stuck at 95%, then enter CTRL+C to unblock it. It should then show the success message in the console.
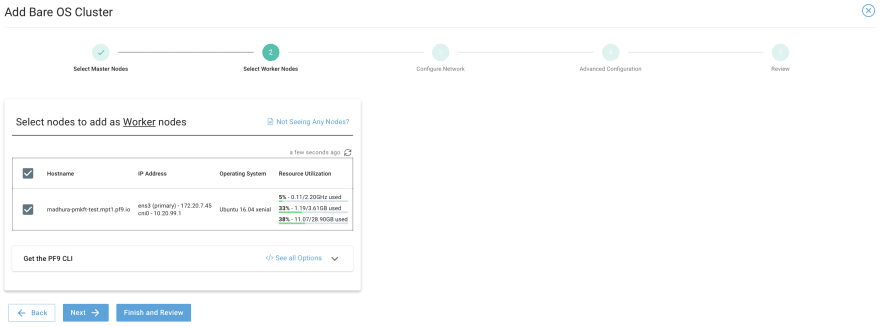
Once you have prepared the instances, go into the UI again and refresh the screen. After a while you will be able to proceed with the master and the worker selection screens, as depicted in the images below:

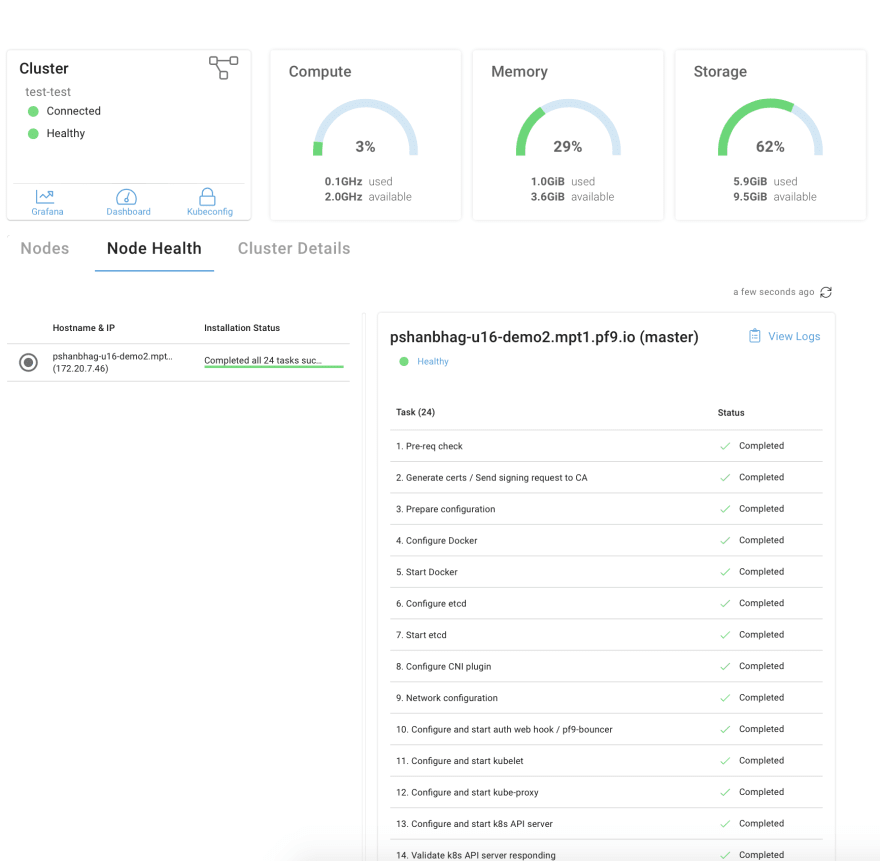
At the end you should be having a basic cluster configured and prepped, and you will be able to see the Node Stats and system pods as shown below:
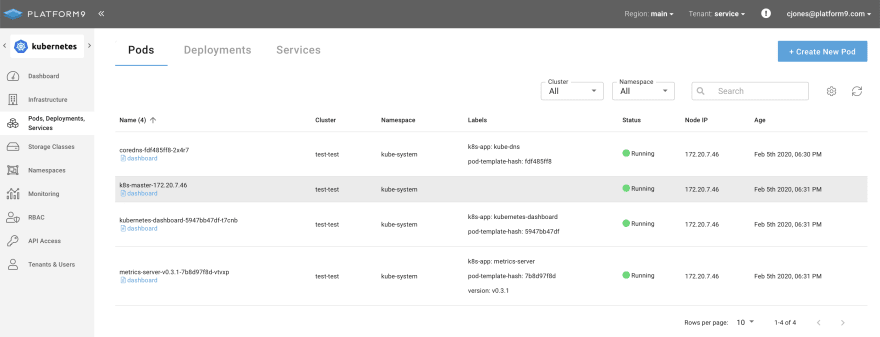
Also, before we proceed, make sure the cluster is healthy by inspecting the Master Pods in the Pods/Deployments page:
After that we are ready to issue our first deployment.
Issuing a Deployment Once we have our cluster ready, we can download the kubeconfig file and use it as our context. This way, we can use the kubectl CLI tool as well, for the remainder of the tutorial.
Navigate to the API Access section and click on the cluster name under the Download kubeconfig section. This will download a yml file. We need to use this as the cluster config:

In a new shell, export the KUBECONFIG environmental variable pointing to the downloaded file location:
$ export KUBECONFIG=$(pwd)/test.yaml
then issuing the get-clusters command will show us the demo cluster:
$ kubectl config get-clusters
NAME
test
Now lets see how we can issue our first deployment. Click on Pods/Deployments and select Deployment.
Fill in the New Resource form by selecting the cluster and the default namespace.
For the Deployment Description we can use a simple Node.js Application as an example. Here is the spec:
apiVersion: extensions/v1beta1
kind: Deployment
metadata:
  name: nodejs-deployment
spec:
  selector:
    matchLabels:
      app: nodejs
  replicas: 1
  template:
    metadata:
      labels:
        app: nodejs
    spec:
      containers:
      - name: nodejs
        image: joerx/express-hello-src:latest
        ports:
        - containerPort: 3000
        livenessProbe:
          httpGet:
            path: /headers
            port: 3000
          initialDelaySeconds: 30
          periodSeconds: 30
        readinessProbe:
          httpGet:
            path: /headers
            port: 3000
          initialDelaySeconds: 15
          periodSeconds: 3

Here is a small breakdown of the above specification:
- apiVersion: We specified the version of the deployment spec here. We used this reference site
- kind: We specified a deployment type.
- metadata: We defined a name for our deployment as nodejs-deployment.
- spec: here we define our deployment specification. We assign a label, a label selector, one replica instance and the container image information. We also added some health probes to detect status.
When saved, on the dashboard we can see the phases of the deployment. If you click on the name, you should be redirected to the Kubernetes Dashboard. Once it’s ready, though, we cannot directly access it because the server is exposed only inside the cluster. We need to add a service specification to expose it in public. We can use the Services->Add Service Button to do that.
Here is the spec:
apiVersion: v1
kind: Service
metadata:
  name: nodejs-service
spec:
  selector:
    app: nodejs
  ports:
    - protocol: TCP
      port: 3000
  type: NodePort
Here we expose the Node.js application using a service named nodejs-service and assigns TCP port within a range 30000-32767 with the container port 3000, which our application runs. The key thing to note is the type: NodePort, which will expose the port in the node public IP address.
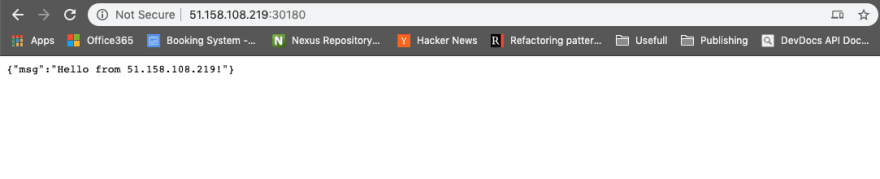
Now in order to check our application, we need to find the actual IP of the VM node. In this example mine is: 51.158.108.219, so we need to open a browser link to the following path:
Indeed, as you can see in the following picture, the server has responded with our IP address:
Scaling a Deployment
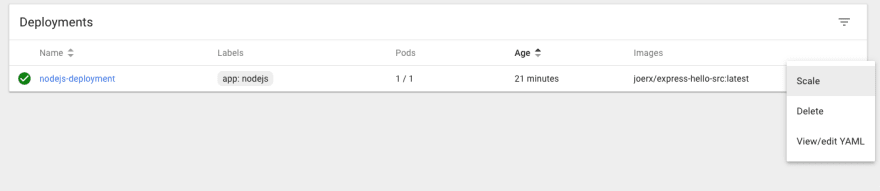
The current deployment spins up one instance of the Application. If we want to scale it up, we can use the Kubectl CLI tool; or, we can use the Kubernetes UI, instead. If we click on the deployment link, it will redirect us to the Kubernetes UI. The first time it will ask for a token, which is present inside the kubeconfig yml file we downloaded earlier.
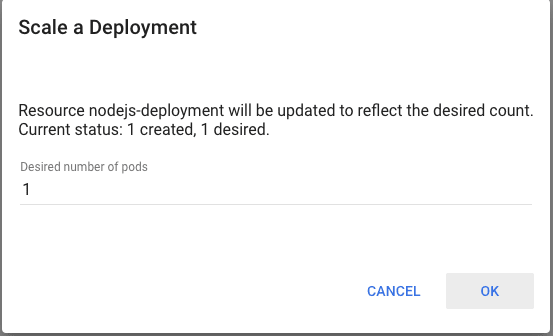
We just only need to select the deployment in the Deployments list on the right-hand side with the three dots. Select Scale and then in the model, change the number from 1 to 3:
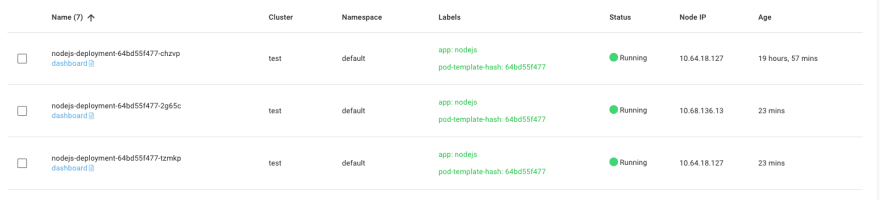
After that, we can see the pods increasing from one to three in the dashboard:
Note that when using this approach, there are some limitations, as we currently have only two nodes and three instances; so, we are able to reach only two out of three pods. In subsequent tutorials, we can see how different types of services can overcome this limitation.
Deploying a new version of the App
Similarly, if we wanted to deploy a newer version of the Application, we just need to change the deployed image reference to point to a new image. Using the kubectl command, this can be done as easy as issuing the following command:
$ kubectl set image deployment <deployment> <container>=<image> --record
For example:
$ kubectl set image nodejs-deployment nodejs=joerx/express-hello-src:latest
Before we do that though, it’s important to define a Rolling update strategy so that we can limit the number of images that are being replaced at the same time. We need to add the following section in the deployment spec section:
strategy:
    type: RollingUpdate
    rollingUpdate:
      maxSurge: 1
      maxUnavailable: 1
Here we want a maximum of one pod unavailable and a maximum of one extra pod update at the same time. This effectively means that there will be, at most, four pods during the update process, as we currently have three pods running (3 + 1 with the new version)
Also, note one more thing – we started with the following image:
joerx/express-hello-src:latest
Ideally, we should always be using a version tag. For example:
joerx/express-hello-src:1.0.0
Then, when we want to deploy the next version – such as 1.1.0 – we can set the following docker image:
joerx/express-hello-src:1.1.0
Any subsequent updates should follow this convention. I leave it as an exercise to the reader to perform a rolling update of an image from an older version to a newer one.
Overview and next steps
In this tutorial, we walked through the process of signing up with Platform9, setting up our own Kubernetes cluster and issuing an example deployment. We also learned how to navigate to the Kubernetes dashboard, scale up the deployment and expose our app via a service specification.

Top comments (0)