
React
In my previous article, I had talked about react and its significance in the world of web application development. In this article, you'll learn how to work with react by building a web application.
Getting Started
We've seen how to start a new project with react. So, lets get started by using the command: npx create-react-app weather-app
Go into the project directory after installation using cd weather-app.
Understanding the structure of your project
After executing the above command your project folder will look something like this:

We don't have to worry about most of the files in this folder. All that matters is the index.html, App.js, index.css and index.js files. As of now the way things work is that, all the things we want to render to the screen is written into App.js file(with the styles in index.css) which is passed onto the index.js that renders this App component in the div tag with the id 'root' in the index.html, which is displayed on the screen. Phew! Well, this is simply how react works, breaking the structure into components, using it wherever required and passing it finally to the html file. Awesome!
The Weather App
Follow these steps to build a wonderful weather application:
Sign up at OpenWeatherMap and obtain the API keys.
Make a file called 'keys.js' in the src folder and use your api keys to place them in this file like mentioned below.
module.exports = {
  API_KEY: "<your-api-key-here>",
  BASE_URL: "https://api.openweathermap.org/data/2.5/",
};
- Copy paste this piece of code into your App.js:
import React, { useState } from "react";
import keys from "./keys";

const api = {
  key: keys.API_KEY,
  base: keys.BASE_URL,
};

function App() {
  const dateBuild = (d) => {
    let date = String(new window.Date());
    date = date.slice(3, 15);
    return date;
  };

  const [query, setQuery] = useState("");
  const [weather, setWeather] = useState({});
  const search = (e) => {
    if (e.key === "Enter") {
      fetch(`${api.base}weather?q=${query}&units=metric&APPID=${api.key}`)
        .then((res) => res.json())
        .then((result) => {
          setQuery("");
          setWeather(result);
          console.log(result);
        });
    }
  };

  return (
    <div
      className={
        typeof weather.main != "undefined"
          ? weather.main.temp > 18
            ? "App hot"
            : "App cold"
          : "App"
      }
    >
      <main>
        <div className="search-container">
          <input
            type="text"
            placeholder="Search..."
            className="search-bar"
            onChange={(e) => setQuery(e.target.value)}
            value={query}
            onKeyPress={search}
          />
        </div>
        {typeof weather.main != "undefined" ? (
          <div>
            <div className="location-container">
              <div className="location">
                {weather.name}, {weather.sys.country}
              </div>
              <div className="date"> {dateBuild(new Date())}</div>
            </div>
            <div className="weather-container">
              <div className="temperature">
                {Math.round(weather.main.temp)}°C
              </div>
              <div className="weather">{weather.weather[0].main}</div>
            </div>
          </div>
        ) : (
          ""
        )}
      </main>
    </div>
  );
}

export default App;
- Then, Copy this into your index.css file:
* {
  margin: 0;
  padding: 0;
  box-sizing: border-box;
}

body {
  font-family: "Ubuntu", sans-serif;
}

.App {
  background-image: linear-gradient(
      to right,
      rgba(255, 0, 0, 0.52),
      rgba(0, 195, 255, 0.73)
    ),
    url("img/app.jpg");
  background-repeat: no-repeat;
  transition: 0.2s ease;
}

.App.hot {
  background-image: linear-gradient(
      to bottom,
      rgba(255, 16, 16, 0.52),
      rgba(0, 0, 0, 0.73)
    ),
    url("img/hot.jpg");
  background-repeat: no-repeat;
  background-size: cover;
  transition: 0.2s ease;
}

main {
  min-height: 100vh;
  padding: 25px;
}

.App.cold {
  background-image: linear-gradient(
      to bottom,
      rgba(0, 255, 213, 0.52),
      rgba(0, 0, 0, 0.73)
    ),
    url("img/cold.jpg");
  background-repeat: no-repeat;
  background-size: cover;
  transition: 0.2s ease;
}

.search-container {
  width: 100%;
  margin: 0 0 75px;
}

.search-bar {
  color: black;
  font-size: 15px;
  display: block;
  width: 100%;
  padding: 15px;
  border: none;
  outline: none;
  appearance: none;
  border-radius: 15px 15px 15px 15px;
  box-shadow: 0px 5px rgba(58, 53, 53, 0.73);
  background: rgba(255, 255, 255, 0.52);
  transition: 0.4s ease;
}

.search-container .search-bar:focus {
  background-color: white;
}

.location-container {
  color: white;
  font-size: 30px;
  text-align: center;
  text-shadow: 3px 3px rgba(58, 53, 53, 0.73);
}

.location-container .date {
  color: white;
  font-size: 20px;
  text-align: center;
  text-shadow: 3px 3px rgba(58, 53, 53, 0.73);
}

.weather-container {
  text-align: center;
}

.weather-container .temperature {
  color: white;
  position: relative;
  display: inline-block;
  margin: 30px auto;
  padding: 15px 25px;
  font-size: 100px;
  font-weight: 700;
  background-color: rgb(255, 255, 255, 0.1);
  border-radius: 16px;
  box-shadow: 3px 3px rgba(58, 53, 53, 0.73);
  text-shadow: 3px 3px rgba(58, 53, 53, 0.73);
}

.weather-container .weather {
  color: white;
  font-size: 50px;
  font-weight: 700;
  text-shadow: 3px 3px rgba(58, 53, 53, 0.73);
}
Explanation
I know your overwhelmed by the code, but it will all be very clear once I break it down for you.
HTML: Only focus on the HTML elements of the App.js file. These HTML div's include the search box, the location to be displayed, the temperature and the prevalent conditions.
CSS: We will assign these div elements with a classname so that they can be given necessary styles in our CSS file.
(P.S: A little understanding of HTML and CSS is a pre-requisite.)
Date function: In the div class that handles the date we make sure to call a function called 'dateBuild'. This 'dateBuild' function in javascript gets the date in string format. Then we extract the current month, date and year using the slice() function.
API Fetch and Hooks: We make use of 'useState' Hook of react to change the state of what is being rendered on the screen. One hook for the search bar value and the other for the content being displayed.
In the div which handles the search bar, we call a function called 'search' when user hits 'Enter' key. In this function we make a call to the URL using our credentials and query to fetch the data from the server and then we change the state of what is being displayed on the screen. Hence, the useState hook is significant when it comes to state management in React.
Dynamic Background: This is just a simple logic to show the power of JSX in react. In my previous article, I had mentioned that JSX is an essential feature of react that combines the power of both javascript and HTML. This dynamic background feature is to make the application more stylish. In the class where we render the whole app, we just add a condition to check if the temperature fetched is greater than a certain limit. If yes, then add a different classname to the div tag that changes the background of the screen. Likewise, many such conditions can be applied to display a whole range of weather scenarios as background.
Result
If you have understood so far about how this application works, then go ahead and enter npm start into your terminal to get this app up and running.
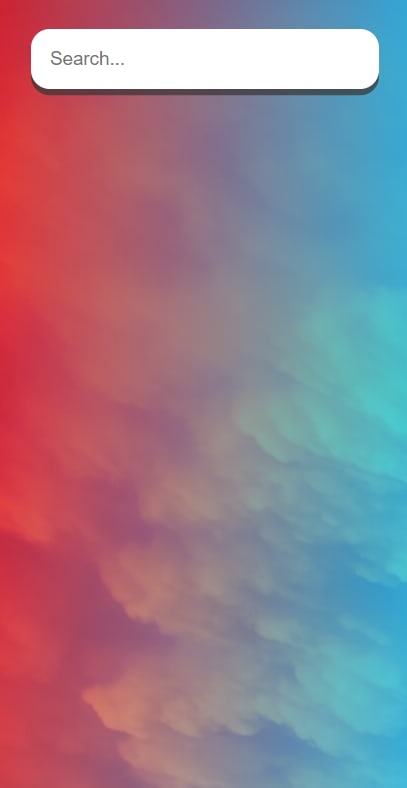


There you go, you just built an amazing weather application that keeps you informed of the weather conditions of cities thousands of miles away, right in your fingertips.
Thank you for reading this article, if you faced any issues feel free to contact me on LinkedIn. The entire project is available on GitHub.


Top comments (5)
Thank you for your kind words! If you are building a Covid-19 visualizer I would suggest you take a look at this repository of mine: github.com/K-G-PRAJWAL/ReactJS-Pro... . This might give you a fair understanding of how you could use charts and consume API data. The API that I've used is mathdroid's covid-19-api.
Thanks for your article. It has beneficial content and summary form explanation.
Thank you! Glad to hear that!
Thank You!
Beautiful and straight to the point tutorial.