
Introduction
In a previous post we looked at the process of generating an Excel add-in and using mkcert to create private certification authority (CA) trusted by browsers. In this post, we continue the journey of developing office add-in by looking at the steps involved in side loading our add-in in an Excel host.
Prerequisites
The add-in how to guide for iPad and Mac sets out the following prerequisites:
A Mac running OS X v10.10 "Yosemite" or later with Office for Mac installed.
Excel for Mac version 15.19 (160206).
The manifest .xml file for the add-in you want to test.
In this post, we will utilize the following:
A Mac running macOS High Sierra v10.13.3
Excel for Mac version 16.16.5 (181209)
Manifest.xml for the Excel add-in that we created in the previous post
Steps to sideload our Excel add-in
Open Terminal window and verify that
weffolder exists on your computer by running the following command.cd /Users/${USER}/Library/Containers/com.microsoft.Excel/Data/Documents/wefIf a No such file or directory message is displayed, then run the following commands from the terminal to create the folder and navigate to the newly created folder
mkdir /Users/${USER}/Library/Containers/com.microsoft.Excel/Data/Documents/wefandcd /Users/${USER}/Library/Containers/com.microsoft.Excel/Data/Documents/wefCopy
manifest.xmlfile of your Excel add-in to theweffolder. If you followed the previous post on generating an office add-in, then your copy command will be similar to the following:cp ~/office-js/expense-updater/manifest.xml .
If you are testing more than one Excel add-in, rename the add-in manifest.xml file while copying to avoid overwriting a manifest file for another add-in. cp ~/office-js/expense-updater/manifest.xml ./expense-updater.xml
Change directory to the root of your Excel add-in and start your add-in server
cd ~/office-js/expense-updater && npm startClose the Excel application if it is already running. Make sure your completely quit the application.
Open your Excel workbook
Choose Insert from the menu
Click on the drop-down arrow next to My Add-ins and select your Excel add-in.

- Your Excel add-in will now load and a callout will be displayed
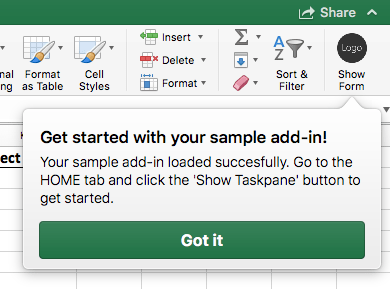
Click on the Got it button to dispose the callout.
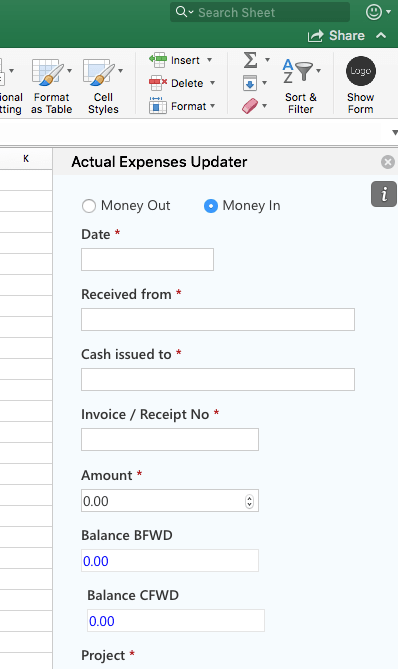
Click on your Excel add-in button to sideload the add-in.

Top comments (0)