
Introduction
Developing of Office add-ins requires use of HTTPS. SSL/TLS certificates are therefore required to grant permission to use encrypted communications and authenticate the identity of the certificate holder. When a new add-in project is generated, self signed certificates are also created for the project. For browsers to use these certificates, they have to be added as trusted root certificates. There are times however that some browsers fail to recognize these self-signed certificates as trusted even after adding them as root trusted.
mkcert when installed turns your computer in to a trusted private certificate authority (CA). Browsers will therefore trust and load any certificates generated using mkcert without raising any warnings.
In this post we step through the process of generating an office add-in project, installing mkcert and adding trusted certificates to the add-in project. This process will set the stage for creating and testing of an Excel add-in without browsers raising any certificate errors.
Prerequisites
-
You need to have installed Nodejs. Installing Nodejs will also install npm.
You can verify whether Nodejs and npm are installed by running the following command on the Terminal.
npm --version && node --version For this post we will be using Visual Studio Code. You are free to use your favorite editor.
Install Yeoman Toolset
Yeoman is an open source client-side stack of tools which helps developers build modern web applications.
From the Terminal run the following command: npm install --global yo
If you encounter permission or access errors such as EPERM or EACCESS during installation, you can follow instructions for installing npm packages without sudo on macOS and Linux or manually change npm’s default directory. Repeating the installation process should now complete without errors.
After installation for Yeoman is complete, install Yeoman generator for Office Add-ins. npm install --global yo generator-office
Create the web app
Optionally create a folder to hold your office add-ins. You can use a different name or location where you store your projects.
mkdir ~/office-jsChange location to the folder you have created or your project folder.
cd ~/office-js-
Generate your Excel add-in project by running the following command:
yo officeYou will be prompted for required information to enable Yeoman generator create the project
    ? ==========================================================================
    We're constantly looking for ways to make yo better!
    May we anonymously report usage statistics to improve the tool over time?
    More info: https://github.com/yeoman/insight & http://yeoman.io
    ========================================================================== No

        _-----_     ╭──────────────────────────╮
        |       |    │   Welcome to the Office  │
        |--(o)--|    │   Add-in generator, by   │
       `---------´   │ @OfficeDev! Let's create │
        ( _´U`_ )    │    a project together!   │
        /___A___\   /╰──────────────────────────╯
        |  ~  |
    __'.___.'__
    ´   `  |° ´ Y `

    ? Choose a project type: Office Add-in project using Jquery framework
    ? Choose a script type: Javascript
    ? What do you want to name your add-in? actual-expense-add-in
    ? Which Office client application would you like to support? Excel
    ----------------------------------------------------------------------------------
It is also possible to create the project without being prompted for answers by running the yo command with following arguments and options. yo office jquery "actual-expense-add-in" excel --js
- `jquery` is the project type. Other types are `angular`, `react`, `excel-functions` for Excel Custom functions or `manifest` which will create only the `manifest.xml` file.
- `expense-add-in` is the name of the project
- `excel` is the Microsoft Office client that will host the add-in. Other supported hosts are onenote, outlook, powerpoint, project and word.
- `--js` tells the generator to use Javascript. If you want to use TypeScript, then pass `--ts`.

When the project has been generated, it will also create a folder which contains the project files.
Update the manifest file
Change directory to the new created project.
cd actual-expense-add-inOpen the newly created project by running the following command.
code .Open manifest.xml file which is at the root of the project and update the ProviderName, DisplayName and Description of your add-in.
    <ProviderName>Kagunda JM</ProviderName>
    <DefaultLocale>en-US</DefaultLocale>
    <!-- The display name of your add-in. Used on the store and various places of the Office UI such as the add-ins dialog. -->
    <DisplayName DefaultValue="Actual Expenses Updater" />
    <Description DefaultValue="Allows capturing invoice/receipts data and automatically updating VAT Payments lists workbooks"/>
Install Local Certification Authority (CA)
Office host clients (excel, onenote, outlook, powerpoint, project and word) require add-ins to come from a trusted and secure location. Generating a new project also generates self-signed certificates which are not trusted by browsers. It is possible to make browsers trust these self-signed certificates by adding the self-signed certificate as trusted root certificate.
Another approach and the one we are going to use is install mkcert which is a zero configuration tool written in Go for generating trusted certificates signed by your own private Certification Authority (CA). When browsers load your webpages signed by your CA, you will not end up getting warnings like Your connection is not private or Your connection is not secure.
-
Open Terminal and run the following commands:
brew install mkcertandbrew install nss # if you use FirefoxInstallation instructions are available for all supported platforms including mobile devices.
Run
mkcert -installfrom the Terminal to install your private CA
    => mkcert -install
    Using the local CA at "/Users/kagundajm/Library/Application Support/mkcert" ✨
    Password:
    The local CA is now installed in the system trust store! ⚡️
    The local CA is now installed in the Firefox trust store (requires browser restart)! 🦊
At the root of your project, there is a folder named certs. Change directory to this folder.
cd certsWithin this folder are three files ca.crt, server.crt and server.key. Delete these files using following commands.
rm ca.crtandrm server.*While within the certs folder, generate new certificate files using the following command:
mkcert -cert-file server.crt -key-file server.key localhost 127.0.0.1 ::1
This should give you an output similar to the following:
        => mkcert -cert-file server.crt -key-file server.key localhost 127.0.0.1 ::1
        Using the local CA at "/Users/kagundajm/Library/Application Support/mkcert" ✨

        Created a new certificate valid for the following names 📜
        - "localhost"
        - "127.0.0.1"
        - "::1"

        The certificate is at "server.crt" and the key at "server.key" ✅
- Finally copy rootCA.pem from the trust store to current folder as ca.crt.
cp "$(mkcert -CAROOT)/rootCA.pem" ca.crt
The above two steps would need to be repeated every time you generate a new add-in project. Instead of repeatedly performing these two steps of generating certificates for new projects, you could copy the certs folder and all files in the folder to a common accessible location. Then any time you generate a new project, you modify the package.json file to point to this location when searching for the certificates during startup.
Copy the certs folder to ~/office-js we created at the beginning. Remember we are still within the certs folder.
cp -r . ~/office-js/certsOpen package.json which is at the root of the project and modify the following line so that the certificates can be read from the new location.
"start": "webpack-dev-server --mode development --https --key ./certs/server.key --cert ./certs/server.crt --cacert ./certs/ca.crt --port 3000",
After the changes, the line should be similar to the following
"start": "webpack-dev-server --mode development --https --key ~/office-js/certs/server.key --cert ~/office-js/certs/server.crt --cacert ~/office-js/certs/ca.crt --port 3000",
- Save the changes.
Start the dev server
Open the Terminal in the root of the project and run the following command to start the dev server.
npm start-
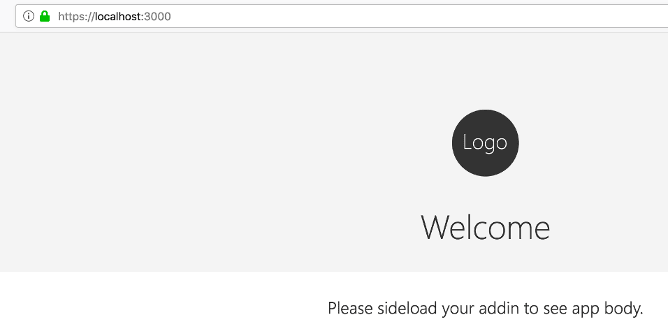
Open your web browser and navigate to https://localhost:3000/
You should now see the Welcome page without any warnings
Now that we have tested our generated office add-in on browsers using https without certificate errors, we can start preparing to add more functionality to our add-in. This will be a topic for a future post.

Top comments (0)