Hey! I'm on a mission to make 100 React.js projects ending March 31st. Please follow my dev.to profile or my twitter for updates and feel free to reach out if you have questions. Thanks for your support!
Link to the deployed project: Link
Link to the repo - with json server: github
Link to the repo - without backend: github
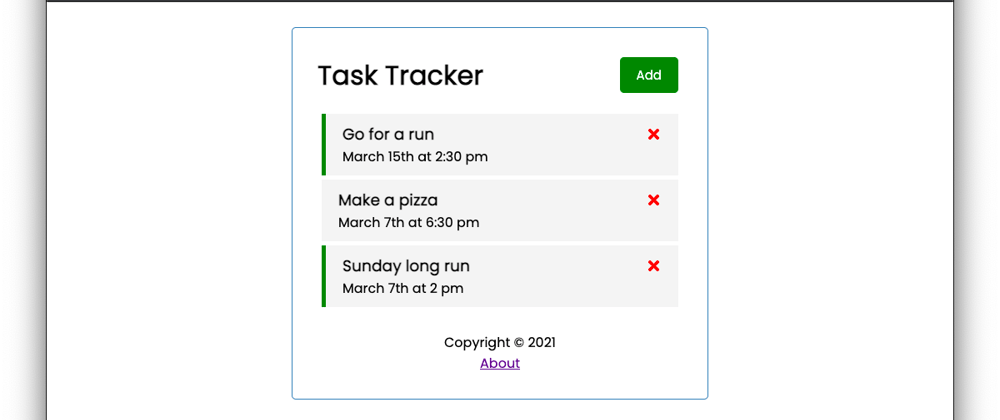
This blog post is going to cover a summary of things learned in Brad Traversy's 2021 React Crash Course. I sometimes like to go back to the basics and do a class or tutorial on something I know pretty well because you have a chance to get a refresher on how the foundational parts of the language work and review the habits you've built up while working in more advanced topics and this Youtube tutorial was excellent for that.
I actually have a blast doing tutorials like this because you reconnect with skills you've learned before but haven't used in a while, too. So as a recap, I am going to go through the major topics discussed while building this project one by one as a summary, like a text accompaniment for the video course so that I (and other developers) can refer back to it if they desire. You can find also skip to the topic as it is covered on Youtube by following the timestamps in the description of the video.

1. Create React App
create-react-app is a library maintained by the Facebook React team that allows developers to get up and running quickly. It is often regarded as the default way to start a React application. To use it, install npm, then install npx, then run npx create-react-app . in a folder you want to run it in.
2. JSX
JSX is a shorthand language for creating elements in pure Javascript that looks and feels like HTML in most ways. If you understand HTML, you'll likely understand writing in JSX.
Compare creating a
element with and without JSX:
Without JSX
const appEl = document.getElementById("app")
const myParagraph = document.createElement("<p>");
myParagraph.innerText("I am a paragraph")
appEl.appendChild(myParagraph)
With JSX
<div id="app">
  <p>I am a paragraph!</p>
</div>
3. Expressions in JSX
Another great feature of JSX is that you can write Javascript directly in the code by using curly brackets {} that evaluate as the page is being rendered. This should be pretty familiar if you've used a template language before elsewhere, like in a CMS.
<div id="app">
  <p>I am a paragraph!</p>
  <p>I have been able to drive for {29 - 16} years!</p>
</div>
4. Creating a Component
Components are Javascript functions that return JSX code that can be included and reused throughout your application. They are made by creating a function and writing JSX in the return statement. To use it elsewhere, you will need to export it which is done with ES6 module syntax.
5. Component Props
Props is a word used while coding React that's short for "properties". The distinction is useful because properties are also used to describe key-value pairs in a JS object. It's also shorter.
To pass props to a child component to a parent component, just add a word to the JSX element in the parent component and follow it with the data you want to pass to the child. In the child component, you can access the component's props by including props as the function's argument.
func ChildComponent(props) {
  return (
    <p>My name is {props.name}</p>
  )
}

func ParentComponent() {
  return (
    <div>
      <ChildComponent name="James" />
    </div>
  )
}
6. PropTypes
PropsTypes refers to a library that can be used to verify that props being passed to a component are of a certain data type. It can be used by importing the library prop-types
import PropTypes from `prop-types`

function MyComponent = (props) => (...)

MyComponent.propTypes = {
  name: PropTypes.string
}
The above will throw an error if the name prop does not have a string data type.
Similarly, you can use the native defaultProps property to specify the default for a prop just in case no data was passed to that child component.
function MyComponent = () => (...)

MyComponent.defaultProps = {
  name: "James"
}
7. Styling
There are many ways to style React components. You can use inline styling or object styling by giving specifying styles as JS properties like backgroundColor: "green".
My favorite though is to give each major component its own CSS stylesheet and importing the stylesheet directly into the component. This compliments the modularity of a React application and makes the styling for a component easy to locate.
8. Events
Events in React can be programmed into a component by making use of the native JSX event handlers like onClick and onChange. The values you give these props determine what happens following a particular even occurring.
9. Creating JSX elements with .map()
The ES6 Javascript array methods are widely used in React. They allow us to dynamically create components given an array of data.
const names = ["James","Rufus","Mary"];

const App = () => (
  <div className="app">
    <ul>
      {names.map((name,idx) => <li key={idx}>{name}</li>)}
    </ul
  </div>
)
10. useState
React components have state- these can be thought of as variables that are specifically reserved for the component they are in (though they can be used elsewhere through props). State is different from a plain old variable because they can cause the component to refresh when state is changed to reflect the changed value.
State is created for a functional component using the React useState hook. It uses destructured array syntax to name the state variable and also create function reserved for changing the variable. This also sets the default value for the state when the component is rendered.
import React, {useState} from 'react

function MyComponent () {
  const [name,setName] = useState('')

  return (...)
}
11. Global state
Global state in this tutorial refers to keeping state variables in parent components such as App in order to more easily use those pieces of state throughout the application. There are a number of ways to create global state but the simplest is to simply create state in a parent component and give it to child components through props.
This saves time- but it also allows you to modify the data displayed by many components at once which is exceptionally handy.
12. react-icons
React icons is a library I actually just heard about that allows you to import several popular icon libraries into your application at once. I will be using this again as it replaces having to chase down CDNs.
13. Prop Drilling
Prop drilling refers to the practice of sending props down multiple levels of children and in the case of functions- making sure the events or data passed into those functions in the child are used properly by the function stored in the parent component.
Functions can be passed down through child components like any other prop so this is essentially about making sure you have a reference to the passed in argument in the parent.
14. Optional message
We can create JSX elements that display differently depending on variables in the function and data stored in state. This is done frequently and using conditional statements within JSX. The main conditional statements you will see are the ternary and a "short-circuited" AND operator.
15. Conditional Styling
Conditional styling is using conditionals to determine how a component should be rendered. This is a convenient way to display styling based on your component's state or data being passed to your application.
Here is an example from this application, where we set a button's color depending on whether the form is open or closed.
<Button
  color={showAdd ? 'gray' : 'green'}
  text={showAdd ? 'Close' : 'Add'}
  onClick={onAdd}
/>
16. Controlled Components
Components that take in data such as forms also often show data as they're being edited. For example a text input will show the data that is being stored in the element as you type. We also must update state to store this data somewhere so it can be used by the broader application.
The practice of taking data from an input, storing that data in state, and using the value property to set the value of the element to the variable stored in state.
17. Submitting Forms in React
Since the standard behavior of HTML forms is to refresh the page you are on with the form's data in the URL, and this is usually not what you want your form to do, you will often see developers use e.preventDefault() in the form's handler function.
Form submissions are handled by the onSubmit event handler.
18. Build for Production
Since React is not natively read by browsers it must be compiled in the build step so that it can be deployed to a server. If you're using create-react-app then you can create the build folder with the terminal command npm run build.
19. JSON Server
One of my favorite new libraries from this tutorial is the npm package json-server. This allows you to create a local server and allow your front end application to interact with it as though it was an external server. This is really useful for testing since your server and endpoints are going to be external in the wild.
20. fetch()
The Fetch API isn't a React thing but a native Javascript API that is actually just a beautiful library over the native XMLHTTPRequest api to interact with servers. The fetch API can handle any HTTP request and is very flexible.
21. useEffect
useEffect is a native React hook for functional components that allows you to take advantage of times when the application changes to call functions. useEffect is called when the page loads and when the component is rendered. It can also be called whenever a state variable changes if you specify that.
22. React Router
React Router is another npm package. This one allows you to display different components depending on what is in the URL path. You can also create routing for your components.


Top comments (0)