
in this blog spot we will create a web app in Azure using the command line interface. According to Wikipedia definition ,azure web app is a cloud computing based platform for hosting websites, created and operated by Microsoft. It is platform as a service which allows publishing Web Apps running on multiple frameworks and written in different programming languages, including Microsoft propriety ones and 3rd party ones.
Things Required
- Install Azure CLI
- GitHub Account
- Install Git Bash
Follow the steps below to get started
- On your windows machine open PowerShell
- To login into your Azure account type
az loginand press ENTER

- Create A Resource group using the command
az group create --name ( group name) --location (region)

- Create a web app service plan using the command
appservice plan create --name(plan name) --resource-group (resource group name)

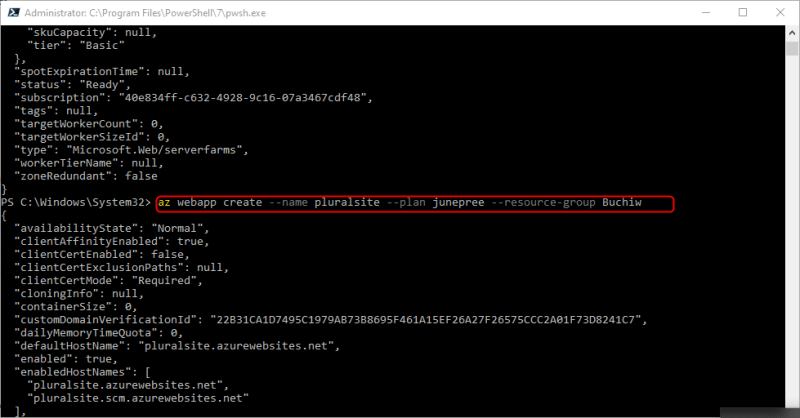
- Create a web App next using the below command
az webapp create --name (name of your webapp) --resource-group (resource group name) --plan (name of plan created already)
STEPS TO DEPLOY WEB APP
- Go to your Git Hub account ,and click on the repository that contains your website files(HTML, CSS, JavaScript)
- Click on the Code and copy the URL,HTTPS is selected by default, copy it.

3 Go back to PowerShell and type the following command
az webapp deployment source config --name "webApp name" --resource-group "resource group name" --repo-url "url copied from GitHub" --branch "branch of the repo" --manual-integration
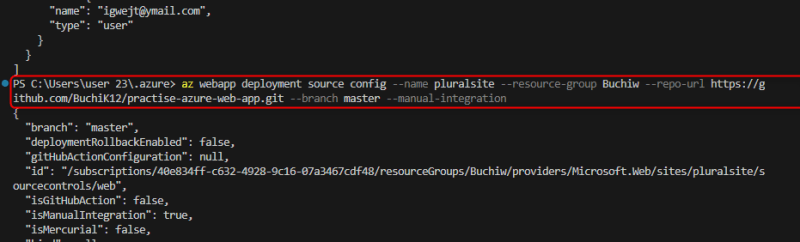
In this case we are using webapp name of "pluralsite", resource-group name "Buchiw", repo-url "The copied url from your GitHub above", and branch "master".
- Go to your Azure portal and open your resource group, then App service plan, under settings select the Apps . select and click the App created,"pluralsite".

The web app gives us an overview of
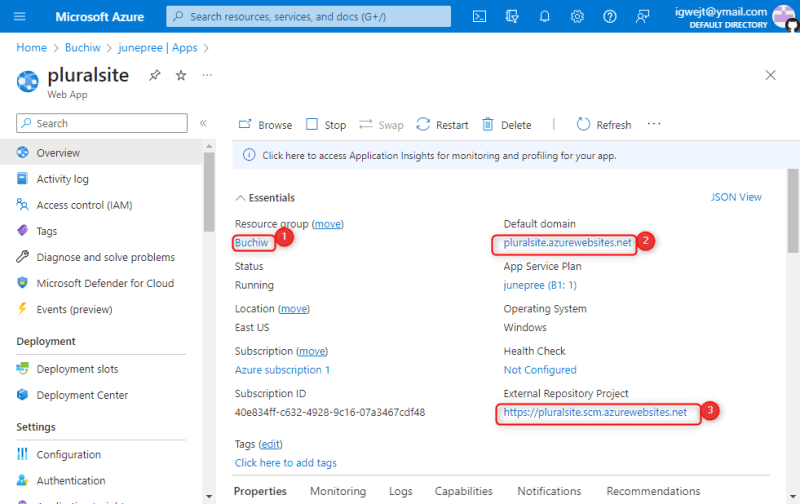
From the above created web app, label1 is the resource group containers where all the services and resource are stored, label2 is the default domain, the URL of your website and label3 is the Repository from GitHub. It holds every content of your websites.
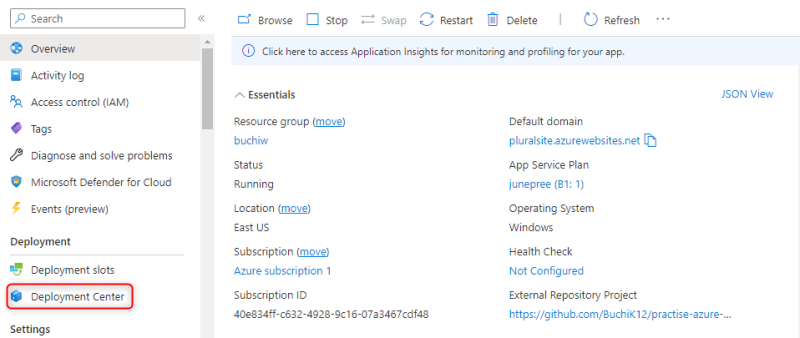
Clicking on Deployment centre at rightside under Deployment gives you a summary of your entire page
We can also view our web page by copying and pasting the domain name on our browser.

SCALEUP AND SCALEOUT
Scalability is the ability to quickly and easily increase or decrease the size or power of an IT solution or resources
Vertical scaling or scaling up or down is used when we need to react quickly to fix performance issues that cannot be resolved using classic database optimization techniques. It involves adding more RAM and Storage.
Horizontal scaling or scaling out or in, it involves you adding more databases or divide your large database into small pieces using a partitioning technology called sharding. Sharding is separating different rows of information from table and storing them in different databases. It is used in most notably non-relational No SQL databases. It enables them to handle large indeterminate and rapidly changing data.
STEPS TO SCALE UP
- Go to on app service plan,
- under settings click on scale up, choose a desired capacity from Production, the next window shows you a confirmation window to confirm your selection.


SCALE OUT
- Go to the App service plan page,
- Under setting select scale out. In the Scale out, we have Pricing plan and Scaling options. In pricing plan you can select from a range of different prices. For Dev/Test(less demanding workload), you may pick from Free F1 to Basic B3, and for Production Standard S1 to Premium V2 P3V2. On the scale out , we can choose manual, automatic or rule based.
In conclusion, as production increases and more and more traffics comes to our websites we will always need to scale up and scale out. I hope you were able to provision your web app following these steps.


Top comments (0)