
Azure Function is a serverless platform as a service (PaaS) in Azure that runs small, single-task code without requiring new infrastructure to be spurn up.
To understand it better, I will define what a serverless is , it is a cloud computing execution model in which the cloud provider allocates machine resources on demand taking care of servers on behalf of their customers.
In this guide we need to know some basic definition to provide us with a foundation to understanding what a function app is in azure, we will be covering the below mentioned objectives
- Creating a Function App in Azure.
- Using Visual studio to create a simple calculator App
- Testing the Calculator App and on our web browser
- Pushing files to GitHub and formatting our ReadMe to be readable.
Steps to Create A Functional App in Azure.
- Sign up to Azure or login if you already have an existing account.
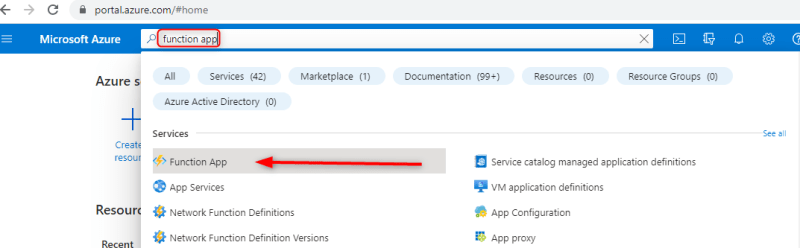
- On the search bar, type "Function App", and select funtion app from the listed services below. Then create.
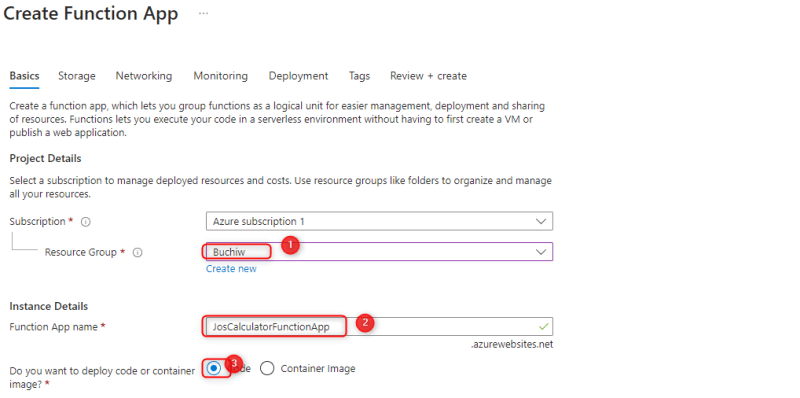
- On the window that opens, in the basic task pane select an existing subscription, resource group or create a new one, if no resource group exists.

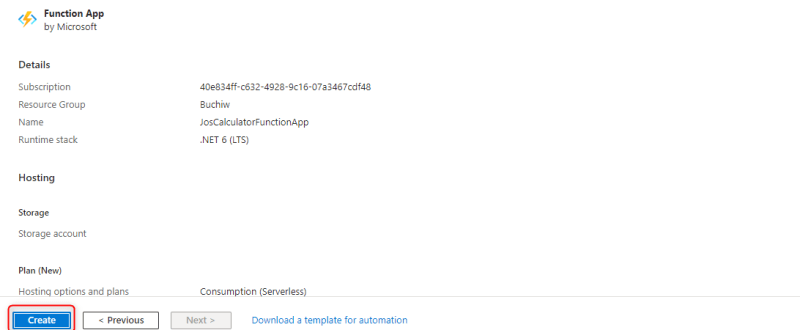
- In the instance details, provide a name for the function app
Leave radio button code selected as default. in the do you want to deploy code or container?
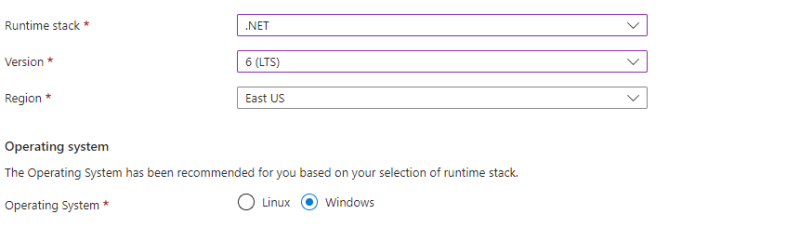
 5.scroll down ,under Runtime stack click the drop down button and select .NET
 - for operating system, leave window as default.
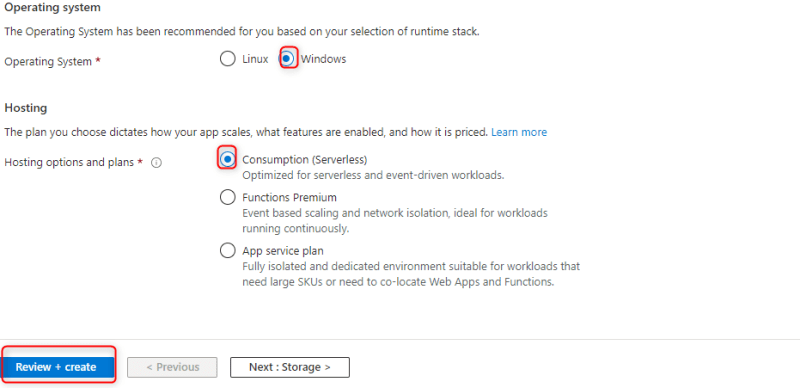
- For Hosting consumption model is selected.
- Click the Review+ create button below.
- Click create button
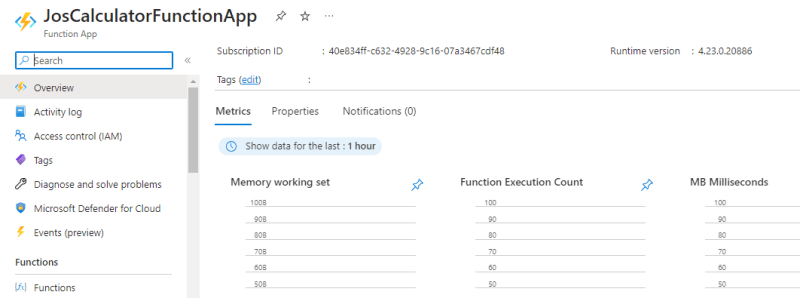
- When the deployment is complete click on the open resource button.
Steps To Creating A Calculator App Using Visual studio
In the below steps we will be creating a simple calculator using function app in visual studio . You will need to have Visual studio installed in your machine to carry out the exercise.
Steps
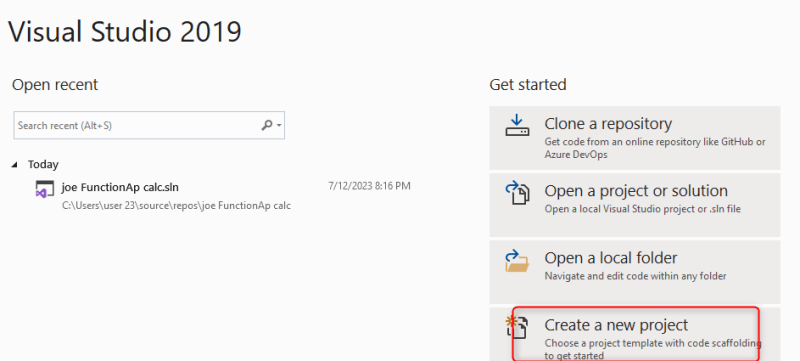
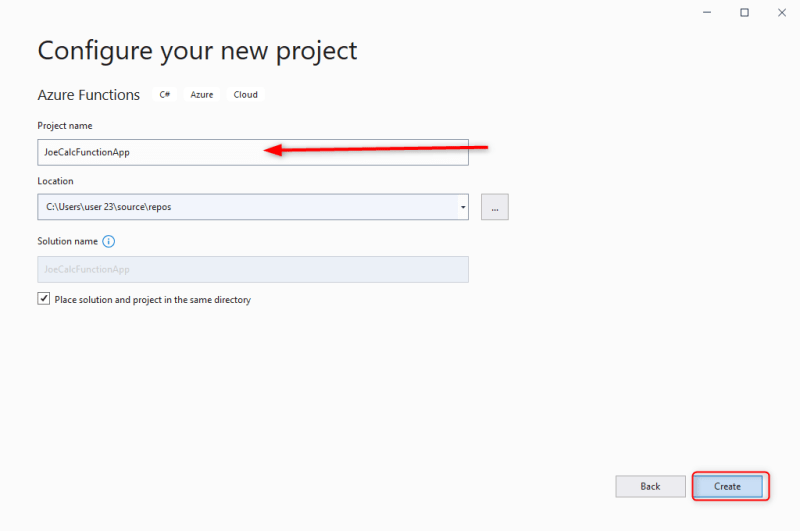
- Launch Visual studio from your local machine. At the right pane, select create a new project.
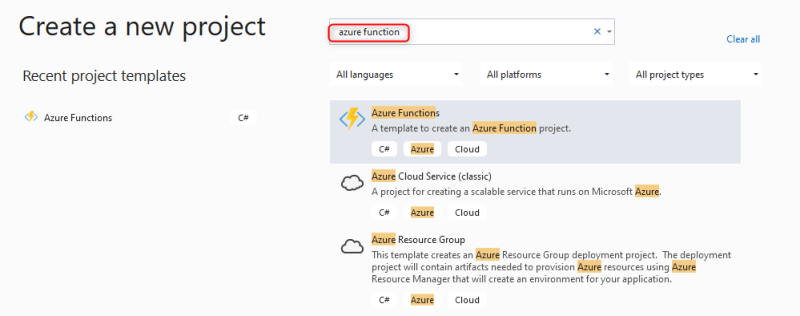
- In the search bar type "Azure function", or select from the list below and click on the Next button below.
- In the window that opens next, give the azure function a Project name. Then click the create button below.
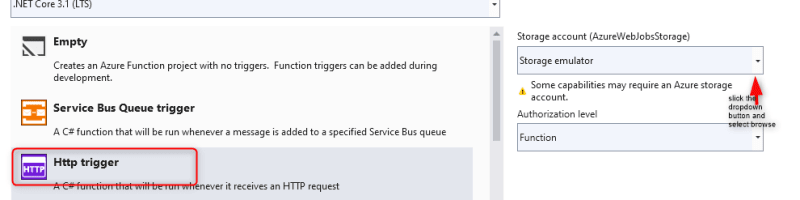
- In the window that opens, select HTTP trigger. At the right pane select the storage account dropdown button, select browse
- An azure storage account appears, create a new one on the existing subscription and click ok.
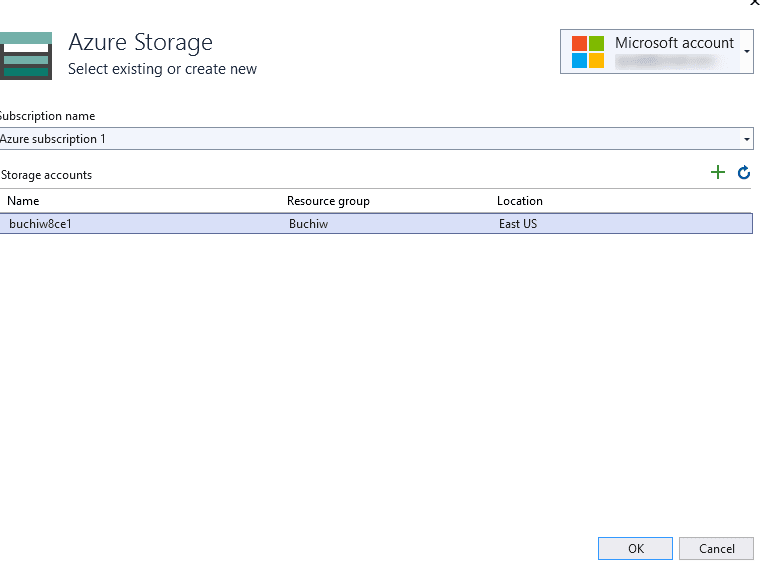
- click the create button.
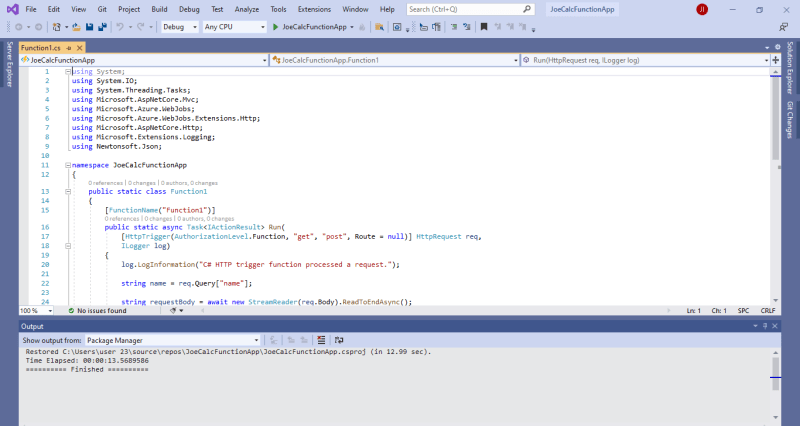
We can see above that we have successfully created our Function App in visual studio. We will start the process to coding our simple calculator app that is triggered on the browser.
Coding the Calculator App
To code the calculator app, we follow the below steps
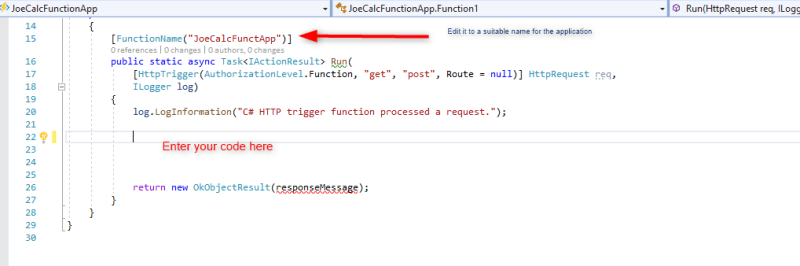
- In line 15,Function App name change it to "JoeCalcFunctApp".
- Delete from line 22, to line 30.
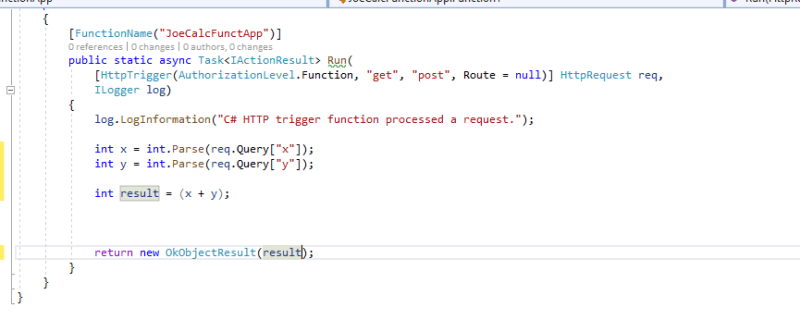
 3.Enter code as shown below to build a simple calculator app.
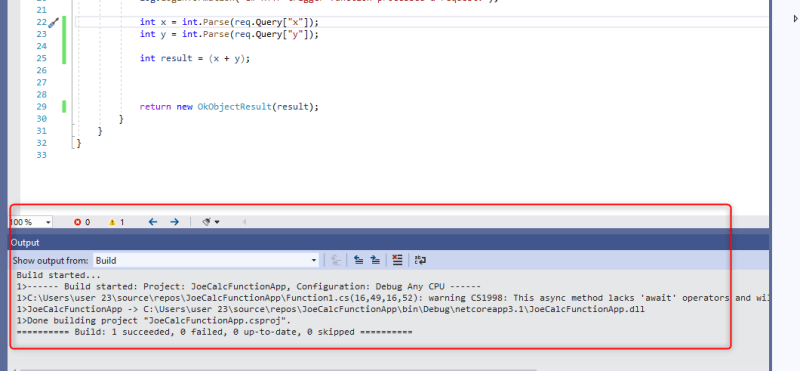
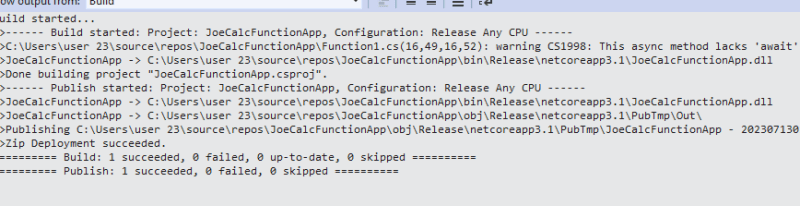
- At the right pane, Right click on the Calculator function app created and select Build from the options.
- Our Calculator Function app was built successfully.
 Publishing Our Function App to Azure
To publishing our calculator app to azure, follow the following steps below.
- At the right pane, Right click on the Calculator function app created and select publish from the options.
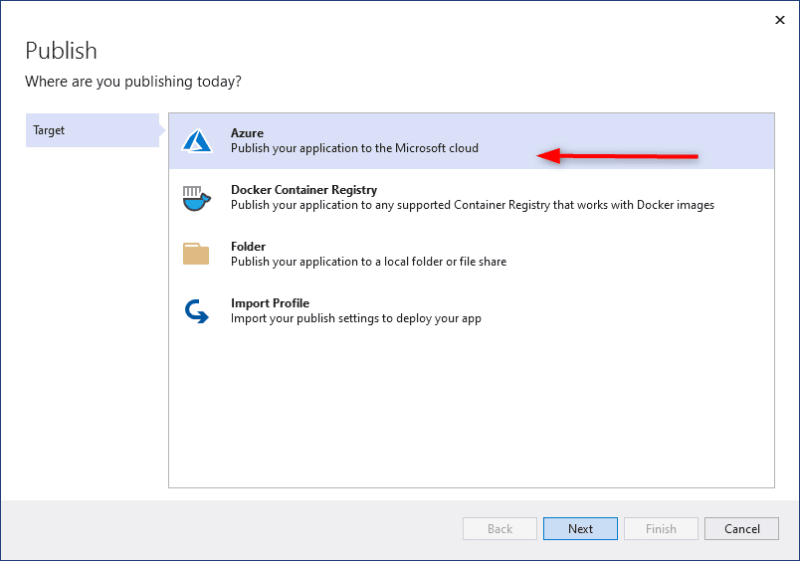
- In the Publish target, select Azure and click Next.
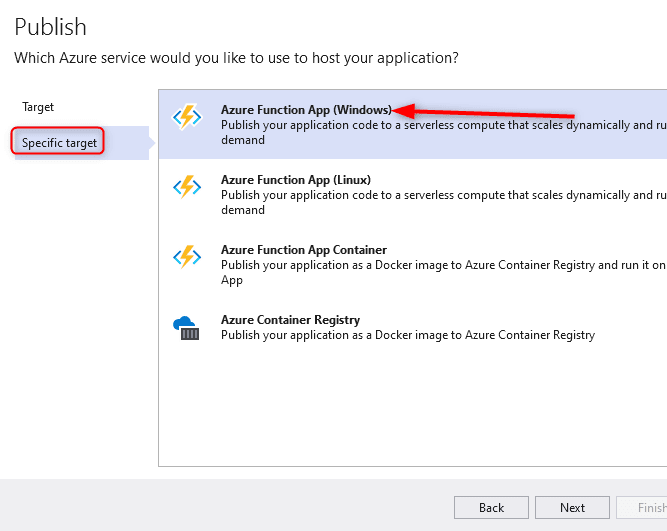
- In the "Publish specific target" ,select Azure function(windows), and click next.
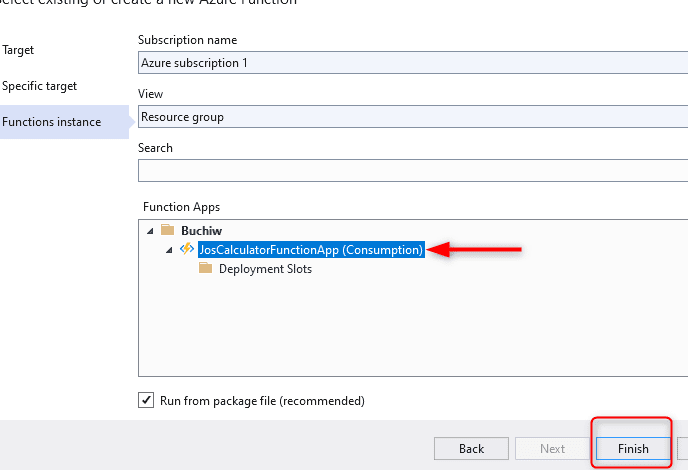
 4.In the function Instance window, your existing subscription name will be shown, for group leave as default, then for the function app, click the folder with an arrow in front, in the drop down select your function app created in azure. Finally click the finish button below.
- The next window that appears its the ready to publish window, if satisfied click the publish button.
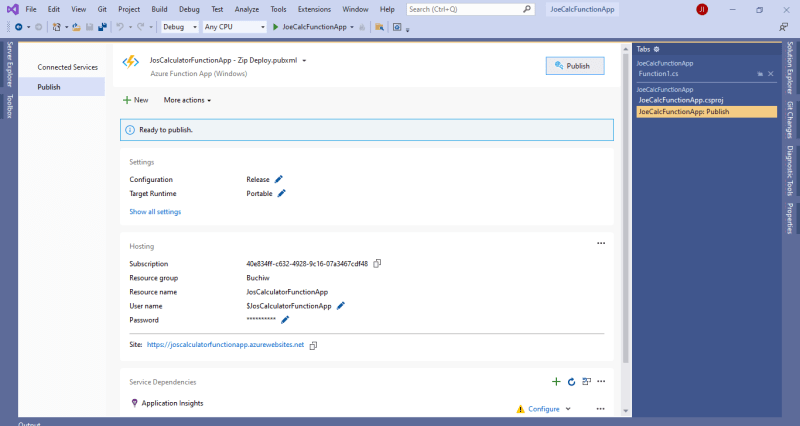
- When the publish button is clicked , the function has been successfully published to azure cloud.
Testing Your Function App on The Browser.
Alright its been an amazing journey so far, we are now going to test our calculator app on our browser to ensure its working properly. Follow this steps below to achieve this process.
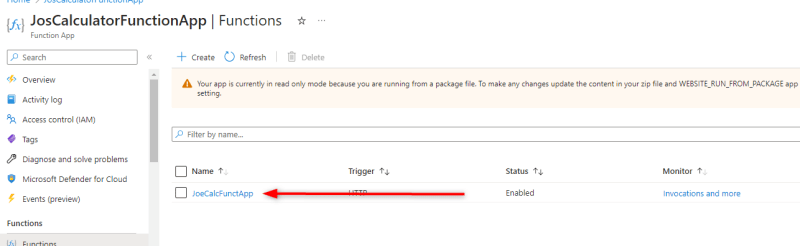
- Open the Azure portal and select function app from the home screen.

- At the left pane, scroll down to Function and select. We can see the calculator app created.
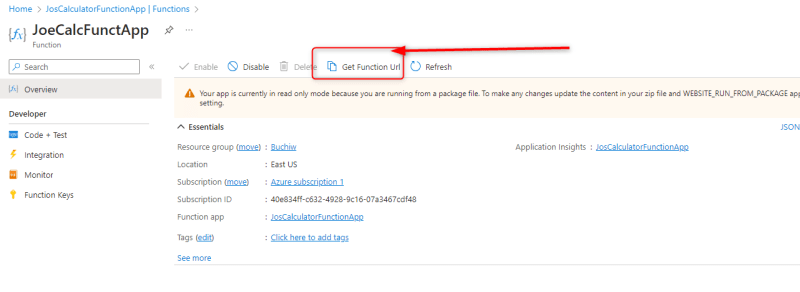
- Click the App to open it and copy the get function URL.
- On a browser address bar paste the copied URL.
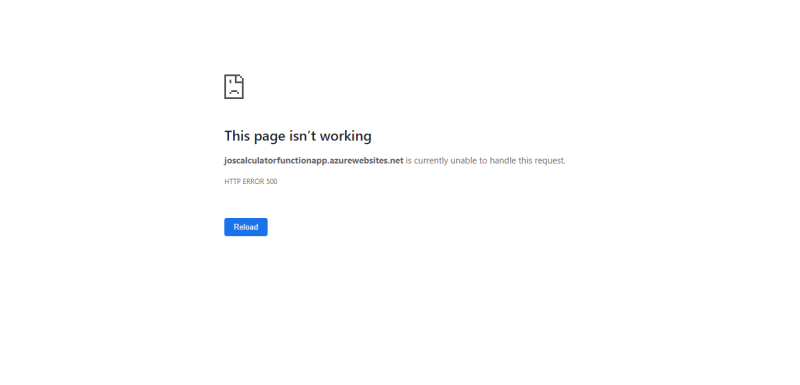 5.The above window shows "this page is not working". To test our code at the end of the pasted URL, after "==", type &x=n&y=n. Note: n is an integer.

Pushing Files To GitHub and formatting Readme
In the below steps i will guide you on how to push our calculator application to GitHub and format our files in human readable format.
We are required to have an existing GitHub account to do this successfully.
- Login into your GitHub account, on the dashboard click on new

- In the create repository window , give your file a name and below ,make sure the add a Readme file is selected.
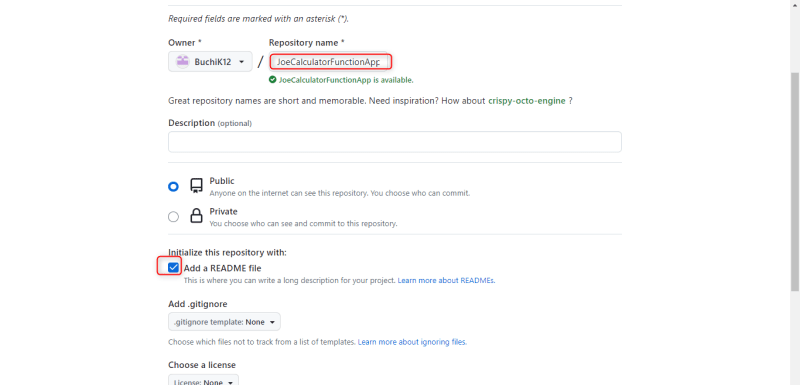
- Click the create repository button below.

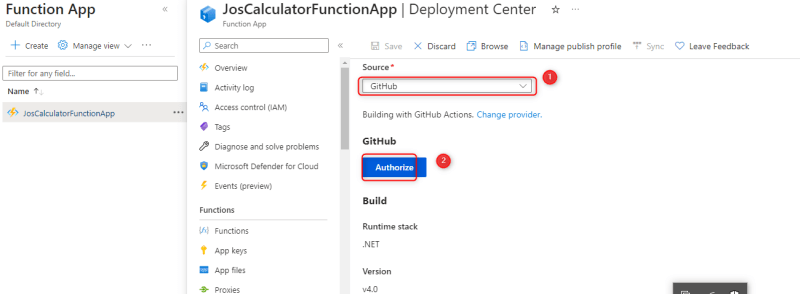
- On the azure portal ,select the Calculator function application, on the left pane, scroll down to Deployment, select deployment center.
- In the Source, click the drop-down arrow and select** GitHub** from the options provided, then click the Authorize button.
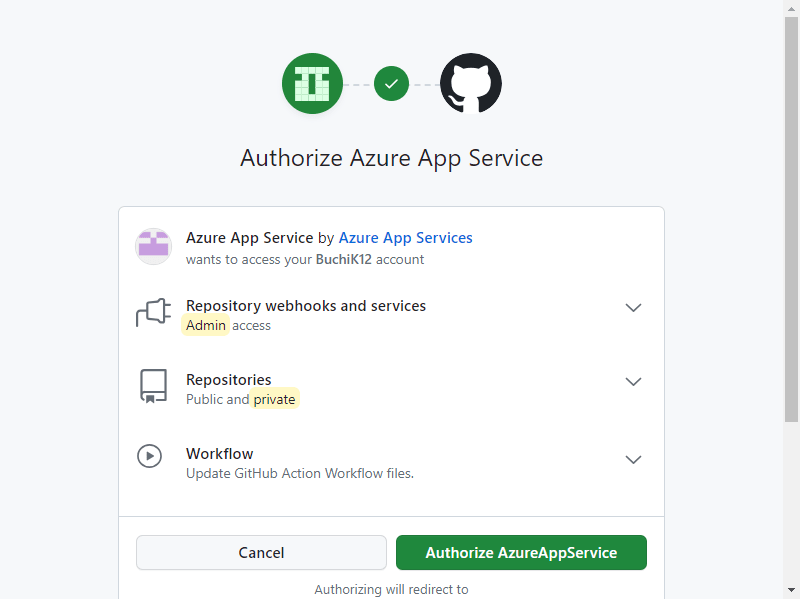
- In the next window, an authorization window opens, click on the Authorize Azure App services button below.
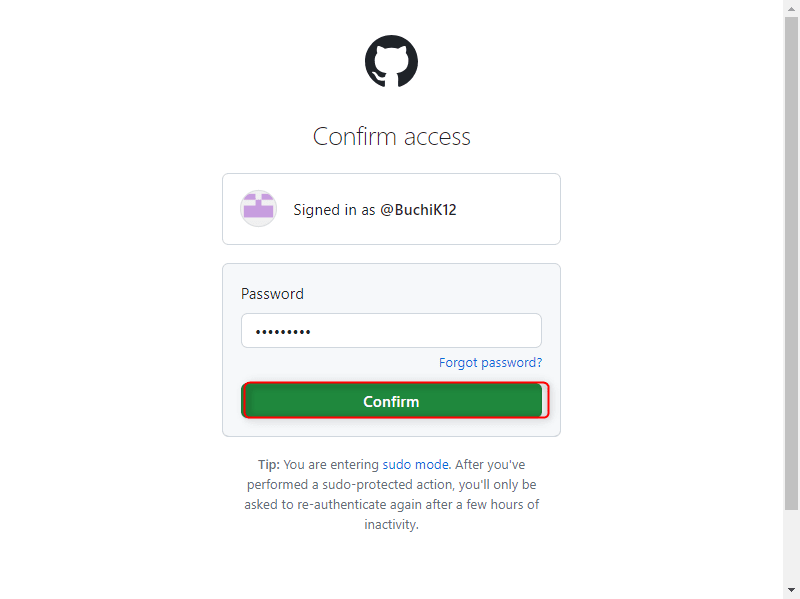
- Enter your password and click on the confirm button.
- The Function App opens a second time, your GitHub username is shown by default. In the Repository, click the drop-down arrow and select the function app deployed. For Branch, select Main , and click on the save button above.

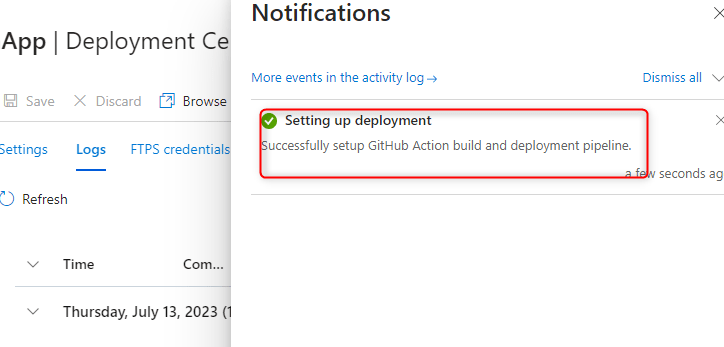
- Clicking the notification button above it shows that GitHub setting up and deployment was completed.
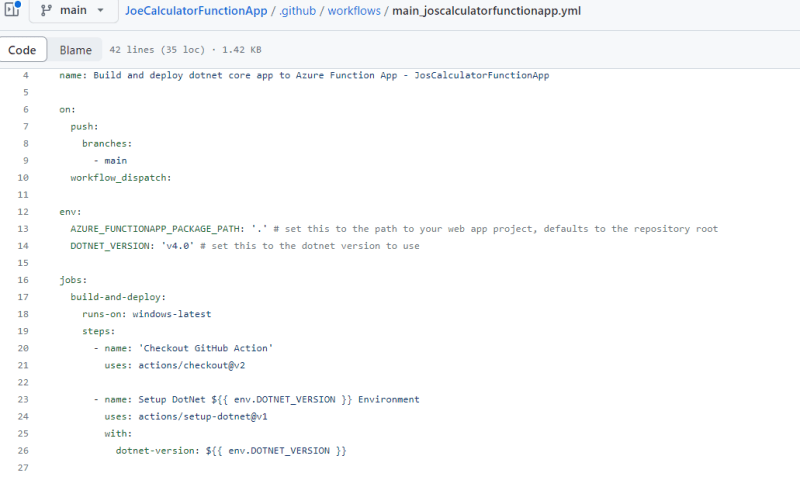
- On the Function app on GitHub account, open main and click to see our deployed .
 Alright, we are done with the deployment of our Application from Azure to GitHub, next we proceed to formatting our GitHub to be human readable.


Top comments (0)