
The Azure storage platform is Microsoft answer to modern data storage on the cloud. its highly available, scalable, durable and secure storage for a variety of storages in the cloud. Imagine yourself coming home from the grocery store and you need to store food items in your kitchen, you will need to separate items based on their nature, some in the fridge, others in open spaces. Azure cloud storage are accessible from anywhere in the world over HTTP or HTTPS or REST API.
Azure blob storage is a massively scalable object store for text and binary data. For example, photos, documents, videos or software can be stored into it. Other Azure storage includes:
Azure files, Queues, Tables, Elastic SAN and Managed disks.
In the following steps we will create our Blob storage and explain the different tier options in Blob storage.
1 Prerequisite
2 Create your storage account.
3 Explain tiers in blob.
To get started you are required to open one of the different accounts provided to start you journey in Microsoft Azure.
Creating Your storage account
Sign into your account on Azure portal and search for "storage account"

2 On the storage account click "create", it brings up the "Basic" page.
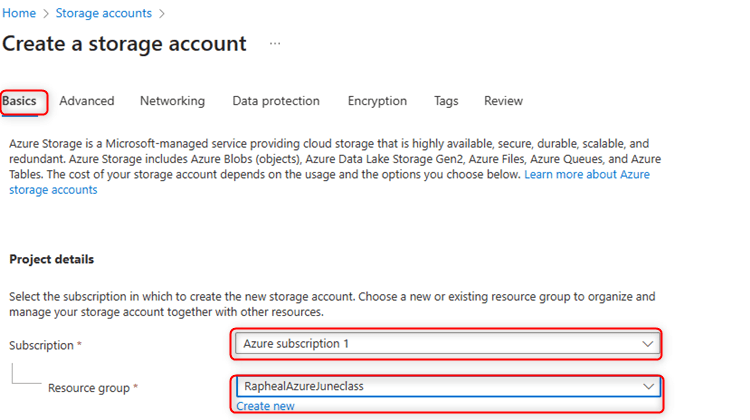
3 In project detail, choose a "Subscription".
4 Click on "Create new" or choose an existing Resurce group.
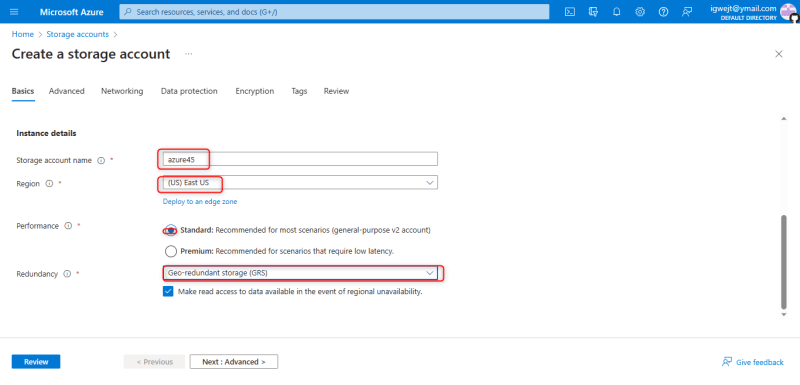
4 Next, Instance details, select a unique name for "storage account name", select a Region where your storage account should be deployed.
5 Select "standard" for performance option and, for redundancy we use "Geo-Redundant-Storage" (GRS). it stores your data in two regions, first the primary region, and a secondary for redundancy.
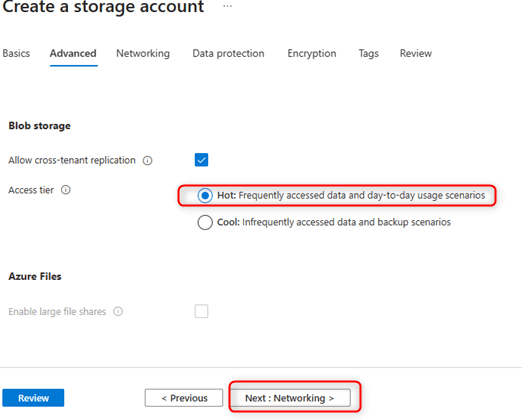
6 Click "Advanced", next, scroll down to Blob storage section, pick "hot" to always access your data at all times.
7 Next, Networking, under network connectivity, select "Enable public access for all networks."

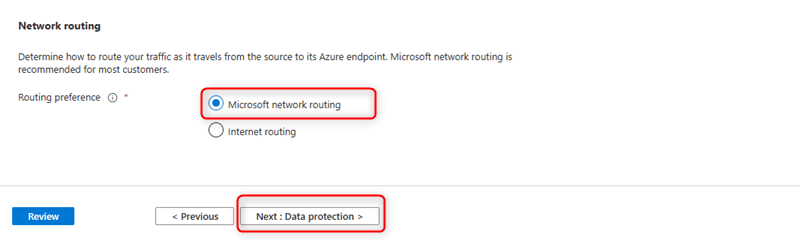
8 Scroll down, network routing, leave the "Routing preference" as default.
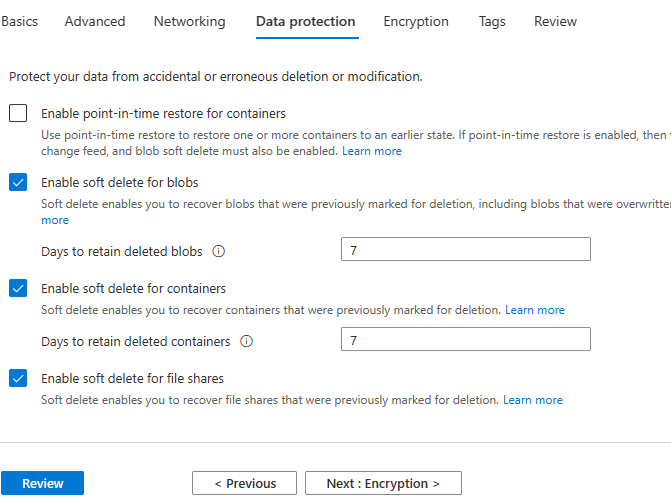
9 Next, Data Protection, we leave it at its default.
10 Next, Review, the click create.

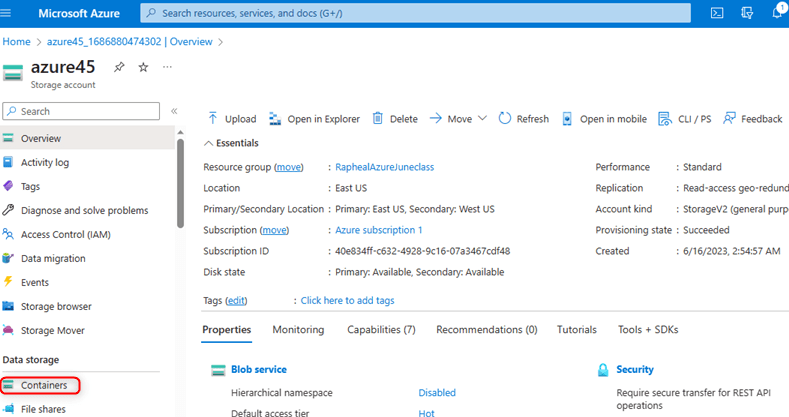
After we have clicked "create" we wait for the deployment to complete and once done click on the "Go to resource" button to view our storage created.

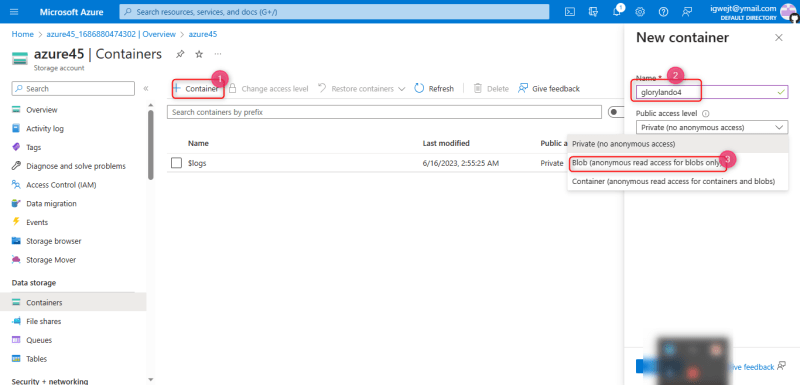
A storage account is more like an empty space, we need to create compartments inside it called containers to store our files. Follow this step to create a container and a Blob storage that can hold our non-binary data.
Creating A Container And Blob storage
1 Inside the storage account, at the left pane, under Data storage, select "container."
2 in the window that opens, select "+Container", a right pane opens, input a unique name, and under public access level, click the drop-down arrow and select Blob.
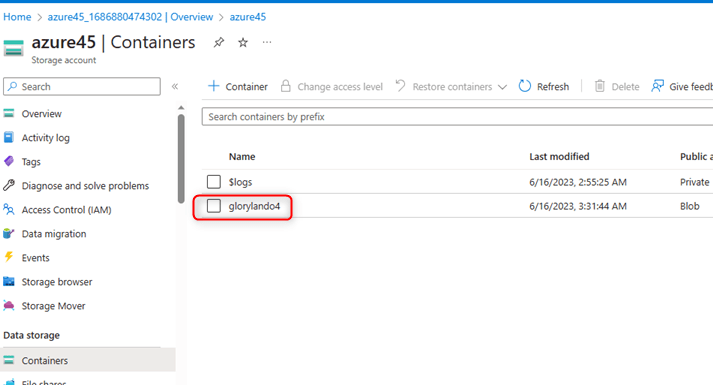
3 We have created our container successfully; next we are going to upload a file into it.
4 Select the created container, click to open it.

4 Click on the Upload button at the top, a right panel window opens, click the browse for a file button, from your local computer select a file to upload.
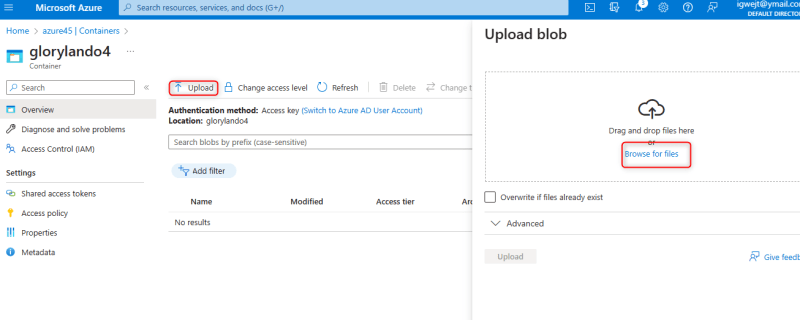
5 After uploading the file, we proceed to copy the url of the file and paste on the browser to see it.


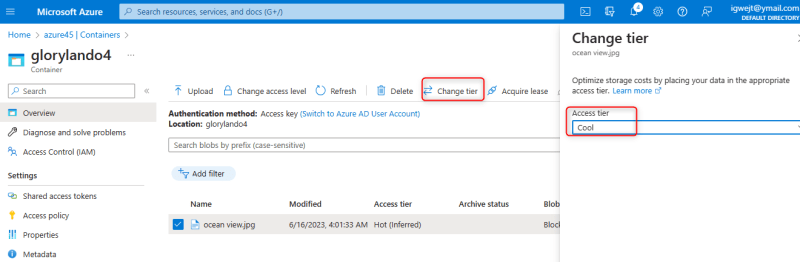
Access Tiers in Azure Storage
In Azure storage services, we have three (3) different tiers of storage, Hot, Cool, and Archive.
Hot tier
It is optimized for storing data that requires frequent access, it has higher access cost but lower storage costs.

Cold tier
Data in the cool and cold tiers has slightly lower availability but offer the same higher durability. Data stored for a minimum of 90 days.it has lowest storage cost and higher access cost.
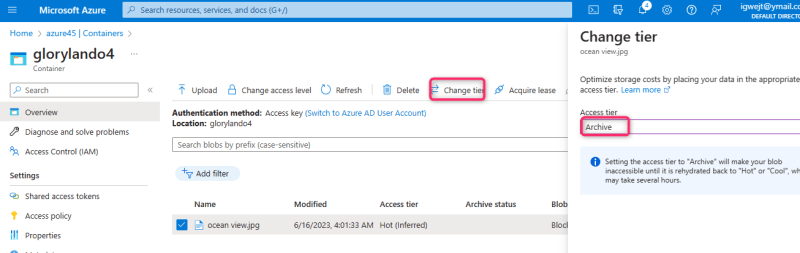
Archive tier
An offline tier optimized for storing data that is rarely accessed. and has flexible latency requirements, on the order of hours. Data in the archive tier should be stored for a minimum of 180 days.


Top comments (0)