
Azure virtual machine comes by default, comes with as OS Disk when created, but this provisioned disk cannot hold storage apart from the Image (Operating system) installed on it. To expand this storage and make it ready for production we need to add a new disk, data disk. In summary, picture an on premises physical disk sitting on your server, but virtualized. In azure available disks are ultra disks, premium solid-state drives (SSD), standard solid-state drives (SSD), and standard hard disk drives (HDD).
In the below guides, we are guided on how to get started...
1 Create a windows 11 virtual machine, follow the link highlighted to get started.
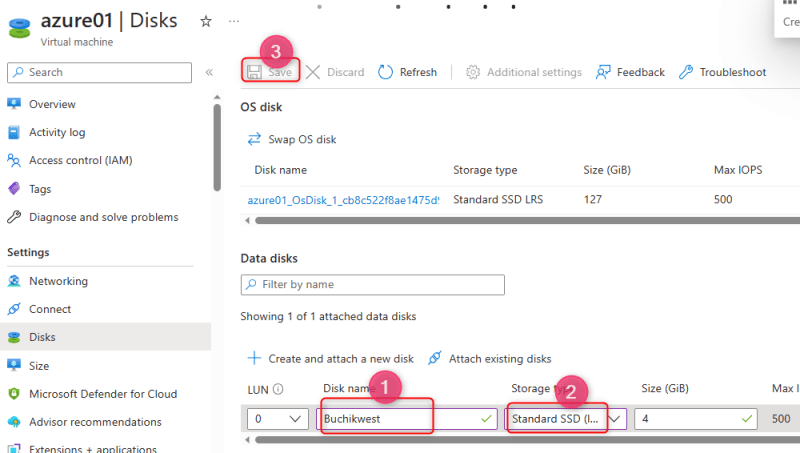
2 On the left side pane, under settings, click on "Disk". A new window opens, under data disks click the "Create and attach disk button" to start.

3 Provide a name, for the new disk, we are going to select a "standard disk SSD", under storage type, for this experiment, but it's recommended to use premium for a production environment. Then click the save, button.
4 Now our data disk has been created successfully as shown below.

5 Click the connect button, at the left side-pane, then download RDP to gain access to your Virtual machine. Open the downloaded RDP file and put your username and Password as used while creating the VM.

6 In the virtual machine, right-click on the window icon, and select and open disk management.

7 As seen above we can see "disk2", the new created disk. Select ok and continue.

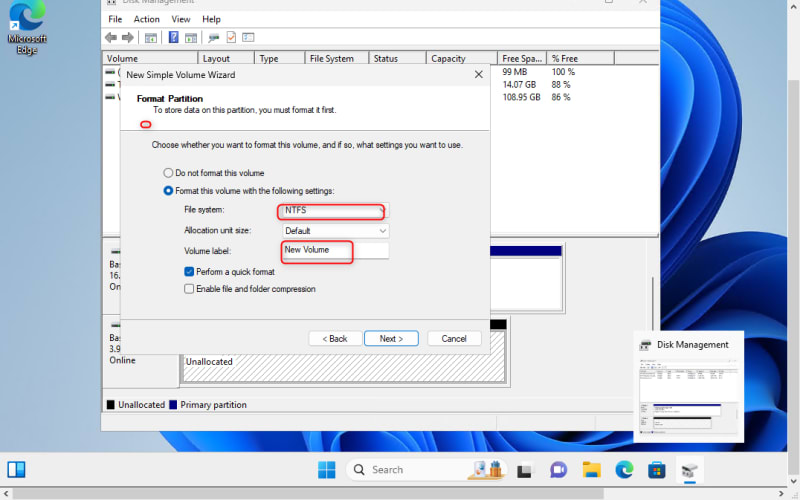
8 Right-click on "disk2" and select "new simple volume".

9 Continue clicking next, leave as default. When at the "Format Partition" window, format this volume button is selected by default. Choose a volume name, allocation size, and file system as it is suitable to your needs.
Note: We are changing the default name to "disk2" for this experiment.
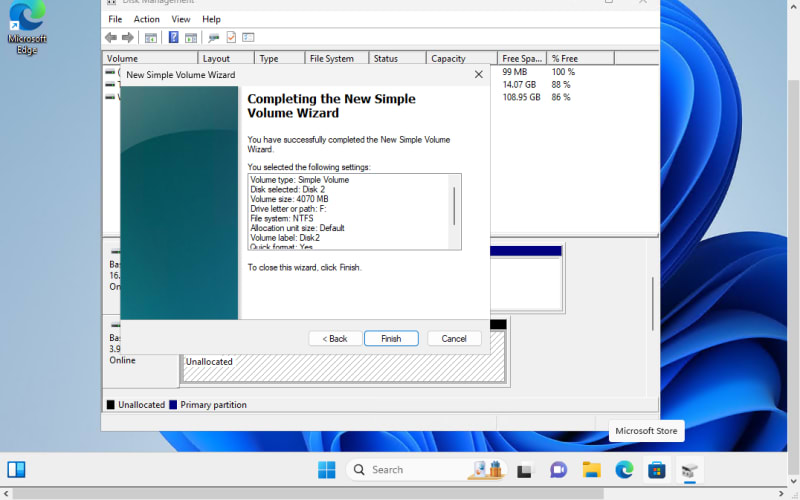
10 the next window shows, an overview of what we have done, when satisfied select and click finish button.
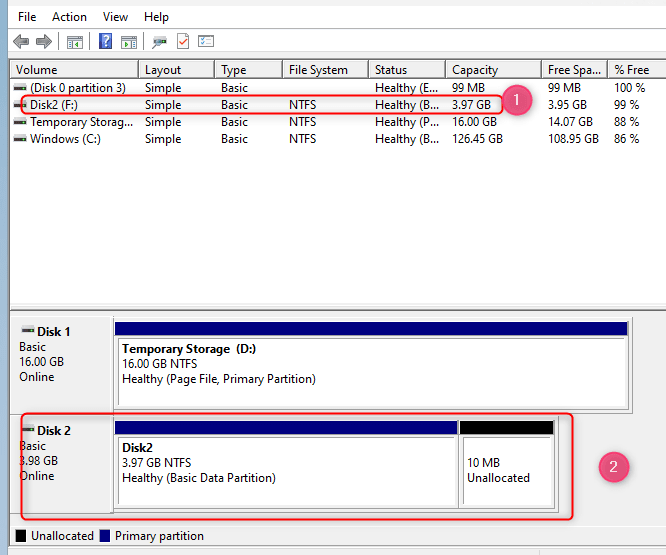
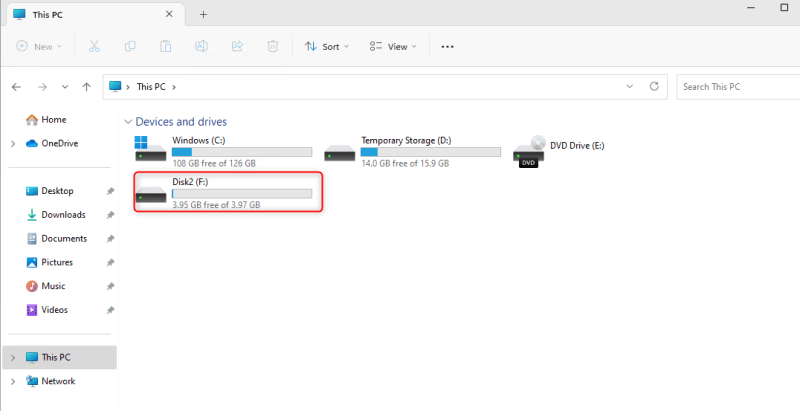
11 Finally, our data disk has been created as seen below and ready for deployment.
As a rule of thumb, remember to delete every resource created after usage to minimize on cost except they are very important. Please leave your comments below.


Top comments (0)