Hello👋 and welcome to the second article on "Git and GitHub" series!
In this article, we will learn how to create a git repository. I'll believe you understand the terms 'Git' and 'GitHub'. If not, kindly refer to my previous article in which I explained them. I'll also assume you're familiar with the terminal, at least the basic commands.
So let's get kicking!💪
Step 1. Create a new repository on GitHub
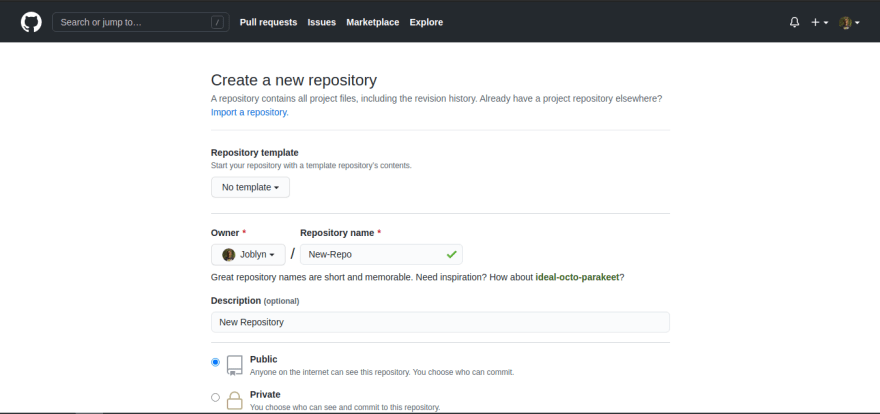
First, you log into your GitHub account and navigate to the 'Repositories' tab. Click on the button on the top right corner, written New. Once clicked, you should be directed to a new page where you set up your new repository. Fill in the Repository name input box with the name you wish to give your repository. For this article, I'll call mine 'New-Repo'. You can also write in a description (optional) for your repository. For this article, I'll just type in 'New Repository'. Don't worry about the other input-fields, for now just leave them the way they are.
Having done that, your page should look similar to this
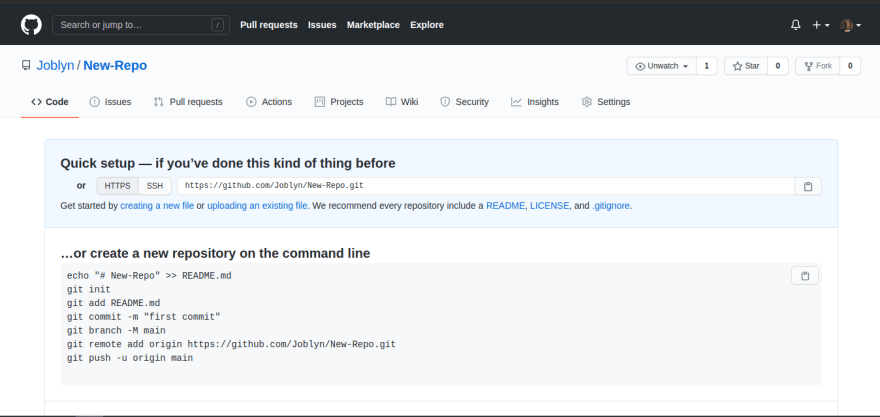
With that said and done, scroll down and click on the
Create repository button.
Now you should see a page similar to this
Step 2. Create a directory on the local machine
In your local machine (laptop, desktop etc), create a directory with the name of your GitHub Repository, in my case New-Repo, wherever you want it to be. Create a README.md file in the directory, describing your project.
Now, head on to your terminal and navigate to your directory, and execute the following commands:
git init
This initiates the directory as a git repository. The directory now has a .git hidden file indicating its a git repository, thus enabling you to execute git commands in the directory.
git remote add origin <repositoryurl>
This syncs your local directory with the GitHub repository. By default, you're in the master branch.
You can try running git status to confirm that.
Step 3. Push Changes to GitHub repository
To push changes to the GitHub repository, run the following commands:
git add .
This stages all the files in your directory for push, in our case, only the README.md file.
git commit -m 'initial commit'
This creates a description for your Push. Since it's our first, we'll just write 'initial commit'.
And lastly,
git push -u origin master
This sets up the master branch in the GitHub repository as the upstream branch for the master branch in your local directory, and pushes the staged changes to the branch.
Now, go back to your GitHub repository and refresh the page. What you see should be similar to this
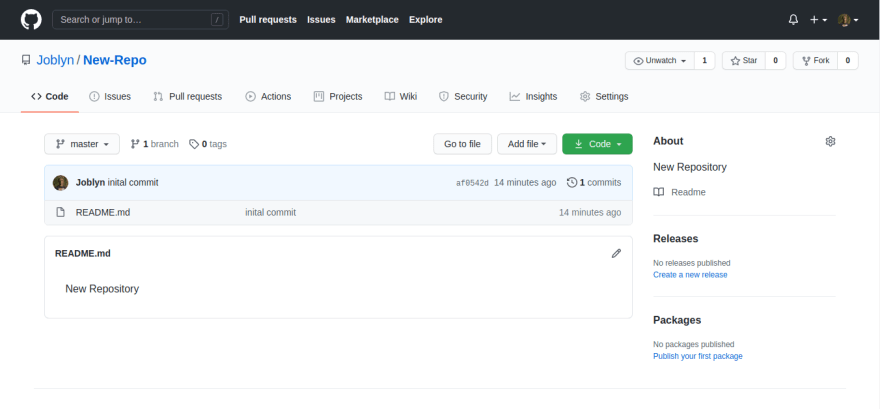
Voila!! 😃 You've created your first GitHub repository and pushed your first change. Subsequent times, it's a similar pattern.
And that's it for now guys! Thanks for the audience!
If you enjoyed this article or found it helpful, be sure to give a thumbs-up. Feel free to drop a comment. And don't forget to click the 'follow' icon to get updated on every new article.


Top comments (0)