
In this post/video we finally begin with some more serious but simple code (not just dotnet new like in the previous episode), getting started with ASP.NET Core MVC, taking a look at building controllers and views.
For the walk-through you can check the next video, but if you prefer a quick read, skip to the written synthesis.
The playlist for the whole series is here.
Intro
In the last episode we prepared the repository for the first component responsible for group management, as well as initialized the first application. Now we’ll pick up from where we left, adding MVC to the application and adding some group read/write logic.
Adding MVC to the mix
Getting MVC working in the application requires just a couple of lines of code, both on the Startup class.
First we add services.AddMvc() to the ConfigureServices method. This will register in the dependency injection container ASP.NET Core MVC required services. In the next post we’ll add our own services to the container, but for now, that’s it.
With the required services registered, we just need to add MVC to the request handling pipeline. To do this, we add app.UseMvc() to the Configure method. I deleted the app.Run(...) method call, but could’ve left it there as long as it was after the MVC registration, if not, it would handle all requests and none would get to our MVC developments. If we leave it after MVC registration, anything that isn’t handled by MVC will fallback to the Hello World! middleware.
And that’s it, now we can get started with the controllers.
Creating the first controller
Following the default project organization, we create a Controllers folder in the root of the application.
This is not mandatory though (and many advocate against it), as ASP.NET Core MVC is able to discover the controllers regardless of the location in the project, as long as they fulfill one of the following requirements:
- Class inherits from
Controller - Class inherits from
ControllerBase - Class name ends with
Controller - Class is decorated with the
[Controller]attribute - Class is decorated with the
[ApiController]attribute
These are the ways I know ASP.NET Core is able to discover controllers. Maybe there are more, if you know any, drop a comment for me to add it 🙂. Also, this "magic" works for controllers in the web application project, for controllers in other projects, it needs to be explicitly done, but that's more than I want to cover in this introductory post.
Inside the newly created Controllers folder we add a new class, GroupsController. Like I mentioned, just because of the name ending with Controller, MVC would find it and assume it as a controller, nothing else needed. However, as I want to make use of some functionality already existent, we'll make this new class inherit from the Controller class, as it provides several useful properties and methods for building our request handling logic.
Above the GroupsController class we add the attribute [Route("groups")], which indicates the route at which the controller will be available, in this case (in development) http://localhost:5000/groups.
Now for our first action, I’m adding an Index method that returns IActionResult. This is the usual type of return when we’re defining MVC actions, as it allows for returning different responses and status codes with a call of the base Controller class method, like NotFound (returns a 404), Content (returns a 200 plus the provided content) or View (renders the view discovered by convention or passed as argument).
Just to see the action in action (pun intended 😛), we’ll implemented as following:
Now to see it working, we’ll go to the project folder and run dotnet watch run, which will do the same as dotnet run, with the added benefit of listening to file changes and then restarts the application automatically.
Heading to the browser and typing in http://localhost:5000/groups, we’re greeted with Helloooow!.
Now let’s add a view to the mix.
Creating the first view
As we did for the controllers, we follow the conventions and create a Viewsfolder, and then inside it a Groups folder. This will make MVC match the views inside the newly created folder to the actions of the GroupsController.
We can create a new view file called Index.cshtml, again, notice the name matches the name of the action, so MVC makes the match automagically. Let’s postpone worrying with valid HTML and just add some random text.
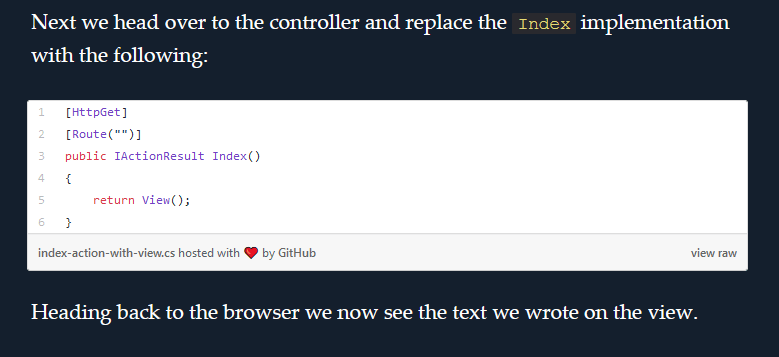
Next we head over to the controller and replace the Index implementation with the following:
Heading back to the browser we now see the text we wrote on the view.
Now that we’ve seen things starting to work together, let’s add some business logic.
Add business logic
Models
As this component we’re developing is targeted at group management, it’s only fitting that the first model we need is a representation of a group (yeah, mind blowing stuff! 🙃).
For starters add another folder to the project called Models and in there create a new class GroupViewModel that’ll represent a group, although right on in the simplest of forms, with an id and a name.
This class will be passed along from controller to view, to present and gather the needed information to/from the user - hence the suffix ViewModel.
As we’re still not using databases and nothing of the sort, we’ll go with an in memory collection to keep the groups.
Homepage (list groups)
For the homepage, we’ll just list the user’s available groups (we don’t have authentication yet so… it’ll be all). With that purpose, we just pass the existent groups when calling the View method, so the view model will be provided to the view.
On the view side, we now get the collection of GroupViewModel, so we need to add that fact to the Index.cshtml file, as you can see in the first line of the following code.
Then we use Razor to present the data, which is a mix of C# and HTML (as the file extension probably gave away). So as you can see in the code we create an unordered list and then, for each group in the model we got from the controller, we create a li element.
We access the C# stuff by using the @, like accessing the name by doing @group.Name.
When we’re creating a cshtml file, we can use tag helpers to ease the integration of HTML with MVC specific stuff. In this case, the anchor element on the list is not a normal HTML element, but a tag helper provided by ASP.NET Core that adds some extras and will generate the HTML for the real a element.
Those asp-* are attributes for the tag helpers. Instead of hardcoding the route, we use the a tag helper to generate it based on the information of the controller and action. So in this case asp-controller and asp-action indicate that we want the Details action of the GroupsController. The asp-route-id sets the route argument with the name id. For this to work we need the action defined in the controller, and that’s what I’ll show in a bit.
Just to finish up this page, we have a final anchor that links to the group creation page, using exactly the same logic we just saw for the group details page links.
Side note: importing model classes and tag helpers
An important note on building the views, regarding the tag helpers and model classes.
To reference the models, we would normally need to add a using statement to the beginning of the file or use fully qualified class names (like we do in “normal” C# files). Something similar with tag helpers, as we need to declare that we want to use them.
To avoid repeating the same code in all views, as in most cases we’ll want access to the models and tag helpers, we can create a _ViewImports.cshtml file on the Views folder root, and all views will have access to what’s imported there.
If we wanted to do specific imports just for the groups views (assuming we had more), we could create another _ViewImports.cshtml file in the Views\Groups folder.
Group details page
For the group details page we want two actions, one just to show the information and another to update it.
Lets begin with showing the information. Notice the {id} we have on the route attribute. That’s what allows the map of the name id to the route, as we saw in the previous section, when using the tag helper asp-route- with the suffix id. The name also makes the match between the route and the argument on the action method signature. As for the implementation, we start by fetching the detail from the in memory group collection. If we can’t find the requested group we return a 404 HTTP status code, by calling the NotFound method we inherited from Controller. If we had a match on the group id, then we pass it to the view to render.
On the view side, like before we now have something different - a form.
When creating the form, we’re using a form tag helper as we saw previously for the anchors, including the attributes to map the route. Then we add a label and an input to allow editing of the group name. Notice the asp-for. Particularly in the input case, will make it generate the HTML, including the input name to match the model property and the type, considering the model property’s type (in this case string, so text).
Taking a look at the generated HTML we can see what we expect given the previous explanations, plus something else.
There’s an input of type hidden with the name __RequestVerificationToken. This is used to protect against CSRF attacks, and is added automatically when we create the form in the view using the tag helper. As we’ll see, this is checked on the update action, using the attribute ValidateAntiForgeryToken to indicate we want to make this check.
We can see the ValidateAntiForgeryToken attribute mentioned previously, together with the attribute that binds the action to the post HTTP method and the route definition, that’s the same as for reading the details, being the distinction between the two made by the HTTP method.
Notice the method arguments. The id comes from the route, being the match done by name, so the argument’s name must be the same that is defined in the Route attribute. The GroupViewModel comes from the request body and is automatically bound by MVC.
As for the logic, it’s pretty simple. Fetch the group, 404 if it doesn’t exist, update the name if it does. In the end, RedirectToAction sends the user back to the homepage (following the Post/Redirect/Get strategy to avoid repeated form submissions).
Create group page
To wrap this up, we have the page to create new groups. It is very similar to the details page, so this should be quick.
Starting with the view this time around, it’s basically a copy paste of the update details page.
The only difference is really the target action and not having an id argument, as it will be generated in the backend when inserting the new group.
As for the controller actions, again, very similar to the update details.
We start with an action (Create) that just maps to the view, to render the creation form.
Then we have the CreateReally action, that’s bound to the HTTP post method and also validates the anti-forgery token. The way I’ve done it, I needed to change the name from Create as I initially named it, as the create view’s form tag helper wasn’t able to figure out the correct route, even though I set method="post". There are surely better ways to do this (like named routes) but this worked well enough for this case.
The logic is rather simple: set an id, add the group to the list and redirect the user to the home page.
Outro
That’s it for the first bits using ASP.NET Core MVC. What we did in this post is mostly simple, but if anything could be better explained, don’t hesitate to ask.
The source code for this post is here.
Don’t hold back on feedback! Hope you’ll be back for the next one!
Thanks for reading, cyaz!

Top comments (7)
This was very helpful for me, it enhanced my knowledge on the tutorial video I was watching on same subject.
Thanks for sharing and I look forward to the next article.
Glad it was useful!
There are already a good amount of articles in here, this is the number 3 out of 35 so far 🙂.
Oh really!
Where can I find the link to other articles?
If you look at the top at the article, you have some links to the other articles in this series, look for "ASP.NET Core: From 0 to overkill (36 Part Series)".
Otherwise, you can head to my dev.to profile or my blog.
Considered done.
Much appreciated with thanks!
Hey joao, this is awesome. can't wait to reach the end of the series :D
but i think you gave the wrong code bit here,
dev-to-uploads.s3.amazonaws.com/i/...
Hi Amin, thanks!
It's far from impossible for there to be some mistakes, so I appreciate you pointing it out for me to adjust it 🙂.
In this case though, it seems like some sort of bug with dev.to/GitHub gists.
This is what I see:
If it persists for you, maybe take a look at my blog, for the original content here -> blog.codingmilitia.com/2018/10/13/...
At some point in the series I gave up on gists and embedded the code directly, so these kinds of things shouldn't happen anymore.