
This post was originally from jaredwolff.com
Depending on where you live, your air quality can be a big deal. Whether it's pollution from factories or particulates from burning forest fires, they're not good for your lungs or overall health.
While there are plenty of air quality meters out there, it's doubtful they're open source never-mind reasonably priced. In this post, i'll be showing you how to connect an Air Quality Wing, publish data to the web via Golioth and view your data in real time using Grafana.
So first, let's get started by assembling hardware.
Side note: this post is fairly lengthy. You can download a PDF version of it here.
Assembling hardware

In this project, you'll need a few things to get started.
- An Air Quality Wing with connected PM2.5 sensor
- A Feather compatible processor board. We'll be using the nRF9160 Feather which is NB IoT and LTE Cat-M enabled.
- A Feather doubler to connect the two together.
- A SIM card with your favorite provider. Some of the options out there include Hologram, Soracom and Twilio.
Assembly is straight forward and only requires you to solder headers if you haven't already. Here's an example of using female headers on the Air Quality Wing.
Every Air Quality Wing comes with a set of male headers. One is 12 pins and the other is 16.

The best way to solder them is size them correctly, place them in a breadboard or already assembled doubler and place the board on top for soldering.

Note: Don't spend too much time holding your iron to the pins as the breadboard is not meant for high heat usage!
You will also have to do a similar solder job if you use a Feather doubler. More on the assembly for that board can be found here.
In the end you should have a setup that looks something like this:

Setting up a device
Currently the Air Quality Wing works with the following boards:
- nRF9160 Feather
- Particle Xenon
- nRF52840 DK
Adding support for new boards is simple thanks to Zephyrs ability to target many hardware targets for the same core source code. In this sample we'll be using the nRF9160 Feather since it can publish directly to Grafana. So here's the instructions to getting the firmware up and running:
Set Up Python Virtual Environment
One of the main dependencies for Zephyr is Python. Instead of installing the required packages directly to your system, I highly recommend use a virtual environment instead.
First lets make a project folder. We can call it aqw:
mkdir -p aqw
If you don't have virtualenv installed already, make sure you install it:
pip3 install virtualenv
Set up a python virtual environment:
virtualenv -p python3 env
Then enable it by running:
source env/bin/activate
Install west
west is the command line utility for Zephyr. You'll need it to build the firmware.
pip3 install west
Initialize and update project
Next we'll download the source code and install the dependencies.
west init -m https://github.com/circuitdojo/air-quality-wing-zephyr-demo.git --manifest-rev main
Then run
west update
This will download all the dependencies. If there are ever fixes to this sample you'll need to pull the changes and then re-run west update:
git pull && west update
Install remaining python dependencies
Finally, there are some important dependencies needed to build your freshly cloned Zephyr repository. Let's install those here.
pip3 install -r zephyr/scripts/requirements.txt
Install toolchain
-
For Mac run the following: (it does require you install
wget.brewis an easy way to do so:brew install wget)
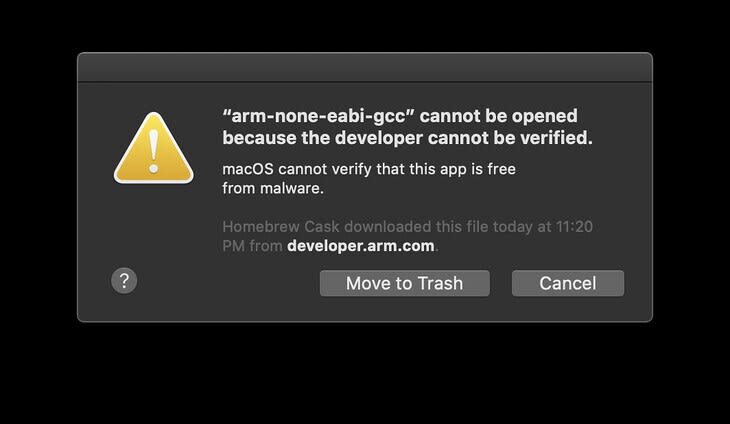
 cd ~
 wget "https://developer.arm.com/-/media/Files/downloads/gnu-rm/9-2019q4/gcc-arm-none-eabi-9-2019-q4-major-mac.tar.bz2"
 tar xvfj gcc-arm-none-eabi-9-2019-q4-major-mac.tar.bz2
 rm gcc-arm-none-eabi-9-2019-q4-major-mac.tar.bz2
Note for Catalina (and newer) users you will get an error when running these utilities for the first time. You must allow them to be executed in your Security preferences.
For Windows you can download and install the toolchain with this direct link.
That's it for your SDK install! Next, we'll want to generate credentials for your device and add them to the sample code. We'll do that next.
Get credentials
First jump over to Golioth and create an account if you haven't already. Golioth is finally in open beta which means anyone can join!

Once instead you'll be prompted to create a project. So let's do that now. I've named my project Air Quality Wing but you can name it whatever you want. Only unique project names can be used at the moment so you'll need to name yours differently.

Make sure you click Save to continue to the next step.
Once you have a project created, it will open up other options within Golioth including the Devices tab. Click on the Devices tab.

Then click the Create drop down and then Provision with Credentials. You you should get a screen like the one below.

Change the device name to whatever you'd like. Change the identity to match if you'd like. (or leave it be) Finally, add your super secret pre-shared key. You'll need the Identity and PSK for the next step.
Add credentials to sample code
If you've gotten this far, you have your device provisioned! Next is to add the Identity and PSK to the demo code.
You will need to edit demo/golioth/config/golioth.conf with your credentials in order to connect to Golioth's backend. Update CONFIG_GOLIOTH_SYSTEM_CLIENT_PSK_ID and CONFIG_GOLIOTH_SYSTEM_CLIENT_PSK with the credentials you used in the previous step.
# Golioth credentials
CONFIG_GOLIOTH_SYSTEM_CLIENT_PSK_ID="<INSERT CLIENT ID HERE>"
CONFIG_GOLIOTH_SYSTEM_CLIENT_PSK="<INSERT YOUR SUPER SECRET HERE>"
Also, if you're not using the PM2.5 sensor you may need to comment out &hpma_sensor, in static struct aqw_sensor *sensors[] = {.
Build and Deploy
Finally build the application by running the following commands.
cd demo
west build -b circuitdojo_feather_nrf9160_ns -s golioth
Once built you'll get to the end of a bunch of output. The end should look something like this:
[5/16] Linking C executable zephyr/zephyr_prebuilt.elf

[11/16] Linking C executable zephyr/zephyr.elf
Memory region         Used Size  Region Size  %age Used
           FLASH:      189380 B     425472 B     44.51%
            SRAM:       44376 B     178968 B     24.80%
        IDT_LIST:          0 GB         2 KB      0.00%
Then plug in your nRF9160 Feather and either program using newtmgr or nrfjprog. I'll include both here.
For programming directly over USB use newtmgr:
newtmgr -c serial image upload build/zephyr/app_update.bin
If you have a programmer setup, use nrfjprog
nrfjprog --program build/zephyr/merged.hex --chiperase --reset
Then open up a serial console and make sure the board has booted properly:
SPM: NS image at 0x20200
SPM: NS MSP at 0x2001d2e8
SPM: NS reset vector at 0x264b5
SPM: prepare to jump to Non-Secure image.
*** Booting Zephyr OS build v2.6.99-ncs1  ***
[00:00:00.204,681] <err> i2c_nrfx_twim: Error 0x0BAE0002 occurred for message 0
[00:00:00.218,902] <inf> golioth_system: Initializing
[00:00:00.219,268] <inf> aqw_golioth_demo: Connecting..
[00:00:01.979,187] <inf> aqw_golioth_demo: LTE cell changed: Cell ID: 13368336, Tracking area: 1547
[00:00:02.044,860] <inf> aqw_golioth_demo: RRC mode: Connected
[00:00:03.416,809] <inf> aqw_golioth_demo: RRC mode: Idle
[00:00:13.547,454] <inf> aqw_golioth_demo: RRC mode: Connected
[00:00:16.709,899] <inf> aqw_golioth_demo: Network registration status: Connected - roaming
[00:00:16.709,930] <inf> aqw_golioth_demo: Air Quality Wing Golioth Demo
[00:00:16.710,235] <inf> aqw_golioth_demo: PSM parameter update: TAU: -1, Active time: -1
[00:00:18.313,415] <inf> golioth_system: Starting connect
[00:00:18.682,647] <inf> golioth_system: Client connected!
[00:00:20.848,358] <inf> aqw_golioth_demo: Temperature: 26.32333°C
[00:00:20.848,388] <inf> aqw_golioth_demo: Humidity: 60.771179%
[00:00:20.848,419] <inf> aqw_golioth_demo: PM2.5: 4.0 ppm
[00:00:20.848,541] <inf> aqw_golioth_demo: Data size: 42
[00:00:27.561,889] <inf> aqw_golioth_demo: RRC mode: Idle
If you've gotten some sensor measurements within the first 30 seconds, you're golden!
Setting up Grafana
You're almost there! Let's get a Grafana interface set up. If you already have Grafana this should be a very straight forward integration. If you don't I recommend you check out Grafana's hosted service. I've also written about setting up Grafana in a past post.
API keys for Golioth
In order to get the streamed data from the nRF9160 Feather and Air Quality Wing, you'll need to set up API credentials for your Golioth Account.
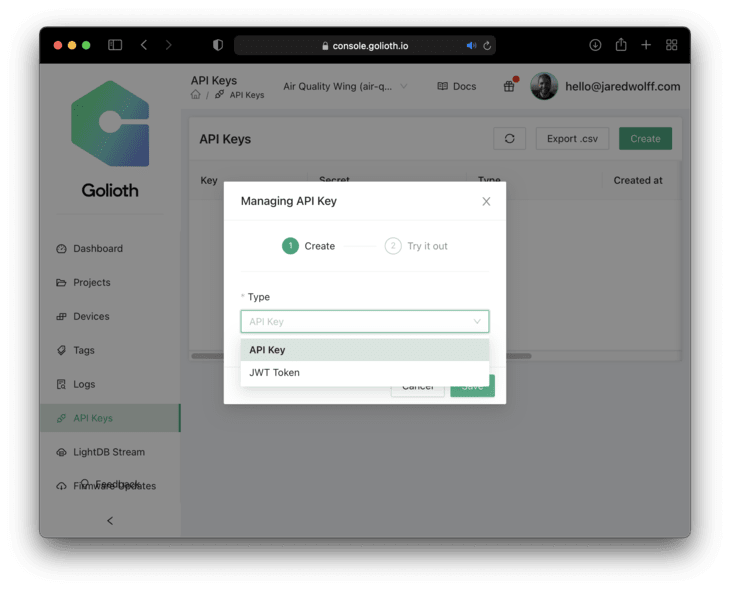
Navigate to the API Keys section and click Create a Key!

Make sure you have API Key selected and click Save
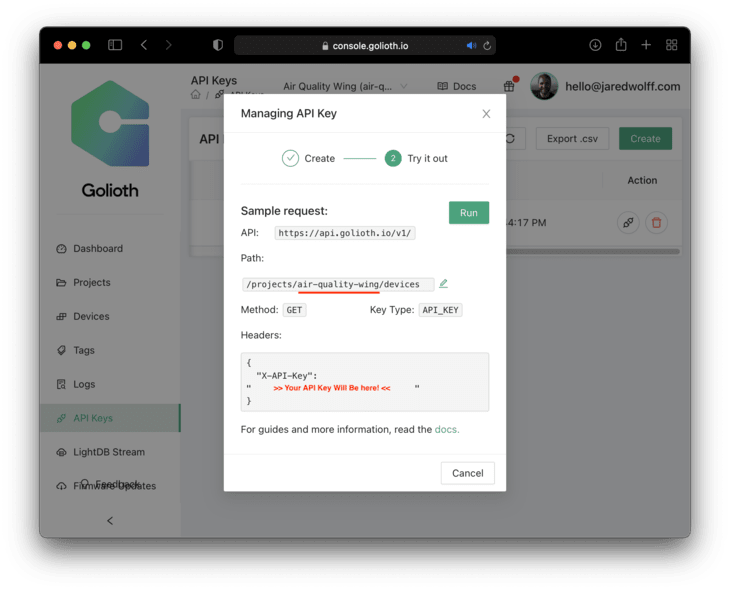
Finally you'll get a window like the one below. Take note of your X-API-Key value and the project name. We'll need both in a second!
Setting up your data source
Now let's get over to Grafana.
First we'll want to create a new Data Source by going to the gear icon on the left navigation bar and clicking Data Sources

On the next screen click Add data source and use the JSON API option. If you do not see the JSON API option you may need to install it first. Instructions on how are here.

Next you'll want to change the Name to Golioth and also your URL to https://api.golioth.io/v1/projects/{your-project-id} where your {your-project-id} is the same one indicated earlier in the API key generation step.
Note do not include the /devices suffix. Insert the URL above as shown with your project identifier.

Finally go to the bottom and setup a Header under the Custom HTTP Headers section. Set the name to X-API-Key and the value to the API key generated earlier.
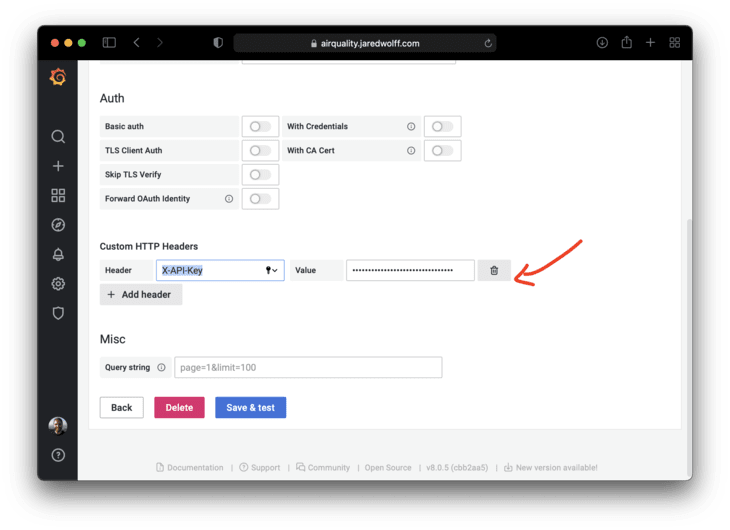
Then click Save & test. You should get a nice big Success check mark if things check out!

Creating your dashboard
In this step, we'll import a dashboard that i've already created. You can download it here:
Click the + button on the left side menu and click Import

Then click the Upload JSON file button

Then select the Golioth data source that we set up earlier and click Import

The graphs should automatically pull data for your device and it should show some pretty graphs!

You've done it!
Now you can start playing around with the panels and tweak as you need to. More on creating the panel from scratch you can look at Golioth's setup documentation here.
Conclusion
And that's a wrap!
I hope this has been a useful introduction if this is your first time playing with Zephyr. Additionally, now that we have services like Golioth, I'm excited to see more people use it across different hardware platforms and projects.
I'm also excited to announce that the latest version of the nRF9160 Feather are available.

Some of the biggest changes include:
- Revamped power supply
- USB connector to USB-C
The latest Air Quality Wing, is also finally available!

Some of the big changes include:
- Updating the onboard sensors to Sensirion parts
- Improved thermal management to prevent contaminating temperature readings
- Reduced size to fit Featherwing profile
You can get some right now by heading over to my store. 🏬
Thanks for reading. If you have questions or run into problems the Circuit Dojo community is open and ready to help.

Top comments (0)