In this post, we will build the docker image for a nodejs application and deploy it onto AWS ECS (EC2 Launch type)
Prerequisites
#1: Create a simple Node app
- Create a directory and navigate to it
mkdir node-app
cd node-app
- Initialize packages
npm init --y
- Install ExpressJS
npm install express
- Enter this block of code into an
index.jsfile
const express = require('express');
const app = express();
app.get('/', (req,res) => {
    res.send("This is ECS deployment")
});
app.listen(8080,() => {
    console.log("Server started")
});
- Issue the below command to run the application locally
node index.js
- You can now view the application at http://localhost:8080
#2: Dockerize Node app
- Next, we create a
Dockerfilein the project root to build an image out of
# Use a Node runtime as a parent image
FROM node: alpine
# Set the working directory to /app
WORKDIR /app
# Copy package.json and package-lock.json to the working directory
COPY package*.json ./
# Install any needed packages specified in package.json
RUN npm install
# Copying the rest of the code to the working directory
COPY . .
# Make port 8080 for the application port
EXPOSE 8080
# Run index.js for application expose for the container
CMD [ "node", "index.js"]
#3: Build and Push the docker image to AWS ECR
- Navigate to ECR service in your AWS Console
- Click on
Create repositoryin top right corner to create the repo
- Create either a private or public repo based on your need
- Once the repository is created, click
view push commandsfrom inside to push the image
- You can from the instructions, infer the commands to log in to AWS ECR, build the image, tag the build, and push the tagged image to AWS ECR.
- Finally, your pushed image should look like this
#4: Create the ECS Cluster
- Click on
Clustersfrom the ECS console sidebar
- Choose
EC2 Linux + Networkingas the cluster template
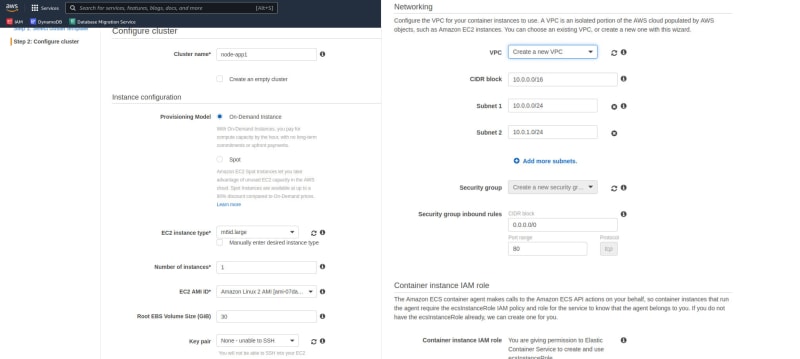
- Input the instance and networking configuration
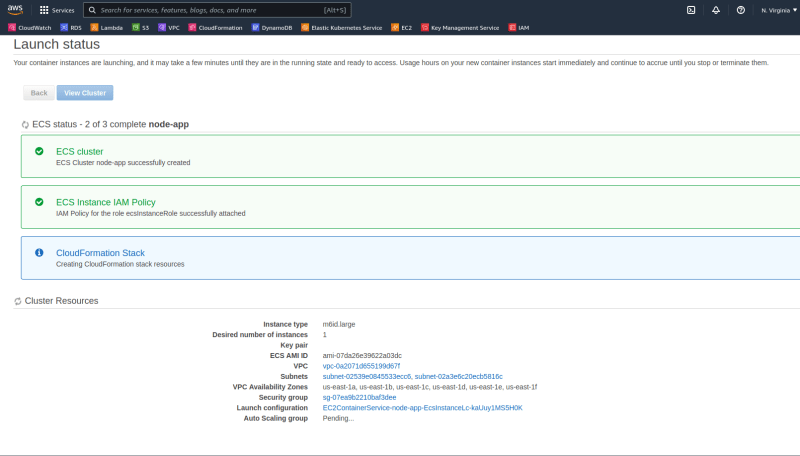
- The cluster then is created and cloudformation by default takes care of launching the rest of the resources
#5: Create a Task Definition
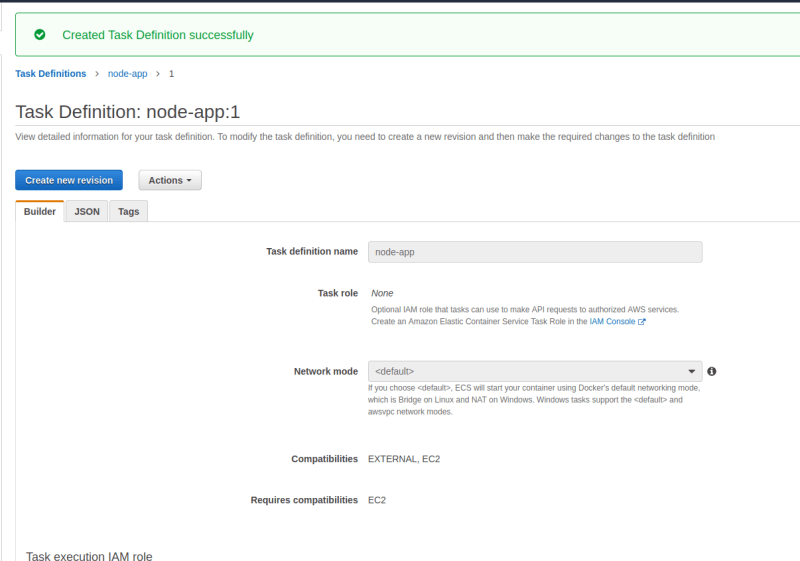
Task Definitions in ECS sort of acts as a blueprint of how an application should be deployed
- Click on
Task Definitionsright underClustersfrom the ECS console sidebar and click onCreate new Task Definition.
- Select
EC2as the launch type
- Assign the
Name,Task role, andNetwork modeof the container
- vCPU and Memory count is optional, as we have opted for the EC2 launch type. Click
Add containeronce filled.
- Now, time to configure the container:
Container name,Image; copy the AWS ecr image URI, specify theMemory limit- 300MB and above, and setPort mappingto the given application port
- Now your task definition is ready to be used in tandem with the Service definition
#6: Create Service
- Navigate to the Cluster tab, scope in on the service tab, and click
Create
- Configure the service with
launch typeEC2, choose theTask definitionwe have created, andService typeas Replica.
- Configure the VPC within which the ECS service should go. We are selecting
NoneonLoad balancingandService discovery, as we aren't aiming for a larger scale.
- Configure auto-scaling if need be
Do a quick review glance once all the configuration is done
- Clicking the
servicestab will give you info on running containers and their configurations
- Navigate to the
Taskstab and you'll find the task
- Here you can view the details of the task
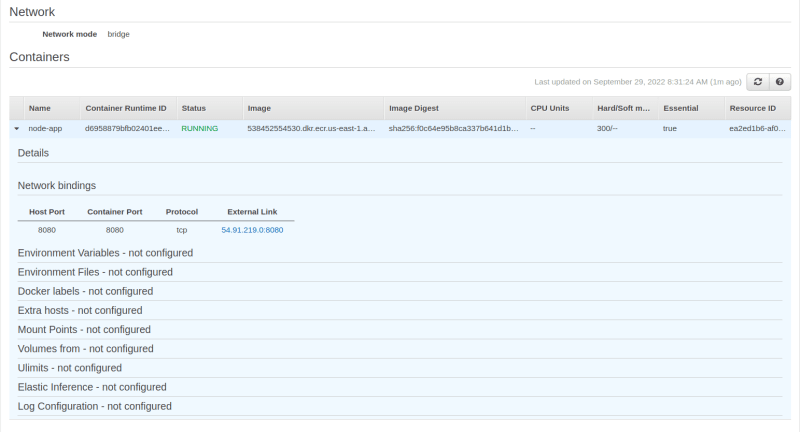
- Click the drop-down next to the container name to reveal the
External Link
And there we have it
The NodeJS application is successfully deployed on AWS ECS.


Top comments (0)