Introduction
AWS Lambda is a serverless computing service offered by Amazon Web Services (AWS), allowing developers to run code without provisioning or managing servers. With Lambda, users can execute code in response to events, scale automatically, and only pay for the compute time consumed by their applications.
Amazon Simple Email Service (SES) is a cloud-based email-sending service provided by Amazon Web Services (AWS), enabling businesses to send high-quality emails at scale without managing their email infrastructure. SES is designed for reliability, scalability, and ease of integration, providing a cost-effective solution for both transactional and marketing email needs.
In this article, we are going to learn how to integrate AWS Lambda with SES to send enhanced emails.
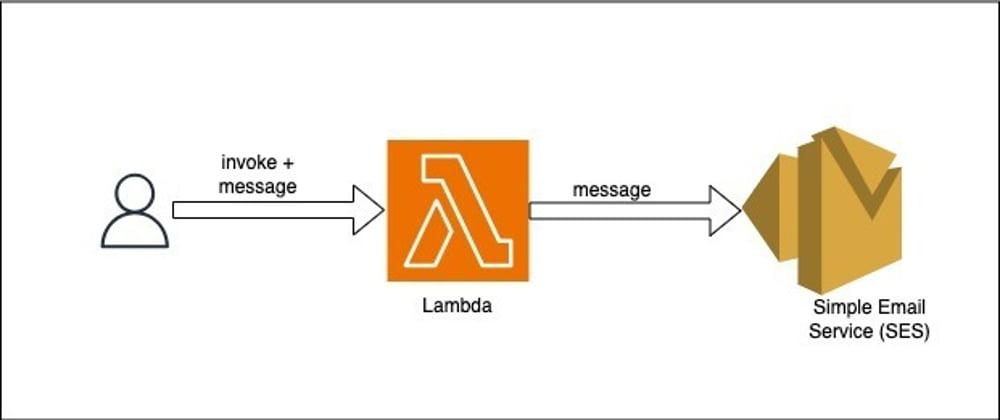
Architecture Diagram

When a user invokes a Lambda function with a message, the objective is to enrich the message with additional details and then automatically send the improved version to the user via email.
SES Setup
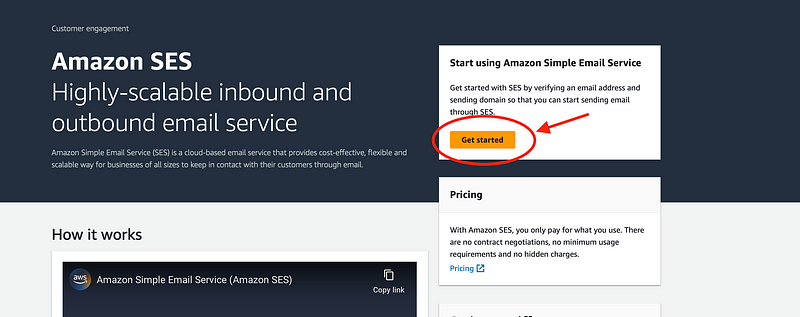
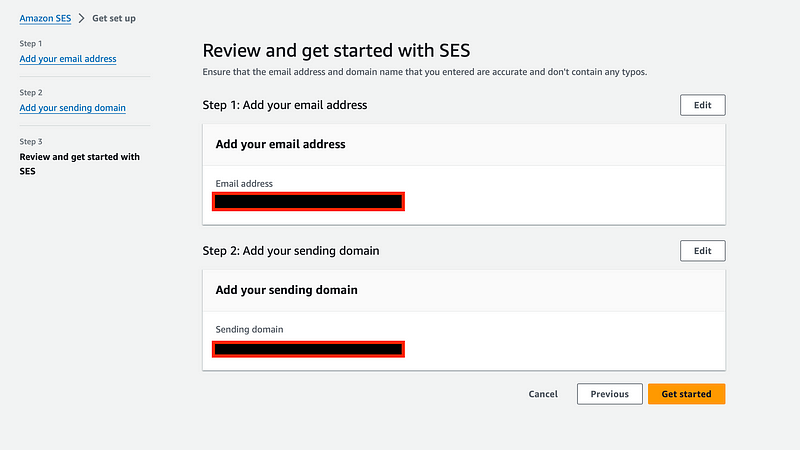
From the search bar open SES and click on "Get Started"
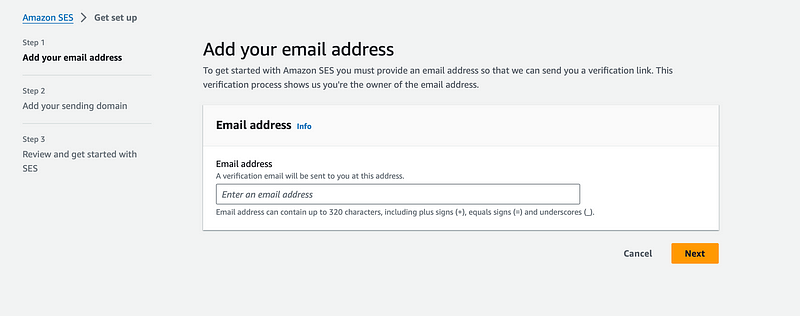
Add your email address you have access to. Verification email will be sent to this email address.
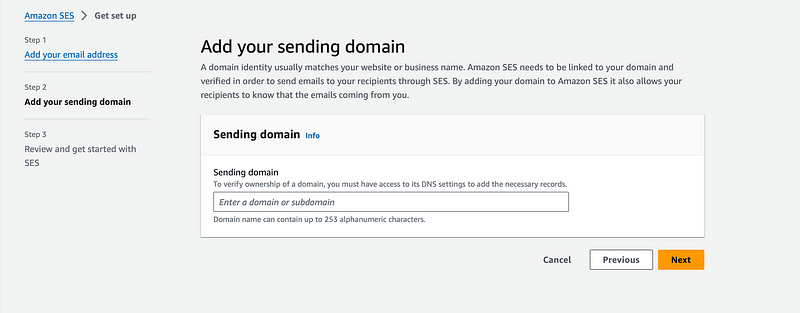
Add the domain you would like to use to send emails. Some examples of domains are Gmail, yahoo, google, etc. (You need to add a CName entry to activate this domain once the setup is done. You can skip the domain registration and proceed with just the sender and recipient email for this exercise).
Review everything and click on "Get Started".
Once these steps are done you will receive an email with the verification link. Click on that link and you will be successfully verified.
In SES, you need to verify both the sender and recipient email addresses to ensure a secure and controlled email-sending environment. To add additional email addresses simply go to the "identities" option on the left and click on the "create identity" button to register them. (You'll have to verify each email you register)
AWS Lambda
Now the fun part, CODE IT OUT! Create a Lambda function with Python runtime.
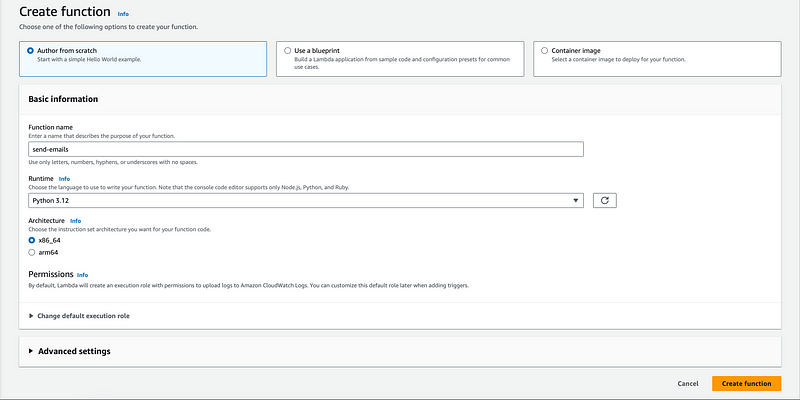
Add the Python code code provided below to your lambda.
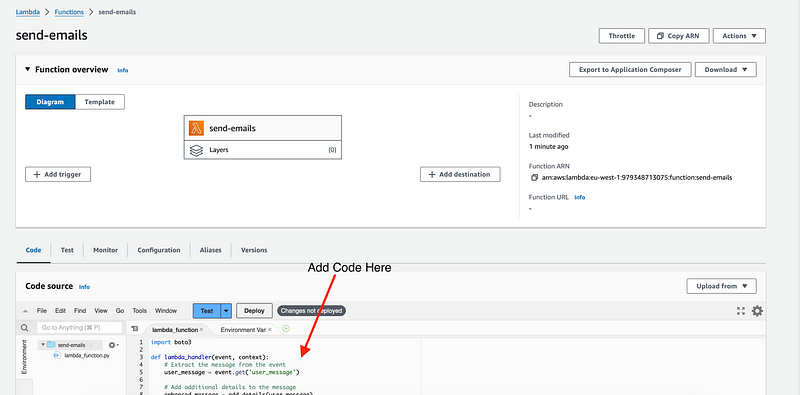
Python Code
import boto3
def lambda_handler(event, context):
# Extract the message from the event
user_message = event.get('user_message')
# Add additional details to the message
enhanced_message = add_details(user_message)
# Send the enhanced message via email using SES
send_email(enhanced_message)
return {
'statusCode': 200,
'body': 'Execution successful!'
}
def add_details(message):
# Add your logic to enhance the message here
# For example, adding details like greetings
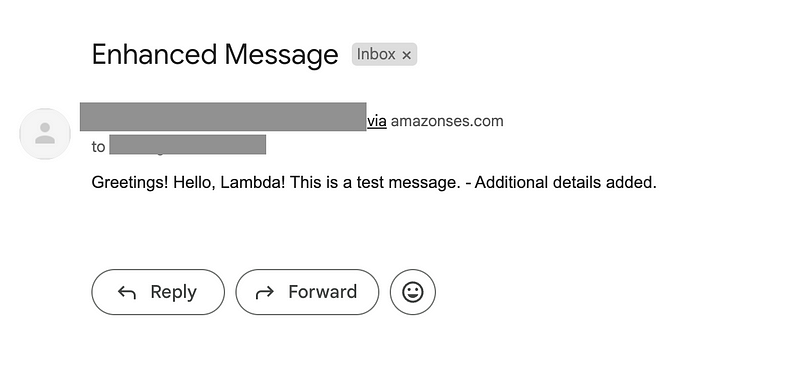
enhanced_message = f"Greetings! {message} - Additional details added."
return enhanced_message
def send_email(message):
# AWS SES configuration
aws_region = 'your_aws_region'
sender_email = 'your_sender_email@example.com'
recipient_email = 'recipient@example.com'
# Create an SES client
ses_client = boto3.client('ses', region_name=aws_region)
# Try to send the email
try:
# Provide the contents of the email
response = ses_client.send_email(
Destination={
'ToAddresses': [recipient_email],
},
Message={
'Body': {
'Text': {
'Charset': 'UTF-8',
'Data': message,
},
},
'Subject': {
'Charset': 'UTF-8',
'Data': 'Enhanced Message',
},
},
Source=sender_email,
)
print("Email sent successfully! Message ID:", response['MessageId'])
except Exception as e:
print(f"Error sending email: {e}")
Make sure to replace 'your_aws_region', 'your_sender_email@example.com', and 'recipient@example.com' with your actual values. And also make sure both your sender and recipient emails are added and verified in SES.
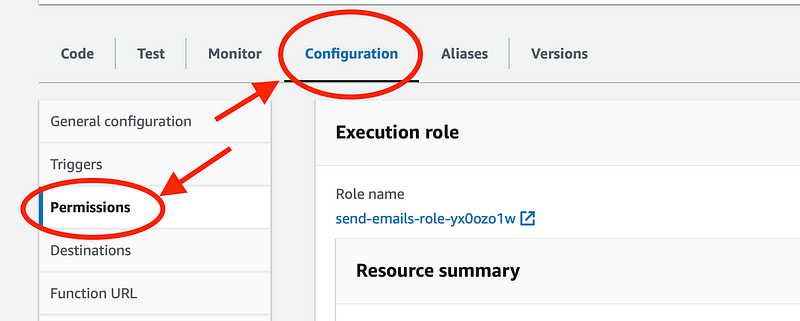
For SES, ensure the Lambda function's execution role has SES permissions.
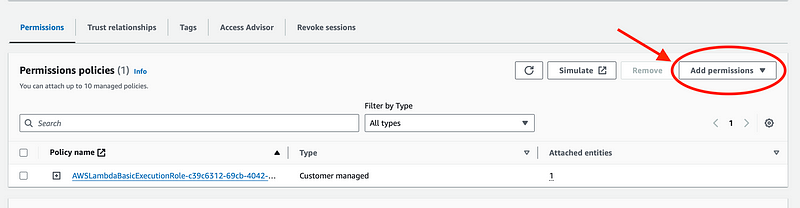
To check if your lambda has SES permissions to send emails, you need to open the lambda in the console, go to the "Configuration" tab, and then on the left click on "Permissions". Click on the role name, in this case, "send-emails-role-yx0ozo1w" from the screenshot below. It will open up the IAM Management Console in another tab.
On the IAM Management Console scroll down to see permissions and click on "Add Permissions" to add the SES permission.
Now that everything is set up and ready it is time to run the lambda!
You can run the lambda using AWS CLI or directly from the console. Make sure you pass the message as payload when you invoke the lambda function.
Here is an example of how it can be done from the console.
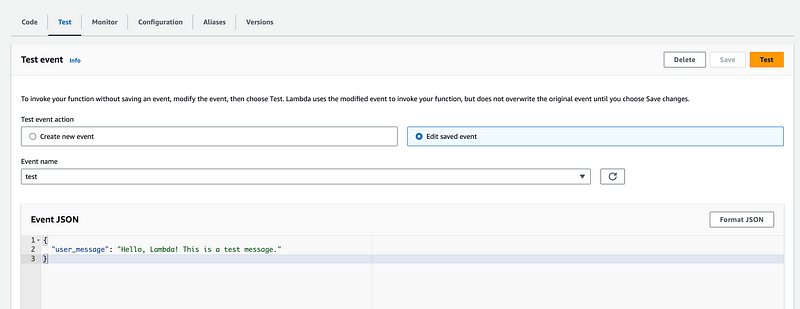
Save it and click on Test. Voila, you have successfully integrated Lambda with Simple Email Service (SES)!!
Congratulations! You've successfully harnessed the power of AWS Lambda and SES to elevate your email automation. Your enhanced email delivery is now just a Lambda function away. Keep innovating with AWS! :)


Top comments (0)