When deploying your application, it's always better to use a third-party service to host your images, videos files, etc. Using server storage can greatly increase your monthly or yearly server costs also, some services like Heroku do not allow you to host your files persistently.
Solution? Use cloud storage.
We are going to implement Aws 3 as our cloud storage for our Rails application using Active storage. There are other services that you can implement and the setup will be very similar with each requiring its own gem and a few other minor changes.
Gems needed
gem "aws-sdk-s3", require: false
Installing Active Record Tables
Active Record needs two tables to associate with your models,active_storage_blobs and active_storage_attachments.
Run these commands in your terminal making sure that you are in the project directory.
rails active_storage:install rails db:migrate
Setting up your config/storage.ymlfile
Inside your storage.yml file, uncomment the amazon section
Setting up access_key and secret_access_key
In rails 5.2 and up, we can now use config/credentials.yml.enc. This stores your credentials securely with encryption and requires config/master.key to decrypt in production.
In your terminal, enter EDITOR="code --wait" rails credentials:edit
If you use another editor like atom, vim, or webstorm ,replace "code" with your editor's name.
A window should appear with the following:
You should now uncomment these lines and get your access_key and secret_access_key from your Identity and Access Management (IAM) on amazon.
I added a bucket key but you don't have to. You can add your bucket name in the storage.yml file.
When finished, save the file.
Checking the credentials.yml.enc file
You can test this by using rails console and you should get the values that were entered previously.
Now your config file should look like this.
Don't forget to use the correct region.
Production and Development setup
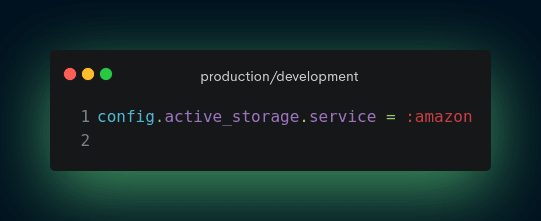
In your config/environments/production and config/environments/development, look for this line (shown in the image below ) and change it to ":amazon"
You should now have the ability to test amazon #####aws3 in development.
Setting up in Production
Don't forget to push your changes to Heroku
Go to your Heroku account.
Go to your settings Tab.
Click Reveal Config Vars.
Add a new key RAILS_MASTER_KEY.
Retrieve the arbitrary text in yourconfig/master.key and put the text as the value for RAILS_MASTER_KEY.
Everything should be working at this point.
Conclusion
I hope that this helped make a stress-free setup.


Top comments (2)
the single post that made me sign up to this community... THANK YOU SO MUCH
Glad to help :) and Welcome 🎉