
How to Add Chat with Face Filters to Your Multiplayer Unity Game
Do you have any thoughts about real time engagement in your game? Undoubtedly, having video chat during a co-op or multiplayer online game adds jokes and laughs to the experience. How about extend the fun with a face filter? It will definitely increase a player’s session time during this COVID-19 lock down.
In this tutorial, we will make use of an existing project, written by Joel Thomas and apply a face filter feature to the player. To follow what has been done, please check out the tutorial here. Make sure you can download the full project from GitHub to start. For comparison to the original project, consider the following preview:

Prerequisites
Create an Agora.io developer account here to get your AppID.
Create a Photon developer account for their AppID.
Clone my GitHub project as the starter project, which contains Viking demo’s assets, Agora Video SDK and Photon SDK.
-
Unity 2019.3 or up.
You need to have a Banuba client token to run the project. Contact info@banuba.com for a trial token and SDK package if you don’t want to pay up front at the Asset Store.
Getting Started
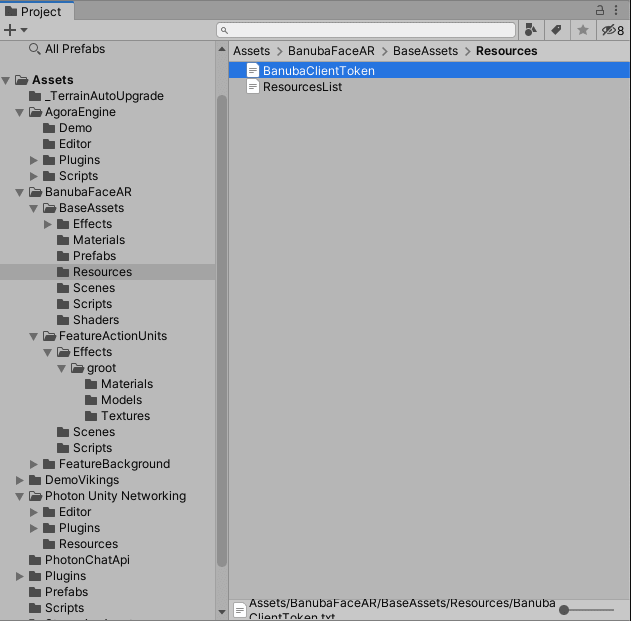
First, we will use the Banuba Face SDK to start the AR face masking. Import the package that you downloaded from the Asset store or the unzipped SDK to the Unity project directory. You should see the current project directory structure and find the BanubaClientToken file in the Resource folder. Open the file in text editor and paste your SDK token key there.
Next, enter your Photon project info in Window > Photon Unity Networking > PUN Wizard > Setup Project. Paste your AppID or email you used for your Photon account.

Note that the GitHub project already contains a copy of the Agora Video SDK. You may choose update to the latest from the Asset Store. It is recommended that you delete the folder Assets/AgoraEngine/Plugins for a clean replacement.
Create BNB_AR Prefab
Open the Sample scene from BanabuFaceAR/Scenes, and do the following:
Create an empty game object, name it “BNBARStuff”.
Drag and drop items Camera, Faces and Surface *into **BNBARStuff.*
Change layers of BNBARStuff to “default” recursively.
Update the Camera component to culling mask on “default” only.
Drag the BNBARStuff object into th Prefabs folder to make it a prefab.
Open the prefab, rename Camera to “ARCamera”, and rename Surface to “ARSurface”. Change ARCamera’s culling mask to Default only. Uncheck Default from MainCamera’s culling mask list.
If your Banuba SDK has a FPS game object under Surface, you can remove it from the prefab. Also update the code in CameraController to do a null check:
**if (fpsTextObj != null)** fpsTextObj.text = “FPS: “ + fps;
Do NOT save the Sample scene. Open VikingsScene from DemoVikings and set up the BNBARStuff object using the prefab:
Drag and drop the BNBARStuff prefab to the Hierarchy.
Enable the one of the filters under Faces (e.g. Afro).
Highlight the Camera under BNBARStuff and play the app in Editor.
√ You can observe yourself with the AR filter applied in the Camera preview.

Save the VikingsScene scene if everything looks good so far.
Create Render Texture
Create a render texture to host the ARCamera input:
Create a RenderTexture; name it “ARRenderTexture”.
Assign ARRenderTexture into ARCamera’s Target Texture field.

Create Local View Prefab
In the* Viking* scene, create a UI hierarchy as following:
Create a new Image, change its width to 140 and height to 140; name it “ViewContainerWithMask”. Add a Mask component to this object.
Add a new game object under ViewContainerWithMask, name it “AvatarRenderTarget”. Make sure its scale is set to 1.
Add a RawImage component to AvatarRenderTarget. Drag and drop the ARRenderTexture into the Texture field of the RawImage component.
Add a button that has no text and no image as a child object of AvatarRenderTarget, set Normal Color and Pressed Color’s alpha to 0 (transparent). Set a low alpha (e.g. 35) for the other states. This button will invoke the appearance of the FilterDropdown.
Attach this “AvatarViewController.cs” script to AvatarRenderTarget object.
- Assign ViewContainerWithMask object into the “Mask RectTan” field of the AvatarViewController component on the AvatarRenderTarget object.
Verify you set up as describe in Step 1–4. Drag the game object ViewContainerWithMask to the Prefab folder. Delete it from the Vikings Scene. Save.
Set up dropdown list for the masks
In the VikingsScene, create a UI Dropdown and place it to the upper right corner. Make sure you set the Canvas scaler to “Scale with Screen”. Assign the dropdown’s layer to “UI” and name it “FilterDropdown”. Hide this from the scene for now, since it will be activated later only when user taps the self-video display.

Code Modification
Spawn with Banuba FaceFilter enabled Prefab
In AgoraVideoChat.cs, update the CreateUserVideoSurface method with the following code snippet:
Update Prefab Field Assignments
Open Assets/DemoVikings/Resources/Charprefab, updated the fields:
Assign the prefab ViewContainerWithMask into the “AvatarVideoPrefab” field (see line 2 in the above code snippet).
Update the AppID and Channel ID.

Send the Frames as Custom Source Video
Add the following code snippet to the end of the AgoraVideoChat.cs script. The code runs at every frame to capture what is displaying on the ARCamera and sends it as a video frame into the channel.
Last Check
Since we created a bigger rectangle for Avatar image view (140 pt), we should also update Asset/Prefabs/UserVideo’s RectTransform to 140x140. Also, in AvatarViewController, we provided an option for zoom level. You may want to try 1.5x zooming for better view of yourself in that window. Here is the look after everything connects up:

That’s it! With a face mask on, you look much cooler than before! Have fun playing with friends and talking to them at the same time with your cool new look!
In Summary
We connected to Agora’s network to display our video chat channel.
We enabled other users to join our party, see their faces, and talk with them in real time.
We took it one step further and let user to pick a face mask provided by the Banuba ARFace Filter SDK.
If you have any questions or hit a snag in the course of building your own networked group video chat, please feel free to reach out directly or via the Agora Slack Channel!
Check out the link to the full project (it is the CompletedProject branch of the same repo):UnityVikingGameChatDemo

Top comments (0)