
This is a follow-up to Part 1. Make sure you read it before this post. Today, I will showcase how I add editable user profile and profile Picture.
Again, below are the Github repository and a demo for this project to follow along.
About nextjs-mongodb-app project
nextjs-mongodb-app is a Full-fledged serverless app made with Next.JS and MongoDB
Different from many other Next.js tutorials, this:
- Does not use the enormously big Express.js
- Supports
serverless - Using Next.js v9 API Routes w/ middleware
For more information, visit the Github repo.
What we are making

(The GIF above is actually from an older version. Looks super bare-bone 😜)
We are adding the following features:
- Profile Page
- Edit Profile
- Profile Picture
The user profile page
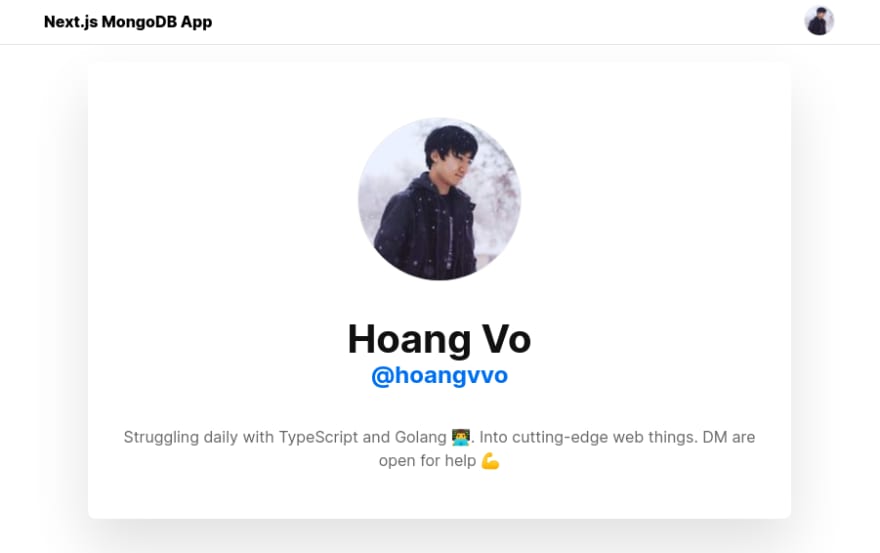
My user profile page will be at /user/my-username. Let's create /pages/user/[username]/index.jsx so we can dynamically show user profile based on the username param.
import { database } from "@/api-lib/middlewares";
import nc from "next-connect";
import Head from "next/head";

const ProfilePage = ({ user }) => {
  return (
    <>
      <Head>
        <title>
          {user.name} (@{user.username})
        </title>
      </Head>
      <div>
        <img
          src={user.profilePicture}
          width="128"
          height="128"
          alt={user.name}
        />
        <h1>
          <div>{user.name}</div>
          <div>@{user.username}</div>
        </h1>
      </div>
    </>
  );
};

export async function getServerSideProps(context) {
  await nc().use(database).run(context.req, context.res);

  const user = await req.db
    .collection("users")
    .findOne(
      { username: context.params.username },
      { projection: { password: 0, email: 0, emailVerified: 0 } }
    );

  if (!user) {
    return {
      notFound: true,
    };
  }
  user._id = String(user._id); // since ._id of type ObjectId which Next.js cannot serialize
  return { props: { user } };
}

export default ProfilePage;
For the above, we use getServerSideProps to retrieve the user data from the database.
Our database middleware is used to load the database into req.db. This works because getServerSideProps is run on the server-side.
Then, we call MongoDB findOne() to retrieve the user by the username from params (context.params.username). You can also notice that we filter out the sensitive fields via projection.
If the user is found, we return it as a prop. Otherwise, we return the not found page by setting notFound to true.
Our page component would receive the user prop as to render his or her information.
The Profile Setting page
Building the Profile Update API
The way for our app to update the user profile is would be to make a PATCH request to /api/user.
In pages/api/user/index.js, we add a handler for PATCH:
import { auths, database, validateBody } from "@/api-lib/middlewares";
import nc from "next-connect";
import slug from "slug";

const handler = nc();

handler.use(database, ...auths);

handler.patch(
  validateBody({
    type: "object",
    properties: {
      username: { type: "string", minLength: 4, maxLength: 20 },
      name: { type: "string", minLength: 1, maxLength: 50 },
      bio: { type: "string", minLength: 0, maxLength: 160 },
    },
  }),
  async (req, res) => {
    if (!req.user) {
      req.status(401).end();
      return;
    }
    const { name, bio } = req.body;

    if (req.body.username) {
      username = slug(req.body.username);
      if (
        username !== req.user.username &&
        (await req.db.collection("users").countDocuments({ username })) > 0
      ) {
        res
          .status(403)
          .json({ error: { message: "The username has already been taken." } });
        return;
      }
    }

    const user = await db
      .collection("users")
      .findOneAndUpdate(
        { _id: new ObjectId(id) },
        {
          $set: {
            ...(username && { username }),
            ...(name && { name }),
            ...(typeof bio === "string" && { bio }),
          },
        },
        { returnDocument: "after", projection: { password: 0 } }
      )
      .then(({ value }) => value);

    res.json({ user });
  }
);
We first validate the body using our validateBody middleware. Then, we check if the user is logged in by checking req.user. If not, it will send a 401 response.
If a username is provided, we will slugify it and check if exists in the database. Finally, we call MongoDB findOneAndUpdate to update the user profile based on the data from req.body.
We then return the updated user document.
The Profile Settings Page

The next thing to do is have page at /settings for us to update our info.
Let's create pages/settings.jsx
import { useCurrentUser } from "@/lib/user";
import { fetcher } from '@/lib/fetch';
import { useRouter } from "next/router";
import { useEffect, useCallback } from "react";

const AboutYou = ({ user, mutate }) => {
  const usernameRef = useRef();
  const nameRef = useRef();
  const bioRef = useRef();

  const onSubmit = useCallback(
    async (e) => {
      e.preventDefault();
      try {
        const formData = new FormData();
        formData.append("username", usernameRef.current.value);
        formData.append("name", nameRef.current.value);
        formData.append("bio", bioRef.current.value);
        const response = await fetcher("/api/user", {
          method: "PATCH",
          body: formData,
        });
        mutate({ user: response.user }, false);
      } catch (e) {
        console.error(e.message);
      }
    },
    [mutate]
  );

  useEffect(() => {
    usernameRef.current.value = user.username;
    nameRef.current.value = user.name;
    bioRef.current.value = user.bio;
  }, [user]);

  return (
    <form onSubmit={onSubmit}>
      <input ref={usernameRef} placeholder="Your username" />
      <input ref={nameRef} placeholder="Your name" />
      <textarea ref={bioRef} placeholder="Your bio" />
      <button type="submit">Save</button>
    </form>
  );
};

const SettingsPage = () => {
  const { data, error, mutate } = useCurrentUser();
  const router = useRouter();
  useEffect(() => {
    if (!data && !error) return; // useCurrentUser might still be loading
    if (!data.user) {
      router.replace("/login");
    }
  }, [router, data, error]);
  if (!data?.user) return null;
  return <AboutYou user={data.user} mutate={mutate} />;
};

export default SettingsPage;
First of all, the settings page should only be available to authenticated users only. Therefore, if the current user is not available, we want to navigate to /login, which I do so using router and our useCurrentUser hook.
For the update form, we simply create an onSubmit function that collects the inputs and makes a PATCH request to our just created API at /api/user.
Every time the user prop is updated, we need to set the values of the inputs accordingly, which I do so inside the above useEffect.
One thing to note is that we use FormData to send our fields instead of the regular application/json. The reason for this is that it allows us to include our profile picture later, which can be conveniently transmitted via FormData, in the same request.
Upon receiving a successful response, we call mutate to update the SWR cache.
Building the Profile picture functionality
To have this functionality, we need somewhere to host our images. I choose Cloudinary to host my images, but you can use any service.
Add profile picture to the settings page
In the same form above, we add our profile picture field:
<input type="file" accept="image/png, image/jpeg" ref={profilePictureRef} />
(note: the screenshot actually above puts this input in front of an image to achieve the effect as seen, see the source code)
This field has a ref of profilePictureRef, allowing us to access its value:
const profilePictureRef = useRef();
Adding into our existing onSubmit function:
/* ... */
if (profilePictureRef.current.files[0]) {
  formData.append("profilePicture", profilePictureRef.current.files[0]);
}
If the user did select an image, we can access its value in profilePictureRef.current.files[0] (files is an array because it can be a multi-file upload) and add it to our FormData instance.
It will be included in the same PATCH request.
Building the Profile Picture Upload API
Since our profile picture is submitted to the same PATCH endpoint. Let's edit its handler.
To handle images, we need something to parse the uploaded file. Multer is the package that we will use.
Let's take a look at our PATCH handler again:
import { auths, database, validateBody } from "@/api-lib/middlewares";
import nc from "next-connect";
import slug from "slug";

import multer from "multer";
const upload = multer({ dest: "/tmp" });

const handler = nc();

handler.use(database, ...auths);

handler.patch(
  upload.single("profilePicture"),
  validateBody({
    type: "object",
    properties: {
      username: { type: "string", minLength: 4, maxLength: 20 },
      name: { type: "string", minLength: 1, maxLength: 50 },
      bio: { type: "string", minLength: 0, maxLength: 160 },
    },
  }),
  async (req, res) => {
    /* ... */
  }
);

export const config = {
  api: {
    bodyParser: false,
  },
};

export default handler;
Looking at:
export const config = {
  api: {
    bodyParser: false,
  },
};
I am disabling Next.js 9 body-parser because form parsing is already handled by Multer.
We initialize an instance of Multer that is configurated to save the file to our temp folder:
const upload = multer({ dest: "/tmp" });
The instance itself is a middleware, so we attach it before our main handler in the PATCH handlers. The middleware expects a single file upload under the profilePicture field that we specified earlier in our form submission function. Now, we can access the file via req.file.
handler.patch(
  upload.single("profilePicture"),
  validateBody({
    /* ... */
  }),
  async (req, res) => {
    console.log(req.file);
  }
);
Integrate Cloudinary
This is the section for the file uploading logic. The content in this section depends on the File Uploading library or service you choose. I am using Cloudinary in my case.
If you use Cloudinary, go ahead and create an account there.
Cloudinary provides its Javascript SDK.
To configure Cloudinary, we need to set the following environment variable:
CLOUDINARY_URL=cloudinary://my_key:my_secret@my_cloud_name
The Environment variable value can be found in the Account Details section in [Dashboard](https://cloudinary.com/console "Cloudinary Dashboard). (Clicking on Reveal to display it)
If you use Cloudinary, look at its Node.js SDK documentation for more information.
Import the cloudinary SDK (Using its v2):
import { v2 as cloudinary } from "cloudinary";
Uploading an image is as simple as:
cloudinary.uploader.upload("theImagePath");
...where out image path is req.file.path.
let profilePicture;
if (req.file) {
  const image = await cloudinary.uploader.upload(req.file.path, {
    width: 512,
    height: 512,
    crop: "fill",
  });
  profilePicture = image.secure_url;
}

const user = await updateUserById(req.db, req.user._id, {
  ...(username && { username }),
  ...(name && { name }),
  ...(typeof bio === "string" && { bio }),
  ...(profilePicture && { profilePicture }), // <- set the url to our user document
});
We are uploading our image to Cloudinary with the option of cropping it down to 512x512. You can set it to whatever you want or not have it at all. If the upload is a success, I set the URL (the secured one) of the uploaded image to our user's profilePicture field. See cloudinary#upload for more information.
Awesome, we have managed to create our Profile Picture functionality.
Conclusion
Let's run our app and test it out. We have managed to create our user profile functionality with profile picture.
Again, check out the repository nextjs mongodb app.
If you find this helpful, consider give the the repo a star to motivate me to add more content.
Good luck on your next Next.js + MongoDB project!


Top comments (2)
api: {
bodyParser: false,
}
not working on heroku - 2020-04-29T10:51:35.725587+00:00 heroku[router]: sock=backend at=error code=H18 desc="Server Request Interrupted" method=PATCH path="/api/upload" host=eeeman-masterclass.herokuapp.com request_id=de89640c-a9f0-4dd1-bb7c-b64d0a0239e5 fwd="109.252.129.15" dyno=web.1 connect=0ms service=286ms status=503 bytes=180 protocol=https
Hi,
I build an app closed to nextjs-mongodb-app with SQL and Bulma CSS.
check it out at nextjs-sql-app.vercel.app
github repo : github.com/Fredestrik/Next.Js-SQL-app