
Introduction
In this article, I will explain how to subscribe the topic using integrating the Huawei Push Kit into React Native project.
Push notifications offers a great way to increase your application’s user engagement and boost your retention rates by sending meaningful messages or by informing users about your application. Push Kit supports two types of messages: notification messages and data messages. You can send notifications and data messages to your users from your server using the Push Kit APIs or directly from the AppGallery Push Kit Console.
Requirements
- Any operating system (MacOS, Linux and Windows).
- Must have a Huawei phone with HMS 4.0.2.300 or later.
- Must have a laptop or desktop with Android Studio, Jdk 1.8, SDK platform 26 and Gradle 4.6 installed.
- Minimum API Level 21 is required.
- Required EMUI 9.0.0 and later version devices.
Integrate HMS Dependencies and React Native Project Preparation
First register as Huawei developer and complete identity verification in Huawei developers website, refer to register a Huawei ID.
Create a project in android studio, refer Creating an Android Studio Project.
Generate a SHA-256 certificate fingerprint.
To generate SHA-256 certificate fingerprint. Choose View > Tool Windows > Gradle > Signingreport > SHA256 code.
Or use cmd as explained in SHA256 CODECreate an App in AppGallery Connect.
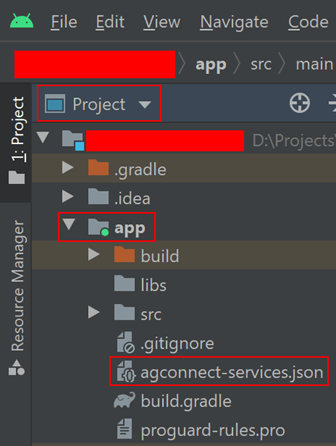
Download the agconnect-services.json file from App information, copy and paste in android Project under app directory.
Enter SHA-256 certificate fingerprint and click Save, as follows.

Click Manage APIs tab and enable Push Kit.
Environment set up, refer below link
https://reactnative.dev/docs/environment-setupCreate project using below command
react-native init projectnameYou can install react native command line interface on npm, using the install -g react-native-cli command as shown below.
npm install –g react-native-cliIntegrate the Hmspush plugin
npm i @hmscore/react-native-hms-pushAdd the AGC Plugin dependency.
apply plugin: 'com.huawei.agconnect'Add to dependencies.
Implementation project (': react-native-hms-push)Project level build.gradle/buildScript directory set minSdkVersion to 19 or higher higher. In android/signingConfigs/config node, enter the keystore file credentials.
signingConfigs {

config {

storeFile file(<keystore_file_name>)

storePassword ‘<store_password>’

keyAlias ‘<alias>’

keyPassword ‘<key_password>’

}

}
Navigate to App level android/build.gradle directory in your React Native project. Follow the steps:
-Add to buildscript/repositories
maven {url 'http://developer.huawei.com/repo/'}
-Add to buildscript/dependencies
classpath 'com.huawei.agconnect:agcp:1.3.1.300’'3)Navigate to android/settings.gradle and add the following.
include ':react-native-hms-push'

project(':react-native-hms-push').projectDir = new File(rootProject.projectDir, '../node_modules/@hmscore/react-native-hms-push/android')
Add below permissions in Android.manifest file.
<uses-permission android:name="android.permission.WAKE_LOCK" />

<uses-permission android:name="android.permission.INTERNET"/>

<uses-permission android:name="android.permission.ACCESS_NETWORK_STATE"/>
Development
- Obtain a Token: In order to push notifications to a device, you need to obtain a token. To get the token, use getToken method from HmsPushInstanceId module.
HmsPushInstanceId.getToken("")
      .then((result) => {
        this.log("getToken", result);
      })
      .catch((err) => {
        alert("[getToken] Error/Exception: " + JSON.stringify(err));
      });
- Enabling/Disabling the message receiving
HmsPushMessaging.turnOnPush()
  .then((result) => {
    this.log("turnOnPush", result);
  })
  .catch((err) => {
    This.log("[turnOnPush] Error/Exception: " + JSON.stringify(err));
  });

HmsPushMessaging.turnOffPush()
  .then((result) => {
    this.log("turnOffPush", result);
  })
  .catch((err) => {
    This.log("[turnOffPush] Error/Exception: " + JSON.stringify(err));
  });
- Add Push Notifications To push a notification message to your device, navigate to your Huawei developer console and choose Project>Growing>Push Kit>Add notification.


- Receiving the data messages The data messages are not displayed directly on user devices. They have a data payload in a key-value pair. The data messages pushed by the server can be listened to by onRemoteMessageReceived() encapsulated in HmsPushEvent. The data message listener should be registered in componentDidMount() of Component to be used.
componentDidMount() {
   this.listener = HmsPushEvent.onRemoteMessageReceived(event => {
      const RNRemoteMessageObj = new RNRemoteMessage(event.msg);
      const msg = RNRemoteMessageObj.parseMsgAllAttribute(event.msg);
      console.log("Data message received : " + msg);
   })}

- Performing automatic Initialization.
HmsPushMessaging.setAutoInitEnabled(true)
  .then((result) => {
    this.log("setAutoInitEnabled", result);
  })
  .catch((err) => {
    This.log("[setAutoInitEnabled] Error/Exception: " + JSON.stringify(err));
  });
- User can also send local notification messages. Add the following code in AndroidManifest.xml :
<application ...>
<receiver android:name="com.huawei.hms.rn.push.receiver.HmsLocalNotificationActionsReceiver" />
    <receiver android:name="com.huawei.hms.rn.push.receiver.HmsLocalNotificationBootEventReceiver">
      <intent-filter>
        <action android:name="android.intent.action.BOOT_COMPLETED" />
      </intent-filter>
    </receiver>
    <receiver android:name="com.huawei.hms.rn.push.receiver.HmsLocalNotificationScheduledPublisher"
              android:enabled="true"
              android:exported="true">
    </receiver>
 </application>
- Modify and add following code according to need:
import { HmsLocalNotification } from'@hmscore/react-native-hms-push';

const notification = {
  [HmsLocalNotification.Attr.title]: ‘Title of Notification',
  [HmsLocalNotification.Attr.message]: 'Message is important', // (required)


  [HmsLocalNotification.Attr.bigText]: ‘bigText says HI',
  [HmsLocalNotification.Attr.subText]: 'subText says hi',


};
// LocalNotification
HmsLocalNotification.localNotification(notification)
  .then((result) => {
    this.log("LocalNotification Default", result);
  })
  .catch((err) => {
    This.log(
      "[LocalNotification Default] Error/Exception: " + JSON.stringify(err)
    );
  });
- Run the application (Generating the Signed Apk): Open project directory path in command prompt. Navigate to android directory and run the below command for signing the apk. gradlew assembleRelease
Result

Tips and Tricks
- Set minSDK version to 24 or later, otherwise you will get AndriodManifest merge issue.
- Make sure you have added the agconnect-services.json file to app folder.
- Make sure you have added SHA-256 fingerprint without fail.
- Make sure all the dependencies are added properly.
- Make sure you import: import {HmsPushMessaging} from'@hmscore/react-native-hms-push';
- For project cleaning navigate to android directory and run the below command. gradlew clean
Conclusion
In this article, we can learn about how to integrate Push Kit in React native project. It offers reliable, responsive and precise push service. It helps the app to react to a wide range of usage scenarios, dramatically boosting user engagement.
Reference
Push Kit: Documentation
Push Kit: Codelab
Push Kit: Training Video


Top comments (0)