These setup procedures aren’t necessary at the start of the tutorial, but will be referenced in later examples.
Jump to a section:
Setting up PHP debugging in Visual Studio Code
Setting up email dispatch from a local server
Setting up PHP debugging in Visual Studio Code
1. Open Visual Studio Code to your project folder inside htdocs.
2. Create a new file add this to it:
<?php
phpinfo();
?>
3. Open XAMPP Control Panel and start the Apache module and open this page in your browser. Select the whole output from your browser (Ctrl + A) and copy it (Ctrl + C).
4. Go to the online XDebug Support Wizard and paste (Ctrl + V) the output into the form. Follow the instructions for which XDebug file to download and where to put it.
5. Open your <xampp>/php/php.ini file and append the following lines at the end of the file. The zend_extension value will be given to you from the above wizard.
zend_extension = WHATEVER XDEBUG SUPPORT WIZARD GAVE YOU!
[XDebug]
xdebug.remote_enable = 1
xdebug.remote_autostart = 1
6. Stop and start the Apache module in the XAMPP Control Panel.
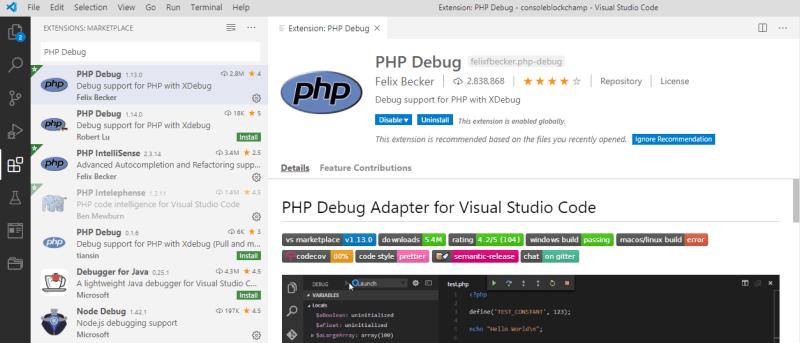
7. In Visual Studio Code, open the Extensions tab and search for PHP Debug. Install the top result.
8. Open the Run tab in Visual Studio Code.
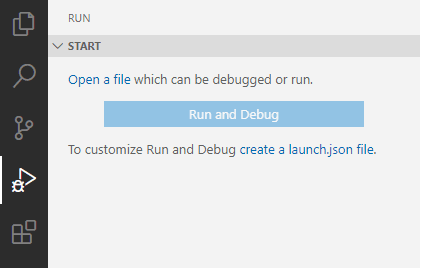
9. Click on create a launch.json file and for the environment choose PHP. If the file was generated empty, copy the code below and save it in your project folder as /.vscode/launch.json.

{
    "version": "0.2.0",
    "configurations": [
        {
            "name": "Listen for XDebug",
            "type": "php",
            "request": "launch",
            "port": 9000
        },
        {
            "name": "Launch currently open script",
            "type": "php",
            "request": "launch",
            "program": "${file}",
            "cwd": "${fileDirname}",
            "port": 9000
        }
    ]
}
10. On the Run tab, select ‘Listen for XDebug’ and click the green Run button to start debugging. This will attach to your active PHP server, so make sure you have started the Apache module in XAMPP Control Panel.
![]()
While Listen for XDebug is active, any PHP requests made to your server (opening the website in your browser) will trigger XDebug. The next time you need to debug PHP, you only need to repeat step 10 to start debugging.
Setting up email dispatch from a local server
You must have already installed XAMPP with the optional sendmail module. If you don’t see a folder in your XAMPP installation called sendmail, you will have to reinstall XAMPP with the Fake Sendmail module.
1. Create or use a Google account to send emails from. Make note of the email address and password.
2. Enable less secure apps to access your Google account. Ensure you are signed in to the email account you want to use and visit this link: https://myaccount.google.com/lesssecureapps.
3. Enable the following Gmail settings.
POP Download: Enable POP for all mail
IMAP access: Enable IMAP
4. Uncomment (remove starting ; semicolon) and set values in <xampp>\php\php.ini:
[mail function]
SMTP=smtp.gmail.com
smtp_port=587
sendmail_from=YOUR EMAIL ADDRESS
sendmail_path="<xampp>\sendmail\sendmail.exe -t"
5. Uncomment (remove starting ; semicolon) and set values in <xampp>\sendmail\sendmail.ini:
smtp_server=smtp.gmail.com
smtp_port=587
smtp_ssl=tls
error_logfile=error.log
debug_logfile=debug.log
auth_username=YOUR EMAIL ADDRESS
auth_password=YOUR EMAIL PASSWORD
6. Restart all XAMPP services from the XAMPP Control Panel. These .ini files are only accessed when the system starts up.


Top comments (0)