
Accidents and unintentional changes can happen in the dynamic world of cloud computing, where many users collaborate and interact with many resources.
Resource locks allow you to protect important assets, prevent accidental deletion or modification, and ensure reliable functioning throughout your Azure environment. Resource locks act as a crucial defence mechanism which help impose restrictions on necessary resources to protect their availability, integrity, and confidentiality.
In this blog post, we will show you how to create and manage resource locks in Azure.
Locks are used to prevent accidental changes and deletion of azure resources while maintaining privileges assigned to users. Users can maintain their roles and the resource locks can be applied when needed. Locks can also be applied to Subscription and on a Resource group level, this is known as Management Locks. The highest-level locks can be applied to is the subscription level.
Resource locks can be either of the following types:
CanNoDelete (Delete Locks): This lock type restricts the user from deletion. The user can read and update a resource.
ReadOnly: This lock restricts the user from updating and deleting resources. However, the user has only read access.
By making use of these locks strategically, you gain an additional layer of protection and peace of mind, reducing the chances of human error or unauthorized changes.
Now, let's delve into the process of applying resource locks in Azure. The good news is that the process is simple and straightforward.
To create a resource lock in the Azure portal, follow these steps:
Part 1
Go to the Azure portal
Log in to the Azure Portal using this link
Create a New Resource Group
A resource group is a logical container that holds related Azure resources. To create a resource group, search for resource group in the search bar and click on it

Click on "Create"

Give it a name (Resource Group) and click on "Create + Review"

Access the Locks section and Add a new lock
Click the "Locks" tab in the left-hand menu. On the "Locks" page, click on the "Add" button to create a new lock.

Define the lock details
In the "Add lock" dialog, provide the necessary information to configure the lock
Lock Name: Give a meaningful name to identify the lock
Lock Type: Select "Delete" from the drop-down menu since you want to prevent deletion
Notes (optional): Add any relevant notes or descriptions to provide additional context for the lock. Click on the "OK"
button to create the lock.

Verify the lock
After saving the lock, you should see it listed in the "Locks" section

Part 2
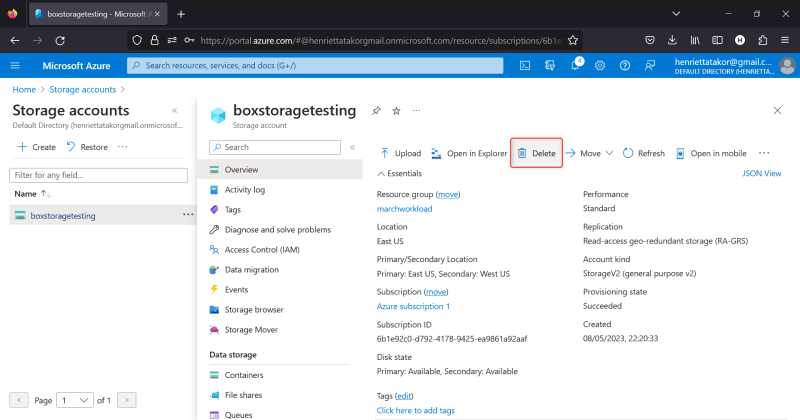
Locate the storage account
Use the search bar or navigate to the Azure "Storage service"

Click on "Create"

Give the Storage account a name and click on the "Review button" and then "Create button"


If you try to delete the storage account, an error message will appear

Once the lock has been removed, you will have the necessary permission to delete


Congratulations! You have successfully enabled a lock for your Azure storage account to prevent accidental deletion and unauthorized changes. This lock will help ensure the integrity and availability of your storage resources.

Top comments (0)