
In this series of articles, we will build a react client app which will interact with GitHub GraphQL API.
At the end of this series you will create an app with below features:
- Validate GitHub token access of a user
- Search the Public Repository which are in GitHub
- Able to Star and Watch your favourite public repository
- Show Star, Watch and Total public repository count for search results.
You can find the code repository here:
This project was bootstrapped with Create React App.
Available Scripts
In the project directory, you can run:
npm start
Runs the app in the development mode.
Open http://localhost:3000 to view it in the browser.
The page will reload if you make edits.
You will also see any lint errors in the console.
npm test
Launches the test runner in the interactive watch mode.
See the section about running tests for more information.
npm run build
Builds the app for production to the build folder.
It correctly bundles React in production mode and optimizes the build for the best performance.
The build is minified and the filenames include the hashes.
Your app is ready to be deployed!
See the section about deployment for more information.
Final source code :
This project was bootstrapped with Create React App.
Available Scripts
In the project directory, you can run:
npm start
Runs the app in the development mode.
Open http://localhost:3000 to view it in the browser.
The page will reload if you make edits.
You will also see any lint errors in the console.
npm run build
Builds the app for production to the build folder.
It correctly bundles React in production mode and optimizes the build for the best performance.
The build is minified and the filenames include the hashes.
Your app is ready to be deployed!
See the section about deployment for more information.
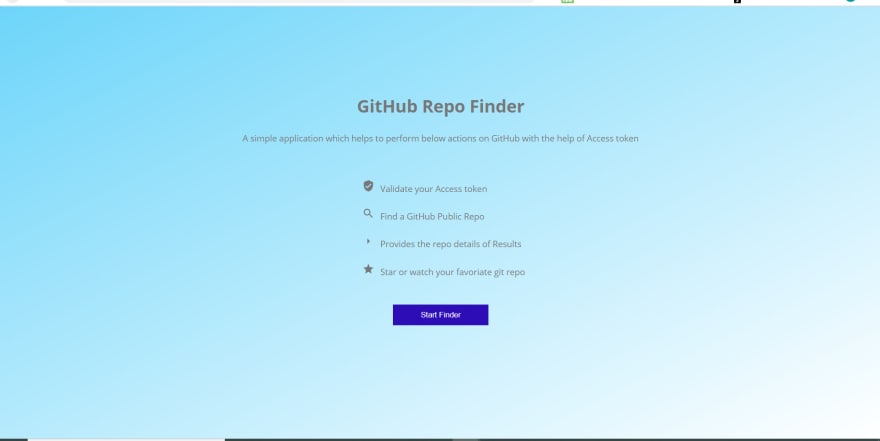
You can find the app here: GitHub Repo Finder. Before reading further I would highly recommend you to have a tour of app.
Note: Please ensure that you have a fair understanding on below points. It will help me to make you understand about this article.
- React: This tutorial assumes that you have a good experience on React. Please check-out their docs if you want to learn react.
- React-Redux: We are using this cool library for store management. Please check-out their docs if you want to learn react-redux.
- React-Router: To create single page application, for easy and protected routes.
- Redux-thunk: To perform asynchronous updates/ actions on redux store. I have chosen redux-thunk but redux-saga is also a great alternative.
- GraphQL: Since we are using GitHub GraphQL API I highly recommend you to know this sexy cool library. Basics is enough rest we will cover in this article.
- NPM: I will be using npm package manager throughout this series if you want to learn more check their docs.
- Axios (Http Client): To call GitHub Graphql endpoint we will be using Axios. You can use Apollo Client as well.
Well lot of pre-requisites and many things to digest. So, let’s begin by setting up our project 😊
Step 1: Create a React App.
Create your react project with help of below command.
npx create-react-app “Your Project Name”
cd “Your Project Name”
npm start
After creating the app, start your app. You can run npm start command and this should bootstrap your app without any error.
Step 2: Create a Landing Page (Optional)
Well this is optional but I would recommend you to build this so that you can give gist to your user about what these app does.
Create a src/component and src/container folder so that you can distinguish your stateless from state components.
You can find the code here: Landing Page
Step 3: Getting started with GitHub GraphQL Api
To use GitHub's GraphQL API, you need to generate a personal access token on their website. The access token authorizes users to interact with data, to read and write it under your username. Follow their step by step instructions to obtain the personal access token, and be sure to check the necessary scopes (permissions) for it, as you will need them to implement a well-rounded GitHub client later. After generating the access token, you can validate your token with the help of GraphIQL application.
Interacting with GitHub GraphQL Api using GraphIQL application.
Add your GraphQL Endpoint:

Set Your Header Field:
In the next step, we add a new header with a name and value to your GraphiQL configuration. To communicate with GitHub's GraphQL API, fill in the header name with "Authorization" and the header value with "bearer [your personal access token]". Save this new header for your GraphiQL application. Finally, you are ready to make requests to GitHub's GraphQL API with your GraphiQL application.

Step 4: Validate the User Token

In this section we will write a logic to validate the access token which you have generated above. In general, our objective is that a user cannot proceed further if they have an invalid access token. Moving further this validation will help us to make our routes protected.
Create a src/containers/TokenValidator/TokenValidation.js
Handling the user input
import * as actions from '../../store/actions/index';

class TokenValidator extends Component
{
    state={
        token:''
    }
    handleForm=(e)=>{
        e.preventDefault();
        this.props.tokenValidator(this.state.token);
    }
    inputChangeHandler=(e)=>this.setState({token:e.target.value});


    render()
State of the Token
Here we can use token as a state to store the access token given by user.
1. handleForm
This function executes when user submits the token (we will talk about inner implementation shortly)
2. inputChangeHandler
Changes the state of token on every input of a user
Handling the actions
const mapStateToProps=(state)=>{
    return {
        token:state.tokenValidator.token,
        loading:state.tokenValidator.loading,
        error:state.tokenValidator.error
    }
}
const mapDispatchToProps=(dispatch)=>{
    return {
        tokenValidator:(token)=>dispatch(actions.tokenValidator(token))

    }
}
export default connect(mapStateToProps,mapDispatchToProps)(TokenValidator);
Here comes the react-redux to the rescue where we can use valid token across the application. As notice above whenever user submits the token this.props.tokenValidator(this.state.token) is call which dispatches tokenValidator action to update the reducer and also validate our token.
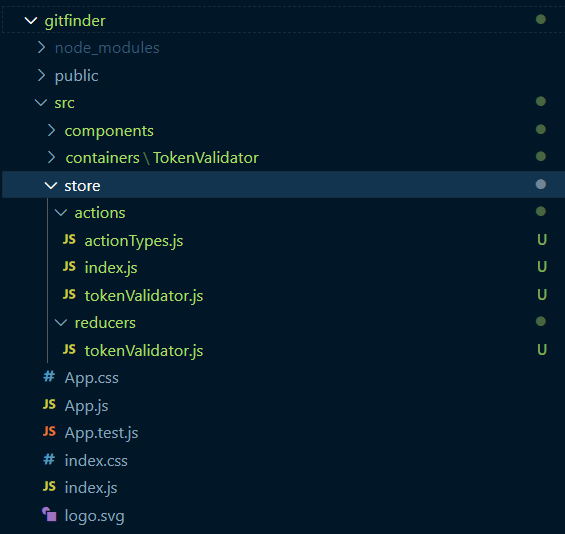
Our Redux Store and Actions
Before heading further, I would recommend you to create a folder structure as shown below for your redux store. You may choose to follow other folder structure but keep a habit of best practices so that you can clearly distinguish your actions and reducer.
Different Action Types
We cannot update redux store directly and it is done through reducers. With different actionTypes we will trigger our actions and ask reducer to update the state/store accordingly.
I always keep my action creator and action type file separated so that it is easy to maintain and readable.
I will not be able to explain all the code in details. You can find the code for this section below:
Our first Reducer (tokenValidator.js)
Let’s see what all synchronous actions do we have:
- tokenValidStart - First action to dispatch whenever async action is call
- tokenValidSuccess- If our http request is complete and promise is resolve than success action is dispatch.
- tokenSetter- Once the promise is resolve we will set the token state in our redux store only if our response status is 200.
- tokenValidationFail- If our promise is rejected then failure action is dispatch.
- tokenInvalid- If our token is not valid than this action is dispatch which updates error state to ‘Invalid’ in our redux store. This attribute will help us to identify whether token is valid or not.
export let tokenValidator=(token)=>(dispatch)=>{

    dispatch(tokenValidStart());
    axios.post(`https://api.github.com/graphql`,{
        headers:{
            'Authorization':`bearer ${token}`
        }
    })
    .then((res)=>{
        dispatch(tokenValidSuccess());
        if(res.status=='200')
        dispatch(tokenSetter(token));

    })
    .catch((err)=>{

            if(err.response)
            {
                if(err.response.status=='401')
                dispatch(tokenInvalid());
                else dispatch(tokenValidationFail(err));
            }
            else dispatch(tokenValidationFail(err));
    })

}
As you can see above, we have created a redux thunk where we accept token as a parameter (refer your Dispatch props in TokenValidation.js file) and also dispatching multiple synchronous actions which we have discuss above.
That’s it this is our reducer for token validation and different actions for our react-redux application.
Congratulations! Till now we have covered below feature:
- Validate GitHub token access of a user.
In my upcoming articles I will cover the features given below with some basics of GraphQL as well.
- Search the Public Repository which are in GitHub
- Able to Star and Watch your favourite public repository
- Show Star, Watch and Total public repository count for search results.
Please leave your comments below regarding these article and stay tuned for Part 2! :-)


Top comments (2)
Can we make a post request to create or edit a file using Github API ?
Yes, you can using their REST API. Checkout this . Haven't explore much with their graphql api yet but I will check and get back to you