Data Engineering involves building pipelines to produce data driven decisions from a variety of data sources as shown below:
- Relational Databases
- Non Relational Databases
- Data Marts
- Streaming Sources .... etc.
In this blog we will create an end to end Data Pipeline from a Flask Web application which will make use of Big Data tools like Athena to query the data on AWS and finally visualize the same on the cloud in near real time.
The architecture flow is as follows:

- The flask application is hosted inside Ec2 and uses the data wrangler package to interact with AWS. A query is run in the backend which hits the Athena table.
- The data returned is stored a data frame in the flask application.
- The data frame is converted to a csv and pushed to S3
- There is a glue crawler which runs every time a new file is pushed to s3. This is useful if we run queries multiple times which gives multiple CSV files for each fired query.
- The Glue Catalog has the Database and the DDL for creating the table in Athena
- The table in Athena can be connected to Quicksight which is used to visualize the data.
Flask Application on Ec2 interacting with AWS CLI :
This front end can have any number of input methods such as input boxes, radio buttons which need to be relevant to the existing query.This front end hosting will be covered below.
Here we can use a micro instance from the EC2 dashbord, from the link below:
Blogpost on micro instance deployment
After launching the instance, we need to SSH into it, we need to install the necessary dependencies:
Dependencies:
- AWS cli
This provides control over most of the services on AWS. It must be installed as per the blogpost below to interact with Athena and other services:
- Flask with Virtual environment
Link: Install flask
- AWS data wrangler:
After activating the virtual environment use the link below to install AWS data wrangler
Link: Install wrangler
Once the instance is up and running we need to create a folder structure for our front end application:

Creating the index.html file:
Here we need to create multiple text boxes. Each text box will contain an input filed as well as a label which can then be referenced in the app.py file to execute the query.
**index.html**
<html>
<head><center><h3>Ornament Verification Report </h3></center></head>
<style>
.orn1
{
border: 1px outset blue;
background-color: lightblue;
padding-top: 10px;
padding-left: 10px;
padding-right: 10px;
padding-bottom: 10px;
}
</style>
<body>
<form action="`{{url_for("test")}}`" method="post">
<div class="orn1">
<label for="ornament1">Ornament1</label>
<input type="text" id="ornament1" name="ornament1" placeholder="enter b1/b2/b3/b4" required>
<label for="lowercount">Lowercount</label>
<input type="text" id="lowercount1" name="lowercount1" placeholder="enter lowercount" required>
<label for="uppercount">Uppercount</label>
<input type="text" id="uppercount1" name="uppercount1" placeholder="enter Uppercount" required>
<br>
<br>
<label for="grossweightlowerrange">Gross Weight Lower Range</label>
<input type="text" id="grossweightlowerrange1" name="grossweightlowerrange1" placeholder="enter lower range" required>
<label for="grossweightupperrange">Gross Weight Upper Range</label>
<input type="text" id="grossweightupperrange1" name="grossweightupperrange1" placeholder="enter upper range" required>
</div>
<br>
<div class="submitbutton">
<button type="submit">Execute</button></div>
</form>
</body>
</html>
The main logic will be developed in the backend where, based on the number of ornaments inputted the query will dynamically execute.
Creating the app.py file with the execution logic
Here we are referencing the ID of the label from the HTML file
Example :
first_ornament=request.form.get("ornament1")
import time
from flask import Flask, request, render_template
import awswrangler as wr
# Flask constructor
app = Flask(__name__)

@app.route('/', methods=["GET", "POST"])
def gfg():
    if request.method == "POST":
        first_ornament=request.form.get("ornament1")
        second_ornament = request.form.get("ornament1")
        uppercount2 = request.form.get("uppercount1")
        lowercount2 = request.form.get("lowercount1")
        grossweightlowerrange2 = request.form.get("grossweightlowerrange1")
        grossweightupperrange2 = request.form.get("grossweightupperrange1")
        # Get the output into a dataframe by using **wr** which is the aws datawrangler package to interact with AWS
        df = wr.athena.read_sql_query("query", database="databasename")
        # Specify the path of the bucket where the result will be stored as **file1.csv**
        bucket = 'input_bucketname'
        path1 = f"s3://{bucket}/file1.csv"
        # Write the csv file to the S3 bucket
        wr.s3.to_csv(df, path1, index=False)
return render_template("index.html")
Now we have successfully taken input from the user-> Got back the result as a dataframe -> Converted it to a CSV -> Pushed it to s3
2. AWS S3 bucket, Glue, Athena, Quicksight:
In the AWS user account we need to enable S3, Glue, Athena and Quicksight follo
 wing the blogs below in sequence.
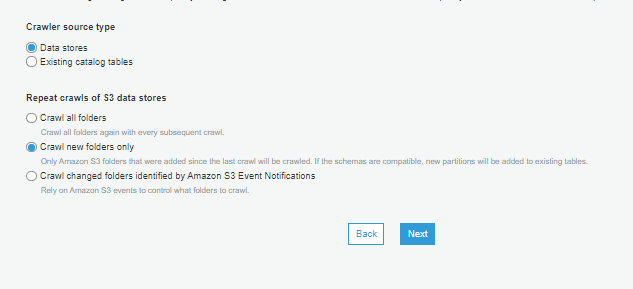
Once all three services are launched for the respective user id, we need to enable the glue crawler to read the data into Athena as soon as it is put into S3.
The data flow is as follows,
Once the data sits in s3 it will trigger a glue crawler which is automatically configured to read the latest data from s3.
Then a glue catalog schema is generated on the latest data in S3 which is then read by Quicksight.
- Open AWS glue and select Crawlers
- In the crawler settings select the options as follows
- In athena create the DDL as shown below


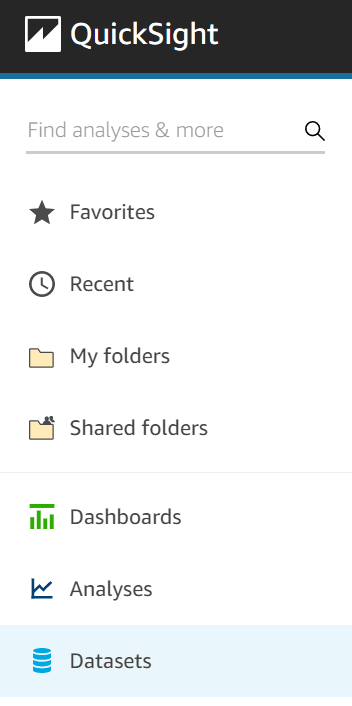
- In quicksight create a data set and point it to athena table as shown below
Click on add a new dataset as shown below
Select the same athena table where the ddl was generated as per the image below


Top comments (0)