
Telling stories has proven to be one of the most effective ways to sell ourselves. In recent times visual content has dominated the web, making telling stories with pictures an even more captivating technique.
This article aims to build a portfolio that provides an overview of storing, sending, and retrieving data and using these data to promote ourselves.
At the end of the article, your portfolio should look like this
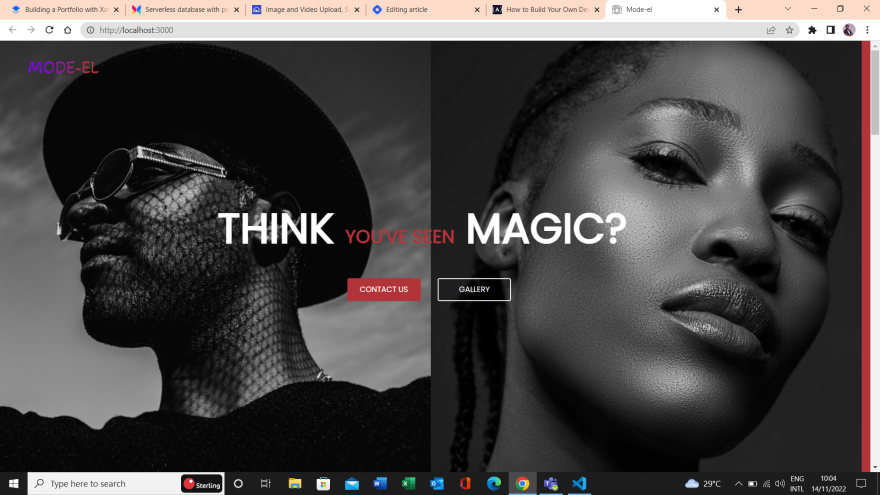
click image to play demo
The live demo of this application is available here. Here’s the source code for the project.
Prerequisites
To complete this project, you will need some knowledge of the following
- Adequate knowledge of React and Next.js.
- Node and its package manager,
npm. Run the commandnode -v && npm -vto verify that you have them installed or install them from here. - Code Editor
- Knowledge of TypeScript
- A Xata account - Create one here.
- A Cloudinary account - Create one here.
NOTE: To get you started, the prerequisites are attached with links to guide you. You can also catch up with crash courses.
What is Xata?
Xata is a branchable serverless database that offers a web UI that makes working with data seamless, an indefinitely scalable data API, and lots more.
Xata allows you to store, retrieve, update, delete, search through data and more
Why Cloudinary?
Cloudinary provides extensive video management and a cloud-based image platform while optimally creating, managing, and delivering digital experiences. With Cloudinary, you can:
- Store images
- Upload images
- Transform images
- Download images
- Embed images and more
Getting Started
Setting up a Cloudinary account
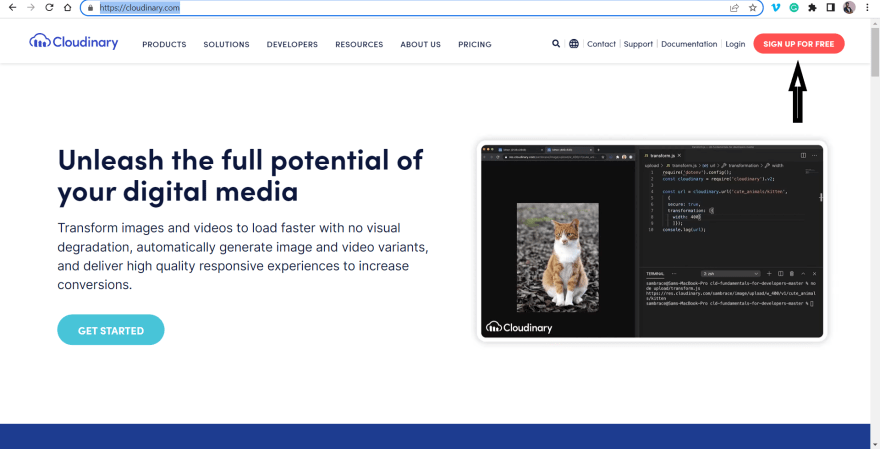
Head to Cloudinary, log into your account or create an account here.
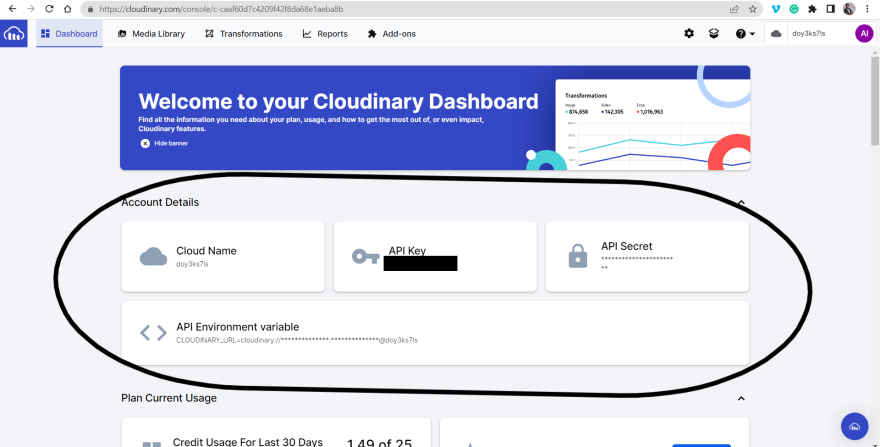
After successfully creating an account, Cloudinary will then redirect you to your account's dashboard page, where you can see account details that will be useful later on, including:
- Cloud name
- API Key
- API Secret
NOTE: Do not share these details with anyone.
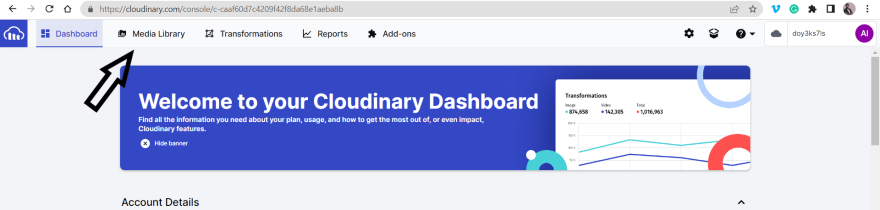
Next, go to Media Library to create a folder to house your images.
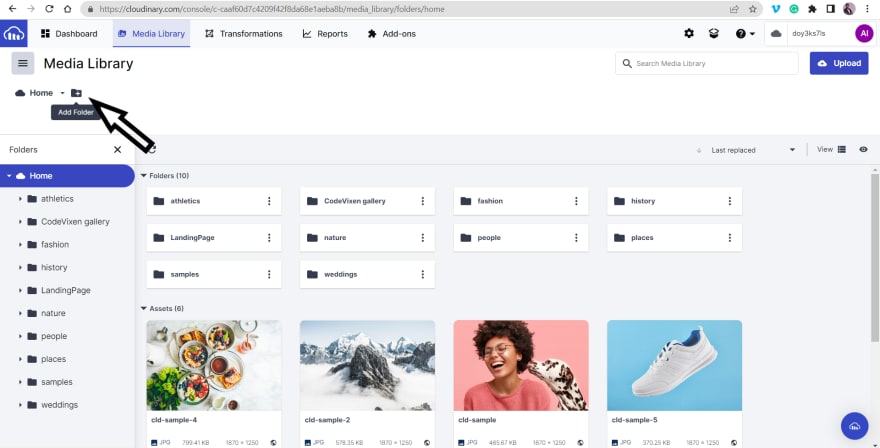
Upload images to the created folder by simple drag and drop.

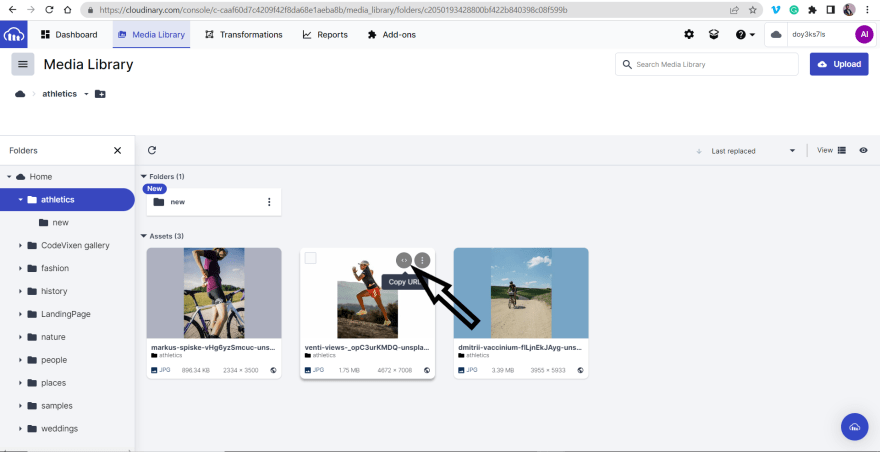
Next, copy the uploaded image links; you’ll use this when building your application.
Setting up your Xata account
Visit Xata to log into your account or create an account here.

After creating an account, Xata will redirect you to create a workspace for your project.

Next, you’ll create a database to house your project data.

You will then create tables serving as the database component holding your data.

Finally, you’ll add data to the table you created in the step above.
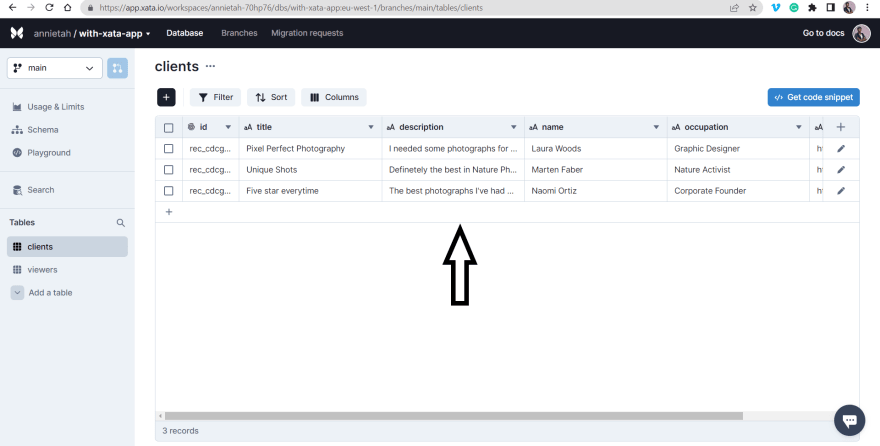
NOTE: The image column content is the URLs of images copied from Cloudinary.
Project Setup and Installation
You’ll be bootstrapping with-xata template using the create-next-app command.
Open your Node.js terminal after you've navigated to the directory you want the project on:
npx create-next-app --example with-xata with-xata-app
You'll get some prompts, including a prompt to create a dummy new table (nextjs_with_xata_example), if you have an already existing database, you can ignore else, accept to get some content displayed on npm run start.
Install the Xata CLI
Still in the terminal, run npm install @xata.io/cli -g to install Xata for global use.
Then link an existing database by initializing with xata init --db=[databaseUrl]. Run npm run start:xata to get Xata started.
Building the Homepage Component
Let’s add our logo to the _app.tsx just above the Component declaration, as shown below.
// _app.tsx
<h2 className='logo'>MODE-EL</h2>
      <Component {...pageProps} />
In the index.tsx file, replace the default syntax with the code snippet below.
    import type { InferGetServerSidePropsType } from "next";
    import { XataClient, getXataClient } from "../utils/xata.codegen";

    export default function IndexPage({
    }: InferGetServerSidePropsType<typeof getServerSideProps>) {
      // Some UI rendering
      return (
        <div className="homepage">
           {/* Take the content here out to input your own content */}
        {/* Hero Section */}

        {/* About section */}

        {/* More about section */}

        {/* Testimonial section */}

        {/* Contact section */}

        {/* Scroll to top */}

        {/* Footer section */}
        </div>
      );
    }
This displays the content of different sections, as seen above.
Let’s get into defining what each section does. In the Hero section, display the images of links from Cloudinary as the first section to be seen when a viewer visits your portfolio.
    // Hero section
    <div className="homepage">
        <div className='top-images'>
           <img src="image link from cloudinary" alt=" " />
           <img src="image link from cloudinary" alt=" " />
        </div>

         <div className='top-content'>
            <h1>think <span>you've seen</span> magic?</h1>
             <div className='top-content-btn'>
               <button id="contactBtn" className='left-button'> CONTACT US </button>
               <button className='right-button'>GALLERY</button>
          </div>
     </div>
Next, the About section shows some information about you, such as text, call-to-action, etc.
    // About section
    <div className='dancing-lady'>
       <img src="image link from cloudinary" alt=" "/>
    </div>

    <div className='cta-one'>
       <h2># Photography Agency</h2>
        <p>
            We are the problem solvers that will help you convey your message in
            pixels. We communicate creatively both online and offline and always
            putting a smile on your face through satisfaction.
        </p>
    </div>
Also, More about section gives viewers more context about the portfolio.
    // More about section
    <div className='woman-in-glasses'>
       <img src="image link from cloudinary" alt=" " />
    </div>
    <div className='cta-two'>
       <h2>Want To Be Discovered?</h2>
        <p>
           We are the problem solvers that will help you convey your message in
            pixels. We communicate creatively both online and offline and always
            putting a smile on your face through satisfaction.
        </p>
    </div>
    <div className='guy-in-glasses'>
       <img src="image link from cloudinary" alt=" " />
    </div>
In the Testimonial section, we will get data in the form of testimonials from Xata to display in your project.
    // Testimonial section
    <div className='testimonials'>
       <div className='testimonials-head'>
         <h2>TESTIMONIALS</h2>
       </div>
       <div className='testimonial'>
        {/* Fetched data from xata to be displayed */}
    </div>
Next is the Contact section, where you’ll display a form to get viewers' data and send it to the database.
    // Contact section
    <div id="contact">
       {/* contact form*/}

    {/* Scroll to top */}
      <i
          className=" ">
          {/* arrow up icon */}
      </i>
    </div>
The last section in the index.tsx is the Footer section, where you’ll place the content of your footer.
// Footer section
<footer>
<p>
MODE-EL © 2022
</p>
</footer>
Let's make our contact form displayed on the index page and serve as our data collection point to be sent to Xata.
In the root folder, we'll create a components folder, then create our ContactForm.tsx
    // components/ContactForm.tsx

    export const ContactForm = () => {
      return (
        // form to submit details
        <div className="">
          <form>
            <p>Need us!</p>
            <input
              type="text"
              name="name"
              value={}
              required
              placeholder="Name"
            />
            <input
              type="email"
              name="email"
              value={}
              required
              placeholder="Email"
            />
            <input
              type="text"
              name="message"
              value={}
              required
              placeholder="Message"
            />
            <button>SEND</button>
          </form>
        </div>
      );
    };
To be able to send data to the Xata table created, you need to send the value of the inputs as responses.
In the api folder located in the pages folder, create a submit-response.ts file where you'll call the API.
    // pages/submit-response.ts

    import { NextApiHandler } from "next";
    import { XataClient, getXataClient } from "../../utils/xata.codegen";
    import dotenv from "dotenv";
    dotenv.config();

    // connecting to xata
    const handler: NextApiHandler = async (req, res) => {
      const xata = new XataClient({ apiKey: process.env.{insert your API key} });
      const { name, email, message } = req.body;
      await xata.db.contacts.create({
        name,
        email,
        message,
      });
      res.end();
    };

    export default handler;
In the ContactForm.tsx, implement your API route, submit-response.ts.
    // components/ContactForm.tsx

    import { useState } from "react";

    export const TestForm = () => {
      const [name, setName] = useState("");
      const [message, setMessage] = useState("");
      const [email, setEmail] = useState("");

      // fetch xata API
      const send = () => {
        fetch("api/submit-response", {
          method: "POST",
          headers: {
            Authorization: `Basic ${process.env.{insert your API key}}`,
            "Content-Type": "application/json",
          },
          body: JSON.stringify({
            email: email,
            message:message,
            name: name,
          }),
        }).then(() => window.location.reload());
      };

      return (
        // form to submit details
    ...........................................................
Then, import the ContactForm.tsx in your index.tsx.
    // Contact section

    <div id="contact">
    {/* Import at the top */}
      <ContactForm />
      <i
          className=" ">
          {/* arrow up icon */}
      </i>
    </div>
At this point, your ContactForm.tsx on the index.tsx should look like this:

This contact form will send data to the Xata database; try filling, submitting and checking the data table in Xata, and you'll see the table populated with what you just submitted.
Now, you’ll get the data you created on your Xata database when you created the table, as this is what you'll display as your testimonial section.
    // index.tsx

    import type { InferGetServerSidePropsType } from "next";
    import { XataClient, getXataClient } from "../utils/xata.codegen";
    import { ContactForm } from "../components/ContactForm";
    import dotenv from "dotenv";
    dotenv.config();

    export default function IndexPage({
      // adding the props in this case links
      links,
    }: InferGetServerSidePropsType<typeof getServerSideProps>) {

      // Some UI rendering
      return (
       <div className="homepage">
         {/* different sections of the page*/}
      </div>
      );
    }

    // fetching db from xata
    export const getServerSideProps = async () => {
    const xata = new XataClient({ apiKey: process.env.{insert your API key} });
    const links = await xata.db.clients.getAll();
      return {
        props: {
          links,
        },
      };
    };
Then, loop through the data from Xata’s database on the testimonial page.
          {/* testimonial section*/}
     <div className='testimonials'>
       <div className='testimonials-head'>
         <h2>TESTIMONIALS</h2>
       </div>
       <div className='testimonial'>
           {links.map((link) => {
                return (
                  <section className='testimonial-single' key={link.id}>
                    <img src={link.image} alt="testimonial image" />
                    <p><b>{link.name}</b></p>
                    <p>{link.occupation}</p>
                    <p>{link.description}</p>
                  </section>
                );
              })}
        </div>
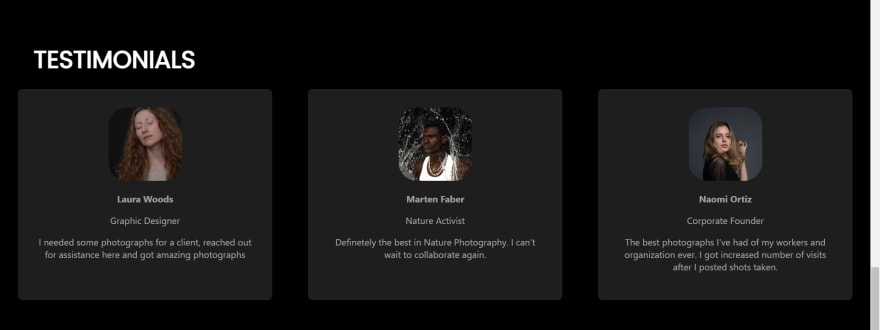
If implemented rightly, you should have this result as seen below:
In the index.tsx page, you'll be writing functions for the scroll behavior.
      // index.tsx
    // scroll to top
      const onBtnClick = (e) => {
        e.preventDefault();
        setTimeout(() => {
          window.scrollTo({
            top: document.getElementById("contact").offsetTop - 60,
            behavior: "smooth",
          });
        }, 50);
      };

      // scroll to top
      const onIconClick = (e) => {
        e.preventDefault();
        setTimeout(() => {
          window.scrollTo({
            top: document.getElementById("contactBtn").offsetTop - 60,
            behavior: "smooth",
          });
        }, 50);
      };

     return (
       <div className="homepage">
         {/* different sections of the page*/}
      </div>
      );
    }

    .................................................................
Then, add the functions to click events in the hero section and contact section, as shown below.
    // hero section
    <div className='top-content'>
        <h1>think <span>you've seen</span> magic?</h1>
         <div className='top-content-btn'>
           <button id="contactBtn" onClick={onBtnClick} className='left-button'>
              CONTACT US
            </button>
           <button className='right-button'>GALLERY</button>
         </div>
     </div>
    // contact section
    <div id="contact">
      <ContactForm />
      <i
          onClick={onIconClick}
          className=" ">
          {/* arrow up icon */}
      </i>
    </div>
In the hero section of the index.tsx, link the gallery button to a gallery page that you’ll create shortly.
    // hero section
    <div className='top-content'>
        <h1>think <span>you've seen</span> magic?</h1>
         <div className='top-content-btn'>
           <button id="contactBtn" onClick={onBtnClick} className='left-button'>
              CONTACT US
            </button>

             {/* import Link at the top */}
           <Link href="/gallery">
                <button className='right-button'>GALLERY</button>
              </Link>
         </div>
     </div>
In the pages folder, create a new file gallery.tsx. This page is where the Cloudinary API and personal details collected will be used to interact with the images uploaded to Cloudinary.
    // gallery.tsx
    import type { InferGetServerSidePropsType } from "next";
    import Link from "next/link";

    export default function gallery({
      images,
    }: InferGetServerSidePropsType<typeof getServerSideProps>) {

      // Some UI rendering
      return (
        <div className="gallery">
        </div>
      );
    }

    // Calling cloudinary API
    export const getServerSideProps = async () => {
      const results = await fetch(
        `https://api.cloudinary.com/v1_1/${process.env.{your cloudinary cloud name}}/resources/image`,
        {
          headers: {
            Authorization: `Basic ${Buffer.from(
              process.env.{your cloudinary API key} +
                ":" +
                process.env.{your cloudinary API secret}
            ).toString("base64")}`,
          },
        }
      ).then((res) => res.json());

      const { resources } = results;

      const images = resources?.map((resource) => {
        const { width, height } = resource;
        return {
          id: resource.asset_id,
          title: resource.public_id,
          image: resource.secure_url,
          width,
          height,
        };
      });
      return {
        props: {
          images,
        },
      };
    };
To display the images, map through the images gotten through the API.
     // gallery.tsx
    // Some UI rendering
      return (
    div className="gallery">
      {/* Looping through cloudinary images */}
      <div className="images">
        {images?.map((image) => {
          return (
            <div key={image.id}>
              <img src={image.image} alt={image.title} />
            </div>
          );
        })}
      </div>

      <nav>
        <Link className="link" href="/">
          HOME
        </Link>
      </nav>
    </div>
    );
    }
This will render a collection of images from Cloudinary uploads, as shown below.

Conclusion
You successfully built a photography portfolio using Cloudinary, NextJs, and Xata, where creators can display their work, show comments from previous clients and get feedback or messages from viewers. I hope you found this article helpful.

Top comments (0)