Pinterest is an American image-sharing and social media service. It allows you to save images, animated GIFs, and videos as pinboards.
In this article, you'd be building out the core functionality of Pinterest: upload, save, and list pins. You'll be exploring the rich capabilities of Xata, a serverless database with built-in powerful search and analytics, and Cloudinary, a cloud-based image, and video management service.
Prerequisites
A basic understanding of JavaScript and Next.js is needed to follow along with this article.
Repository
You can find the complete code used in this article on GitHub.
Project Setup
Node has to be installed on your computer to set up the Next.js application. To install Node, go to the Nodejs website and follow the instructions to install the software compatible with your operating system.
You can verify the Node.js installation by running the command below:
node -v
v16.10.0 //node version installed
To create the Next.js app, run the command below. It will automatically set up a boilerplate Next.js app.
npx stands for Node Package Execute. It executes any package from the npm registry without installing it.
npx create-next-app@latest <app-name>
# or
yarn create next-app <app-name>
After the installation is complete, change the directory into the app you just created:
cd <app-name>
Run npm run dev or yarn dev to start the development server on http://localhost:3000.
Setting up Xata database
Create a new database on your Xata dashboard called pinterest_clone

Next, create a table and name it pins. Your table schema should look like this:

Setting up Xata instance
Run the command below to install the CLI globally:
npm install @xata.io/cli -g
Next, run xata auth login, which will prompt you to Create a new API key in the browser or use an existing one; go with the first option.

Now, in the project directory, run xata init. You will be prompted with several options to set up Xata in your app. Choose the options below:

Installing Cloudinary
Cloudinary provides a rich media management experience enabling users to upload, store, manage, manipulate, and deliver images and videos for websites and applications.
Install the package with the code below:
npm i @cloudinary/react
Fetching data from the database
To fetch the data from the database, first replace the existing code in the index.js file with the code below:
    import styles from '../styles/Home.module.css';
    import { getXataClient } from '../src/xata';
    import Pin from '../components/Pin';

    export default function Home({ data }) {
      return (
        <div className={styles.container}>
          <main className={styles.main}>
            <h1 className={styles.title}>Welcome to Pinterest clone!</h1>
            <p className={styles.description}>
              Get started by creating your{' '}
              <a
                href='/create-pin'
                style={{
                 color: 'red',
                 fontWeight: 'bolder'
                }}
              >
                pin
              </a>
            </p>
            <Pin pins={data} />
          </main>
        </div>
      );
    }
    export async function getServerSideProps() {
      const xata = getXataClient();
      const data = await xata.db.pins.getAll();
      return { props: { data } };
    }
In the root of your project create a components folder. In the components folder, create a Pin.js file and add the code below:
    import styles from '../styles/Home.module.css';

    export default function Pin({ pins }) {
      return (
        <div className={styles.grid}>
          {pins.map((pin) => (
            <div
              className={styles.card}
              style={{
                backgroundImage: `url(${pin.image_url})`,
                borderRadius: '10px',
                backgroundSize: '100% 100%',
                backgroundRepeat: 'no-repeat',
              }}
            >
              <a href={pin.destination_link}>
                <h2>{pin.title}</h2>
                <p>{pin.description}</p>
              </a>
            </div>
          ))}
        </div>
      );
    }
In the Home.module.css file, replace the contents with the code below:
    .container {
      padding: 0 2rem;
    }
    .main {
      min-height: 100vh;
      padding: 4rem 0;
      flex: 1;
      display: flex;
      flex-direction: column;
      justify-content: center;
      align-items: center;
    }
    .title a {
      color: #0070f3;
      text-decoration: none;
    }
    .title a:hover,
    .title a:focus,
    .title a:active {
      text-decoration: underline;
    }
    .title {
      margin: 0;
      line-height: 1.15;
      font-size: 4rem;
    }
    .title,
    .description {
      text-align: center;
    }
    .description {
      margin: 4rem 0;
      line-height: 1.5;
      font-size: 1.5rem;
    }
    .grid {
      display: flex;
      align-items: center;
      justify-content: center;
      flex-wrap: wrap;
      max-width: 800px;
    }
    .card {
      margin: 1rem;
      padding: 1.5rem;
      text-align: left;
      color: inherit;
      text-decoration: none;
      border-radius: 10px;
      transition: color 0.15s ease, border-color 0.15s ease;
      max-width: 300px;
    }
    .card h2 {
      margin: 0 0 1rem 0;
      font-size: 1.5rem;
      color: black;
    }
    .card p {
      margin: 0;
      font-size: 1.25rem;
      line-height: 1.5;
      color: #f82929;
    }
    .logo {
      height: 1em;
      margin-left: 0.5rem;
    }
    @media (max-width: 600px) {
      .grid {
        width: 100%;
        flex-direction: column;
      }
    }
    .form {
      width: 400px;
      height: auto;
      padding: 1%;
      display: inline-block;
      background-color: #626161;
    }
    .formInput {
      width: 100%;
      padding: 12px 20px;
      margin: 8px 0;
      display: inline-block;
      border: 1px solid #ccc;
      border-radius: 4px;
      box-sizing: border-box;
    }
    .submitInput {
      width: 100%;
      background-color: #4caf50;
      color: rgb(255, 255, 255);
      padding: 14px 20px;
      margin: 8px 0;
      border: none;
      border-radius: 4px;
      cursor: pointer;
    }
    .submitInput:hover {
      background-color: #000000;
    }
What has happened so far is that you:
- Imported the
getXataClientutility and initialized a new instance - Queried the
pinstable and fetched all records withgetServerSideProps - Passed the fetched data to the
Pincomponent through props. - Did basic CSS setup ## Inserting new records in the database
To insert new data into the Xata database you created. First, you'd need to create a form and capture all the form data input by the user and send it via an API call to be stored in the database. Remember that you'd need to upload the Image selected by the user to Cloudinary.
Create a new file called create-pin.js and add the following code:
    import { useState } from 'react';
    import styles from '../styles/Home.module.css';

    export default function CreatePin() {
      return (
        <div className={styles.container}>
          <main className={styles.main}>
            <h1 className={styles.title}>Welcome to Pinterest clone!</h1>
            <p className={styles.description}>
              <a
                href='/'
                style={{
                  color: 'red',
                  fontWeight: 'bolder',
                }}
              >
                Home
              </a>
              <br />
              create your pin
            </p>
            <div className={styles.form}>
              <label htmlFor='title'>
                <b>Title:</b>
              </label>
              <input
                type='text'
                className={styles.formInput}
                onChange={(e) => setTitle(e.target.value)}
              />
              <label htmlFor='description'>
                <b>Description:</b>
              </label>
              <input
                type='text'
                className={styles.formInput}
                onChange={(e) => setDescription(e.target.value)}
              />
              <label htmlFor='destination link'>
                <b>Destination Link:</b>
              </label>
              <input
                type='text'
                className={styles.formInput}
                onChange={(e) => setDestinationLink(e.target.value)}
              />
              <label htmlFor='image'>
                <b>Image:</b>
              </label>
              <input
                type='file'
                className={styles.formInput}
                onChange={(e) => setImageSrc(e.target.files[0])}
              />
              <button
                onClick={handleOnSubmit}
                type='submit'
                className={styles.submitInput}
              >
                Submit
              </button>
            </div>
          </main>
        </div>
      );
    }
This is just a basic HTML form. Now you’d need to capture the input data like so:
    import { useState } from 'react';
    import styles from '../styles/Home.module.css';

    export default function CreatePin() {
      const [imageSrc, setImageSrc] = useState([]);
      const [title, setTitle] = useState();
      const [description, setDescription] = useState();
      const [destination_link, setDestinationLink] = useState();

      return (
        ...
Now, create the function to upload the image to Cloudinary and store the data in the database.
Create a function called handleOnSubmit and add the following code to it:
    import { useState } from 'react';
    import styles from '../styles/Home.module.css';

    export default function CreatePin() {
     ...

      async function handleOnSubmit(event) {
        event.preventDefault();
        let response;

        if (imageSrc) {
          const body = new FormData();
          body.append('upload_preset', 'bn1pyehj');
          body.append('file', imageSrc);
          response = await fetch(
            'https://api.cloudinary.com/v1_1/<Your-Cloud-Name>/image/upload',
            {
              method: 'POST',
              body,
            }
          ).then((r) => r.json());
        }
        fetch('/api/create-pin', {
          method: 'POST',
          headers: {
            'Content-Type': 'application/json',
          },
          body: JSON.stringify({
            title,
            description,
            destination_link,
            image_url: response.secure_url,
          }),
        }).then((r) => alert('record added successfully'));
      }

      return (
        ...
What you’re doing in this function is that you’re:
- Uploading the image, if it exists, to cloudinary using your upload preset.
- Storing the data in the database through the next.js API.
You can find your upload preset in the Upload tab of our Cloudinary settings page by clicking on the gear icon in the top right corner of the dashboard page.
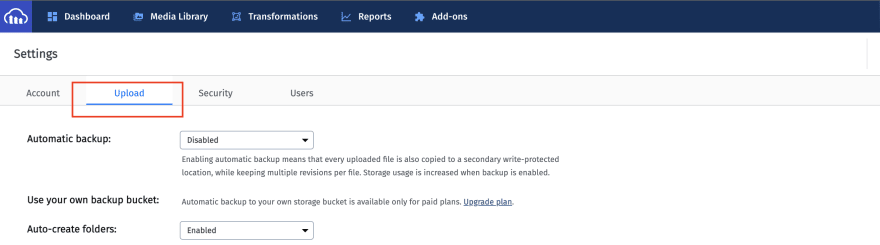
By scrolling down to the bottom of the page to the upload presets section, you’ll see your upload preset, or there will be an option to create one if you don't have any.
Storing data in the database
Create a new file in the api folder and name it create-pin.js. Paste the code below in the file:
    import { getXataClient } from '../../src/xata';
    const xata = getXataClient();

    const handler = async (req, res) => {
      const { title, description, destination_link, image_url } = req.body;
      await xata.db.pins.create({
        title,
        description,
        destination_link,
        image_url,
      });
      res.end();
    };

    export default handler;
Running the Application
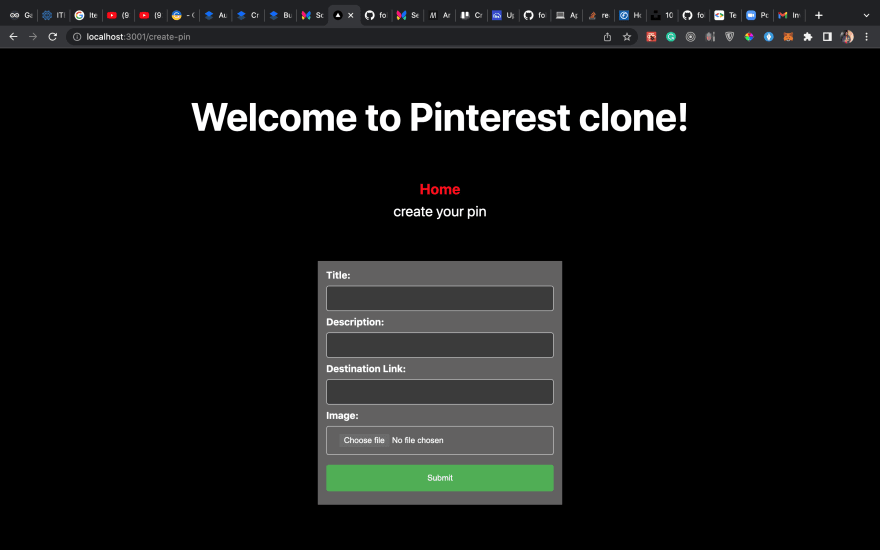
To see the app in action, run npm run dev, and visit the URL. The create-pin.js page should look like this:
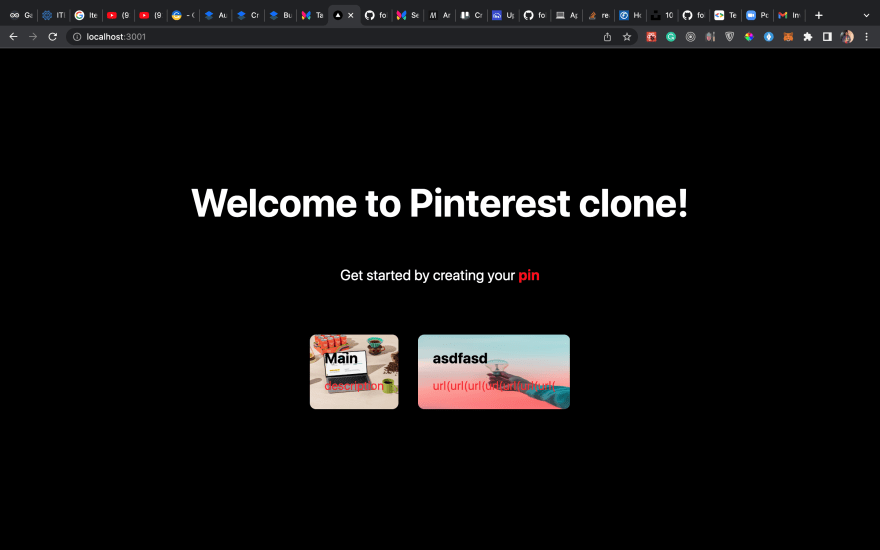
Once you submit the form, the result would show up in the index.js page like so:
Conclusion
In this article, you a pinterest clone that helped you explore using Xata for seamless database storage and Cloudinary for easy image uploads.

Top comments (0)