
It dawned on me the other day that for a publication which regularly uses and talks about Jupyter notebooks, we’ve never actually taken the time to explain what they are or how to start using them. No matter where you may have been in your career, first exposure to Jupyter and the IPython shell is often a confusingly magical experience. Writing programs line-by-line and receiving feedback in real-time feels more like painting oil on canvas and programming. I suppose we can finally chalk up a win for dynamically typed languages.
There are a couple of barriers for practical devs to overcome before using Jupyter, the most obvious being hardware costs. If you’re utilizing a full Anaconda installation, chances are you’re not the type of person to mess around. Real machine learning algorithms take real resources, and real resources take real money. A few vendors have popped up here are offering managed cloud-hosted notebooks for this reason. For those of us who bothered to do the math, it turns out most of these services are more expensive than spinning up a dedicated VPS.
Data scientists with impressive machines have no problem running notebooks locally for most use cases. While that’s fine and good for scientists, this setup is problematic for those of us with commitments to Python outside of notebooks. Upon installation, Anaconda barges into your system’s ~/.bash_profile, shouts “I am the captain now,” and crowns itself as your system’s default Python path. Conda and Pip have some trouble getting along, so for those of us who build Python applications and use notebooks, it's best to keep these things isolated.
Setting Up a VPS
We're going to spin up a barebones Ubuntu 18.04 instance from scratch. I opted for DigitalOcean in my case, both for simplicity and the fact that I'm incredibly broke. Depending on how broke you may or may not be, this is where you'll have to make a judgment call for your system resources:

SSH into that bad boy. You know what to do next:
$ sudo apt update
$ sudo apt upgrade
With that out of the way, next we'll grab the latest version of Python:
$ sudo apt install python3-pip python3-dev
$ sudo -H pip3 install --upgrade pip
Finally, we'll open port 8888 for good measure, since this is the port Jupyter runs on:
sudo ufw enable
sudo ufw allow 8888
sudo ufw status


To Action From
-- ------ ----
OpenSSH ALLOW Anywhere
8888 ALLOW Anywhere
Create a New User
As always, we should create a Linux user besides root to do just about anything:
Adding user `myuser' ...
Adding new group `myuser' (1001) ...
Adding new user `myuser' (1001) with group `myuser' ...
Creating home directory `/home/myuser' ...
Copying files from `/etc/skel' ...
Enter new UNIX password:
Retype new UNIX password:
passwd: password updated successfully
Changing the user information for myuser
Enter the new value, or press ENTER for the default
        Full Name []: My User
        Room Number []: 420
        Work Phone []: 555-1738
        Home Phone []: derrrr
        Other []: i like turtles
Is the information correct? [Y/n] y
Then, add them to the sudoers group:
$ usermod -aG sudo myuser
Log in as the user:
$ su - myuser
To run a command as administrator (user "root"), use "sudo <command>".
See "man sudo_root" for details.
Install The Latest Anaconda Distribution
Anaconda comes with all the fantastic Data Science Python packages we'll need for our notebook. To find the latest distribution, check here: https://www.anaconda.com/download/. We'll install this to a /tmp folder:
cd /tmp
curl -O https://repo.anaconda.com/archive/Anaconda3-2018.12-Linux-x86_64.sh
Once downloaded, begin the installation:
$ sh Anaconda3-2018.12-Linux-x86_64.sh
Complete the resulting prompts:
Welcome to Anaconda3 2018.12

In order to continue the installation process, please review the license
agreement.
Please, press ENTER to continue
>>>
Get ready for the wall of text....
===================================

Copyright 2015, Anaconda, Inc.

All rights reserved under the 3-clause BSD License:

Redistribution and use in source and binary forms, with or without modification, are permitted provided that the following conditions are met:

.......

Do you accept the license terms? [yes|no]
This kicks off a rather lengthy install process. Afterward, you'll be prompted to add Conda to your startup script. Say yes :
installation finished.
Do you wish the installer to prepend the Anaconda3 install location
to PATH in your /home/sammy/.bashrc ? [yes|no]
The final part of the installation will ask if you'd like to install VS Code. Decline this offer because Microsoft sucks.
Finally, reload your /.bashrc file to get apply Conda's changes:
$ source ~/.bashrc
Setting Up Conda Environments
Conda installations can be isolated to separate environments similarly to the way Pipenv might handle this. Create and activate a Conda env:
$ conda create --name myenv python=3
$ source activate myenv
Congrats, you're now in an active Conda environment!
Starting Up Jupyter
Make sure you're in a directory you'd like to be running Jupyter in. Entering jupyter notebook in this directory should result in the following:
(jupyter_env) myuser@jupyter:~$ jupyter notebook
[I 21:23:21.198 NotebookApp] Writing notebook server cookie secret to /run/user/1001/jupyter/notebook_cookie_secret
[I 21:23:21.361 NotebookApp] Serving notebooks from local directory: /home/myuser/jupyter
[I 21:23:21.361 NotebookApp] The Jupyter Notebook is running at:
[I 21:23:21.361 NotebookApp] http://localhost:8888/?token=1fefa6ab49a498a3f37c959404f7baf16b9a2eda3eaa6d72
[I 21:23:21.361 NotebookApp] Use Control-C to stop this server and shut down all kernels (twice to skip confirmation).
[W 21:23:21.361 NotebookApp] No web browser found: could not locate runnable browser.
[C 21:23:21.361 NotebookApp]

    Copy/paste this URL into your browser when you connect for the first time,
    to login with a token:
        http://localhost:8888/?token=1u2grit856t5yig5f37tf5iu5y4gfi73tfty5hf
This next part is tricky. To run our notebook, we need to reconnect to our VPS via an SSH tunnel. Close the terminal and reconnect to your server with the following format:
ssh -L 8888:localhost:8888 myuser@your_server_ip
Indeed, localhost is intended to stay the same, but your_server_ip is to be replaced with the address of your server.
With that done, let's try this one more time. Remember to reactivate your Conda environment first!
(jupyter_env) myuser@jupyter:~$ jupyter notebook
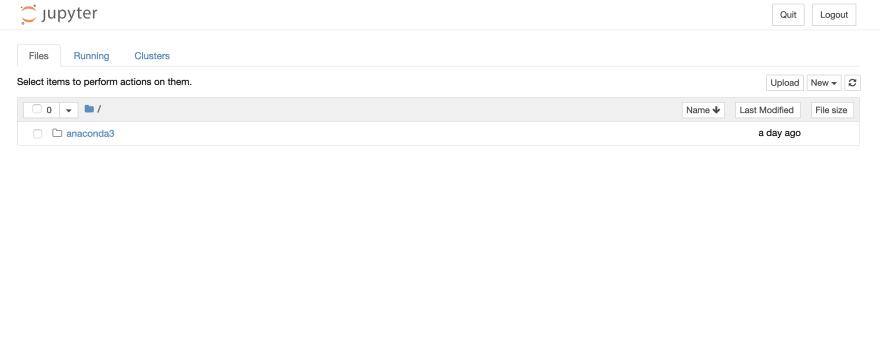
This time around, the links which appear in the terminal should work!
BONUS ROUND: Theme Your Notebooks
If ugly interfaces bother you as much as they bother me, I highly recommend taking a look at the jupyter-themes package on Github. This package allows you to customize the look and feel of your notebook, either as simple as activating a style, or as complex as setting your margin width. I highly recommend checking out the available themes to spice up your notebook!


Top comments (0)