
In this article, you will learn how to install Unity 2020.1.0b13 (Beta) using UnityHub 2.3.2 to start developing games.
UPDATE: Unity 2020.1 is no longer in beta but you can still use this guide for stable releases
Requirements
To install Unity, you will need first to install UnityHub.
Unity Installation
Now to install Unity start UnityHub and go to Installs section and then click on the ADD button. 
Then select the Unity version you would like to install, in this case Unity 2020.1.0b13 (Beta) and click NEXT. 
Check the box of Microsoft Visual Studio Community 2019 to install it as it will be the IDE you will be using for coding. 
You will have to agree to Microsoft Visual Studio Community 2019 License terms. 
After that, you will see a box with a loading bar meaning that the installation of Unity and Visual Studio is in progress. 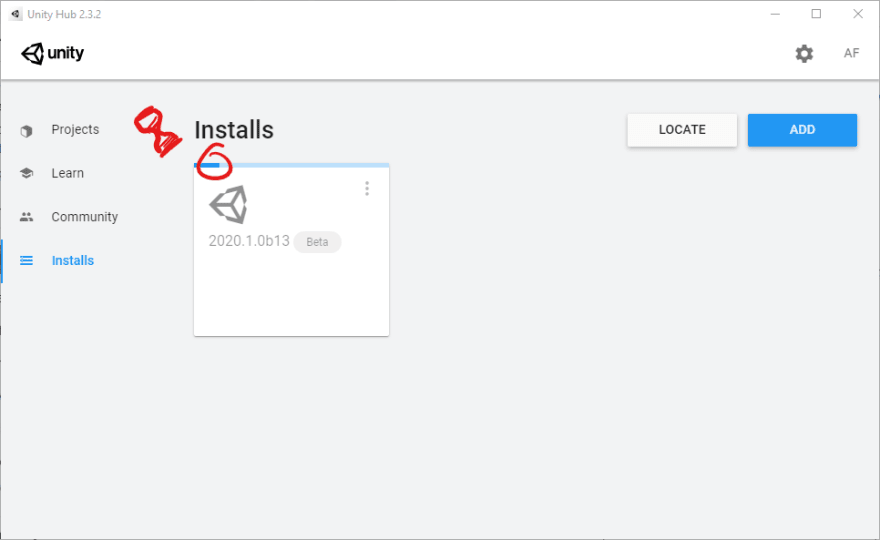
Once the installation completes, you will be ready to open or start a new project with Unity 2020.
Checkout Unity 2020.1 Manual "Installing Unity" Chapter for more info
Happy Game Dev! 👾

Top comments (0)