Originally posted & more like this here: https://aquiladb.xyz
AquilaDB now support Couch replication protocol, means - connect natively to your existing CouchDB (variant) / IBM Cloudant cluster for sharding, replication, decentralization and Neural Information Retrieval.
Perform Direct and Reverse image search like Google Images
Download Jupyter notebook here
In this tutorial, we will be looking at how multi-model search can be done in AquilaDB. We will build a tool similar to Google Image search and we will be performing direct (text to image) and reverse (image to image) search with the help of two pretrained models - one is for text and the other one for image.
To make things faster and easier, will be using a Fasttext model for sentence embedding and a MobileNet model for image encoding.
This tutorial will be fast and will skim some unwanted details in code. If you find it hard to follow, please refer to previous tutorials where we take more time to discuss those details in the code.
So, Let's begin..
Prerequisites
Install and import all required python libraries (we will be installing & importing AquilaDb library later).
!pip install fasttext
!pip install Pillow
!pip install matplotlib
!pip install "tensorflow_hub==0.4.0"

from PIL import Image
import numpy as np
import matplotlib.pyplot as plt

import tensorflow as tf
import tensorflow_hub as hub

import pandas as pd
import fasttext as ft
Load Flickr30k images dataset
You need to download Flickr Image captioning dataset and extract it to a convenient location. We have extracted it into a directory ./flickr30k_images/ which is in the same directory as this notebook.
Load results.csv file as a Pandas dataframe - which contains all the captions along with file names of each image.
# read image descriptions
image_descriptions = pd.read_csv('./flickr30k_images/results.csv', sep='\|\s', engine='python')
selected_columns = ['image_name', 'comment']
image_descriptions = image_descriptions[selected_columns]
Train and load Fasttext Model
Now let's quickly build a Fasttext language model from the raw comments that we have.
To make things easy, we already have extracted all the comments from the CSV file to a text file - results.txt.
Let's train the Fasttext model on our data in skip-gram unsupervised mode.
# create a language model quickly with fasttext
fasttext_model = ft.train_unsupervised(model='skipgram', input='flickr30k_images/results.txt')
# save model
fasttext_model.save_model("ftxt_model.bin")
# load saved model
fasttext_model = ft.load_model("ftxt_model.bin")
Verify that the model encodes the semantic information for different words properly.
Note that, fasttext is not good for encoding semantic information for sentences. We are using it here, because we expect the user to search images by giving importance to the words - resulting each object in the image rather than the overall context of the image.
In case you wanted semantic sentence based retrieval, feel free to use better language models (slower than Fasttext) like Universal Sentence Encoder. We have a tutorial on that over here.
# test the language model
! echo "girl" | fasttext nn ftxt_model.bin
! echo "==============="
! echo "garden" | fasttext nn ftxt_model.bin
! echo "==============="
! echo "glass" | fasttext nn ftxt_model.bin
! echo "==============="
! echo "ball" | fasttext nn ftxt_model.bin
Pre-computing word vectors... done.
Query word? little 0.81607
child 0.749877
Girl 0.730085
pink 0.729028
Little 0.728659
boy 0.721146
young 0.70541
Child 0.696403
blond 0.69241
pigtails 0.683836
...
Query word? ===============
Pre-computing word vectors... done.
Query word? t-ball 0.850855
T-ball 0.842449
ballgame 0.822507
A&M 0.745541
Tennis 0.731484
Rugby 0.726965
rugby 0.719968
33 0.719124
defends 0.716951
racquet 0.71034
Query word?
Just in case you wonder how we generate sentence embedding from Fasttext, here's a one-liner to do that.
# convert string to embeddings
fasttext_model.get_sentence_vector('a cat is sitting on the carpet')
array([ 3.55252177e-02,  4.62995056e-04, -5.44314571e-02, -3.67470682e-02,
        5.60869165e-02, -8.12834278e-02,  3.80968209e-03, -2.74911691e-02,
        ...
        5.96124977e-02, -1.29236341e-01,  5.84035628e-02,  1.21095881e-01,
        5.16762286e-02,  1.02854759e-01, -1.47027825e-03, -1.08863831e-01],
      dtype=float32)
cleanup data (dataframe)
Before we proceed into the core of this tutorial, we need to cleanup the dataframe to keep only what we wanted. The code below is self explanatory, if you have a background knowledge using Pandas. We are skipping the explanation just because it is out of scope of this tutorial.
def concater(x):
    try:
        return ' '.join(x)
    except Exception as e:
        return ''

# concatenate strings for same images
image_descriptions['comment'] = image_descriptions.groupby(['image_name'])['comment'].transform(concater)
image_descriptions = image_descriptions[['image_name','comment']].drop_duplicates()
image_descriptions.head(4)
| image_name | comment | |
|---|---|---|
| 0 | 1000092795.jpg | Two young guys with shaggy hair look at their ... |
| 5 | 10002456.jpg | Several men in hard hats are operating a giant... |
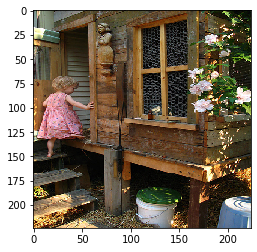
| 10 | 1000268201.jpg | A child in a pink dress is climbing up a set o... |
| 15 | 1000344755.jpg | Someone in a blue shirt and hat is standing on... |
# verify comments in each row
print(image_descriptions.iloc[0][0], image_descriptions.iloc[0][1])
print(image_descriptions.iloc[1][0], image_descriptions.iloc[1][1])
print(image_descriptions.iloc[500][0], image_descriptions.iloc[500][1])
1000092795.jpg Two young guys with shaggy hair look at their hands while hanging out in the yard . Two young , White males are outside near many bushes . Two men in green shirts are standing in a yard . A man in a blue shirt standing in a garden . Two friends enjoy time spent together .

10002456.jpg Several men in hard hats are operating a giant pulley system . Workers look down from up above on a piece of equipment . Two men working on a machine wearing hard hats . Four men on top of a tall structure . Three men on a large rig .

1159425410.jpg A female washes her medium-sized dog outdoors in a plastic container while a friend secures it with a leash . A brown dog is in a blue tub , while one person holds his leash and another is soaping him . Two people give a dog a bath outdoors in a blue container . A small brown dog is being washed in a small blue bin . A dog calmly waits until his bath is over .
Load pretrained MobileNet Model
Now we need to load pretrained MobileNet model from Tensorflow Hub.
# load mobilenet featurevector model as a Keras layer
module = tf.keras.Sequential([
    hub.KerasLayer("https://tfhub.dev/google/tf2-preview/mobilenet_v2/feature_vector/4",
        output_shape=[1280],
        trainable=False)
])

# build the model
module.build([None, 224, 224, 3])

# This model will only accept images of size 224 x 224
# So, we need to make sure throughout the code, that we supply correcty resized images
im_height, im_width = 224, 224
Helper functions
Here are some self explanatory helper functions that will help us during the embed/encode/predict stages.
# Here is the helper function to load and resize image
def load_rsize_image(filename, w, h):
    # open the image file
    im = Image.open(filename)
    # resize the image
    im = im.resize(size=(w, h))
    return np.asarray(im)
# Let's test loading an image
image_array = load_rsize_image('./flickr30k_images/flickr30k_images/301246.jpg', im_width, im_height)
plt.imshow(image_array)

# helper function to retrieve fasttext word embeddings
def get_ftxt_embeddings(text):
    return fasttext_model.get_sentence_vector(text)

# helper function to encode images with mobilenet
def get_image_encodings(batch, module):
    message_embeddings = module.predict(batch)
    return message_embeddings
# helper function to embed images and comments in a dataframe and return numpy matrices
# this function will iterate through a dataframe, which contains image file names in one column and
# comments in another column and will generate separate matrices for images and comments.
# row order of these matrices matters because same row index in both matrices represent related image and comments.
def embed_all(df, w, h):
    img_arr = []
    txt_arr = []
    # for each row, embed data
    for index, row in df.iterrows():
        # img_arr will contain all the image file data (will be passed to mobilenet later)
        img_arr.append(load_rsize_image('./flickr30k_images/flickr30k_images/' + row['image_name'], w, h))
        # txt_arr will contain all Fasttext sentance embedding for each comment
        txt_arr.append(get_ftxt_embeddings(row['comment']))
    return img_arr, txt_arr
img_emb, txt_emb = embed_all(image_descriptions, im_width, im_height)
# reset fasttext model
fasttext_model = None
# verify that image is image loded correctly
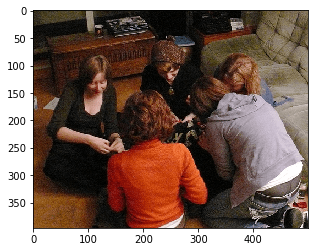
plt.imshow(img_emb[2])
In above steps, we have embedded text data with Fasttext. Image data still need to be encoded. To keep the CPU and RAM away from exploding, we decided to do it in batches, before sending them to AquilaDB.
But just in case you wonder how an image can be encoded, here is a one-liner for that:
# test image encodings generation
get_image_encodings(np.true_divide(np.array(img_emb[0:100]), 255), module).shape
(100, 1280)
Filter based indexing
This is the core idea we wanted to share with you through this tutorial.
In this tutorial, we are using multiple models that generate encodings. So we need to index both of them inside AquilaDB and need to somehow discriminate (filter) them during k-NN search. With AquilaDB we could do this efficiently.
Padding can be done in two ways:
- Positional padding
- Filter vector padding
Positional Padding
This is what we will be doing in this tutorial.
If you have a limited number of models ranging between 2 to 4, this will be the best method that you can use.
Suppose, we have two models M1 and M2. And these models generate vectors v1 and v2.
Then we will build two long vectors vlong as, size(vlong) = size(v1) + size(v2) for each models.
Then we will pad each of them with either preceding or following zeroes.
Example:
v1 = [1, 2, 3, 4, 5]
v2 = [10, 20, 30, 40, 50, 60, 70, 80, 90, 100]
then; size(vlong) = 5 + 10 = 15
So, we will be sending two vectors to AquilaDB, each of them are:
v1long = [1, 2, 3, 4, 5, 0, 0, 0, 0, 0, 0, 0, 0, 0, 0]
v2long = [0, 0, 0, 0, 0, 10, 20, 30, 40, 50, 60, 70, 80, 90, 100]
Filter vector padding
If you have more than 4 models, we highly recommend you to use a better Machine Learning model that combine all of these and then use Positional Padding. But, of course there might be requirements apart from that, then use this method.
Consider designing filter vectors for each model. For example, we have two models M1 and M2. And these models generate vectors v1 and v2. Then, design two filter vectors f1 and f2 as,
f1 = [0, 0, 0, 0, 0, 0, ........ n items]
f1 = [1, 1, 1, 1, 1, 1, ........ n items]
value of n is a variable should be chosen to maximize the distance between two filters.
So, we will be sending two vectors to AquilaDB, each of them are:
v1long = append(f1, v1)
v2long = append(f2, v2)
Send data to AquilaDB for indexing
# install AquilaDb python client

! pip install aquiladb

# import AquilaDB client
from aquiladb import AquilaClient as acl
# create DB instance.
# Please provide the IP address of the machine that have AquilaDB installed in.
db = acl('192.168.1.102', 50051)

# let's get our hands dirty for a moment..
# convert a sample dirty Document
sample = db.convertDocument([0.1,0.2,0.3,0.4], {"hello": "world"})
# and print it
sample
{'vector': {'e': [0.1, 0.2, 0.3, 0.4]}, 'b64data': b'{"hello":"world"}'}
As you can see above, this is what happens when a document along with a vector is serialized. This will then be sent to AquilaDB.
add documents to AquilaDB
In the code below we do a lot of things. So, please pay attention to the comments to see how it is done.
# We are going to encode a small portion (6000) images/text that we have downloaded.
# You can add more if you have got enough interest, patience and a good machine.

# batch length - to be sent to mobilenet for encoding
blen = 500
# which index to start encoding - ofcause its 0
vstart = 0
# How much images/text we need to encode
vend = 6000

# convert text embeddings to numpy array
txt_emb = np.array(txt_emb)

# iterate over each batch of image/text data/embedding
for ndx in range(vstart, vend, blen):
    # encode each batch of images
    image_encoding = get_image_encodings(np.true_divide(np.array(img_emb[ndx:ndx+blen]), 255), module)

    # pad image and text vectors - this is discussed in section `filter based indexing`
    # select subset of data we're interested for text embeddings
    text_embedding = txt_emb[ndx:ndx+blen]
    # pad text encodings with trailing zeros
    text_embedding = np.pad(text_embedding, ((0, 0), (0, 1280)), 'constant')
    # pad image encodings with preceding zeros
    image_encoding = np.pad(image_encoding, ((0, 0), (100, 0)), 'constant')

    # finally, create and send each document
    for i in range(blen):
        # create document - text
        doc_txt = db.convertDocument(text_embedding[i], {"image_name": image_descriptions.iloc[ndx+i][0]})
        # create document - image
        doc_img = db.convertDocument(image_encoding[i], {"image_name": image_descriptions.iloc[ndx+i][0]})

        # send documents - text
        db.addDocuments([doc_txt])
        # send documents - image
        db.addDocuments([doc_img])

    # Wooh! done with nth batch
    print('Done: ', ndx, ndx+blen)
Done:  0 500
Done:  500 1000
...
Done:  5500 6000
Show off final results
Yeah, we have indexed all our images and texts in AquilaDB. Now it's time to retrieve them either by text search or by image search.
search images by text
import json

# search by text
def search_by_text(text_in):
    # load saved model
    fasttext_model = ft.load_model("ftxt_model.bin")
    # generate embeddings
    text_embedding_ = fasttext_model.get_sentence_vector(text_in)
    # pad text embedding
    text_embedding_ = np.pad([text_embedding_], ((0, 0), (0, 1280)), 'constant')

    # convert query matrix
    q_matrix = db.convertMatrix(np.asarray(text_embedding_[0]))
    # do k-NN search
    k = 10
    result = db.getNearest(q_matrix, k)
    return json.loads(result.documents)

# render images
def render_images(doclist):
    for doc in doclist:
        filename = doc["doc"]["image_name"]
        im = Image.open('./flickr30k_images/flickr30k_images/' + filename)
        fig = plt.figure()
        plt.imshow(im)
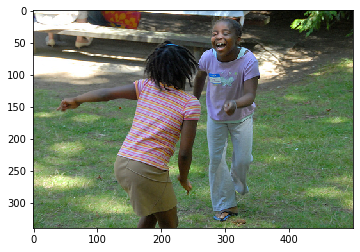
text to image search 1
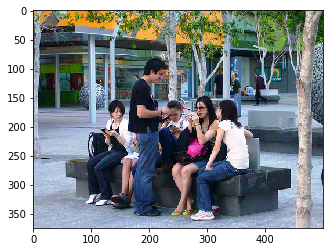
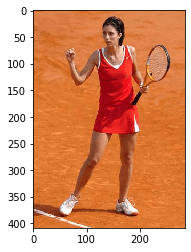
render_images(search_by_text('people sitting on bench'))


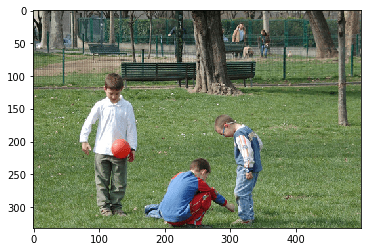
text to image search 2
render_images(search_by_text('kids playing in garden'))


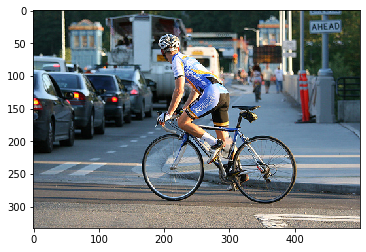
text to image search 3
render_images(search_by_text('man riding a bike'))


search images by image
# search by image
def search_by_image(image_in, w, h, module):
    # load image
    q_image = load_rsize_image('./flickr30k_images/flickr30k_images/' + image_in, w, h)
    q_image = np.array([np.asarray(q_image)])
    # generate encodings
    image_encoding_ = get_image_encodings(np.true_divide(q_image, 255), module)
    # pad image encodings
    image_encoding_ = np.pad(image_encoding_, ((0, 0), (100, 0)), 'constant')

    # convert query matrix
    q_matrix = db.convertMatrix(np.asarray(image_encoding_[0]))
    # do k-NN search
    k = 10
    result = db.getNearest(q_matrix, k)
    return json.loads(result.documents)
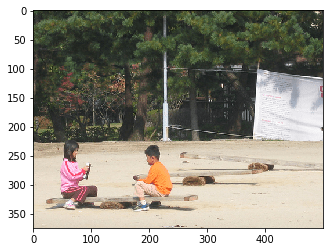
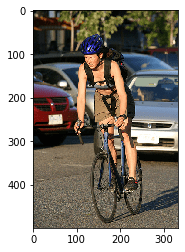
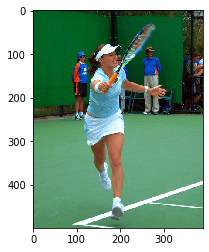
image to image search 1
q_im_file = '134206.jpg'

# show query image
render_images([{"doc":{"image_name": q_im_file}}])

# do search
render_images(search_by_image(q_im_file, im_width, im_height, module))


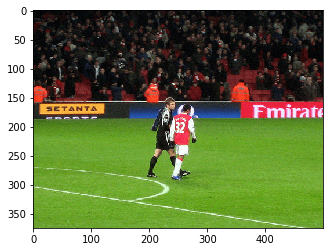


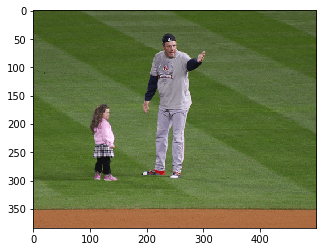
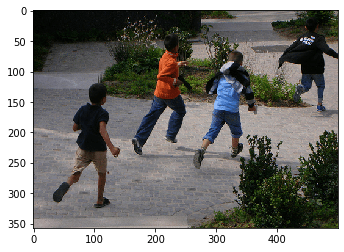
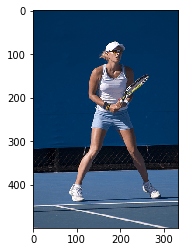
image to image search 2
q_im_file = '11808546.jpg'

# show query image
render_images([{"doc":{"image_name": q_im_file}}])
# do search
render_images(search_by_image(q_im_file, im_width, im_height, module))


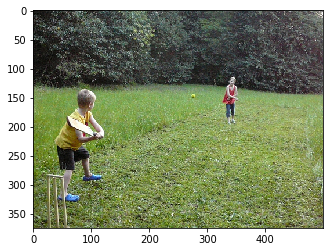
image to image search 3
q_im_file = '14526359.jpg'

# show query image
render_images([{"doc":{"image_name": q_im_file}}])
# do search
render_images(search_by_image(q_im_file, im_width, im_height, module))

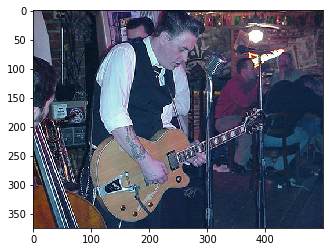


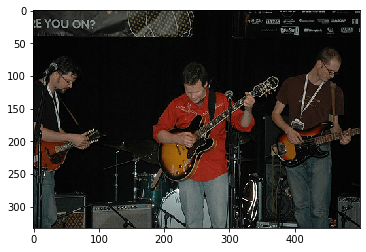


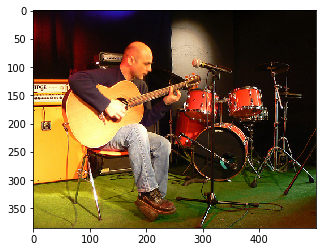


image to image search 4
q_im_file = '21164875.jpg'

# show query image
render_images([{"doc":{"image_name": q_im_file}}])
# do search
render_images(search_by_image(q_im_file, im_width, im_height, module))
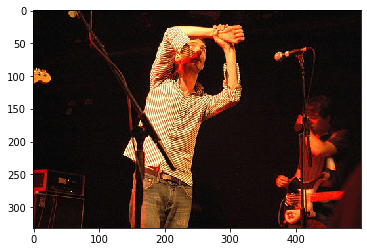

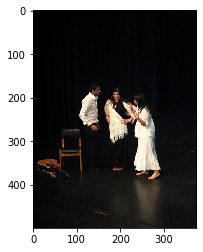

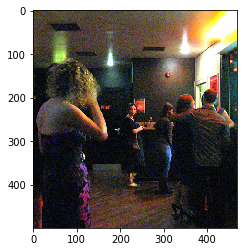


image to image search 5
q_im_file = '23008340.jpg'

# show query image
render_images([{"doc":{"image_name": q_im_file}}])
# do search
render_images(search_by_image(q_im_file, im_width, im_height, module))


That's all for this tutorial. Thanks, happy hacking..!

Top comments (0)