Step 1
Create S3 bucket and enable it for static website hosting
Go to AWS Management Console > Search for S3
At this junction, we need to create a bucket for the project.
Each S3 bucket in AWS needs to have a unique name as bucket names in AWS have to be unique globally
The region where I ran my account was automatically made the region for the bucket
- For Bucket Type: General Purpose
- For Bucket Name: I used harrisonawscloudclubproject
Disable the ACL and also untick the Block All Public Access. Without the Block All Public Access unticked, there wouldn’t be any access to the bucket.
- Unticking the Block All Public Access box triggered this warning but ignore
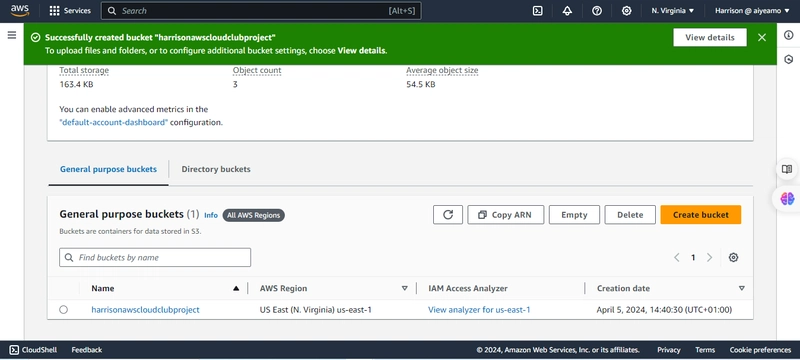
- Scroll down and click on Create Bucket
- Wait for the bucket to be created
Bucket Created Successfully !!
Step 2
Enable Static Website Hosting
Now that the bucket has been created and has been made public, it's time to enable static website hosting
To achieve that;
- Click on the name of the bucket that you created
- You see the options on the tabs, select the PROPERTIES tab option
- Scroll to the end of the PROPERTIES page
- Static website hosting is the last option on the page
Click on the Edit Button
Click on the Enable Button
- Under the Hosting Type, the Host a Static Website is already enabled.
- Fill the index document with index.html
- Click on Save Changes
Static Website Hosting enabled successfully!
Go back to PROPERTIES, scroll down again to STATIC WEBSITE HOSTING, then click on the link you see in that section
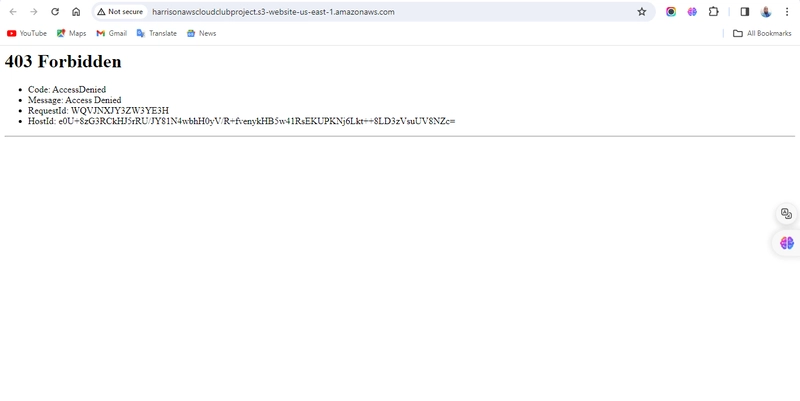
Once clicked, it opens a new tab that shows an error page:
This is so because we haven’t configured the bucket policy to allow public access. Even though we unticked the Block All Public Access option, we still need to configure the BUCKET POLICY.
Step 3
Enable Public Access to the Bucket
- Head to the PERMISSIONS Tab
- Scroll down to BUCKET POLICY
- Click the EDIT button on BUCKET POLICY
- Click on POLICY GENERATOR
- Click on SELECT TYPE OF POLICY dropdown
- Choose S3 BUCKET POLICY
- In the PRINCIPAL box, input “*” (this gives permission to every type of access)
- On the ACTIONS dropdown, choose GET OBJECTS
- Go back to the EDIT BUCKET POLICY page, copy BUCKET ARN
- Go back to the POLICY GENERATOR page and paste it in the AMAZON RESOURCE NAME box
- Click on ADD STATEMENT button
- Click on GENERATE POLICY
- A POLICY JSON DOCUMENT Modal pops up, copy the policy off the modal and click CLOSE
- Go back to EDIT BUCKET POLICY and paste it there and click on SAVE CHANGES
NOTE: If you are receiving an error message, make sure you put “/*” at the end of the AMAZON RESOURCE NAME.
STEP 4
Upload Objects into the Bucket
Upload 2 files: index.html and the image that is going to be reflected in the index.html
- Click on OBJECTS
- Click on UPLOAD
- Click on ADD FILES
- Files are uploaded and you click on UPLOAD
- Wait to get the UPLOADED SUCCEEDED message
STEP 5
Confirm that the static website hosting is working
- Click on PROPERTIES
- Scroll down to STATIC WEBSITE HOSTING
- Click on the URL in that section and it opens a new tab showcasing the files we uploaded to the S3 Bucket
Now, it is important to mark and serve content through CLOUDFRONT DISTRIBUTION to be able to make use of the CACHING FUNCTION of CLOUD FRONT to reduce latency and continuous calls to the S3 Bucket.
STEP 6:
Configure your Cloudfront
Go to CLOUDFRONT
- Click on CREATE DISTRIBUTION
- ORIGIN DOMAIN: The S3 Bucket you created
- Scroll down to ORIGIN ACCESSS
- Select ORIGIN ACCESS CONTROL SETTING
- Select the bucket you created
- Back to the CREATE DISTRIBUTION page,
- Under the WEB APPLICATION FIREWALL (WAF), Select DO NOT ENABLE SECURITY PROTECTIONS
- Now, scroll down to the DEFAULT ROOT OBJECT, type in the name of your HTML file
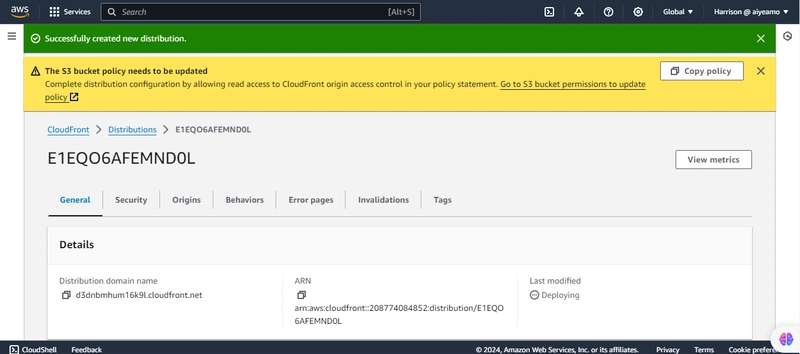
- Scroll to the end of the page and click on CREATE DISTRIBUTION
Click on the CREATE POLICY button
STEP 7
Back to S3
- Now, go back to S3
- Select the bucket that you created
- Go to PERMISSIONS, go to BLOCK PUBLIC ACCESS, then click on EDIT
- Tick on BLOCK ALL PUBLIC ACCESS
- Click on SAVE CHANGES
- Type CONFIRM in the Modal that pops up
- Then click on the CONFIRM button
- Now, click on EDIT on the BUCKET POLICY
- Paste the policy you copied from CLOUDFRONT
- Click on SAVE CHANGES
Step 8
Back to CloudFront
Navigate back to CLOUDFRONT
- Click on the DISTRIBUTION
- Under GENERAL, locate the DISTRIBUTION DOMAIN NAME under the DETAILS section.
- Copy the DISTRIBUTION DOMAIN NAME
- Now, go back to the tab created from the STATIC WEBSITE HOSTING and refresh
- You will find out that the page isn’t accessible anymore; it will report a 403 FORBIDDEN error message
Now, paste the DISTRIBUTION DOMAIN NAME link on a tab and tap ENTER
You will realize that our S3 Files are being served through CLOUDFRONT.


Top comments (0)