Note: This article is part of the course Introduction to iOS using UIKit I've given many times in the past. The course was originally in Spanish, and I decided to release it in English so more people can read it and hopefully it will help them.
SwiftUI? UIKit?
When we develop apps for iOS, we have two base frameworks we can choose from. SwiftUI and UIKit.
Both of them allow us to develop user interfaces (UIs).
SwiftUI
Released in 2019. It's a framework for building declarative user interfaces. It's modern and its approach is similar to React, Flutter and Jetpack Compose in other platforms.
It's clearly the future of iOS development.
You might be forced to use UIKit, because of backwards compatibility, or because it's the framework used in the company you work for. If not, I recommend closing this course and start learning SwiftUI using some the great tutorials in the web, like Paul Hudson's 100 days of SwiftUI.
UIKit
UIKit is the framework all iOS user interfaces are based upon. SwiftUI uses many UIKit components under the hood when compiling for iOS, so knowing UIKit is a great knowledge to have, even if you aren't directly using it in a daily basis.
Another important thing is that SwiftUI can be extended using UIKit components. And you can embed SwiftUI in UIKit if needed. So both of them are complementary to some extent.
In this course we'll focus on UIKit, using MVC as the design pattern for organizing our code.
Model - View - Controller
Design patterns are solutions for software design problems. If many people experience the same problems over and over again, it makes sense to document the ways that problem can be solved, regardless of the specific language or platform you're working on.
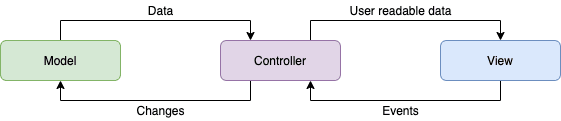
Model View Controller (MVC) is the design pattern Apple recommends to use in order to design iOS applications.
The MVC pattern divides classes in three different groups or layers:
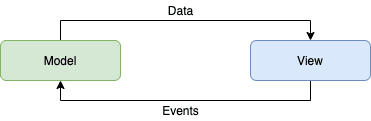
In the Model we have all the classes that are responsible for managing the data for your app.
In the View we include all the classes that are responsible for showing the data (or anything needed) to your users.
So we have a model that holds our data and a view that shows that data to our users.

So, the question here becomes: how does the view know the model and what subset of the model data it should be showing to the user?
As iOS developers, we are developers of user interfaces. The goal of any user interface is to provide a consistent representation of the internal state of a system in a visual way to a user.
The internal state is known as a model, and can be as simple as plain Swift classes.
The visual representation is known as view and we'll develop it using components defined in UIKit.
As user interfaces developers we have two goals:
- First, we must send the data from the model to the view. The view must always reflect the current model state.
- Second, we must reflect the user actions in model data changes. We have to modify the data in the model according to what happens in the user interface.
Both of those actions are done in the controller. At least at the beginning, you can assume that every screen is controlled by a controller.
Each view is a subclass of UIView, defined in UIKit.
Each controller is a subclass of UIViewController, defined in UIKit.
Each controller has a root view. That root view can be accessed through the .view property in UIViewController.
The View
The view is the layer responsible of visually representing the state of the model to a user, and it's organized in the form of a tree.
Quick recap for those who don't know/remember what a tree is: A tree is a hierarchical data structure composed by nodes. Starting from a root node, each node may have children, which may also have other children node, until we finally get nodes without children. Those nodes are known as leaves.
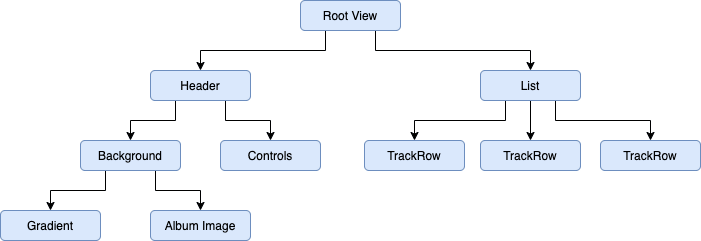
The view is organized as a tree. That means that we will have a root view, which can be accessed from our view controller. Starting from our root view, we may find children views, or subviews, which may have their own subviews.
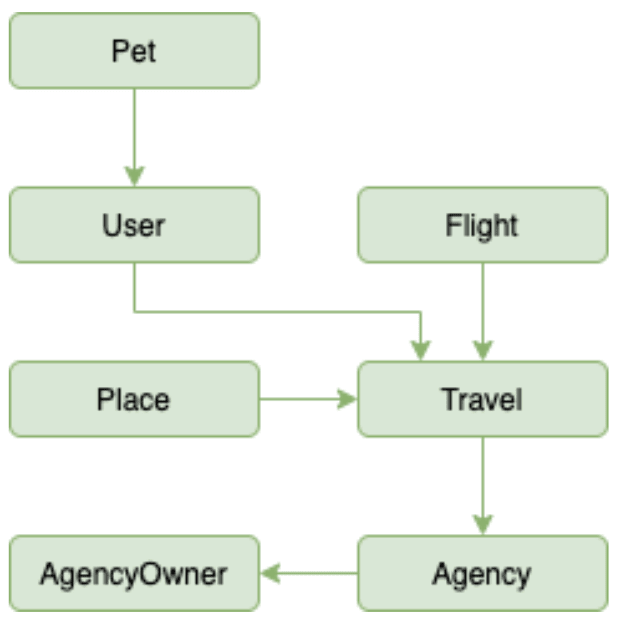
So, for this example:
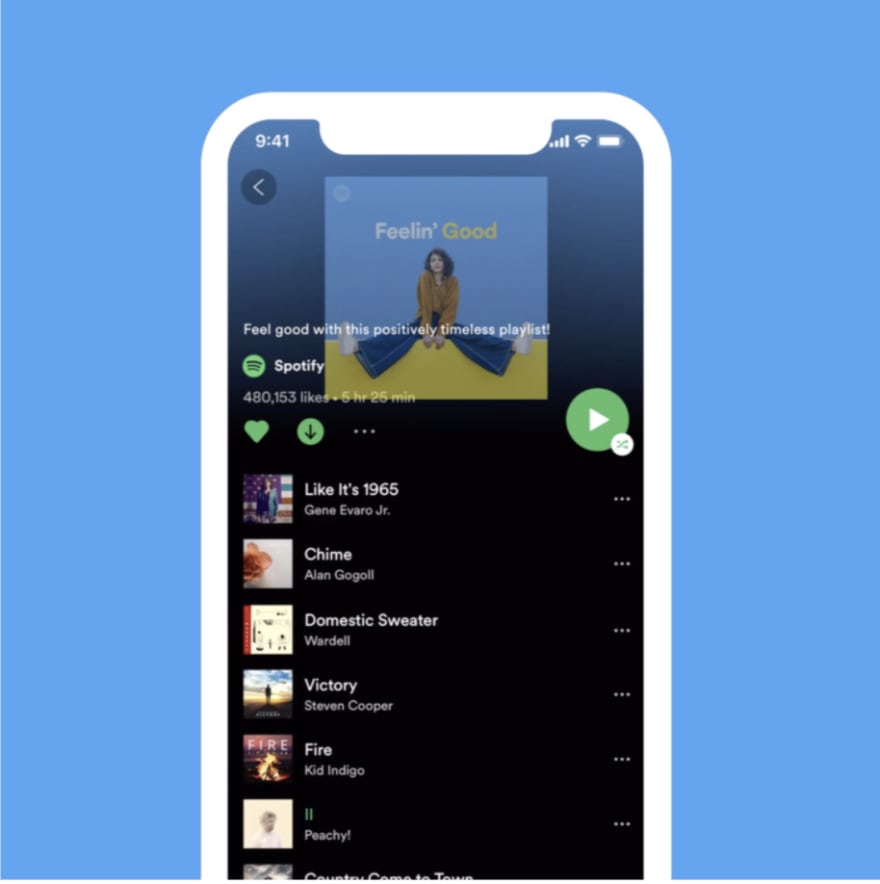
This could be a possible (simplified) view tree (or view hierarchy):
Constraints
Given that the views are the elements shown to the user, and that they compose in form of tree structures, the constraints are the elements that will let us define the exact place where each view should be shown in the screen.
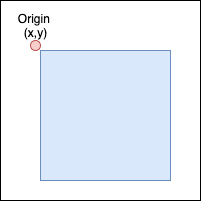
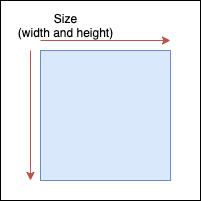
In order to place a view in screen, we must define two values: origin and size.
The origin is the point from where the view starts to be drawn. This value is expressed as a coordinate (CGPoint to be precise), defining the top left corner of the view.
While the size is a value composed of the width and size of the view (CGSize to be precise).
Constraints are just that, constraints, that we apply to our views. The requisite is that we need to determine the origin and size of our views in such a way that isn't ambiguous to UIKit.
If after we apply our constraints to our views, they can take more than one possible value for any of those dimensions (origin.x, origin.y, size.width, size.height), then the constraints applied to the view are considered ambiguous, and we can get non expected results.
We must be specific.
A constraint is composed by:
- origin view + origin attribute
- destination view + destination attribute
- constant
- multiplier (by default it's 1.0)
- relationship operator (by default, and almost always, it's going to be ==)
- priority (by default, 1000 (required)).
Based on these elements, we can build EVERY POSSIBLE LAYOUT. That's why the UIKit constraints system is so powerful.
Attributes can be:
- leading
- trailing
- top
- bottom
- width
- height
- center X
- center Y
Example 1
We want to add a view to a container in such a way te view will occupy the total space of its container.
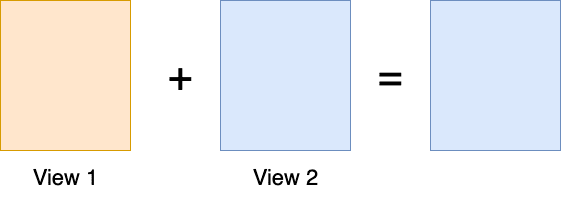
Solution:
- View2.top == View1.top (constant: 0)
- View2.trailing == View1.trailing (constant: 0)
- View2.bottom == View1.bottom (constant: 0)
- View2.leading == View1.leading (constant: 0)
There is other way for them to follow these constraints than to be equal in terms of origin and size. And that's the way to think on constraints.
We left them no choice. The only thing they can do is to fit in the place we want.
Alternative solution:
- View2.width == View1.width (constant: 0)
- View2.height == View1.height (constant: 0)
- View2.centerX == View1.centerX (constant: 0)
- View2.centerY == View1.centerY (constant: 0)
This means that we can get the same layout using different sets of constraints.
Example 2
We want a view that is inside a container view with a margin of 20 points.
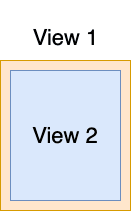
Solution:
- View2.top == View1.top (constant: 20)
- View2.trailing == View1.trailing (constant: 20)
- View2.bottom == View1.bottom (constant: 20)
- View2.leading == View1.leading (constant: 20)
Example 3
We want two views that are inside a third one, and both of them have the same size.
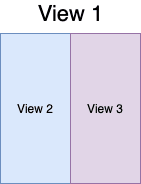
The solution for this problem is a bit more complex, so let's divide it in subproblems.
The first thing we have to fix is how to get View2 to stay on the left part of the container, View1. We can get that in a simple way:
- View2.top == View1.top (constant: 0)
- View2.leading == View1.leading (constant: 0)
- View2.bottom == View1.bottom (constant: 0)
Then, we can add do the same for View3, in order to have that anchored to the right side of its container:
- View2.top == View1.top (constant: 0)
- View2.leading == View1.leading (constant: 0)
- View2.bottom == View1.bottom (constant: 0)
- View3.top == View1.top (constant: 0)
- View3.trailing == View1.trailing (constant: 0)
- View3.bottom == View1.bottom (constant: 0)
And finally, we need to disambiguate how those two views, View2 and View3 are related (they need to be equal in size).
- View2.top == View1.top (constant: 0)
- View2.leading == View1.leading (constant: 0)
- View2.bottom == View1.bottom (constant: 0)
- View3.top == View1.top (constant: 0)
- View3.trailing == View1.trailing (constant: 0)
- View3.bottom == View1.bottom (constant: 0)
- View2.width == View3.width (constant: 0)
- View2.trailing == View3.leading (constant: 0)
How to create a project
- Open Xcode and click on File > New > Project...
- Select iOS > App in the newly opened window. Click on Next.
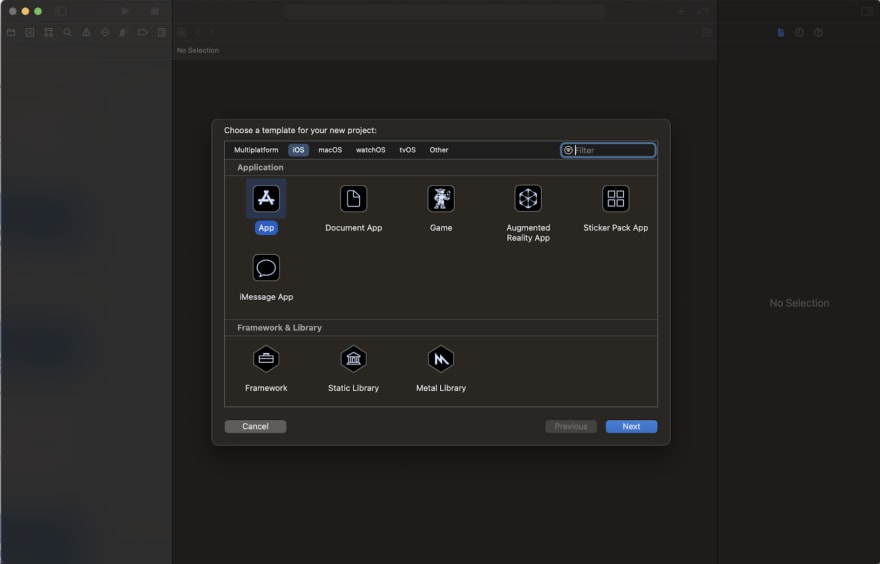
In Product Name insert the name of the application you'd like to create. In this case, "TutorialApp" is good enough. Don't pay attention to Team and Organization Identifier for now. Interface should be Storyboard, Language should be Swift, and let's unselect Use Core Data and Include Tests.

Select any location in your disk you may want to save your project in, and click on Create.
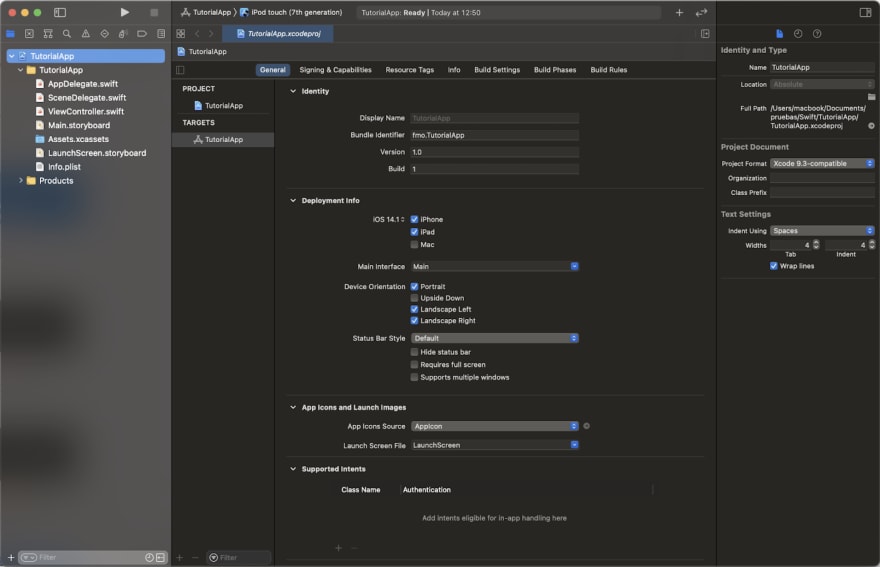
In the initial project you will find:
- AppDelegate.swift: It's a class where we'll have methods that are executed when something happened in our app (for instance, whenever the app goes to background). We can add custom code to those methods, in order to customize the app behavior.
- SceneDelegate.swift: Similar to AppDelegate (for now, let's assume this).
- ViewController.swift: An example UIViewController
- Main.storyboard: We'll explain it in more detail in the next section. It's a file where the UI is described in a visual way.
- Assets.xcassets: It's where we'll save graphic resources for our app. Images, Colors, etc.
- LaunchScreen.storyboard: It's where we define the "Splash" screen of our app, the loading screen that's shown at the application startup. It will only count with a view, without a controller, and can't have any kind of interactivity or animations.
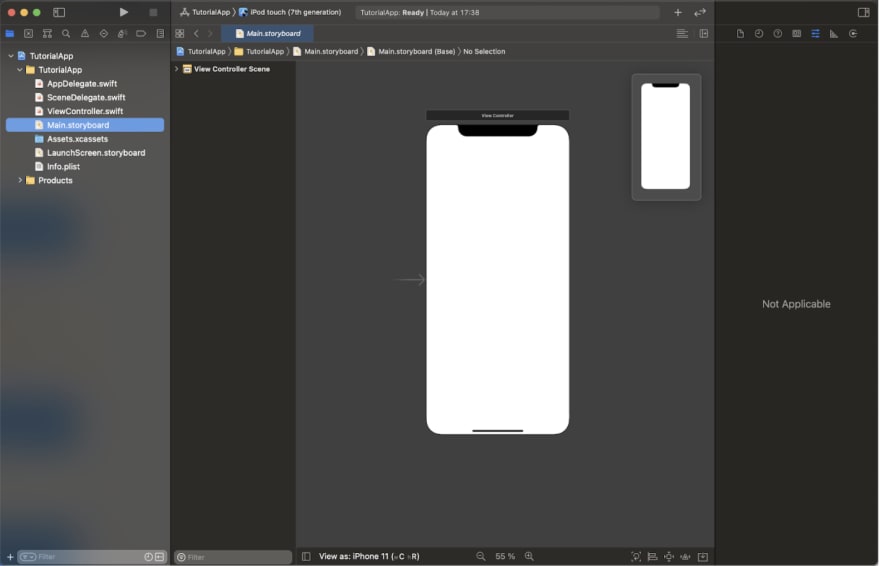
Interface Builder
UIs can be built programmatically. We can instantiate UIView subclasses and add NSLayoutConstraint (the constraints we've just learned) in plain Swift code. However, that can result in a lot of boilerplate. What's more, it isn't clear what kind of UI we're building in plain sight.
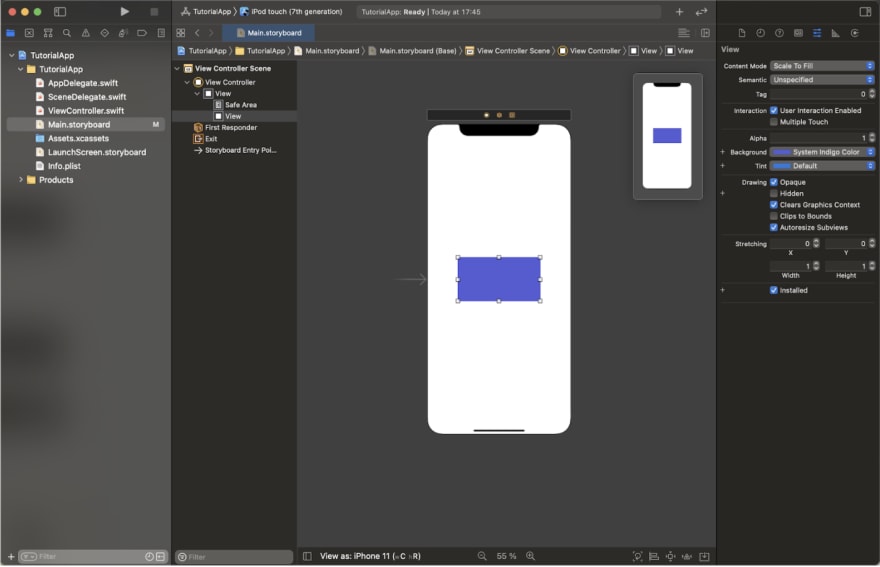
Xcode has a bundled tool called Interface Builder, which will allow us to develop user interfaces in a visual way. .storyboard and .xib files in our project are user interfaces descriptions.
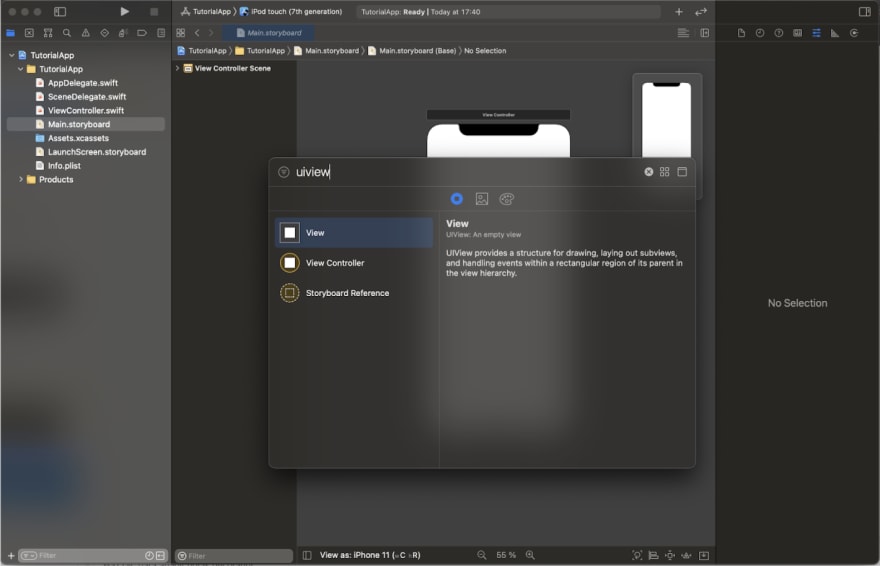
Once a storyboard or xib is opened in the Interface Builder, you can open the UIKit components library by pressing Cmd + Shift + L.

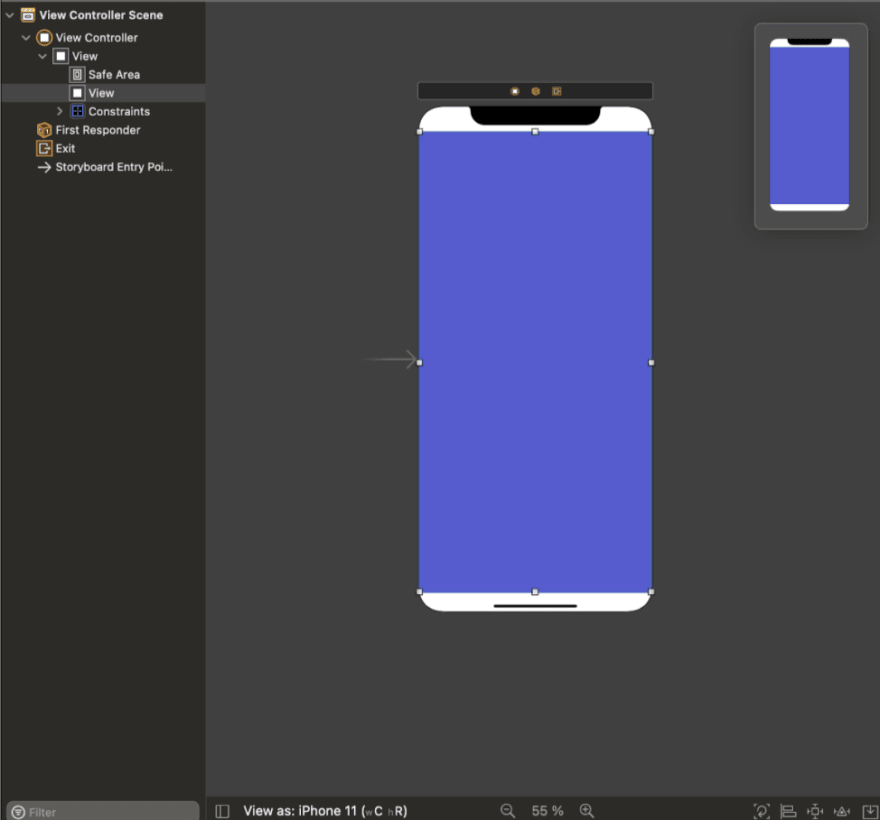
Let's search for UIView and select the first component that appears in the selector, and drag and drop it to our screen.
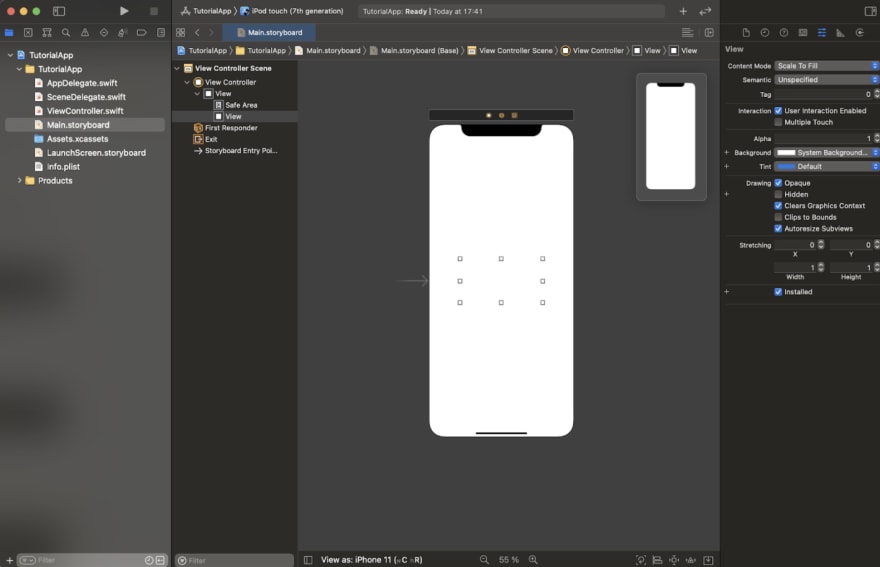
In the right side of the screen, we have an editor for the view attributes, when we have the view selected.
Let's change its background color.
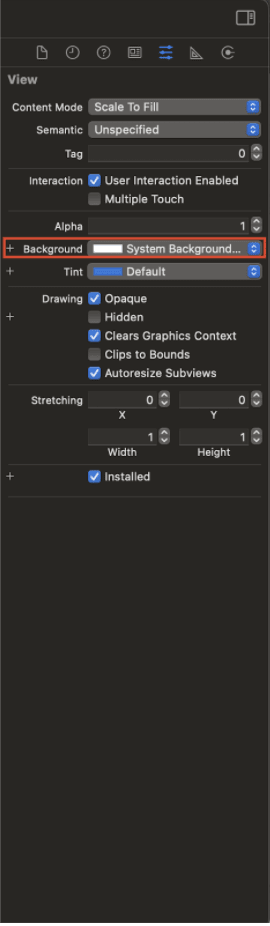
In the lower part of the interface builder interface, we'll find some important controls to create constraints.
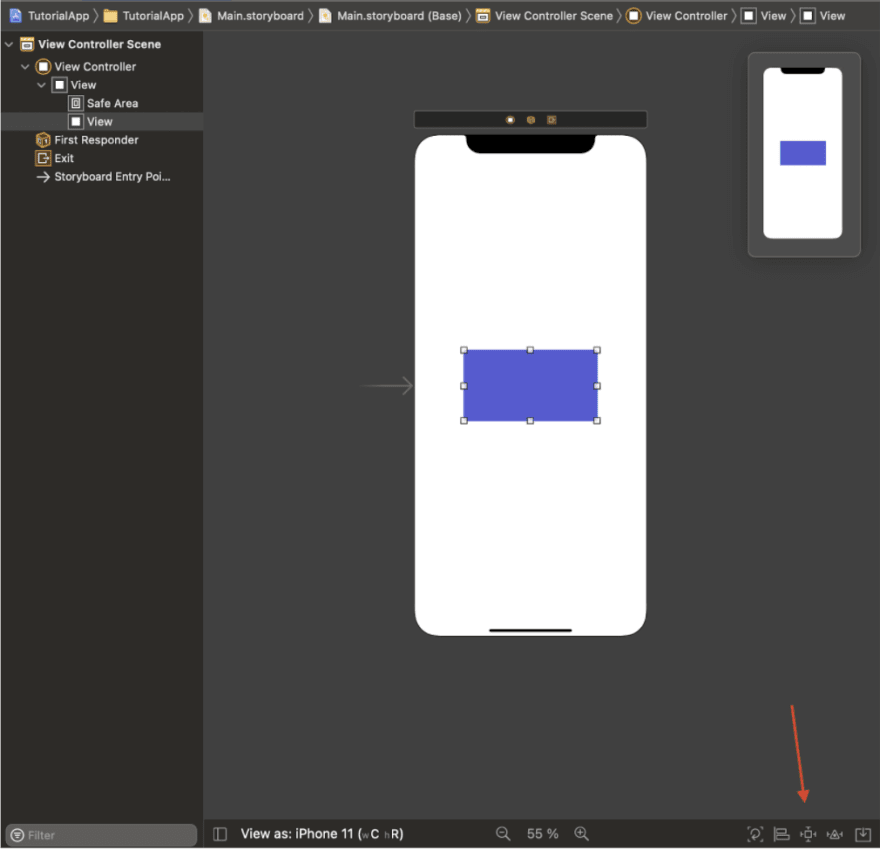
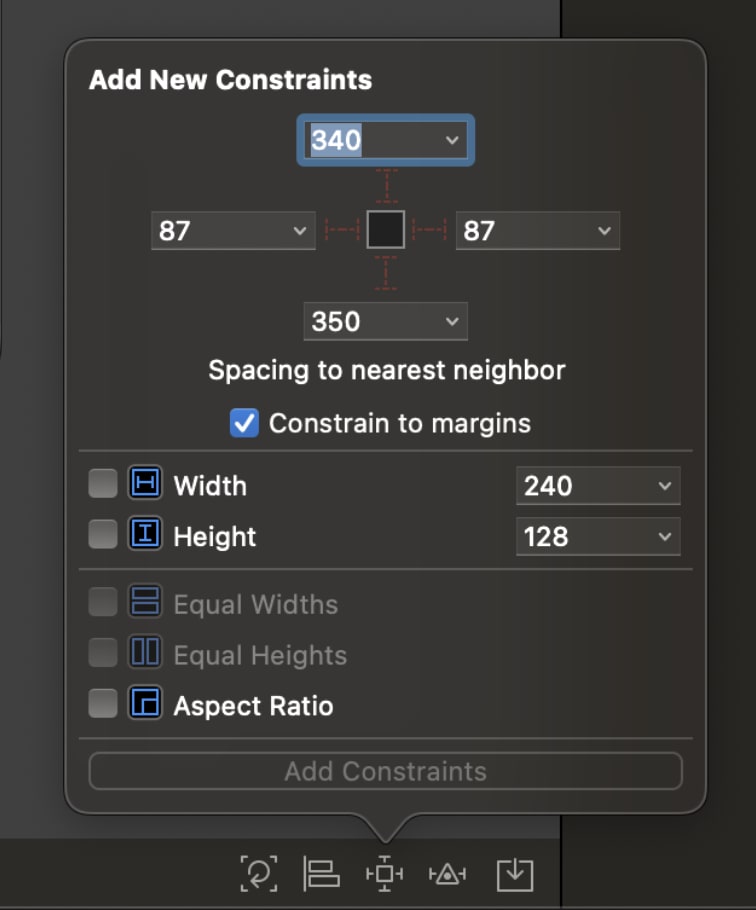
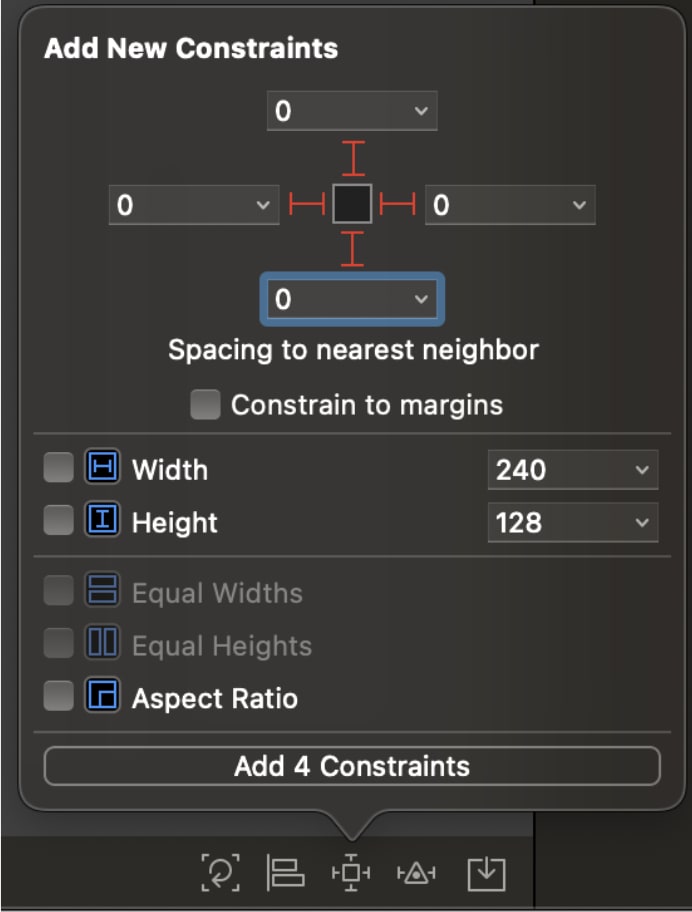
In the third option, we'll have tools to generate constraints for:
- width/height (just constants, without comparing them to other views)
- top
- leading
- trailing
- bottom
- aspect ratio (height vs width inside the same view)
That's always calculated from the view to the nearest neighbor.
Let's keep Constraint to margins always unchecked.
Inside the second option, we'll find tools to define:
- CenterX
- CenterY
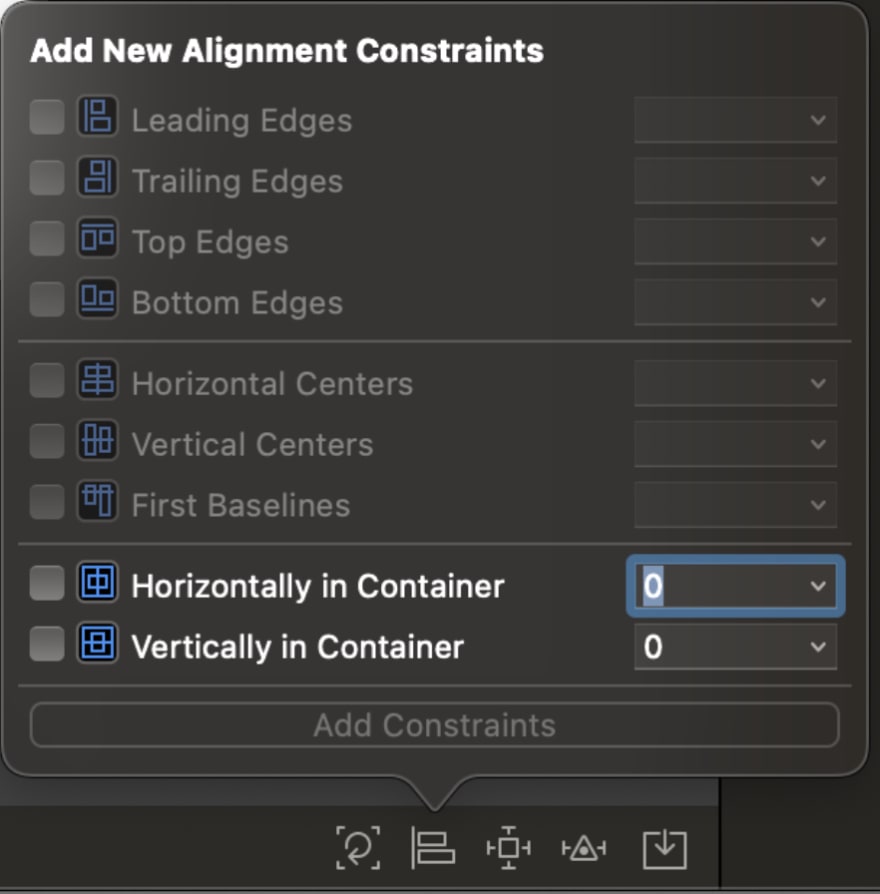
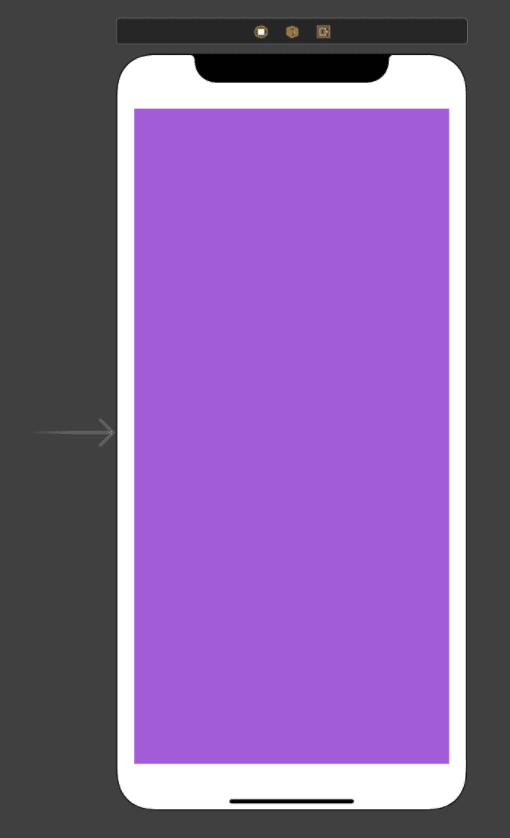
Let's create constraints to the top, leading, bottom, and trailing with 0 as their constant, so that view will have the same size as its container.
After that, let's click on Add 4 constraints.
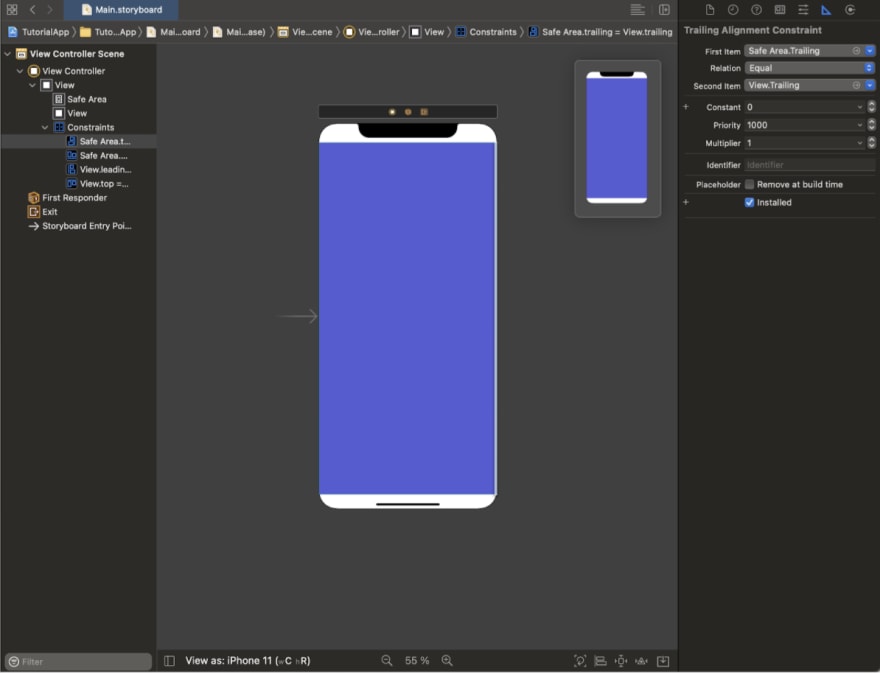
If we go to the sixth tab in the right panel, always maintaining the recently added view selected , we'll see its origin and size and the list of its constraints.
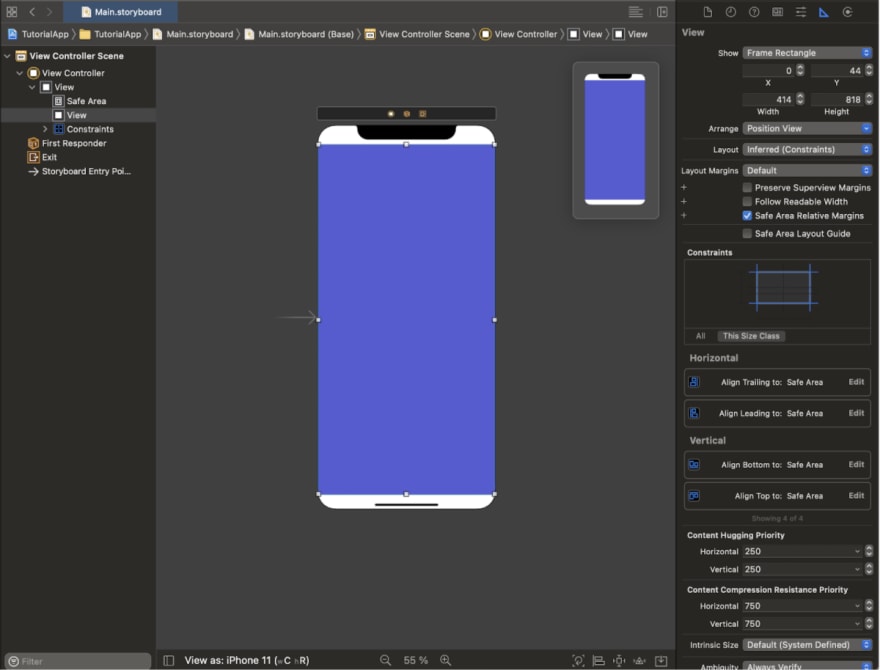
If we do double-click on any of those constraints, we'll see its details, with all the components we've detailed previously.
Note: To delete that constraint, we can press delete in our keyboards.
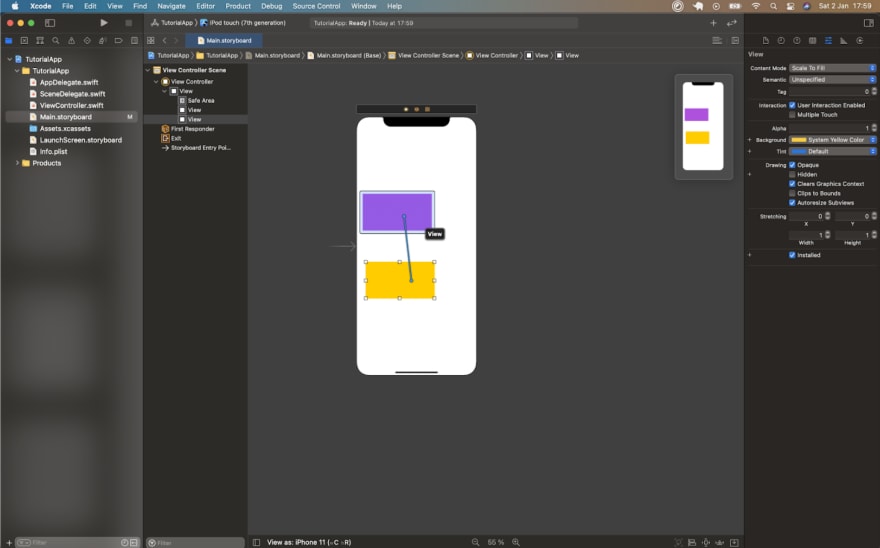
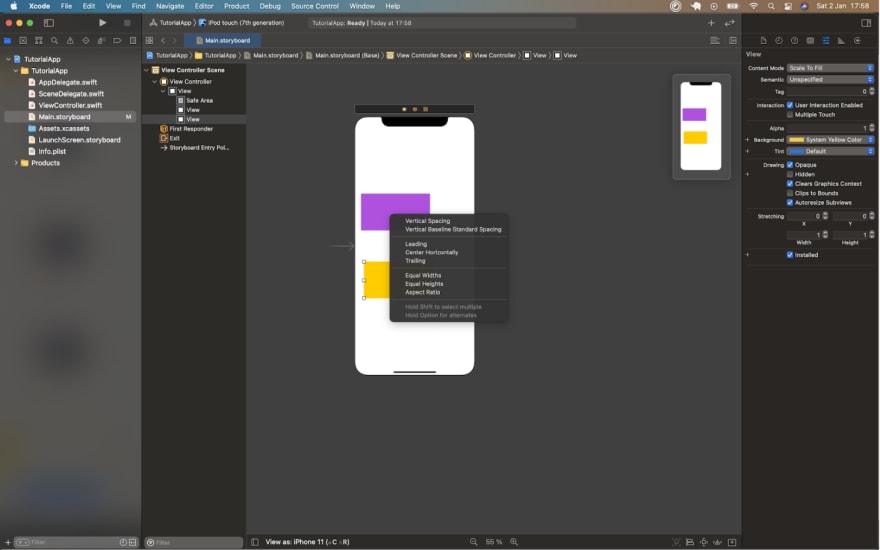
The other option while generating constraints is to keep control pressed, click on a view and drag and drop to another view.
Some options will appear then, and we'll be able to edit them from the panel at the right.
That will let us generate constraints of, for instance, width or height relative to another view.
Practice
In order to do the following exercises, we'll create views using simple colored rectangles, as we've seen in the section about Interface Builder .
You can practice with the examples I'll write in this section or with any example you can think of.
Exercise 1
A view with 20 pts of margin to its container
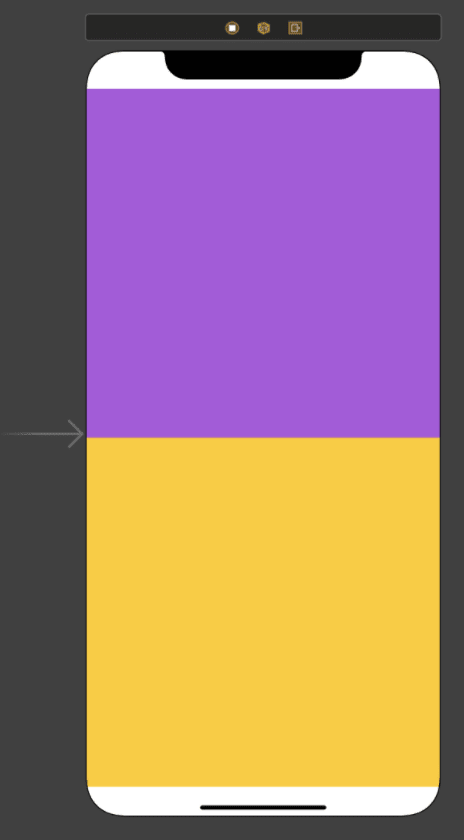
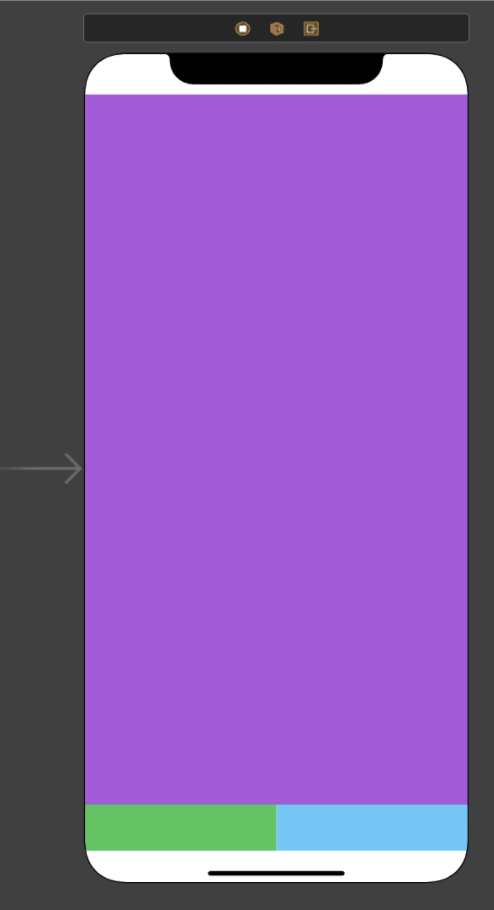
Exercise 2
Two views with the same height, one below the other:
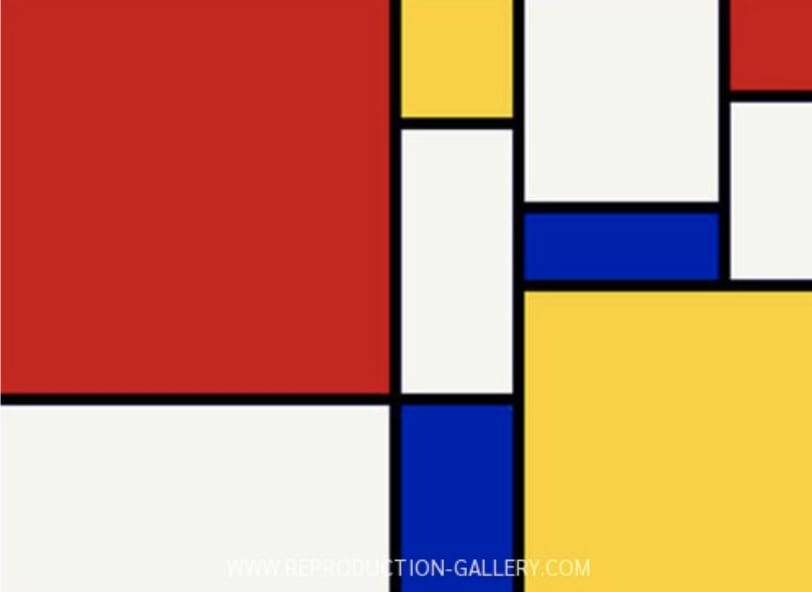
Exercise 3
These weird examples
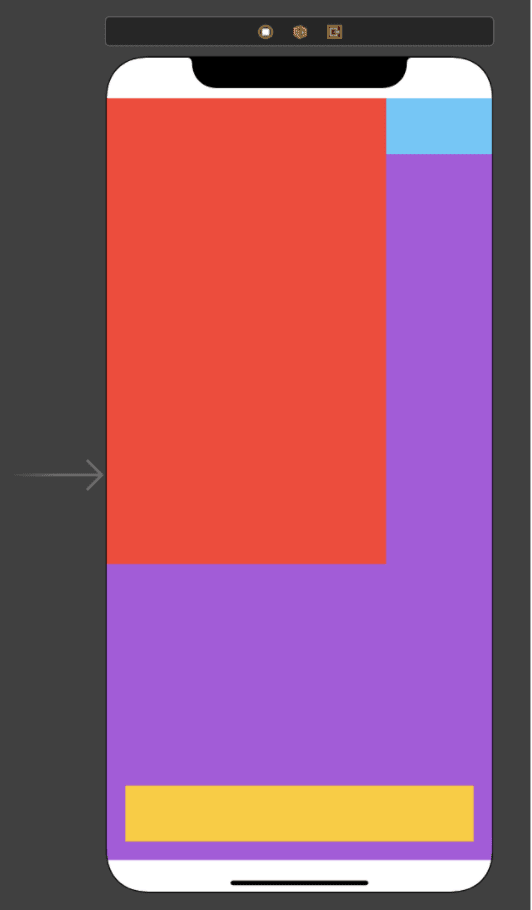
Or any Mondrian you like 😅


Top comments (1)
Thank you for this amazing tutorial