In this last installment, we will talk about Refactoring. Many of us surely use ReSharper to do effective code refactoring. Since the 2019 release of Visual Studio, refactoring capabilities have been greatly improved making other tools unnecessary. Let's see what we got.
Change identifier names
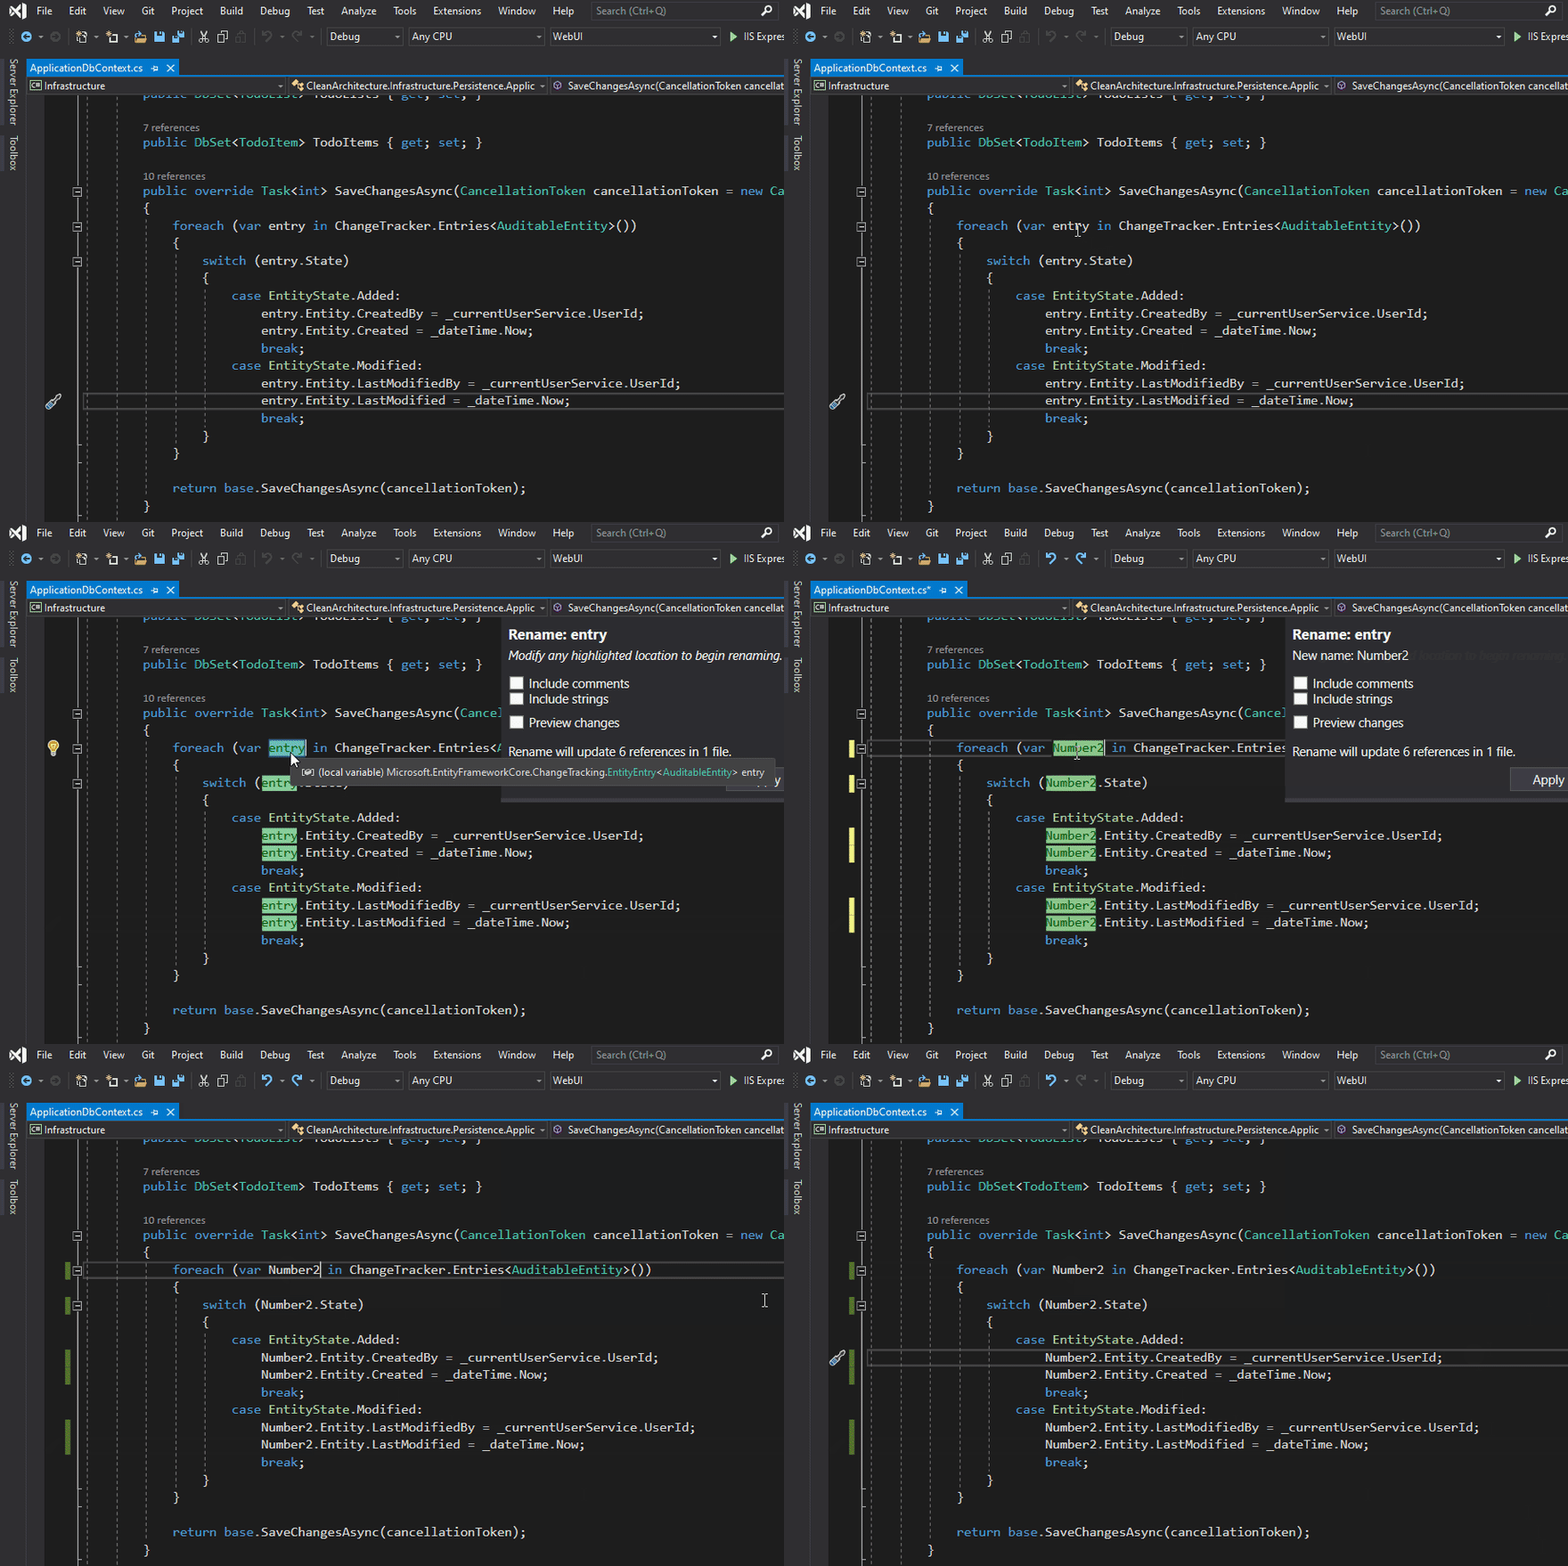
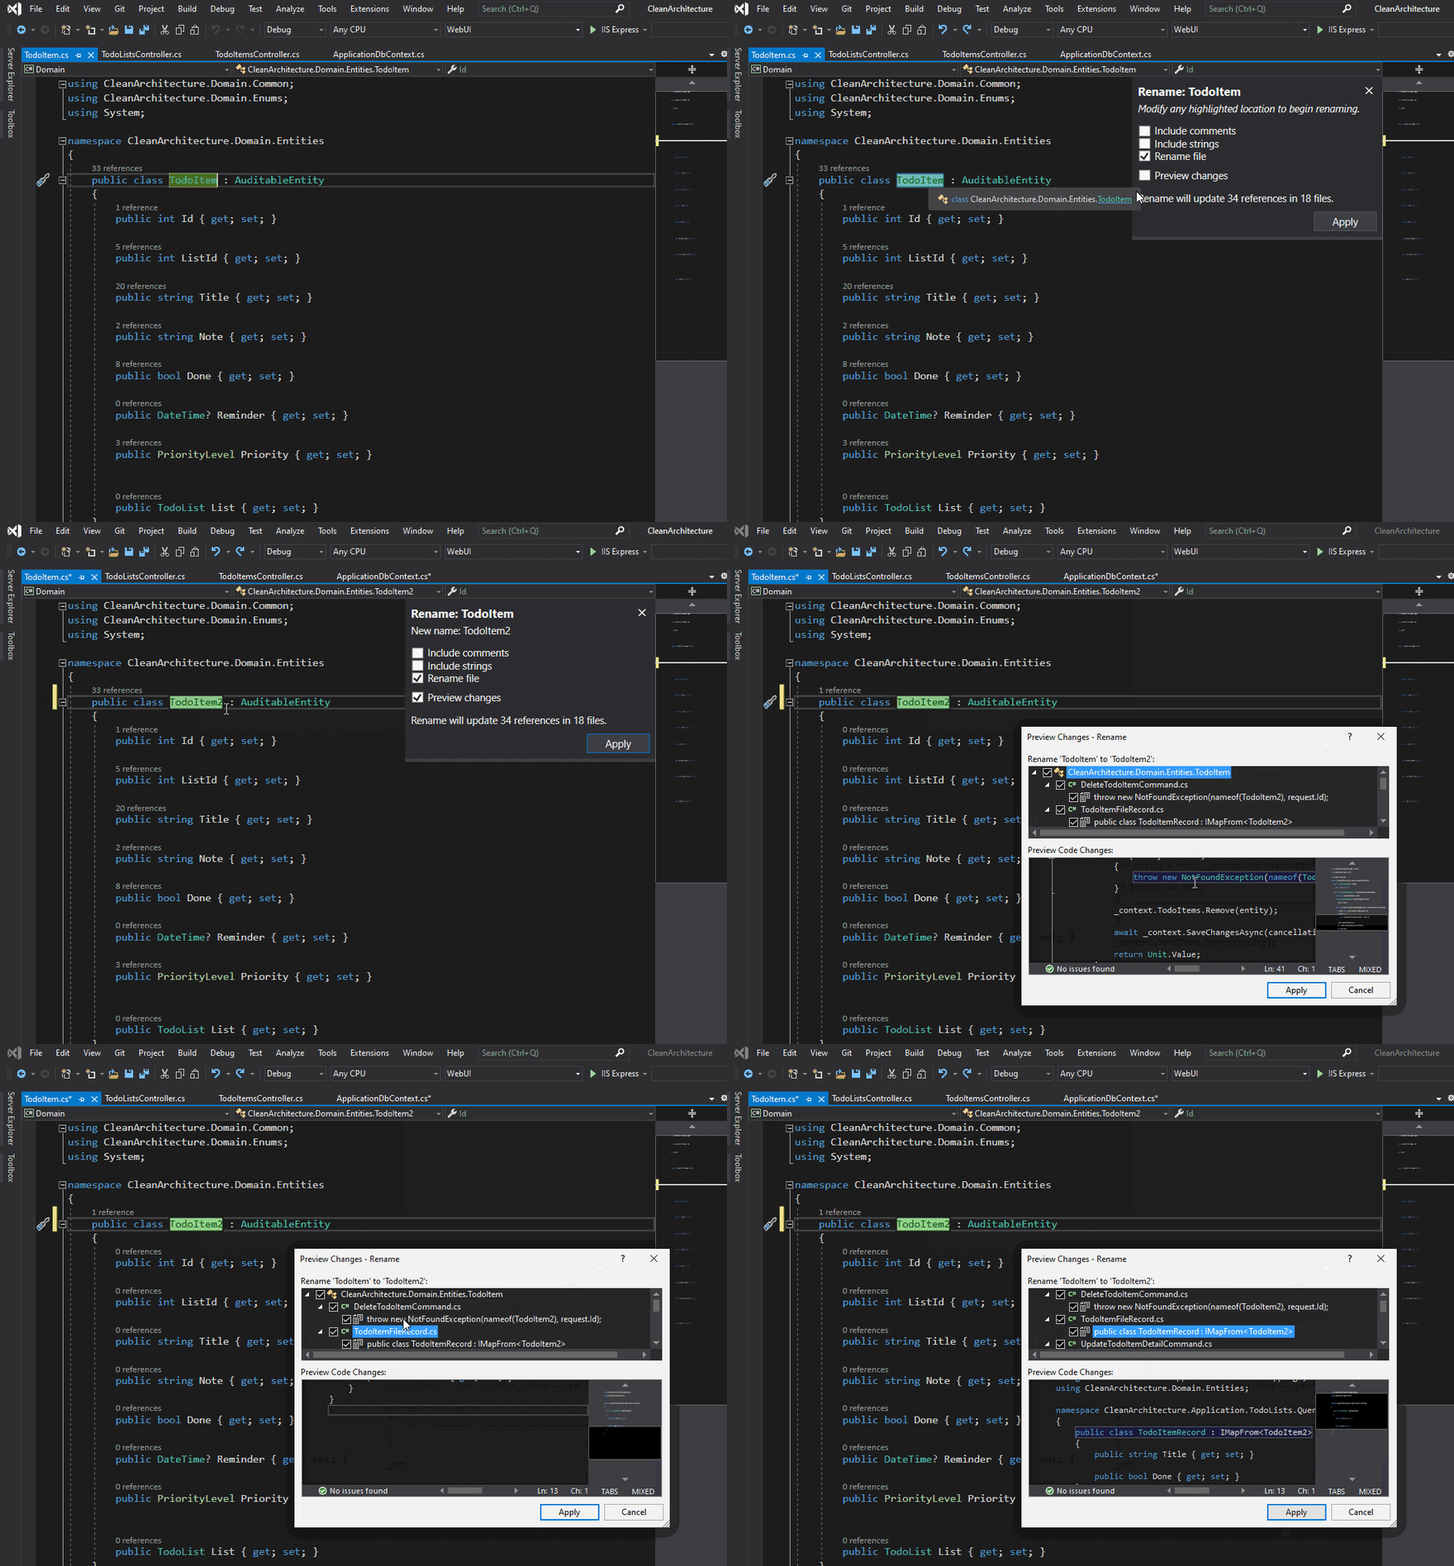
We can change the names of objects or identifiers such as variables, fields, classes, etc. To do this we will select the identifier and press Ctrl + R + R (R 2 times). As we start typing the new identifier name, we'll see how it changes in the places where the identifier is located.
Keep in mind that this change may not only affect the current file. We may need to rename references or rename files. Before making the final change, you can see in the preview window the changes that will be made. In the context window, we should select "Preview Changes" and press Apply.
Extract methods
You can activate Quick Actions and Refactorings using the Ctrl + key. I think it's one of the shortcuts that we should always keep in mind, if you didn't know it until now, paste a post-it on the monitor with this command.
If we want to extract a snippet to a method, we need to do the following steps: first, we select the desired lines of code, then press Ctrl +. , finally, we select "Extract method". Once selected it will be positioned in place, it will be green so that we type the name.
Clean and sort
Many times, when we refactor, maybe the using is deprecated or we add new ones quickly without having a default order. We can automatically clean and sort using from the menu Edit > Intellisense > Remove and Sort Usings.
It does not have a hotkey, but we can configure from the menu Tools > Options > Keyboards.
Another way, perhaps faster, is to position ourselves on the using and press the yellow lamp on the left. We will choose the option to Remove Unnecessary Usings. The most interesting thing about this window is that down to the right we can see several options, not only can we clean the document, but we can also do in a project or in the complete solution.
Using missing when copying and pasting
When we copy and paste code snippets, we may have errors due to the lack of the using needed for the east. To fix it, after pasting the snippet we press Ctrl + . and we choose to Add missing usings.
Create properties from the constructor
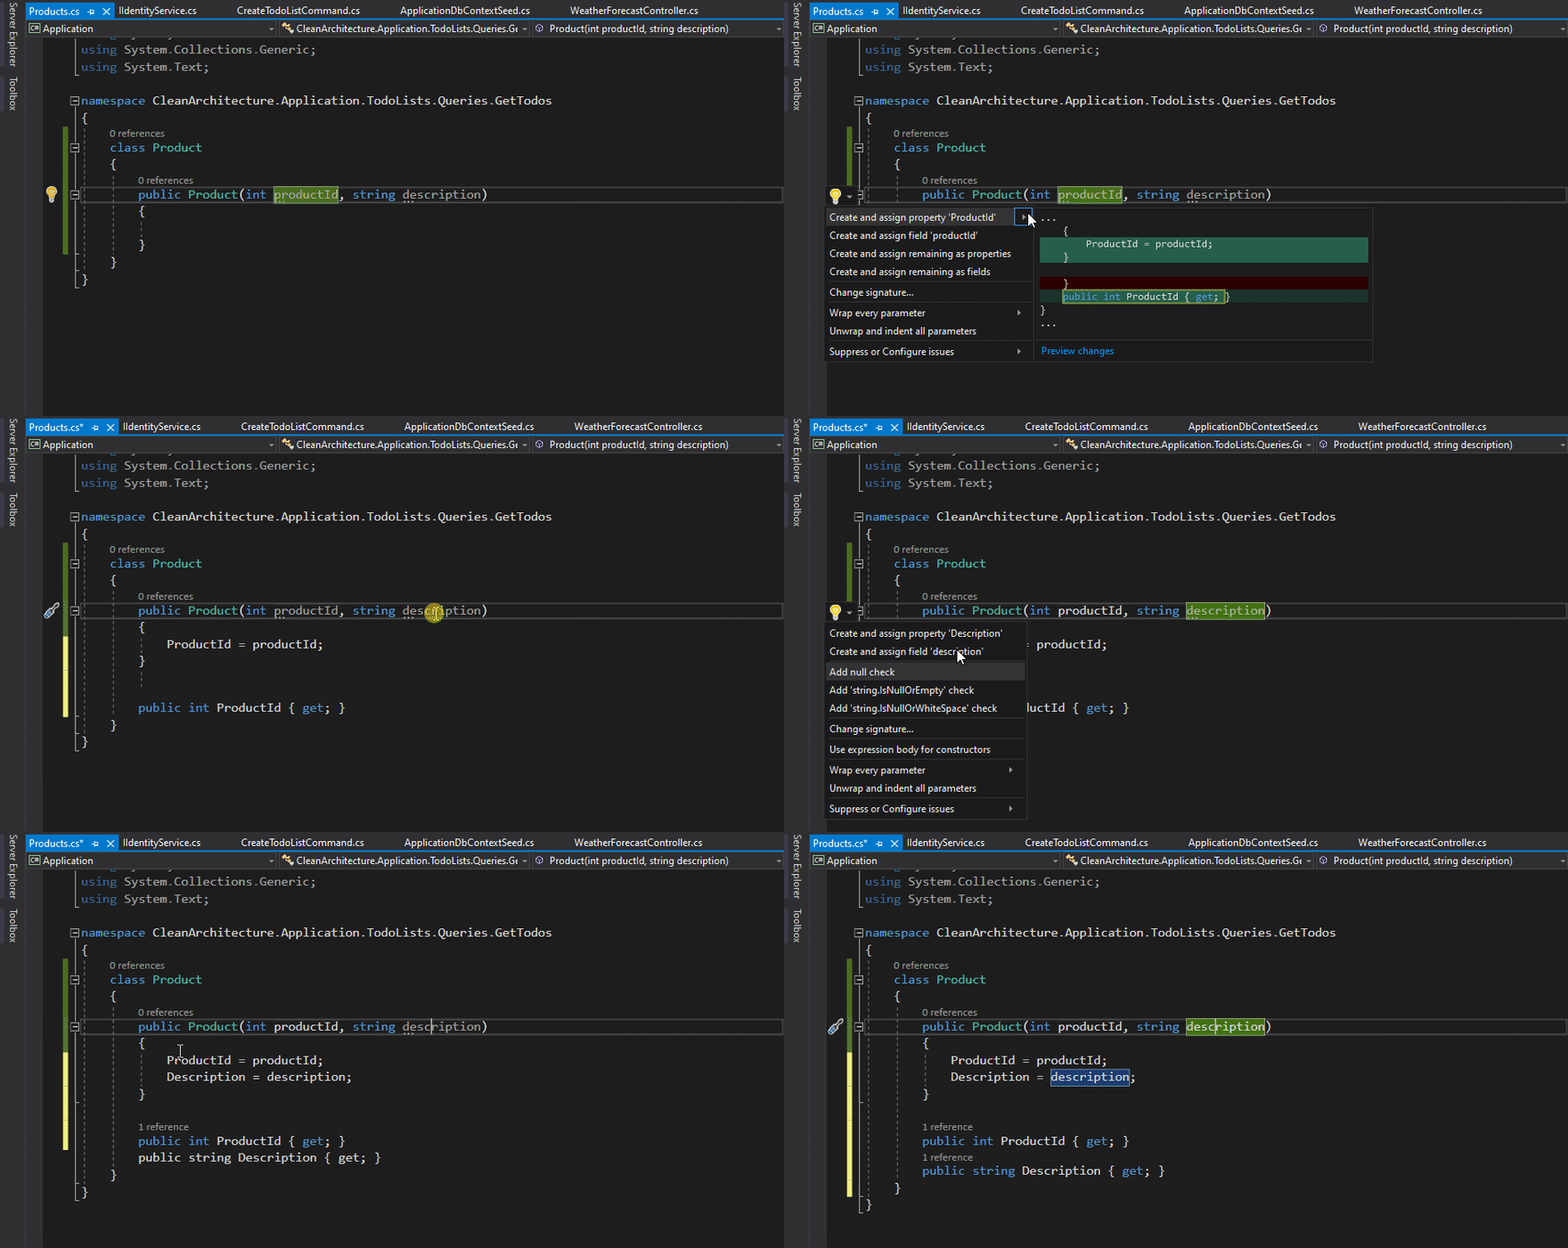
Suppose we have a constructor that receives some variables. Easily, we can convert all these variables into properties, and they will be self-assigned within the constructor. This functionality is very useful when working with dependency injection. We may not need properties, but, the declaration of a private variable and its assignment, we can also do so.
To use the functionality we must stop over the declaration, press Ctrl +. , and the option "Create and initialize property". If we want it to be a field, we choose "Create and initialize field".
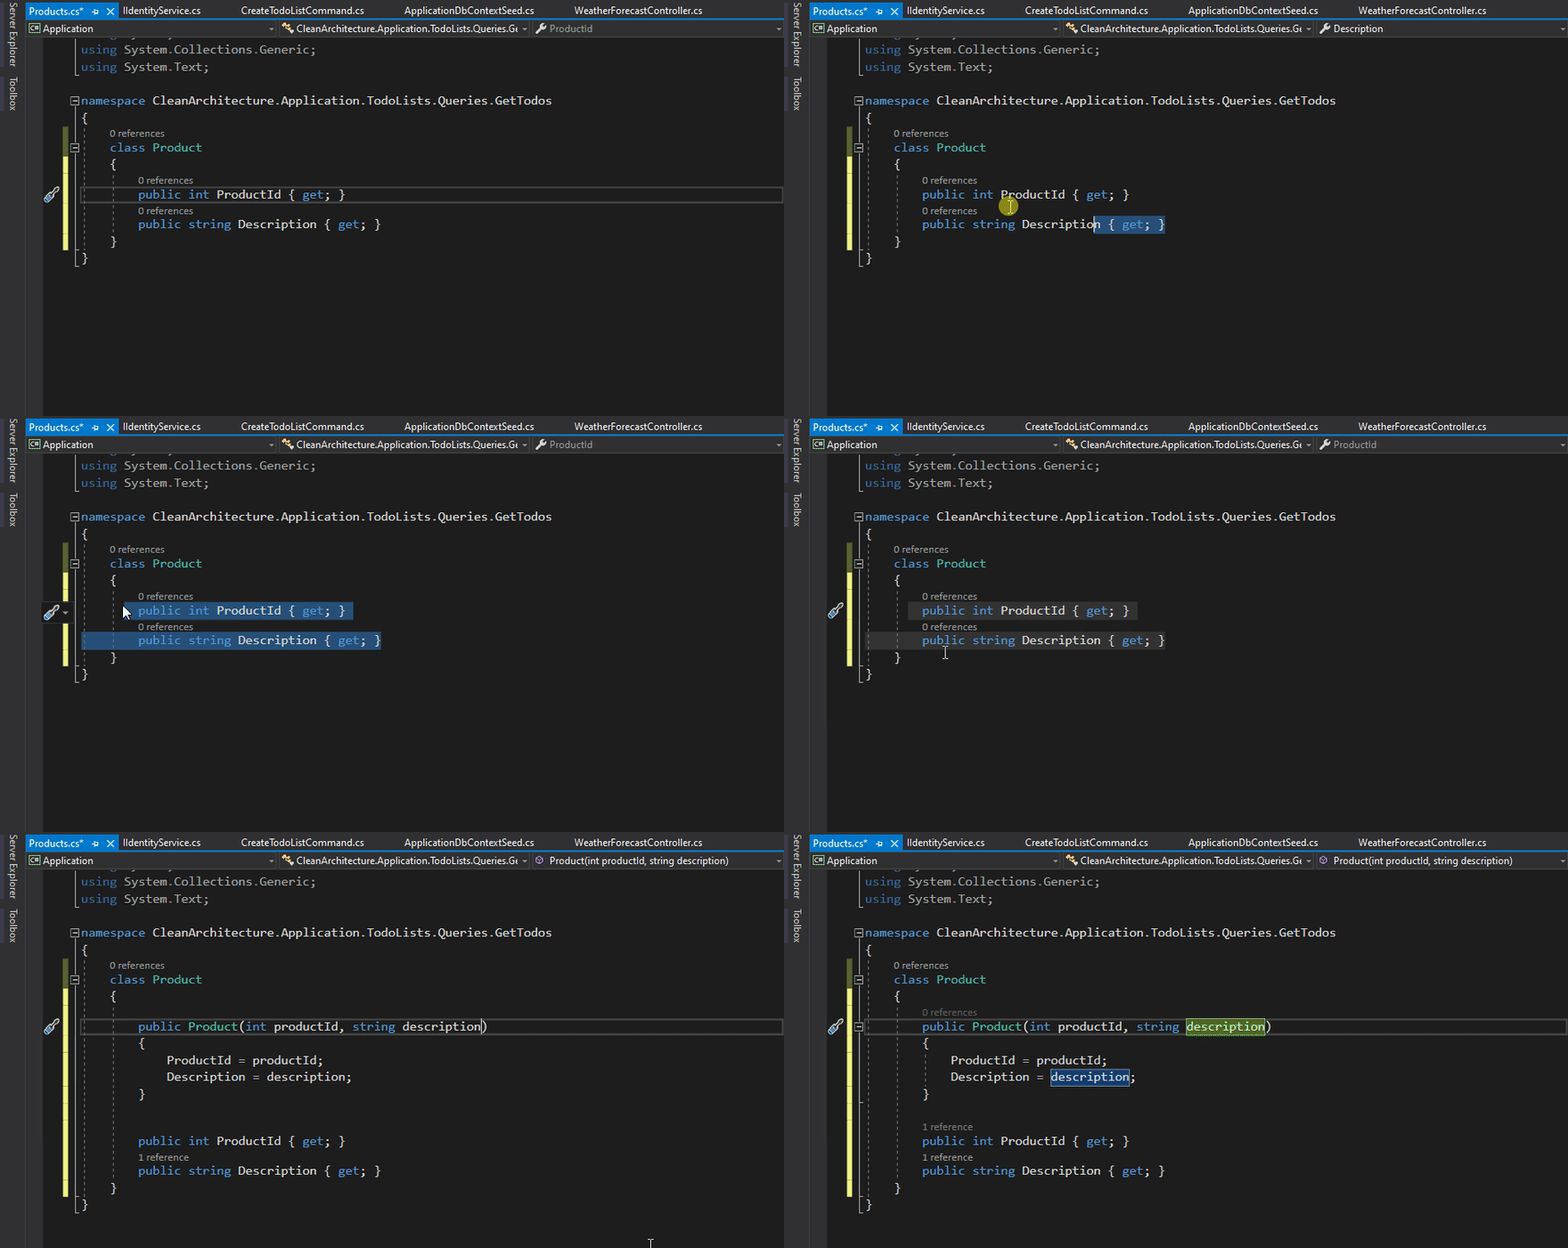
Create constructor from properties
Like the previous one, we can generate a constructor from a set of properties. Choose the fragment with the properties, press Ctrl +. , and choose "Generate Constructor".
Convert a foreach expression to Linq
Many times, when we have one loop, within another and we have a conditional within the latter, it is possible to convert it to a simple LINQ expression. You may not be able in some cases, but for the most part, it is possible. If the pattern we see in the image is met, we can do it.
Select the entire foreach block, press Ctrl + . and choose "Convert to LINQ".
Extract Class to an Interface
This option is for the laziest, who prefer to write the class first and then the interface. We must position ourselves in the class, press Ctrl +. and choose the option "Extract Interface". It will show you a dialog box with the options with which you will create the interface. Press Ok and automatically add inheritance to the class from which we extracted the interface and create the file.
Move to Namespaces
When we create a new code file in C-, Visual Studio, we automatically complete the Namespaces. Let's say we create a new class, complete it, and later realize that we create it in another folder, and it has other Namespaces. We can move it, but it is left with the old Namespaces. If we position ourselves on the object and press Ctrl + . will give us the option "Move to Namespace". This option will not open a dialog box to change the Namespaces, even has a list from which we can choose the correct one.
Add parameter to an existing method
Suppose we are invoking a method and realize that it is missing a parameter or overload. We can invoke the method and type the missing parameter, then select the parameter, press Ctrl + . and we chose the option "Add parameter to".
Simplify string interpolation
The correct path to making interpolations was always String.Format. Over time, improvements were added to C# to be done in a simpler way by means of $ and the { }. It is possible to transform the first to the second structure. Choose the String.Format, press Ctrl +. , and choose the option "Convert to interpolated string".
Conclusions
With the advancement of time, with each new update, Visual Studio becomes an increasingly powerful tool. Since the 2019 releases it has improved in its refactoring functionalities and many more are on the way. I thank you for having accompanied me in this post series. See you in the next post.


Top comments (2)
Cool stuff!
Good!