If you are a developer, you know testing is very important for application development. But integration testing in cloud is really a concern. As deployment time plays a vital role in development, many of us try to do mock test before deploy it into cloud. There are some frameworks for doing that. But in that case integration testing is not possible. If you are a SAM user, you can speed up your development with SAM accelerate. In this blog post, you will see an example of lambda layers and its implementation in sam accelerate.

Prerequisite
- First, you have to install aws sam cli into your machine.
- Then configure aws cli.
If you don't have CLI installed and configured into your local machine please follow the prerequisite steps from this link
Local Development
- After installation done, you have to pull the code from git repository (HTTPS link)
- Then go to project directory by using following command:
    cd <your folder name>
    example: cd sam-accelerate-example
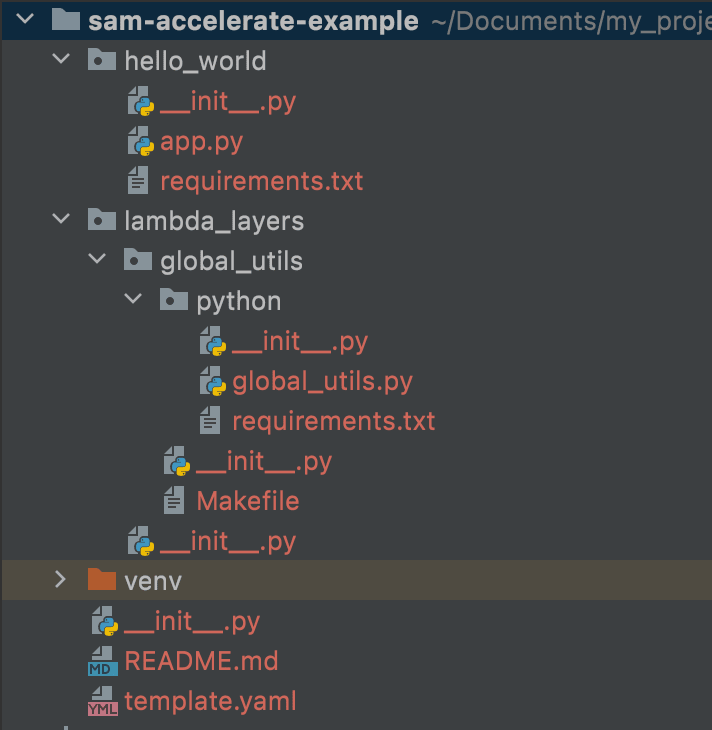
- Then you will see following structure:
Lambda Layers code details
- In template.yaml file, you will get following code for creating lambda layers:

In this image,
- Type: This is used to make resource you want to create. AWS::Serverless::LayerVersion means it will create lambda layer.
- Properties:
- LayerName: This is for layer name you want to give. Here you can give any name. In this demo it is global-utils .
- ContentUri: This will be your code location. In this demo it is lambda_layers/global_utils/
- CompatibleRuntimes:
- python3.9 Here you have to give your choosen language. In this demo, I used python. There are specific folder structure for lambda layers according to language. See this link for other languages.
- Metadata:
- BuildMethod: makefile If you want to create custom layer you can do it easily through SAM. In this make file you have to give commands to run your configuration or settings. See this link for documentation.
- If you need share some libraries through layers, you can add those into requirements.txt file in layer's python folder like following image:

- In make file within global_utils folder, you have to give path to $(ARTIFACTS_DIR)/python, otherwise libraries in requirements.txt file will not found into .aws-sam folder and when calling through layers it will not work. So this line is very important.
  build-GlobalUtils:
      echo "Global layers build started"
      pip install --default-timeout=100 -r ./python/requirements.txt -t $(ARTIFACTS_DIR)/python
      echo "Global layers build completed"
      cp -r ./python $(ARTIFACTS_DIR)/
- If you want to pass some code through layers, you can also do that. In global_utils.py file you can see example of it.
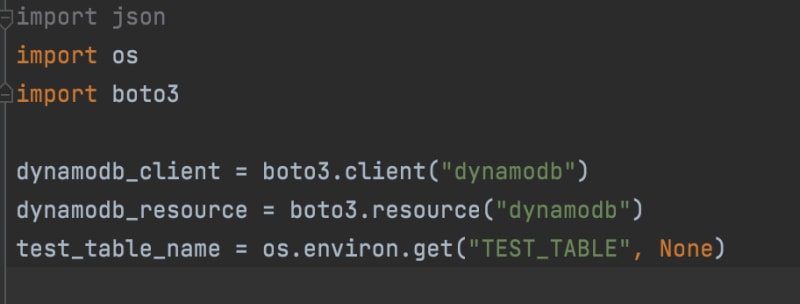
Here three libraries (json, os, boto3) and also dynamo client, resource and table name are passed through this layer. For table name, you have to pass it through function's Environment parameter. You will see it in a while.
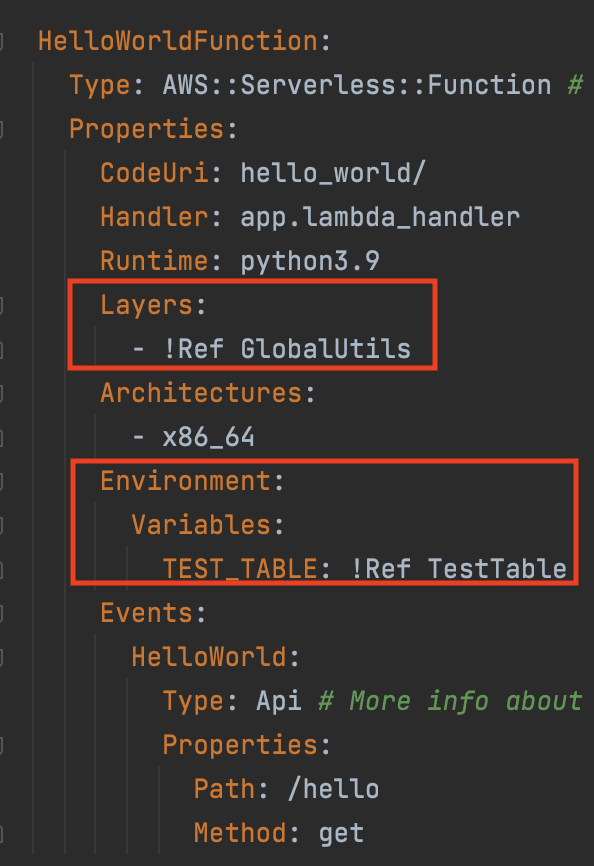
- Now this layer has to be attached with lambda function where it will be used. In this post you will see global_utils layer is passed to HelloWorldFunction . In case of sharing resources with !Ref key, you have to use logical id of that resource. Here logical id for layer is GlobalUtils and for dynamodb table it is TestTable .
How to run sam sync
- You have to run following command into your terminal
    sam sync --watch --stack-name <give your stack name>
    example: sam sync --watch --stack-name sam-accelerate-example
- After running this command, you will see like following image:

- Now you have to press Enter .
- Now open your aws console from browser, you will see your stack is created into cloud like following image.

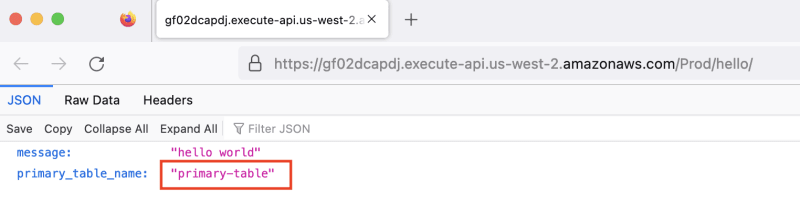
- After sync, you will see an API link in your device terminal like following image:

- After clicking on this API, you will see the table name what is passed through layer.
If you change anything in layers or anything into your template file, you will see that change into cloud. So you can test your application with real aws resources. If you have any question please let me know in comment.

Top comments (1)
Thank you for explaining this quickly.