
Previously, in the beginner's roadmap to web development tutorial series, we talked about how to create a web application using Django, a full-stack Python-based web framework that follows the MTV design pattern. We call it full-stack because we can create both the frontend and the backend with it.
This solution, however, has one small flaw. When the end-user request a webpage, the page will need to be rendered in the backend, and then the rendered HTML page will be sent to the user. As you can imagine, when you have a lot of users, that will put a lot of pressure on your server.
To solve this problem, developers usually split the application into two parts, the backend and the frontend. This way, when the user requests a webpage, instead of rendering the webpage, the backend only gathers the necessary data and transfers them to the frontend. The client's machine, which usually has a lot more excessive computing power, will use the data to render the webpage inside the browser directly, hence relieving the pressure on the server.
In this tutorial, we are going to discuss how to create a modern single-page application using Django as the backend, Vue as the frontend, and GraphQL as the API manipulation language that connects them together.
Before you start, make sure you are familiar with both Django and Vue.js frameworks. If not, please consider going through the following tutorials first:
A brief review on Django
Let's start with a brief review of the Django framework. Django is a Python-based web framework that follows the MTV architecture.
- The model (M) is an interface that allows us to interact with the database, such as retrieving, creating, updating or deleting records.
- The template (T) is the frontend part of the framework, it is the part that the end-users are going to see.
- The view (V) is the backend logic of the application, it uses the model to interact with the database, such as retrieving the data that is required by the user. Then the view would manipulate the data in some way, and return the result (usually a customized template) to the user.
For this particular tutorial, we are only going to use Django for the backend, which means we are not going to use Django's template or view, and replace them with Vue.js and GraphQL.
Let's start by setting up the Django end.
Creating a fresh Django project
Personally, I like to separate the backend and the frontend directories. So this is how I created the project structure:
blog
├── backend
└── frontend
Go to the backend folder, and create a new Python virtual environment. A Python virtual environment is an isolated environment with a fresh Python install, without the custom packages. When you install packages inside this environment, it will not affect your system's Python environment, which is very important if you are using Linux or macOS, and you don't want to mess with it.
cd backend
python3 -m venv env
This command will create a new directory called env, and the virtual environment is generated inside. To activate this virtual environment, use the following command:
source env/bin/activate
If you are using Windows use this command instead. This depends on personal preference, but I do recommend setting up WSL is you are using Windows.
env/Scripts/activate
After the virtual environment has been activated, your terminal will look like this. Notice the (env) in front of the username. This indicates you are currently working in the virtual environment.

Next, it is time for you to create a new Django project. You should be familiar with this process, if not, please check the previously linked article for details.
python -m pip install Django
django-admin startproject backend
Create a new application:
python manage.py startapp blog
After you are done, the project structure should look like this:
.
├── backend
│   ├── backend
│   ├── blog
│   ├── manage.py
│   └── requirements.txt
└── frontend
Creating models
Recall that the model is an interface which we can use to interact with the database. And one of the greatest feature of Django is that it can automatically detect the changes you made to the models, and generate the corresponding migration files, which we can use to make changes to the database structure.
The Site model
Let's start with the Site model, which stores the basic information of your website.
class Site(models.Model):
    name = models.CharField(max_length=200)
    description = models.TextField()
    logo = models.ImageField(upload_to='site/logo/')

    class Meta:
        verbose_name = 'site'
        verbose_name_plural = '1. Site'

    def __str__(self):
        return self.name
On line 4, there is an ImageField which tells Django to upload the image to 'site/logo/' directory. To make this work, there are two things you need to do.
First, you must install the Pillow package. Django requires it in order to process images.
python -m pip install Pillow
Second, you need a new setting directive in the settings.py. You have to tell Django where you are going to store these media files and what URL you are going to use when accessing these files.
import os


# Media Files
MEDIA_ROOT = os.path.join(BASE_DIR, 'mediafiles')
MEDIA_URL = '/media/'
This setting means that the media files will be stored inside the /mediafiles directory, and we'll need to use the URL prefix /media/ to access them. For example, the URL http://localhost:3000/media/example.png will retrieve the image /mediafiles/example.png.
The User model
Next, for the User model. Django comes with a built-in User model, which offers basic permission and authorization functionalities. However, for this project, let's try something more complicated. You can add a profile avatar, a bio, and some other information. To do that, you need to create a new User models which extends to the AbstractUser class.
from django.contrib.auth.models import AbstractUser


# New user model
class User(AbstractUser):
    avatar = models.ImageField(
        upload_to='users/avatars/%Y/%m/%d/',
        default='users/avatars/default.jpg'
    )
    bio = models.TextField(max_length=500, null=True)
    location = models.CharField(max_length=30, null=True)
    website = models.CharField(max_length=100, null=True)
    joined_date = models.DateField(auto_now_add=True)

    class Meta:
        verbose_name = 'user'
        verbose_name_plural = '2. Users'

    def __str__(self):
        return self.username
Django's AbstractUser class looks like this:
class AbstractUser(AbstractBaseUser, PermissionsMixin):
    """
    An abstract base class implementing a fully featured User model with
    admin-compliant permissions.

    Username and password are required. Other fields are optional.
    """
    username_validator = UnicodeUsernameValidator()

    username = models.CharField(
        _('username'),
        max_length=150,
        unique=True,
        help_text=_('Required. 150 characters or fewer. Letters, digits and @/./+/-/_ only.'),
        validators=[username_validator],
        error_messages={
            'unique': _("A user with that username already exists."),
        },
    )
    first_name = models.CharField(_('first name'), max_length=150, blank=True)
    last_name = models.CharField(_('last name'), max_length=150, blank=True)
    email = models.EmailField(_('email address'), blank=True)
    is_staff = models.BooleanField(
        _('staff status'),
        default=False,
        help_text=_('Designates whether the user can log into this admin site.'),
    )
    is_active = models.BooleanField(
        _('active'),
        default=True,
        help_text=_(
            'Designates whether this user should be treated as active. '
            'Unselect this instead of deleting accounts.'
        ),
    )
    date_joined = models.DateTimeField(_('date joined'), default=timezone.now)

    objects = UserManager()

    EMAIL_FIELD = 'email'
    USERNAME_FIELD = 'username'
    REQUIRED_FIELDS = ['email']

    class Meta:
        verbose_name = _('user')
        verbose_name_plural = _('users')
        abstract = True

    def clean(self):
        super().clean()
        self.email = self.__class__.objects.normalize_email(self.email)

    def get_full_name(self):
        """
        Return the first_name plus the last_name, with a space in between.
        """
        full_name = '%s %s' % (self.first_name, self.last_name)
        return full_name.strip()

    def get_short_name(self):
        """Return the short name for the user."""
        return self.first_name

    def email_user(self, subject, message, from_email=None, **kwargs):
        """Send an email to this user."""
        send_mail(subject, message, from_email, [self.email], **kwargs)
As you can see, it offers some basic fields like first_name, last_name, etc.
Next, you need to make sure that Django is using this new User model as its default User model, or the authentication won't work. Go to settings.py and add the following directive:
# Change Default User Model
AUTH_USER_MODEL = 'blog.User'
The Category, Tag and Post model
class Category(models.Model):
    name = models.CharField(max_length=200)
    slug = models.SlugField()
    description = models.TextField()

    class Meta:
        verbose_name = 'category'
        verbose_name_plural = '3. Categories'

    def __str__(self):
        return self.name
class Tag(models.Model):
    name = models.CharField(max_length=200)
    slug = models.SlugField()
    description = models.TextField()

    class Meta:
        verbose_name = 'tag'
        verbose_name_plural = '4. Tags'

    def __str__(self):
        return self.name
class Post(models.Model):
    title = models.CharField(max_length=200)
    slug = models.SlugField()
    content = RichTextField()
    featured_image = models.ImageField(
        upload_to='posts/featured_images/%Y/%m/%d/')
    is_published = models.BooleanField(default=False)
    is_featured = models.BooleanField(default=False)
    created_at = models.DateField(auto_now_add=True)
    modified_at = models.DateField(auto_now=True)

    # Each post can receive likes from multiple users, and each user can like multiple posts
    likes = models.ManyToManyField(User, related_name='post_like')

    # Each post belong to one user and one category.
    # Each post has many tags, and each tag has many posts.
    category = models.ForeignKey(
        Category, on_delete=models.SET_NULL, null=True)
    tag = models.ManyToManyField(Tag)
    user = models.ForeignKey(User, on_delete=models.SET_NULL, null=True)

    class Meta:
        verbose_name = 'post'
        verbose_name_plural = '5. Posts'

    def __str__(self):
        return self.title

    def get_number_of_likes(self):
        return self.likes.count()
Notice how the like system is implemented on line 13. It is not a simple IntegerField, but instead, it works just like tags. And you can use get_number_of_likes() method to get the number of likes for each post.
The Comment model
This time, let's go one step further, and create a comment section for this application.
class Comment(models.Model):
    content = models.TextField(max_length=1000)
    created_at = models.DateField(auto_now_add=True)
    is_approved = models.BooleanField(default=False)

    # Each comment can receive likes from multiple users, and each user can like multiple comments
    likes = models.ManyToManyField(User, related_name='comment_like')

    # Each comment belongs to one user and one post
    user = models.ForeignKey(User, on_delete=models.SET_NULL, null=True)
    post = models.ForeignKey(Post, on_delete=models.SET_NULL, null=True)

    class Meta:
        verbose_name = 'comment'
        verbose_name_plural = '6. Comments'

    def __str__(self):
        if len(self.content) > 50:
            comment = self.content[:50] + '...'
        else:
            comment = self.content
        return comment

    def get_number_of_likes(self):
        return self.likes.count()
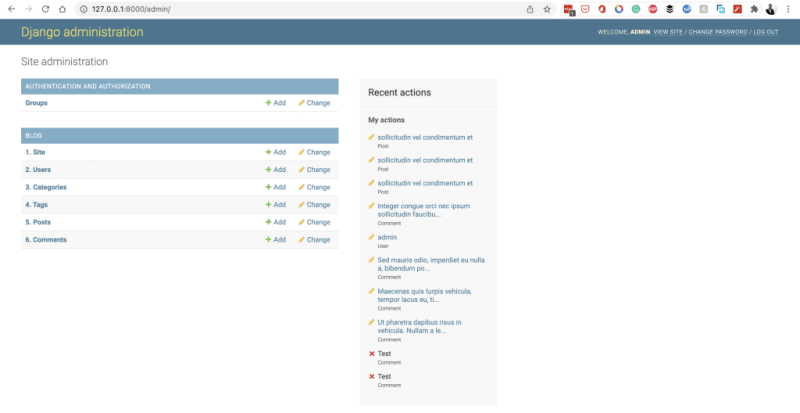
Setup Django admin panel
Finally, it is time to set up the Django admin. Open the admin.py file:
from django.contrib import admin
from .models import *

# Register your models here.
class UserAdmin(admin.ModelAdmin):
    list_display = ('username', 'first_name', 'last_name', 'email', 'date_joined')

class CategoryAdmin(admin.ModelAdmin):
    prepopulated_fields = {'slug': ('name',)}


class TagAdmin(admin.ModelAdmin):
    prepopulated_fields = {'slug': ('name',)}


class PostAdmin(admin.ModelAdmin):
    prepopulated_fields = {'slug': ('title',)}
    list_display = ('title', 'is_published', 'is_featured', 'created_at')

class CommentAdmin(admin.ModelAdmin):
    list_display = ('__str__', 'is_approved', 'created_at')


admin.site.register(Site)
admin.site.register(User, UserAdmin)
admin.site.register(Category, CategoryAdmin)
admin.site.register(Tag, TagAdmin)
admin.site.register(Post, PostAdmin)
admin.site.register(Comment, CommentAdmin)
For the CommentAdmin, __str__ refers to the __str__() method in the Comment model. Which will return the first 50 characters concatenated with "...".
Now, start the development server and see if everything works:
python manage.py runserver
Before moving to the next step, remember to add some pseudo information for your blog.
A brief review on Vue.js
Now that you are done with the backend, it is time to focus on the frontend. In this second part of this article, let's use Vue.js to create the frontend application. Again, we'll start with a brief review. If you've never used the framework before, please go through the previously linked tutorial first.
Vue.js is a front-end JavaScript framework that provides you with a simple component-based system, which allows you to create interactive user interfaces. Component-based means that the root component (App.vue) can import other components (files with extension .vue), and those components can import more components, which allows you to create very complex systems.
A typical .vue file contains three sections, the <template> section includes HTML codes, the <script> section includes JavaScript Codes, and the <style> section includes the CSS codes.
In the <script> section, you can declare new bindings inside the data() model. These bindings can then be displayed inside the <template> section using the double curly braces syntax ({{ binding }}). The bindings declared inside the data() method will automatically be wrapped inside Vue's reactivity system. Meaning that when the value of the binding changes, the corresponding component will be automatically rerendered, without having to refresh the page.
The <script> section can also contain methods other than data(), such as computed, props, methods and so on. And the <template> also allows us to bind data using directives such as v-bind, v-on and v-model.
Creating a new Vue.js project
In the Vue.js For Beginners tutorial, we installed and created a Vue app using the Vue command-line tool. This time, we are going to do things differently. We are going to use a frontend build tool called Vite (pronounced as "veet", the French word for fast), which is created by the same author who created Vue.js.
Go into the frontend folder, and run the following command:
npm init vue@latest
You will be prompted with multiple options, for this project, you only need to add Vue Router:
✔ Project name: … <your_project_name>
✔ Add TypeScript? … No / Yes
✔ Add JSX Support? … No / Yes
✔ Add Vue Router for Single Page Application development? … No / Yes
✔ Add Pinia for state management? … No / Yes
✔ Add Vitest for Unit testing? … No / Yes
✔ Add Cypress for both Unit and End-to-End testing? … No / Yes
✔ Add ESLint for code quality? … No / Yes
✔ Add Prettier for code formating? … No / Yes

Scaffolding project in ./<your_project_name>. . .
Done.
If you are more comfortable with a strong type language, you can elect to install TypeScript. If you need autocorrect and autoformat for your code, you can install ESlint and Prettier as well. This installation process will generate a package.json file in your project directory, which stores the required packages and their versions. You need to install these packages inside your project.
cd <your_project_name>
npm install
npm run dev
One more thing before we start creating the frontend app. We are using a CSS framework called TailwindCSS in this project. To install it, run the following command:
npm install -D tailwindcss postcss autoprefixer
npx tailwindcss init -p
This will generate two files, tailwind.config.js and postcss.config.js. This is not a tutorial on CSS or Tailwind, so I assume you already know how to use them. If not, please read Tailwind's official documentation.
Go to tailwind.config.js, and add the path to all of your template files:
module.exports = {
  content: ["./index.html", "./src/**/*.{vue,js,ts,jsx,tsx}"],
  theme: {
    extend: {},
  },
  plugins: [],
};
Create a ./src/index.css file and add the @tailwind directives for each of Tailwind’s layers.
@tailwind base;
@tailwind components;
@tailwind utilities;
Import the newly-created ./src/index.css file into your ./src/main.js file.
import { createApp } from "vue";
import App from "./App.vue";
import router from "./router";
import "./index.css";

const app = createApp(App);

app.use(router);

app.mount("#app");
Now you should be able to use Tailwind inside the .vue files. Let's test it out.
<template>
  <header>
    . . .
    <div class="wrapper">
      <HelloWorld msg="You did it!" />
      <h1 class="text-3xl font-bold underline">Hello world!</h1>
      . . .
    </div>
  </header>
  . . .
</template>
We added an <h1> heading after <HelloWorld>, and the heading is using the Tailwind classes.

Vue router
Notice that this time, your project directory is a little bit different.

Inside the src directory, there is a router and a views folder. The router directory contains an index.js file. This is where you can define different routes. Each route will point to a view component that is inside the views directory, and the view can then extend to other components inside the components directory. Vue already provided us with an example of index.js:
import { createRouter, createWebHistory } from "vue-router";
import HomeView from "../views/HomeView.vue";

const router = createRouter({
  history: createWebHistory(import.meta.env.BASE_URL),
  routes: [
    {
      path: "/",
      name: "home",
      component: HomeView,
    },
    {
      path: "/about",
      name: "about",
      // route level code-splitting
      // this generates a separate chunk (About.[hash].js) for this route
      // which is lazy-loaded when the route is visited.
      component: () => import("../views/AboutView.vue"),
    },
  ],
});

export default router;
To invoke a defined router, look inside the App.vue file. Instead of the <a> tag, we use <RouterLink> which is imported from the vue-router package.
<script setup>
import { RouterLink, RouterView } from "vue-router";
. . .
</script>

<template>
  <header>
    . . .
    <div class="wrapper">
      . . .
      <nav>
        <RouterLink to="/">Home</RouterLink>
        <RouterLink to="/about">About</RouterLink>
      </nav>
    </div>
  </header>

  <RouterView />
</template>
When the page is being rendered, the <RouterView /> tag will be replaced with the corresponding view. If you don't want to import these components, simply use <router-link to=""> and <router-view> tags instead. Personally, I prefer this way because I always forget to import them.
Creating routes with Vue router
For our blog application, we need to create at least 6 pages. We need a home page that displays a list of recent pages, a categories/tags page that shows all categories/tags, a category/tag page that displays a list of posts that belongs to the category/tag, and finally, a post page that displays the post content as well as the comments.
So, these are the routers I created. The @ maps to the src directory.
import { createRouter, createWebHistory } from "vue-router";
import HomeView from "@/views/main/Home.vue";
import PostView from "@/views/main/Post.vue";
import CategoryView from "@/views/main/Category.vue";
import TagView from "@/views/main/Tag.vue";
import AllCategoriesView from "@/views/main/AllCategories.vue";
import AllTagsView from "@/views/main/AllTags.vue";

const routes = [
  {
    path: "/",
    name: "Home",
    component: HomeView,
  },
  {
    path: "/category",
    name: "Category",
    component: CategoryView,
  },
  {
    path: "/tag",
    name: "Tag",
    component: TagView,
  },
  {
    path: "/post",
    name: "Post",
    component: PostView,
  },
  {
    path: "/categories",
    name: "Categories",
    component: AllCategoriesView,
  },
  {
    path: "/tags",
    name: "Tags",
    component: AllTagsView,
  },
];

const router = createRouter({
  history: createWebHistory(process.env.BASE_URL),
  routes,
});

export default router;
Please note that in this article, we are only creating the frontend interface, we are not dealing with data transfer just yet, so don't worry about how to find the correct post/category/tag right now.
Creating views, pages, and components
This is the frontend UI that I created for this project, you can either use my code directly or if you don't like it, you can follow this tutorial on Vue.js and create your own.

In part two, we are going to talk about how to connect the backend and the frontend. Currently, the industry standard is to use something called REST API, which stands for representational state transfer application programming interface. API refers to the connection between two software applications, and REST refers to a specific architecture that this type of connection follows.

A REST API request usually consists of an endpoint, which points to the server, an HTTP method, a header and a body. The header provides meta information such as caching, user authentication and AB testing, and the body contains data that the client wants to send to the server.
However, REST API has one small flaw, it is impossible to design APIs that only fetch the exact data that the client requires, so it is very common for the REST API to overfetch or underfetch. GraphQL was created to solve this problem. It uses schemas to make sure that with each request, it only fetches data that is required, we'll see how this works later.
Setting up GraphQL with Django
Let's start by setting up GraphQL in the backend. You need to install a new package called graphene-django. Run the following command:
pip install graphene-django
Next, go to settings.py and find the INSTALLED_APPS variable. You must add graphene-django inside so that Django is able to find this module.
INSTALLED_APPS = [
  . . .
  "blog",
  "graphene_django",
]
Configuring graphene-django
There are still a few things you need to do before you can use GraphQL. First, you need to setup a URL pattern to serve the GraphQL APIs. Go to urls.py and add the following code:
from django.views.decorators.csrf import csrf_exempt
from graphene_django.views import GraphQLView

urlpatterns = [
    . . .
    path("graphql", csrf_exempt(GraphQLView.as_view(graphiql=True))),
]
Next, create the schemas and tell Django where to find them in the settings.py. GraphQL schemas define a pattern that allows Django to translate the database models into GraphQL and vice versa. Let's take the Site model as an example.
class Site(models.Model):
    name = models.CharField(max_length=200)
    description = models.TextField()
    logo = models.ImageField(upload_to='site/logo/')

    class Meta:
        verbose_name = 'site'
        verbose_name_plural = '1. Site'

    def __str__(self):
        return self.name
Create a schema.py file inside the blog directory.
import graphene
from graphene_django import DjangoObjectType
from blog import models

# Define type
class SiteType(DjangoObjectType):
    class Meta:
        model = models.Site

# The Query class
class Query(graphene.ObjectType):
    site = graphene.Field(types.SiteType)

    def resolve_site(root, info):
        return (
            models.Site.objects.first()
        )
As you can see, this file is divided into three parts. First, you must import the necessary packages and models.
Next, SiteType class is declared, and this SiteType is connected with the Site model.
Lastly, there is a Query class. This class is what allows you to retrieve information using the GraphQL API. To create or update information, you need to use a different class called Mutation, which we'll discuss in the next article.
Inside the Query class, there is a resolve_site function that returns the first record of the Site model. This method automatically binds with the site variable due to its name. This part works exactly the same as the regular Django QuerySet.
Creating schemas
Now you can do the same for all of the models. To make sure the schema file isn't too big, I separated them into schema.py, types.py and queries.py.
schema.py
import graphene
from blog import queries


schema = graphene.Schema(query=queries.Query)
types.py
import graphene
from graphene_django import DjangoObjectType
from blog import models


class SiteType(DjangoObjectType):
    class Meta:
        model = models.Site


class UserType(DjangoObjectType):
    class Meta:
        model = models.User


class CategoryType(DjangoObjectType):
    class Meta:
        model = models.Category


class TagType(DjangoObjectType):
    class Meta:
        model = models.Tag


class PostType(DjangoObjectType):
    class Meta:
        model = models.Post
queries.py
import graphene
from blog import models
from blog import types


# The Query class
class Query(graphene.ObjectType):
    site = graphene.Field(types.SiteType)
    all_posts = graphene.List(types.PostType)
    all_categories = graphene.List(types.CategoryType)
    all_tags = graphene.List(types.TagType)
    posts_by_category = graphene.List(types.PostType, category=graphene.String())
    posts_by_tag = graphene.List(types.PostType, tag=graphene.String())
    post_by_slug = graphene.Field(types.PostType, slug=graphene.String())

    def resolve_site(root, info):
        return (
            models.Site.objects.first()
        )

    def resolve_all_posts(root, info):
        return (
            models.Post.objects.all()
        )

    def resolve_all_categories(root, info):
        return (
            models.Category.objects.all()
        )

    def resolve_all_tags(root, info):
        return (
            models.Tag.objects.all()
        )

    def resolve_posts_by_category(root, info, category):
        return (
            models.Post.objects.filter(category__slug__iexact=category)
        )

    def resolve_posts_by_tag(root, info, tag):
        return (
            models.Post.objects.filter(tag__slug__iexact=tag)
        )

    def resolve_post_by_slug(root, info, slug):
        return (
            models.Post.objects.get(slug__iexact=slug)
        )
Finally, you need to tell Django where to find the schema file. Go to settings.py and add the following code:
# Configure GraphQL
GRAPHENE = {
    "SCHEMA": "blog.schema.schema",
}
To verify that the schemas work, open your browser and go to http://127.0.0.1:8000/graphql. You should see the GraphiQL interface.

Notice how we are retrieving information in this example, it's the GraphQL language, and it is how we are going to retrieve data in the frontend, which you'll see later.
Setting up CORS
Before you can move on to the frontend, there is still something you need to take care of. By default, data can only be transferred within the same application for security reasons, but in our case we need the data to flow between two applications. To tackle this problem, you must enable the CORS (cross origin resource sharing) functionality.
First, install the django-cors-headers package. Inside the backend app, run the following command:
pip install django-cors-headers
Add "corsheaders" to the INSTALLED_APPS variable.
INSTALLED_APPS = [
  . . .
  "corsheaders",
]
Then add "corsheaders.middleware.CorsMiddleware" to the MIDDLEWARE variable:
MIDDLEWARE = [
  "corsheaders.middleware.CorsMiddleware",
  . . .
]
And finally, add the following code to the settings.py.
CORS_ORIGIN_ALLOW_ALL = False
CORS_ORIGIN_WHITELIST = ("http://localhost:8080",) # Matches the port that Vue.js is using
Setting up Apollo with Vue.js
Now it's time for us to move to the frontend. First, install the Apollo library. It allows you to use GraphQL in the Vue app. To do that, run the following command:
npm install --save graphql graphql-tag @apollo/client
Under the src directory, create a new file called apollo-config.js and add the following code:
import {
  ApolloClient,
  createHttpLink,
  InMemoryCache,
} from "@apollo/client/core";

// HTTP connection to the API
const httpLink = createHttpLink({
  uri: "http://127.0.0.1:8000/graphql", // Matches the url and port that Django is using
});

// Cache implementation
const cache = new InMemoryCache();

// Create the apollo client
const apolloClient = new ApolloClient({
  link: httpLink,
  cache,
});
Then go to main.js and import the apolloClient:
import { apolloClient } from "@/apollo-config";
createApp(App).use(router).use(apolloClient).mount("#app");
Now we can use the GraphQL language we just saw to retrieve data from the backend. Let's see an example. Go to App.vue, and here we'll retrieve the name of our website.
<template>
  <div class="container mx-auto max-w-3xl px-4 sm:px-6 xl:max-w-5xl xl:px-0">
    <div class="flex flex-col justify-between h-screen">
      <header class="flex flex-row items-center justify-between py-10">
        <div class="nav-logo text-2xl font-bold">
          <router-link to="/" v-if="mySite">{{ mySite.name }}</router-link>
        </div>
        . . .
      </header>
      . . .
    </div>
  </div>
</template>

<script>
import gql from "graphql-tag";

export default {
  data() {
    return {
      mySite: null,
    };
  },

  async created() {
    const siteInfo = await this.$apollo.query({
      query: gql`
        query {
          site {
            name
          }
        }
      `,
    });
    this.mySite = siteInfo.data.site;
  },
};
</script>
It is my personal preference to create a separate file for all the queries and then import it into the .vue file.
src/queries.js
import gql from "graphql-tag";

export const SITE_INFO = gql`
  query {
    site {
      name
    }
  }
`;
App.vue
. . .

<script>
import { SITE_INFO } from "@/queries";

export default {
  data() {
    return {
      mySite: null,
    };
  },

  async created() {
    const siteInfo = await this.$apollo.query({
      query: SITE_INFO,
    });
    this.mySite = siteInfo.data.site;
  },
};
</script>
The category page
Now we have a left over problem from the previous article. When we invoke a router, how does the router know which page should be returned? For instance, when we click on a link Category One, a list of posts that belong to category one should be returned, but how does the router know how to do that? Let's see an example.
First, in the router/index.js file where we defined all of our routes, we should set a segment of the URL pattern as a variable. In the following example, the word after /category/ will be assigned to the variable category. This variable will be accessible in the CategoryView component.
import { createRouter, createWebHistory } from "vue-router";
. . .

const routes = [
  {
    path: "/",
    name: "Home",
    component: HomeView,
  },
  {
    path: "/category/:category",
    name: "Category",
    component: CategoryView,
  },
  . . .
];

const router = createRouter({
  history: createWebHistory(process.env.BASE_URL),
  routes,
});

export default router;
Next, in the AllCategories view (the one that will show a list of all categories), we will pass some information to this category variable.
<template>
  <div class="flex flex-col place-content-center place-items-center">
    <div class="py-8 border-b-2">
      <h1 class="text-5xl font-extrabold">All Categories</h1>
    </div>
    <div class="flex flex-wrap py-8">
      <router-link
        v-for="category in this.allCategories"
        :key="category.name"
        class=". . ."
        :to="`/category/${category.slug}`"
        >{{ category.name }}</router-link
      >
    </div>
  </div>
</template>
In the Category view, we can access this category variable using this.$route property.
<script>
// @ is an alias to /src
import PostList from "@/components/PostList.vue";
import { POSTS_BY_CATEGORY } from "@/queries";

export default {
  components: { PostList },
  name: "CategoryView",

  data() {
    return {
      postsByCategory: null,
    };
  },

  async created() {
    const posts = await this.$apollo.query({
      query: POSTS_BY_CATEGORY,
      variables: {
        category: this.$route.params.category,
      },
    });
    this.postsByCategory = posts.data.postsByCategory;
  },
};
</script>
And finally, the corresponding posts can be retrieved using the POSTS_BY_CATEGORY query.
export const POSTS_BY_CATEGORY = gql`
  query ($category: String!) {
    postsByCategory(category: $category) {
      title
      slug
      content
      isPublished
      isFeatured
      createdAt
    }
  }
`;
With this example, you should be able to create the tag and post page.
Creating and updating information with mutations
From the previous section, we learned that we can use queries to retrieve information from the backend and send it to the frontend. However, in a modern web application, it is very common for you to send information from the frontend to the backend. To do that, we need to talk about a new concept called mutation.
Let's go back to the backend and cd into the blog directory, and then create a file called mutations.py. In this example, let's investigate how you can pass data to the backend in order to create a new user.
import graphene
from blog import models, types


# Mutation sends data to the database
class CreateUser(graphene.Mutation):
    user = graphene.Field(types.UserType)

    class Arguments:
        username = graphene.String(required=True)
        password = graphene.String(required=True)
        email = graphene.String(required=True)

    def mutate(self, info, username, password, email):
        user = models.User(
            username=username,
            email=email,
        )
        user.set_password(password)
        user.save()

        return CreateUser(user=user)
On line 7, recall that the UserType is tied with the User model.
Line 9 to 12, to create a new user, you need to pass three arguments, username, password and email.
Line 15 to 18, this should be very familiar to you, it is the same way you create a new item using the Django QuerySet.
Line 19, this line of code sets the password. For security reasons, you can not save the user's original password in the database, and set_password() method can make sure it is encrypted.
After that, you must make sure this mutation.py file is included in the GraphQL schema. Go to schema.py:
import graphene
from blog import queries, mutations


schema = graphene.Schema(query=queries.Query, mutation=mutations.Mutation)
To make sure it works, open your browser and go to http://127.0.0.1:8000/graphql to access the GraphiQL interface.

mutation {
  createUser(
    username: "testuser2022"
    email: "testuser2022@test.com"
    password: "testuser2022"
  ) {
    user {
      id
      username
    }
  }
}
I think you already know how to use this in the frontend. As an example, this is what I did.
<script>
import { USER_SIGNUP } from "@/mutations";

export default {
  name: "SignUpView",

  data() {. . .},

  methods: {
    async userSignUp() {
      // Register user
      const user = await this.$apollo.mutate({
        mutation: USER_SIGNUP,
        variables: {
          username: this.signUpDetails.username,
          email: this.signUpDetails.email,
          password: this.signUpDetails.password,
        },
      });
     // Do something with the variable user
     . . .
    },
  },
};
</script>
src/mutations.js
import gql from "graphql-tag";

export const USER_SIGNUP = gql`
  mutation ($username: String!, $email: String!, $password: String!) {
    createUser(username: $username, email: $email, password: $password) {
      user {
        id
        username
      }
    }
  }
`;
User authentication with Django and Vue.js
Now that you know how to send data to the backend, user authentication shouldn't be too hard. You ask the user to input their username and password and send that information to the backend, and then in the backend, Django finds the user based on username, and it'll try to match the password with the one stored in the database. If the match is successful, the user is logged in.
However, in practice, this plan has some problems. First, sending the user password back and forth isn't exactly safe. You need some way to encrypt the data. The most commonly used method is JWT, which stands for JSON Web Token. It encrypts JSON information into a token. You can see an example here: https://jwt.io/.
This token will be saved inside the browser's local storage, and as long as there is a token present, the user will be considered logged in.
The second problem is caused by Vue's component system. We know that each component is independent. If one component changes, it does not affect the others. However, in this case, we want all components to share the same state. If the user is logged in, we want all components to recognize the user's state as logged in.
You need a centralized place to store this information (that the user is logged in), and all components should be able to read data from it. To do that, you'll need to use Pinia, which is Vue's new official store library created based on Vuex.
JWT in the Backend
First, let's integrate JWT with the Django backend. To do that, you need to install another package called django-graphql-jwt.
pip install django-graphql-jwt
Then go to settings.py and add a middleware as well as authentication backend. The configuration will overwrite Django's default setting, allowing it to use JWT instead.
MIDDLEWARE = [
    "django.contrib.auth.middleware.AuthenticationMiddleware",
]

# Configure GraphQL

GRAPHENE = {
    "SCHEMA": "blog.schema.schema",
    'MIDDLEWARE': [
        'graphql_jwt.middleware.JSONWebTokenMiddleware',
    ],
}

# Auth Backends

AUTHENTICATION_BACKENDS = [
    'graphql_jwt.backends.JSONWebTokenBackend',
    'django.contrib.auth.backends.ModelBackend',
]
To use this package, go to mutations.py and add the following code:
import graphql_jwt


class Mutation(graphene.ObjectType):
    token_auth = graphql_jwt.ObtainJSONWebToken.Field()
    verify_token = graphql_jwt.Verify.Field()
    refresh_token = graphql_jwt.Refresh.Field()
We can test it in the GraphiQL interface.
Wrong Password

User Authenticated

As you can see, the input arguments are username and password, and if the user is authenticated, an encrypted token will be returned. Later, you can save this token in the browser's local storage.
If you want, you can also customize the behaviour of ObtainJSONWebToken. Go back to mutations.py:
# Customize the ObtainJSONWebToken behavior to include the user info

class ObtainJSONWebToken(graphql_jwt.JSONWebTokenMutation):
    user = graphene.Field(types.UserType)

    @classmethod
    def resolve(cls, root, info, **kwargs):
        return cls(user=info.context.user)

class Mutation(graphene.ObjectType):
    token_auth = ObtainJSONWebToken.Field()
Notice that the ObtainJSONWebToken extends to the default JSONWebTokenMutation, and then in the Mutation class, you can use ObtainJSONWebToken instead.
Now you can make GraphQL return more information about the user.

Pinia in the Frontend
Now it's time for us to solve the second problem in the frontend. Let's start by installing Pinia.
npm install pinia
Then, go to main.js and make sure that your app is using Pinia.
import { createPinia } from "pinia";

createApp(App).use(createPinia()).use(router).use(apolloProvider).mount("#app");
Go back to the src directory and create a folder called stores. This is where we'll put all of our stores. For now, you only need a user store, so create a user.js file:
import { defineStore } from "pinia";

export const useUserStore = defineStore({
  id: "user",
  state: () => ({
    token: localStorage.getItem("token") || null,
    user: localStorage.getItem("user") || null,
  }),
  getters: {
    getToken: (state) => state.token,
    getUser: (state) => JSON.parse(state.user),
  },
  actions: {
    setToken(token) {
      this.token = token;

      // Save token to local storage
      localStorage.setItem("token", this.token);
    },
    removeToken() {
      this.token = null;

      // Delete token from local storage
      localStorage.removeItem("token");
    },
    setUser(user) {
      this.user = JSON.stringify(user);

      // Save user to local storage
      localStorage.setItem("user", this.user);
    },
    removeUser() {
      this.user = null;

      // Delete user from local storage
      localStorage.removeItem("user");
    },
  },
});
Notice that this store consists of mainly three sections, state, getters and actions. If you already know how to create a Vue application, this should be fairly easy to understand.
state is like the data() method in a Vue component, it is where you declare variables, except these variables will be accessible to all components. In our example, Vue will first try to get the token from the local storage, if the token does not exist, the variable will be assigned the value null.
getters are the equivalent of the computed variables. It performs simple actions, usually just returning the value of a state. Again, it is accessible to all components and pages.
And finally actions are like the methods in a Vue component. They usually perform some action using the states. In this case, you are saving/removing the user's token and information.
One more thing you need to note is that you cannot save objects inside the local storage, only strings. That is why you have to use stringify() and parse() to turn the data into a string and then back into an object.
Next, you need to use this store when log the user in. I created a SignIn.vue file like this:
<script>
import { useUserStore } from "@/stores/user";
import { USER_SIGNIN } from "@/mutations";

export default {
  name: "SignInView",

  setup() {
    const userStore = useUserStore();
    return { userStore };
  },

  data() {
    return {
      signInDetails: {
        username: "",
        password: "",
      },
    };
  },

  methods: {
    async userSignIn() {
      const user = await this.$apollo.mutate({
        mutation: USER_SIGNIN,
        variables: {
          username: this.signInDetails.username,
          password: this.signInDetails.password,
        },
      });
      this.userStore.setToken(user.data.tokenAuth.token);
      this.userStore.setUser(user.data.tokenAuth.user);
    },
  },
};
</script>
Line 2, imported the user store you just created.
Line 9-12, call the user store in the setup hook, this makes Pinia easier to work with without any additional map functions.
Line 32-33, invoke the setToken() and setUser() actions we just created, this will save the information inside the local storage.
Now, this is how you can log the user in, but what if the user is already signed in? Let's take a look at an example:
<script>
import { SITE_INFO } from "@/queries";
import { useUserStore } from "@/stores/user";

export default {
  setup() {
    const userStore = useUserStore();
    return { userStore };
  },

  data() {
    return {
      menuOpen: false,
      mySite: null,
      user: {
        isAuthenticated: false,
        token: this.userStore.getToken || "",
        info: this.userStore.getUser || {},
      },
      dataLoaded: false,
    };
  },

  async created() {
    const siteInfo = await this.$apollo.query({
      query: SITE_INFO,
    });
    this.mySite = siteInfo.data.site;

    if (this.user.token) {
      this.user.isAuthenticated = true;
    }
  },

  methods: {
    userSignOut() {
      this.userStore.removeToken();
      this.userStore.removeUser();
    },
  },
};
</script>
Line 18-19, try to get the token and user info from the store.
Line 31-33, if the token exists, then the user is considered as authenticated.
Line 38-41, this method will log the user out when invoked.
Now that you know how to retrieve data using queries and how to send data using mutations, you can try something a little bit more challenging. In this article, let's create a comment and a like reaction system for our blog project.
Creating a comment system
Let's start with the comment section. There are a few things you need to remember before diving into the code. First, for security reasons, only users that are logged in can leave comments. Second, each user can leave multiple comments, and each comment only belongs to one user. Third, each article can have multiple comments, and each comment only belongs to one article. Last but not least, the comment has to be approved by the admin before showing up on the article page.
Not logged in

Logged in

Setting up the backend
With that in mind, let's start by creating the model for the comments. This part should be fairly easy to understand if you already know how to work with Django.
# Comment model
class Comment(models.Model):
    content = models.TextField(max_length=1000)
    created_at = models.DateField(auto_now_add=True)
    is_approved = models.BooleanField(default=False)

    # Each comment belongs to one user and one post
    user = models.ForeignKey(User, on_delete=models.SET_NULL, null=True)
    post = models.ForeignKey(Post, on_delete=models.SET_NULL, null=True)
Next, go ahead and apply the changes you've made to the models. Go to the terminal and run the following commands.
python manage.py makemigrations
python manage.py migrate
You also need to set up GraphQL at the backend. You can add a type for the comment model.
class CommentType(DjangoObjectType):
    class Meta:
        model = models.Comment
And then the mutation. Note that there are three things Django needs to know to add a comment, the content of the comment, the user that wants to create this comment, and the article that the user is commenting on.
class CreateComment(graphene.Mutation):
    comment = graphene.Field(types.CommentType)

    class Arguments:
        content = graphene.String(required=True)
        user_id = graphene.ID(required=True)
        post_id = graphene.ID(required=True)

    def mutate(self, info, content, user_id, post_id):
        comment = models.Comment(
            content=content,
            user_id=user_id,
            post_id=post_id,
        )
        comment.save()

        return CreateComment(comment=comment)
class Mutation(graphene.ObjectType):
    . . .
    create_comment = CreateComment.Field()
Remember to add the CreateComment class inside the Mutation class.
Setting up the frontend
As for the frontend, let's go to Post.vue, this is where the comments are shown. Please note that I removed some unrelated code in the following examples, so that the code snippets won't be too long, but if you wish to have the complete code, you can download the source code here.
Post.vue
<script>
import { POST_BY_SLUG } from "@/queries";
import CommentSectionComponent from "@/components/CommentSection.vue";

export default {
  name: "PostView",

  components: { CommentSectionComponent },

  data() {
    return {
      postBySlug: null,
      comments: null,
      userID: null,
    };
  },

  computed: {
    // Filters out the unapproved comments
    approvedComments() {
      return this.comments.filter((comment) => comment.isApproved);
    },
  },

  async created() {
    // Get the post before the instance is mounted
    const post = await this.$apollo.query({
      query: POST_BY_SLUG,
      variables: {
        slug: this.$route.params.slug,
      },
    });
    this.postBySlug = post.data.postBySlug;
    this.comments = post.data.postBySlug.commentSet;
  },
};
</script>
queries.js
export const POST_BY_SLUG = gql`
  query ($slug: String!) {
    postBySlug(slug: $slug) {
      . . .
      commentSet {
        id
        content
        createdAt
        isApproved
        user {
          username
          avatar
        }
        numberOfLikes
        likes {
          id
        }
      }
    }
  }
`;
First, in the created() hook, you retrieve the requested article as well as the comments using the POST_BY_SLUG query, which is shown above. Next, in the computed property, you need to filter out the comments that are not approved by the admin. And finally, you pass the comment, the post ID and the user ID to the CommentSectionComponent.
CommentSectionComponent.vue
<template>
  <div class="home">
    . . .
    <!-- Comment Section -->
    <!-- Pass the approved comments, the user id and the post id to the comment section component -->
    <comment-section-component
      v-if="this.approvedComments"
      :comments="this.approvedComments"
      :postID="this.postBySlug.id"
      :userID="this.userID"
    ></comment-section-component>
  </div>
</template>
Next, let's take a closer look at the comment section component. This component contains two sections, a form that allows the user to leave comments, which is only shown when the user is logged in, and a list of existing comments.
CommentSection.vue
<script>
import { SUBMIT_COMMENT } from "@/mutations";
import CommentSingle from "@/components/CommentSingle.vue";
import { useUserStore } from "@/stores/user";

export default {
  components: { CommentSingle },
  name: "CommentSectionComponent",

  setup() {
    const userStore = useUserStore();
    return { userStore };
  },

  data() {
    return {
      commentContent: "",
      commentSubmitSuccess: false,
      user: {
        isAuthenticated: false,
        token: this.userStore.getToken || "",
        info: this.userStore.getUser || {},
      },
    };
  },
  props: {
    comments: {
      type: Array,
      required: true,
    },
    postID: {
      type: String,
      required: true,
    },
    userID: {
      type: String,
      required: true,
    },
  },
  async created() {
    if (this.user.token) {
      this.user.isAuthenticated = true;
    }
  },
  methods: {
    submitComment() {
      if (this.commentContent !== "") {
        this.$apollo
          .mutate({
            mutation: SUBMIT_COMMENT,
            variables: {
              content: this.commentContent,
              userID: this.userID,
              postID: this.postID,
            },
          })
          .then(() => (this.commentSubmitSuccess = true));
      }
    },
  },
};
</script>
I assume you already know how to use Pinia to verify if the user is logged in, and how to use props to pass information between different components, I'll skip this part, and let's focus on the submitComment() method.
When this method is invoked, it will test if the comment is empty, and if not, it will use the SUBMIT_COMMENT mutation to create a new comment. The SUBMIT_COMMENT mutation is defined as follows:
mutations.js
export const SUBMIT_COMMENT = gql`
  mutation ($content: String!, $userID: ID!, $postID: ID!) {
    createComment(content: $content, userId: $userID, postId: $postID) {
      comment {
        content
      }
    }
  }
`;
The following code is the HTML section of CommentSection.vue file. Notice that at the end of this code, we used another component CommentSingle.vue to display one single comment.
CommentSection.vue
<template>
  <div class=". . .">
    <p class="font-bold text-2xl">Comments:</p>

    <!-- If the user is not authenticated -->
    <div v-if="!this.user.isAuthenticated">
      You need to
      <router-link to="/account">sign in</router-link>
      before you can leave your comment.
    </div>

    <!-- If the user is authenticated -->
    <div v-else>
      <div v-if="this.commentSubmitSuccess" class="">
        Your comment will show up here after is has been approved.
      </div>
      <form action="POST" @submit.prevent="submitComment">
        <textarea type="text" class=". . ." rows="5" v-model="commentContent" />

        <button class=". . .">Submit Comment</button>
      </form>
    </div>

    <!-- List all comments -->
    <comment-single
      v-for="comment in comments"
      :key="comment.id"
      :comment="comment"
      :userID="this.userID"
    >
    </comment-single>
  </div>
</template>
Now, let's take a closer look at the CommentSingle.vue file.
CommentSingle.vue HTML section
<template>
  <div class="border-2 p-4">
    <div
      class="flex flex-row justify-start content-center items-center space-x-2 mb-2"
    >
      <img
        :src="`http://127.0.0.1:8000/media/${this.comment.user.avatar}`"
        alt=""
        class="w-10"
      />
      <p class="text-lg font-sans font-bold">
        {{ this.comment.user.username }}
      </p>
    </div>

    <p>
      {{ this.comment.content }}
    </p>
  </div>
</template>
CommentSingle.vue JavaScript section
<script>
export default {
  name: "CommentSingleComponent",
  data() {
    return {
      . . .
    };
  },
  props: {
    comment: {
      type: Object,
      required: true,
    },
    userID: {
      type: String,
      required: true,
    },
  },
};
</script>
Creating a like reaction system

As for the like system, there are also a few things you need to keep in mind. First, the user has to be logged in to add a like. Unverified users can only see the number of likes. Second, each user can only send one like to one article, and clicking the like button again would remove the like reaction. Lastly, each article can receive likes from multiple users.
Setting up the backend
Again, let's start with the models.
Since each article can have many likes from many users, and each user can give many likes to many articles, this should be a many-to-many relationship between Post and User.
Also notice that this time a get_number_of_likes() function is created to return the total number of likes. Remember to apply these changes to the database using the commands we've talked about before.
# Post model

class Post(models.Model):
    . . .

    # Each post can receive likes from multiple users, and each user can like multiple posts
    likes = models.ManyToManyField(User, related_name='post_like')

    . . .

    def get_number_of_likes(self):
        return self.likes.count()
Next, we add the types and mutations.
class PostType(DjangoObjectType):
    class Meta:
        model = models.Post

    number_of_likes = graphene.String()

    def resolve_number_of_likes(self, info):
        return self.get_number_of_likes()
Notice that in line 8, self.get_number_of_likes() invokes the get_number_of_likes() function you defined in the model.
class UpdatePostLike(graphene.Mutation):
    post = graphene.Field(types.PostType)

    class Arguments:
        post_id = graphene.ID(required=True)
        user_id = graphene.ID(required=True)

    def mutate(self, info, post_id, user_id):
        post = models.Post.objects.get(pk=post_id)

        if post.likes.filter(pk=user_id).exists():
            post.likes.remove(user_id)
        else:
            post.likes.add(user_id)

        post.save()

        return UpdatePostLike(post=post)
To add a like to a post, you need to know the id of the article, and the id of the user that likes this article.
From line 11 to 14, if the post already has a like from the current user, the like will be removed, and if not, a like will be added.
Setting up the frontend
Next, we need to add a like button to our post page. Go back to Post.vue.
Post.vue HTML section
<template>
  <div class="home">
    . . .

    <!-- Like, Comment and Share -->
    <div class=". . .">
      <div v-if="this.liked === true" @click="this.updateLike()">
        <i class="fa-solid fa-thumbs-up">
          <span class="font-sans font-semibold ml-1">{{
            this.numberOfLikes
          }}</span>
        </i>
      </div>
      <div v-else @click="this.updateLike()">
        <i class="fa-regular fa-thumbs-up">
          <span class="font-sans font-semibold ml-1">{{
            this.numberOfLikes
          }}</span>
        </i>
      </div>
      . . .
    </div>

    . . .
  </div>
</template>
Post.vue JavaScript section
<script>
import { POST_BY_SLUG } from "@/queries";
import { UPDATE_POST_LIKE } from "@/mutations";
. . .

export default {
  . . .
  async created() {
    . . .
    // Find if the current user has liked the post
    let likedUsers = this.postBySlug.likes;

    for (let likedUser in likedUsers) {
      if (likedUsers[likedUser].id === this.userID) {
        this.liked = true;
      }
    }

    // Get the number of likes
    this.numberOfLikes = parseInt(this.postBySlug.numberOfLikes);
  },

  methods: {
    updateLike() {
      if (this.liked === true) {
        this.numberOfLikes = this.numberOfLikes - 1;
      } else {
        this.numberOfLikes = this.numberOfLikes + 1;
      }
      this.liked = !this.liked;

      this.$apollo.mutate({
        mutation: UPDATE_POST_LIKE,
        variables: {
          postID: this.postBySlug.id,
          userID: this.userID,
        },
      });
    },
  },
};
</script>
I deleted some code to make this example shorter, but there are still four things we need to talk about in this example. First, the POST_BY_SLUG query that you use to retrieve the article, you need to make sure that it returns the number of likes and the users that already liked the article.
queries.js
export const POST_BY_SLUG = gql`
  query ($slug: String!) {
    postBySlug(slug: $slug) {
      . . .
      numberOfLikes
      likes {
        id
      }
      . . .
    }
  }
`;
Next, in the created() hook, after you've retrieved the post, you must determine if the current user is in the list of users that already liked the post.
Then, in the updateLike() method, when this method is invoked, it will change the number of likes based on whether or not the user has liked the post.
Finally, the method updates the post's likes in the backend using the UPDATE_POST_LIKE mutation.
mutations.js
export const UPDATE_POST_LIKE = gql`
  mutation ($postID: ID!, $userID: ID!) {
    updatePostLike(postId: $postID, userId: $userID) {
      post {
        id
        title
        likes {
          id
        }
      }
    }
  }
`;
A Challenge
After learning how to create a comment and a like system, let's consider a more challenging task. What if we want to create a nested commenting system, where users can comment on another comment? How can we change our code to make this possible? And how can we create a like system for the comment as well?
The complete implementation of these functionalities are included in the source code of this tutorial.
If you liked this article, please also check out my other tutorials:


Top comments (1)