
This post will assist any developer to learn on how to implement async actions with the help of middleware (redux-thunk) in react native apps. We’ll approach the implementation by creating a simple application.
Complete source code of this tutorial is available in the React-native-redux-thunk-example
What Is React Native?

React Native is a JavaScript framework for writing real, natively rendering mobile applications for iOS and Android. It’s based on React, Facebook’s JavaScript library for building user interfaces, but instead of targeting the browser, it targets mobile platforms. In other words: web developers can now write mobile applications that look and feel truly “native,” all from the comfort of a JavaScript library that we already know and love. Plus, because most of the code you write can be shared between platforms, React Native makes it easy to simultaneously develop for both Android and iOS.
Similar to React for the Web, React Native applications are written using a mixture of JavaScript and XML markup, known as JSX. Then, under the hood, the React Native “bridge” invokes the native rendering APIs in Objective-C (for iOS) or Java (for Android). Thus, your application will render using real mobile UI components, not webviews, and will look and feel like any other mobile application. React Native also exposes JavaScript interfaces for platform APIs, so your React Native apps can access platform features like the phone camera, or the user’s location.
React Native currently supports both iOS and Android and has the potential to expand to future platforms as well. In this blog, we’ll cover both iOS and Android. The vast majority of the code we write will be cross-platform. And yes: you can really use React Native to build production-ready mobile applications! Some example: Facebook, Palantir, and TaskRabbit are already using it in production for user-facing applications.
What is Redux?
Redux is a standalone state management library, which can be used with any library or framework. If your background is React developer, then you have used the Redux library with React. The primary use of Redux is that we can use one application state as a global state and interact with the state from any react component is very easy whether they are siblings or parent-child.

Basic usage of Redux comes into picture when the app gets large and complex. In such apps, simple data management as parent-child becomes difficult using props. There are multiple components trying to communicate with multiple other components. In such cases, Redux comes in handy.
Redux can be broken down into few sections while building the application which is listed below.
Actions: “are payloads of information that send data from your application to your store. They are the only source of information for the store.” this means if any state change necessary the change required will be dispatched through the actions.
Reducers: “Actions describe the fact that something happened, but don’t specify how the application’s state changes in response. This is the job of reducers.” when an action is dispatched for state change its the reducers duty to make the necessary changes to the state and return the new state of the application.
Store: with help of reducers a store can be created which holds the entire state of the application it is recommended to use a single store for the entire application than having multiple stores which will violate the use of redux which only has a single store.
Components (UI): This is where the UI of the application is kept.
Middlewares: Redux allows us to put a middleware that sits between an action being dispatched and the action that reaches to the reducers. Two very popular middleware libraries that will allow for side effects and asynchronous activities are Redux Thunk and Redux Saga. We’ll learn more about thunk here.
Redux Thunk is the middleware that lets you call the action creators that return a function instead of the action object. That function then receives the store’s dispatch method, which is then used to dispatch the regular synchronous actions inside a body of the function once the asynchronous operations have completed. The thunk is a concept in programming where a function is used to delay the evaluation/calculation of an operation. I know it’s too much of jargon, so let’s see how it works in the app.

Steps for Implementing Redux-thunk in React Native app
We will follow these step-by-step instructions to create our React Native with Redux Thunk
Step 1: Create a Basic React Native app
Step 2: Running app on a device
Step 3: Install the necessary packages to connect your app with redux.
Step 4: Create the necessary folders inside Root.
Step 5: Create Actions.
Step 6:- Create rootReducer and postReducer.
Step 6: Create a Redux Store.
Step 7: Pass the Store to the React Native app.
Step 8: Connect React Native app to Redux store.
Step 9: Test your app
Step 10: What is the basic difference between redux-thunk and redux-saga?
So let’s dive right in!

1. Create a basic React Native app
First, make sure you have all pre-requisites to create a react-native app as per the official documentation.
At the time of this post, I have React-Native version 0.60
Create a blank react-native app (Replace myApp with your own name)
$ react-native init myApp
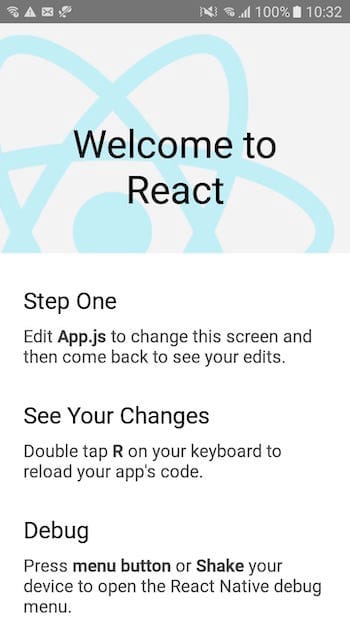
This will create a basic React-native app which you can run in a device or simulator. (either Android or iOS)
Step 2: Running app on device
To run the iOS app, you should specify simulator
react-native run-ios --simulator=”iPhone X”To run Android app, you should start emulator first, either via Android Studio or adb , then call
react-native run-androidYou’ll see the default start screen
Step 3: Install the necessary packages to connect your app with redux.
npm
npm install redux react-redux redux-thunk
yarn
yarn add redux react-redux redux-thunk
React Redux is the official React binding for Redux. It lets your React components read data from a Redux store, and dispatch actions to the store to update data.
As of React Native 0.18, React Redux 5.x should work with React Native. If you have any issues with React Redux 5.x on React Native, runnpm ls reactand make sure you don’t have a duplicate React installation in yournode_modules. We recommend that you usenpm@3.xwhich is better at avoiding these kinds of issues.
The React Redux docs are now published at https://react-redux.js.org .
If you want to know how it works, check out this link
Step 5: Create the necessary folders inside Root
Let’s keep this image in mind to help us understand which parts of Redux are implemented at what step.

To work with redux you can follow this folder structure for better code quality
Create the following folders.
- actions
- constants
- reducers
- components
Step 6: Create Constants and Actions
6.1 Inside the constants folder, create one file called index.js. Add the following line inside index.js.
const GET_PAGE_LIST = 'GET_PAGE_LIST';
6.2 Inside the actions folder, create one file called pageList.js. Add the following code inside pageList.js.
Actions are JavaScript objects that represent payloads of information that send data from your application to your Redux store.
Actions have a type and an optional payload. In our case, the type will be GET_PAGE_LIST and the payload pageList which we are assigning into our pageList variable in store.
import { GET_PAGE_LIST } from '../constants';
export function setPageList(pageList) {
return {
type: GET_PAGE_LIST,
payload: pageList,
};
}
export function getPageList() {
return async (dispatch) => {
try {
const apiReq = await fetch('http://dummy.restapiexample.com/api/v1/employees', {
method: 'GET'
});
console.log(apiReq);
await dispatch(setPageList(apiReq));
return apiReq || [];
} catch (error) {
console.error(error);
}
};
}
So, here we have defined an action that calls the API and gets a response from the server. Remember, the reducer is a pure function, and we do not want any asynchronous call inside reducer, all the asynchronous actions are called here inside actions.
But, we need to connect this action to our App.js component somehow. Otherwise, we cannot add the data into the Redux store. Also, we need to first create a store. But before that, we also need to create a reducer function. So, first, create a reducer → then create a store and → then connect the React Native application to the Redux store.

Step 6:- Create rootReducer and postReducer.
Now, inside the reducers folder, create one file called pageList.js.
Write the following code inside the pageListReducer.js.
import { GET_PAGE_LIST } from '../constants';
const initialState = {
pageList: []
};
const pageListReducer = (state = initialState, action) => {
switch(action.type) {
case GET_PAGE_LIST:
return {
...state,
pageList: []
};
default:
return state;
}
}
export default pageListReducer;
So, here, we have defined the function called pageListReducer that accepts the two arguments.
- state
- action
The first time, it will take the initial state of our application, and then we pass whatever argument, it takes that argument and operates based on the case execution. The second argument is action, which consists of type and payload. The payload is the count value, which assigned to count variable in store.
Remember here — we have returned a new state and not existing state. So we have modified the state in a pure manner.

Step 7:-Create a Redux Store.
Inside the root folder, create one folder called store and inside this folder add one file called configureStore.js add the following code.
import { createStore, combineReducers } from 'redux';
import pageReducer from '../reducers/pageReducer';
import { applyMiddleware } from 'redux';
import thunk from 'redux-thunk';
const rootReducer = combineReducers(
{ pageList: pageReducer }
);
const configureStore = () => {
return createStore(rootReducer, applyMiddleware(thunk));
}
export default configureStore;
Here, we have created the redux store and passed the reducer to that store. This store will ideally contain all the data that handles the app state.
The combineReducer function combines all the different reducers into one and forms the global state. So this is the global state of our whole application.

Step 8: Pass the Store to the React Native app.
Inside the root folder, you will find one file called index.js and inside that file add the following code.
It is almost the same as React web application, in which we pass the Provider as a root element and pass the store and then via react-redux’s connect() function, we can connect the any react component to redux store.

Step 8: Connect React Native app to Redux store.
Finally, we connect our App.js component to the Redux store. For that, we need the connect() function from the react-redux library.
Connect which needs to be imported from react-redux and with the help of connect the properties will be mapped to the UI component.
mapStateToProps will contain all the state properties which will be available to the components of the app whatever properties that need to be accessed from the UI components need to be written into the mapStateToProps helper function.
mapDispatchToProps will contain all the necessary functions wrapped with action creators which will be mapped to the props of the app and can be called directly. The directory containing the below file is ./actions/pageList.js
Here, when we click on the get employee button, we get the Employees value from props and change it and then send it to the action with that value. Now that action returned the object with the action type and payload and based on the type the reducer will be executed and add that values inside the store.
Now, if the store’s values are changed, then we need to update the UI based on the new values. That is why the mapStateToProps function is created. So, when the store’s count get the new value, render function executed again and update the UI.
Step 10: Test your app:
Once you run the application the below UI will be rendered.

Once you click on any of the get employe buttons it will correctly fetch data from a server and render it on UI. Although, what we just did is nothing fancy for an app, remember everything is going through the whole “action-reducer-store-state” flow. This flow can handle large and complex apps, so you don’t get stuck in “props” loops.

(If you are from an Angular background, for ease of understanding, you can understand actions as something similar to methods in services which we can call from any component or page. Reducers are also similar functions, but they change the central store of the app. Store can be assumed as something similar to a $rootscope object which stores all the data at one place, and can be accessed from any page. Don’t draw a direct comparison between these things, this is just to help you understand the concept in an easier way.)
Hope this blog helps you to implement redux with middleware (thunk) in react native apps.
Step 10: What is the basic difference between redux-thunk and redux-saga?
In terms of implementation, Redux-Thunk and Redux-Saga couldn’t possibly be more different. However, in terms of what you can do with them… well, they’re actually very very similar. But not the same. Redux-Thunk and Redux-Saga differ in a few important ways.
But, first, let’s cover some background.
Redux-thunk and Redux-saga are both middleware libraries for Redux. Redux middleware is code that intercepts actions coming into the store via the dispatch() method.
An action can be literally anything.
But if you’re following best practices, an action is a plain javascript object with a type field, and optional payload, meta, and error fields. E.g.
const loginRequest = {
type: 'LOGIN_REQUEST',
payload: {
name: 'admin',
password: '123',
},
};
(by the way, this structure is called Flux Standard Action)
This is what the type signature looks like in TypeScript
type Action = {
     type: string;
     payload?: any;
     meta?: any;
     error?: boolean;
};
Redux-Thunk
In addition to dispatching standard actions, Redux-Thunk middleware allows you to dispatch special functions, called thunks.
Thunks (in Redux) generally have the following structure:
export const thunkName =   parameters =>
     (dispatch, getState) => {
   // Your application logic goes here
 };
That is, a thunk is a function that (optionally) takes some parameters and returns another function. The inner function takes a dispatch function and a getState function -- both of which will be supplied by the Redux-Thunk middleware.
Here we have an example thunk that attempts to call a login API with a username and password. The thunk first dispatches an action indicating that the request is starting. It then makes the call. Finally, it dispatches either a success action or a failure action depending on whether or not the API call succeeded.
import * as api from 'api';
import { loginRequest, loginSuccess, loginFailure } from './loginActions';
export const loginThunk =
(name: string, password: string) =>
(dispatch: Function) => {
dispatch(loginRequest());
try {
api.login(name, password);
}catch (err) {
dispatch(loginFailure(err));
return;
}
dispatch(loginSuccess());
};
When you dispatch your thunk, e.g. dispatch(loginThunk('admin', 'secret')); Redux-Thunk calls your inner function, which is essentially:
(dispatch: Function) => {
dispatch(loginRequest());
try {
api.login('admin', 'secret'); // values from closure
}catch (err) {
dispatch(loginFailure(err));
return;
}
dispatch(loginSuccess());
};
Now that we’ve covered the basics of Redux-thunk, let’s look at Redux-Saga
Redux-Saga
Redux-Saga middleware allows you to express complex application logic as pure functions called sagas. Pure functions are desirable from a testing standpoint because they are predictable and repeatable, which makes them relatively easy to test.
Sagas are implemented through special functions called generator functions. These are a new feature of ES6 JavaScript. Basically, execution jumps in and out of a generator everywhere you see a yieldstatement. Think of a yield statement as causing the generator to pause and return the yielded value. Later on, the caller can resume the generator at the statement following the yield.
A generator function is one defined like this. Notice the asterisk after the function keyword.
function* mySaga() { // ...}We can rewrite the login functionality from before as a saga. It looks like this:
import * as api from 'api';
import { LoginRequestAction, loginSuccess, loginFailure } from './loginActions';
function* loginSaga() {
const action: LoginRequestAction = yield take('LOGIN_REQUEST');
const { name, password } = action.payload;
try {
yield call(api.login, name, password);
}
catch (err) {
yield put(loginFailure(err));
return;
}
yield put(loginSuccess());
}
Once the login saga is registered with Redux-Saga, it will begin executing immediately. But then the yield take on the the first line will pause the saga until an action with type 'LOGIN_REQUEST' is dispatched to the store. Once that happens, execution will continue.
The Biggest Difference
You might think the biggest difference is in the syntax. Although it’s true that writing and reasoning about thunks and sagas are quite different, there’s something bigger.
Thunks can never act in response to an action. Redux-Saga, on the other hand, subscribes to the store and can trigger a saga to run or continue when a certain action is dispatched.
Conclusion
In this post, you learned how to implement Redux with middleware(redux-thunk) in your React Native app. You learnt what are reducers, actions, and store, how the flow of data is managed in a Redux based app.

And that’s it! The application now uses Redux and Redux Thunk to fetch and display the data!
That wasn’t too difficult, was it?
And you’re now a Redux master :D
Stay tuned for more Ionic and React Native blogs!
Happy Coding.🤓👍🏼
Complete source code of this tutorial is available in the React-native-redux-thunk-example
Next Steps
Now that you have learnt about setting up Redux with middleware(redux-thunk) in React Native apps, here are some other topics you can look into
- Firebase — Integrate Firebase | Analytics | Push notifications | Firebase CRUD
- How To in React Native — Geolocation | Life cycle hooks | Image Picker | Redux implementation | Make API calls | Navigation | Translation | Barcode & QR code scan | Send & Read SMS | Google Vision
- Payments — Apple Pay | Stripe payments
- Authentication — Google Login| Facebook login | Phone Auth | Twitter login | Anonymous Login
- Create Instagram / Whatsapp Story Feature in React Native
- React Native life cycle hooks | Implement Redux | Async actions with Redux
- Create Awesome Apps in React Native using Full App
If you need a base to start your next React Native app, you can make your next awesome app using React Native Full App


Top comments (0)