In this tutorial, we'll show you how to integrate Eden AI's Invoice parser, Language detection and Translation API into your app using n8n. But there is a limitless amount of possible workflows (Image tagging, Explicit content detection, Text analysis, etc), so we suggest you also try your own!
NOTE: to follow through with this tutorial, you'll first need to get your 🔑API key on Eden AI for FREE!
What is n8n?
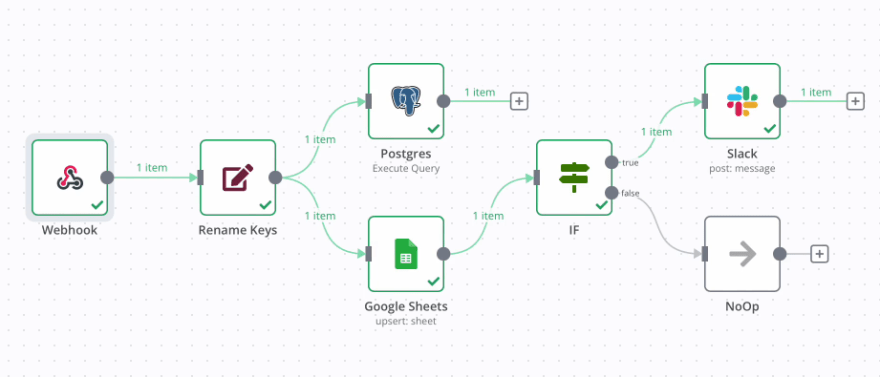
n8n is an automation tool for no-coders, allowing us to easily create and automate workflows using a large variety of services like google services, aws, http requests, slack etc.
Demo 1 | How to add invoice parsing to your app with n8n?
Before we start, what is Invoice Parsing?
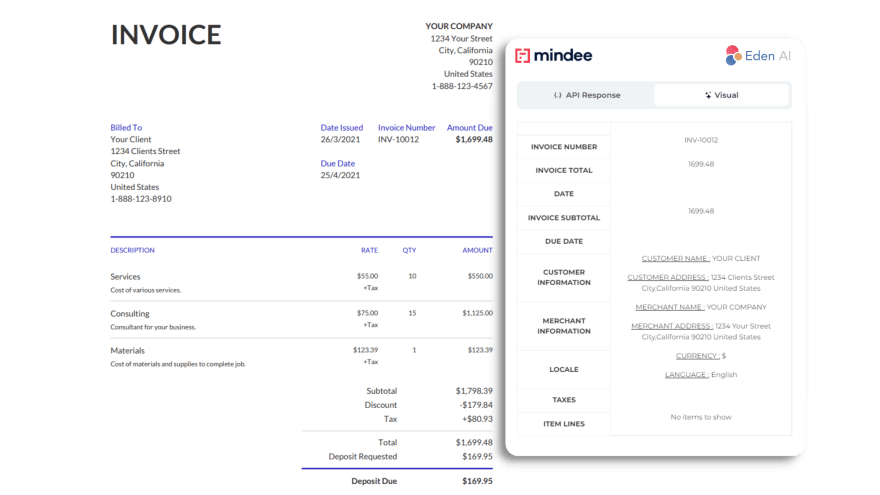
Just like Receipt and Resume Parsing, Invoice Parsing is a tool powered by OCR to extract and digitalize meaningful data, Computer Vision to identify structure of the document, and NLP techniques to pin down the fields. Invoice parser technology extracts key information from an invoice (.pdf, .png or .jpg format) such as the invoice ID, total amount due, invoice date, customer name, etc.
Invoice parser APIs help ensure data accuracy by avoiding errors that can occur during manual data extraction. Then, this information can be used for a variety of purposes and makes it easier to generate reports or export data to other applications and is often used in conjunction with other business management applications.
Bear in mind that your final invoice parsing workflow will look like this:
- Send a message to Telegram bot
- Process the file on Eden AI
- Send the response in a file (JSON) on telegram
- If error happens: send the error message on telegram
Each step of the workflow will be taken care of by a "node". The first node is called a trigger node, so let's start with the telegram trigger node.
NOTE: if you are trying n8n locally you will need to use the --tunnel option in your docker run command (see: https://github.com/n8n-io/n8n/blob/master/docker/images/n8n/README.md)
1. Set up a Telegram Trigger
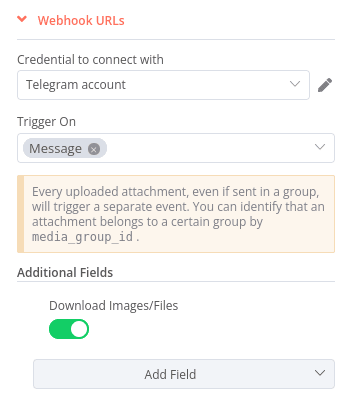
First, you need to search for the Telegram trigger node in the search bar and configure it:
Use your bot access key as credentials, and choose "Message" as the node trigger so that your workflow will be triggered each time you send a message to your bot.
To make it, download incoming files, in the "Additional Field" Category choose "Download Images/Files".
2. Set up an HTTP request
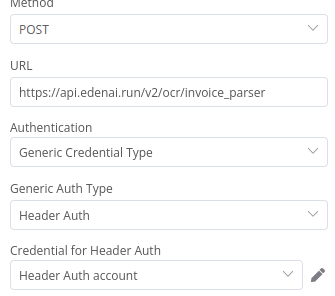
The next node is the "HTTP Request" node. It will serve to make a request to Eden AI with the file received from Telegram.
The node should have the following configuration for Credentials:
In Header Auth account:
Choose “authorization” for Name and “Bearer ” for Value
(We suggest you use your Sandbox API key to test your workflow first)
Body Configuration:
Use “n8n binary data” to select the file from the previous node and use it as a parameter.
You can already try your workflow and see the result from http request as JSON data!
3. Send back via Telegram
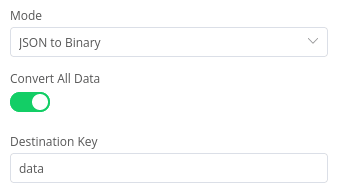
Now, you just need to take the JSON data and send it via Telegram. But a file needs to be in binary, not in JSON format. So we use a new node "Move binary data" and configure it to move from JSON to binary.
Finally, you can use the Telegram node (not the same as "Telegram trigger node") to send a message with the file using your chat id:
4. Optional: Error handling
If an error happens, it is better to be notified instead of getting no response at all. For this purpose, there is an "Error trigger node" that you can use. It will be triggered whenever an error occurs in the workflow. Then, you can link it to another Telegram node to send the error message.
Demo 2 | Language detection + translation
This time we want to translate text into English only if the text’s language is not English.
The final workflow should look like that:
This time, we're introducing a branch in the workflow. IF the language detected is English, do nothing, ELSE translate it.
1. Set up a Telegram trigger
The Telegram trigger is nearly the same as in our first demo for invoice parsing but without the option to download files.
2. Set up an HTTP request
The HTTP Request trigger is nearly the same. You just need to change the endpoint, the encoding type (JSON) and the body parameters (you can see our api documentation here):
Remember to add a parameter “attribute_as_list” to true, so that instead of receiving a list of objects containing a language and a confidence score, you will get multiple lists: one with all the languages detected, and another with all the corresponding confidences.
This will help us in the next step as we want to know if English is part of the list of languages detected. You can see that in the “text” field, you have a dynamic Value. When you want to use specific data from a previous node that is not binary, you can use an Expressions instead of a Fixed Value.
If you click on the expand button you will get an interface to choose the right field from the data of the previous nodes, you can also just drag and drop the field you need in the Value input. Here, you’ll just need the text part of the message received.
3. Branch the workflow
After getting the response, you can branch the workflow depending on its content.
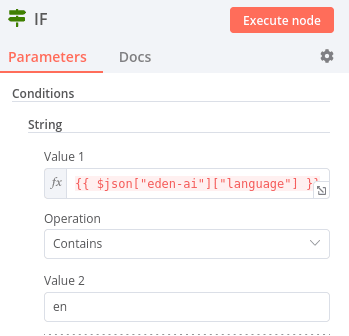
Then, add a condition that will be true if “en” is in the list of languages as followed:
We just want to know if “languages” list contains the value “en”. If the condition is true, the workflow will go to the true branch, otherwise false.
4. Translate and send it to Telegram
Let’s say your text is not in English:
You want to translate the text. To do this, once again, use an HTTP Request node to make a request to Eden AI. There is nothing special happening that we didn’t see in the previous ones, we just want to translate the text message.
Now that you’ve translated the message, you can send it back on telegram!
What if English is detected in the text?
We can just add a “Do nothing” node to… do nothing.
That's it, you now have a chat that automatically translates messages written in a foreign language!
Time to build your own workflow!
That's it!🥳
What we showed you is just a glimpse of all the possibilities available.
Thanks to n8n and Eden AI, it is very easy to build your own workflow using the power of AI and automation without having to write code! Bear in mind that what we showed you were examples using Telegram but you could use nearly anything.
n8n as a large variety of built-in nodes, plus a great amount of community nodes. For instance, you could use similar workflows with Discord, or use mails, Google Drive, AWS, databases, Stripe, etc.
If you're interesting in more low-code tools, have a look at our step-by-step tutorials on how to bring AI to your application with Power Apps, Google App Script, Retool, Make, and IFTTT.







Latest comments (0)