The Admin Panel is the fundamental tool that allows for easy access and manipulation of data within the user interface. Using the admin panel, you can manage products and orders, offer discounts, interact with your customers, and do much more.
An admin panel can be turned into a Sales Dashboard to display business metrics and get your sales insights. It can also be used to export weekly/monthly/yearly data to create reports. Say you run an ecommerce business and need a solution to manage return orders. The customer database sits in a MongoDB database, support tickets being raised on a platform like Zendesk and payments managed through payment gateway tool like Stripe – you can stitch together these sources of truth to an admin panel that looks up the order details, allowing the admin to perform actions like approve return, refund amount, notify the customer.
Creating Admin Panels on DronaHQ is easy
Creating internal tools like Admin Panels and Dashboards on top your datasources like MySQL, MongoDB, Firebase, PostgreSQL etc. is easy with low-code internal tool development platform DronaHQ.
DronaHQ has a growing library of native integrations to let you pull in and combine data from different sources, including your databases and APIs. So if you want to enrich your MongoDB data with some data from another source, you can do so with a ready connector. In this article, we will build an admin panel using MongoDB on DronaHQ.
How to build a MongoDB Admin Panel on DronaHQ
For this example, you need to be signed in to your DronaHQ accounts. If you are DronaHQ user, you can follow along with us here.
1. Adding the MongoDB integration on DronaHQ
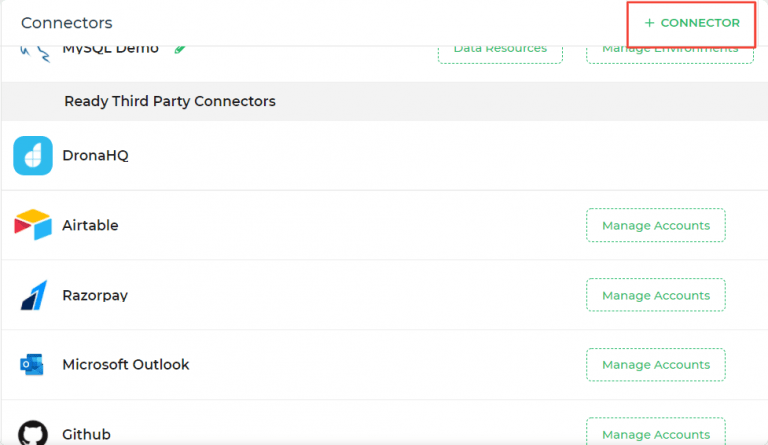
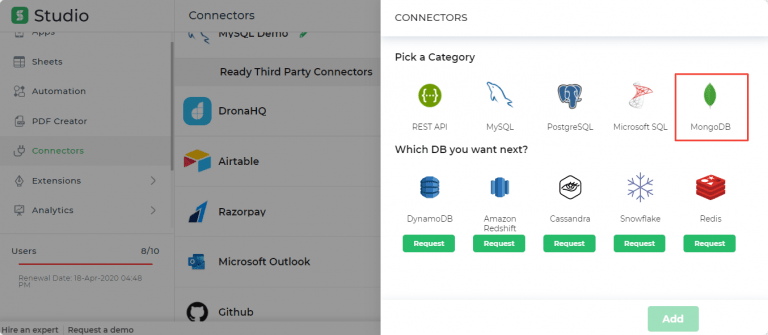
First, head over to the panel menu on the left and click on “ + Connectors.” A list of connectors will pop up. Under the connectors menu, and then select “MongoDB.”
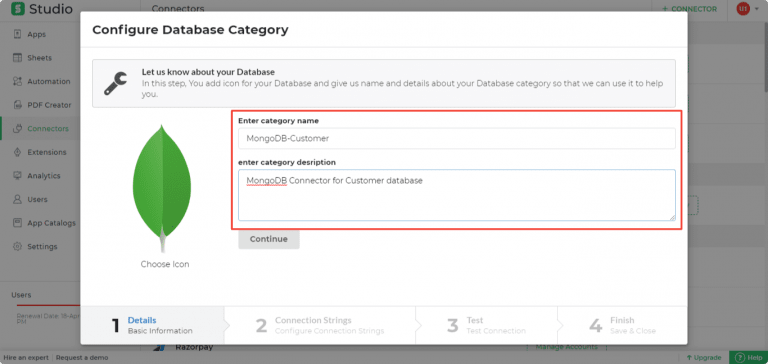
Step 1: Entering Basic Details for the Database Connector
Enter a name for the connector that you would like to use. This will be used to refer to the connector while you are building the app.
After you are done adding a name and description for the connector (I chose to write the purpose of this connector as my description), click on “Continue.”
Step 2: Adding the Connection String from MongoDB
Under the Connection Strings Section, click on “Continue.” It will prompt you to “Test your Connection.” Click on “Test.” You will be asked to select the “Environment” in which the Connector should be available. You can choose between Dev, Beta, and Prod.
I will select Prod as I will need the connector to work in the live app that the customer support team will use.
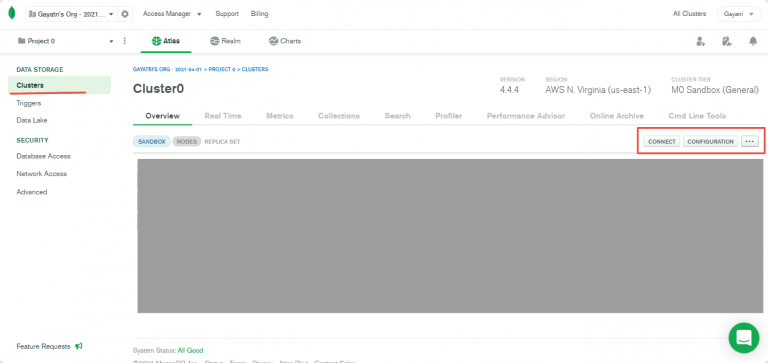
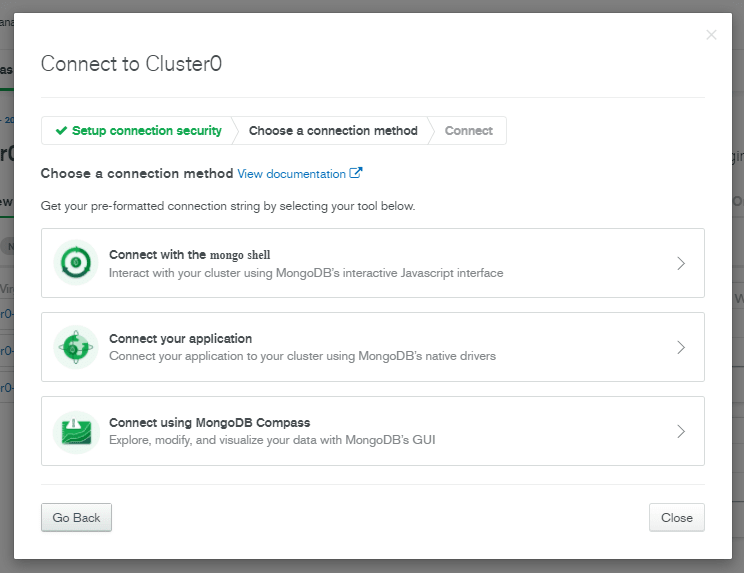
To get the Connection String, head back to your MongoDB database. In my app, I am using MongoDB Atlas. Head over to Clusters > then click on Connect.
Step 3: Configuring the Database and Testing
Click on Connect your Application to get the Configuration link in the next step.
Here’s the process by MongoDB on how to get the configuration link and use it in your apps.
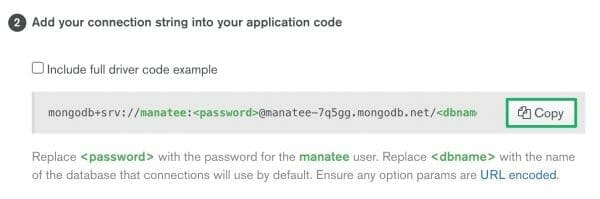
Once you have this link, head back to DronaHQ and enter the copied link into the box. The subsequent field will auto-populate. Click on “Submit” and proceed to
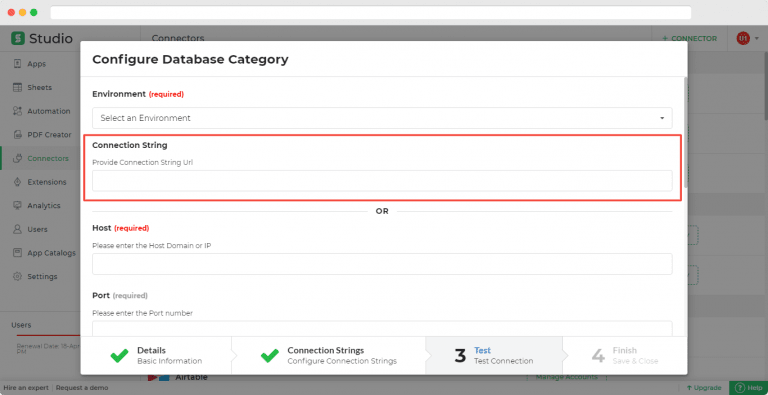
Once these configurations are done, you need to Test the request and connection. If the authentication is successful, you will get the response accordingly. You can now click Continue to Finish and Save your configuration. You will notice the connector is added to the list.
Step 4: Adding query to the database
This is an important step.
Here you configure the various actions MongoDB supports. For example, if your action is Find the parameters would be Filter, projection, sort, limit, and skip, and you can use this to read the data. If you choose InsertOne as an action, the parameter will change to Insert as Key: Value string to write to the database. Once you have assigned the necessary values, you can Run the query. The response can be seen as per the parameters given.

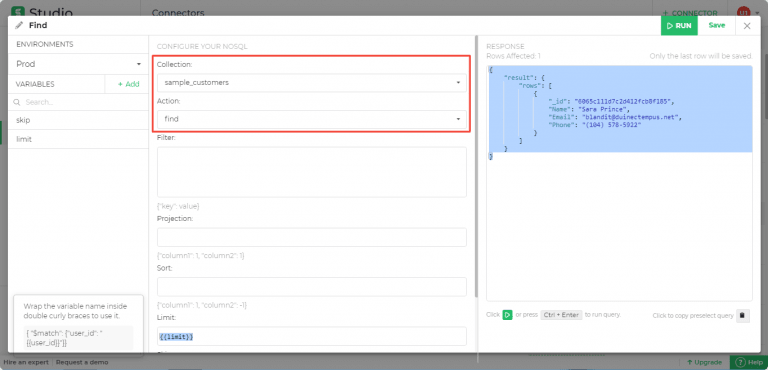
Next, you need to Enter a service name, the collection, and the action.
Let’s name it “FindData.” For our customer portal use case, I will select the “Find” action. Under the Collection dropdown menu, you will be able to see the databases in your cluster. Pick the one you want to use in your app.
Once you are done, click on RUN on the top right corner. You will be able to see the first 10 rows.
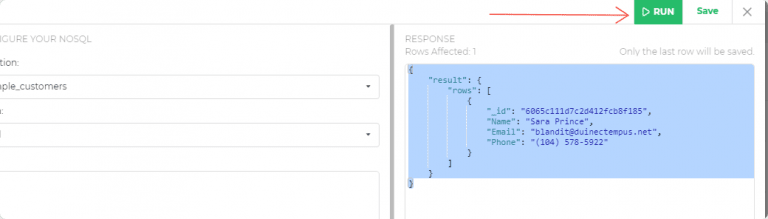
Note: Only the last row will be saved. If the final row has Name, Email, Contact, Address, Company fields, only those will reflect in your app later

Click on “Save” to proceed to the next step.
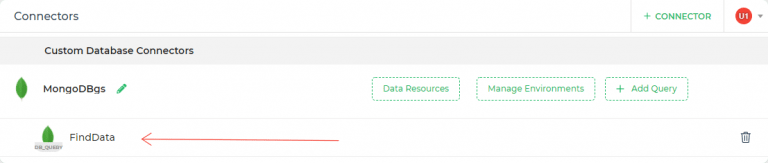
You can now view the queries you saved and use in your apps later under your specific connector under Custom Database connectors.
Building the Admin Panel
Step 1: Building an app from scratch
On the left menu, click on “Apps,” and then click on the “ + “ sign to start building your app from scratch.
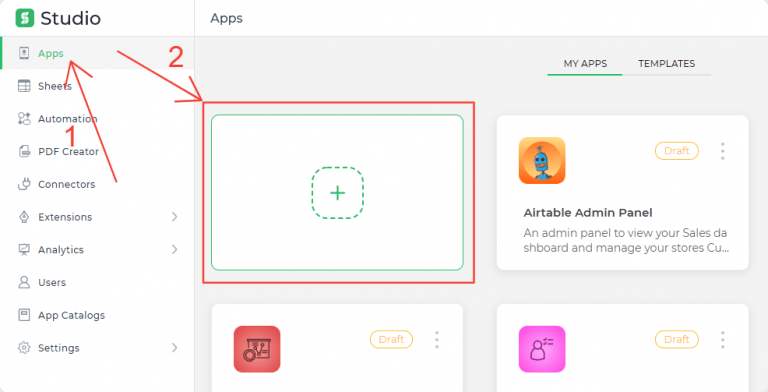
Note: At this step, you are very likely to find a relevant app template (like Customer Support Tool, Sales Dashboard, Customer Feedback, Refund Tool, and so on) under the “TEMPLATES” heading, but in this article, we will be making the app from scratch. If you already have an app on DronaHQ, you can use the connectors we just configured in those apps too.
Let’s give our app a name and a description.

Step 2: Creating the Screens/UI
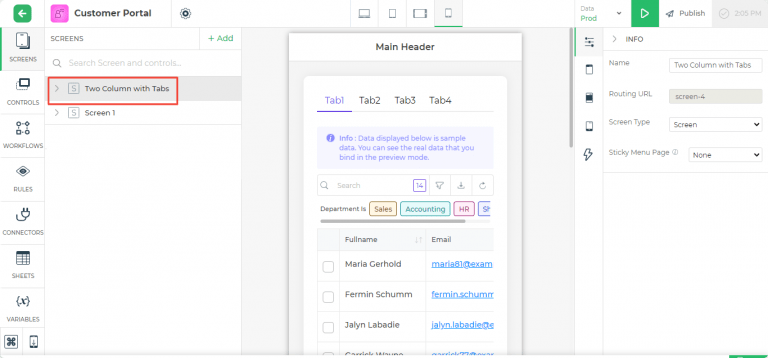
The app will open up in a new tab like in the image below. To make things faster, I will pick a template screen from the Screen Marketplace. To select an app screen, click on the “ + Add.”
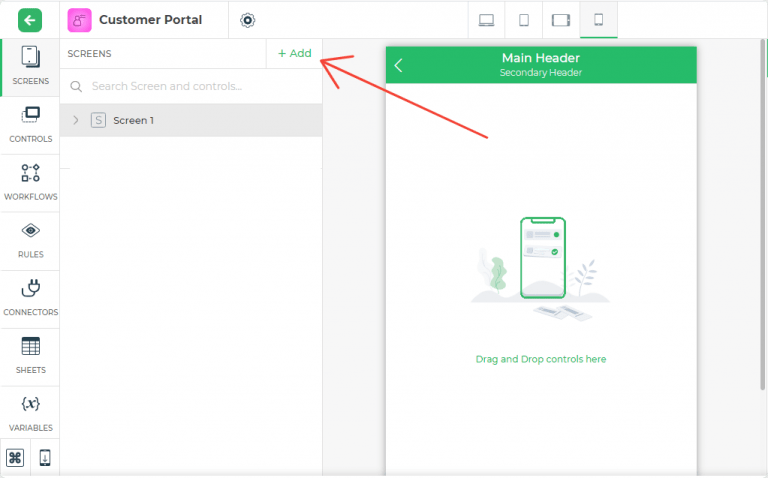
You can browse through a list of Screens, Menus, Pop-ups, Trays. For this app, let’s go with the Two Column with Tabs screen.

You will see the screen is added to your app:
Step 3: Using MongoDB connectors in App
For this, I can use the table grid control.
To do that, we click on the Table Grid Control, then click on the database icon as shown below in the image.
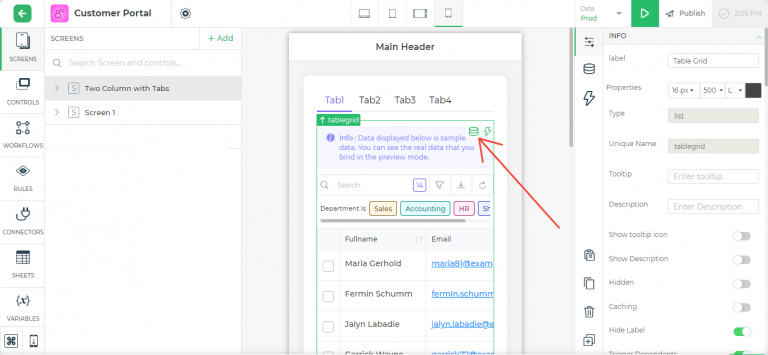
This will pop open a menu on the right of the screen that displays the various methods you can bind your data to the Table Grid control.
Click on the Database icon and head over to add the Custom Function. Here is what the formula should look like:
BINDAPI([MongoDB.result.rows.Name,MongoDB.result.rows.Email,MongoDB.result.rows.Phone,MongoDB.result.rows.Company,MongoDB.result.rows.Address,MongoDB.result.rows.City,MongoDB.result.rows.ZIP,MongoDB.result.rows.Country])
So this is how you build a simple admin panel in less than 10mins.
You can use a similar formula for all other databases like orders list, payment details, etc.
Access the app I built on DronaHQ here
What use case would you like me to cover next DronaHQ?
About: DronaHQ low-code internal tool development platform is the fastest way to build apps for the web, and mobile. Developers and engineering teams love the platform for the speed and flexibility it provides to create admin panels, CRUD apps, GUI, frontends on top of their Databases or APIs. The platform provides the ability to add enhanced event handlers using Actionflows. Unlimited users in all pricing plans.

Top comments (0)