
I recently made the giant leap into the world of Linux and had to sift through many tutorials to create a bootable file. Each tutorial would lead me to another tutorial and would bring up about 3 things I had never heard of. What follows is a summation of my experience and all of the decisions I had to make.
The first thing I had to decide what if I wanted to dual boot or not.
Dual-booting is when you partition your hard drive to load more than one operating system onto it. Your other option is to wipe your whole hard drive and start over with an all Linux system. I switched to Linux using a brand new computer so switching the whole machine to Linux wasn’t an issue.
The next step is to download a Linux ISO. There are many many options when it comes to what Linux version to download. I will give you the advice I was given. Go with the one that is most well documented. That way if you have problems you have the resources to solve them. I was advised that Ubuntu was the tried and true method for programming on Linux. From most of what I’ve seen Linux coding tutorials mostly use Ubuntu.
I decided not to use Ubuntu. Instead, I chose Linux mint. My main reason is that the people I know who use Linux on a regular basis have been using it without major problems. The difference between Linux Mint and Ubuntu is that Ubuntu is made to work more similarly to Mac and Mint works more similarly to a windows desktop. Ubuntu also takes up more memory than mint. Ubuntu unity takes almost twice the amount of space that Mint Cinnamon requires. Mint is also faster.
I’m afraid that isn’t the end of the decisions that I needed to make.
Linux Mint has three desktop options you can download. Xfce, MATE, and Cinnamon.
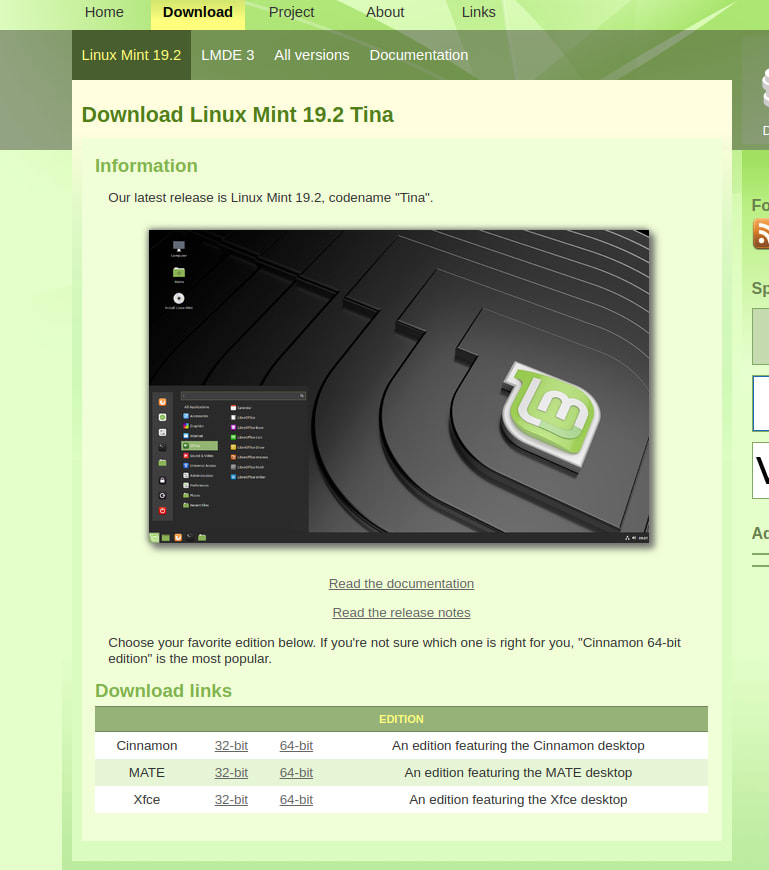
https://linuxmint.com/download.php
I chose Cinnamon. It has a more full-featured desktop and as someone who is new to Linux, I thought starting here would be less frustrating. MATE is more stable and faster. Xfce is lightweight and stable. I didn't worry too much over this choice because the desktop theme can be switched without having to reinstall.
Now to choose which size to download.
Older computers might need to run the 32-bit installation, but if your computer can run the 64-bit it is recommended.
Next up was picking which mirror I wanted to use. Mirrors are just sources to copy and download from. The best bet is to choose the one that is closest geographically, that way it will take less time to download. There is some fear that you may get a malicious ISO. Don’t worry too much there is a step for that. I chose the Oklahoma University option. Mostly because I knew where Oklahoma was.
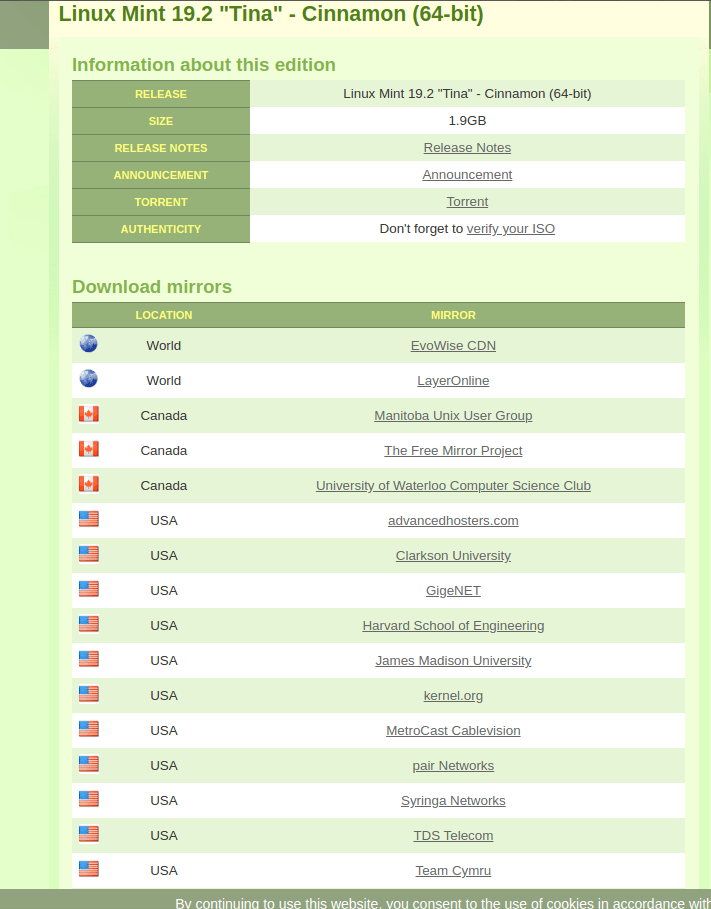
Here is a link to how to verify your ISO. I personally skipped this step and nothing bad has come from this … yet.
Next, I needed to find a flash drive. This was probably the most time-consuming step as I needed an empty or empty-able flash drive with at least 2GB of space on this flash drive. As I found out, A 2GB flash drive likely does not have 2GB of available space. I had 1.83 GB of available space on my flash drive and needed 1.87 GB. It was a very sad realization. I also tried to partition an external hard drive and use it. The utility I used to make a bootable drive, Rufus did not recognize partitions as separate devices and wanted to rewrite both partitions. I elected not to do that.
Let’s talk about Rufus. Rufus helps create a bootable file that will allow you to install Linux. It’s much like unzipping a .zip file, just a different file type. Rufus is your friend. This is a link to the download. https://www.techspot.com/downloads/6062-rufus.html.
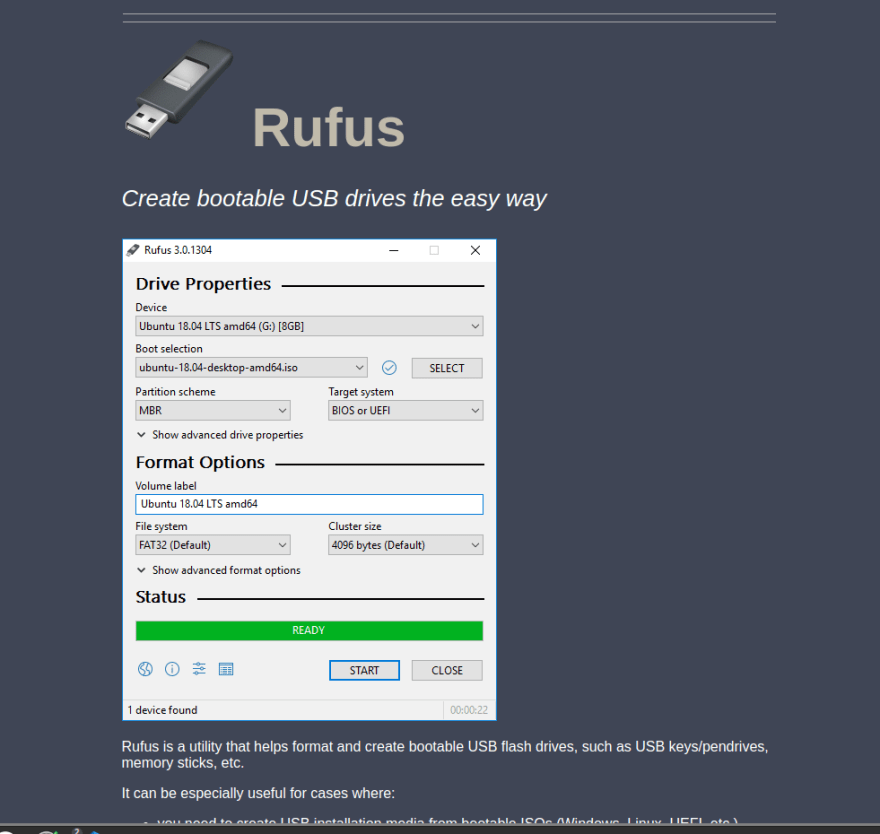
I made sure to switch my file system to FAT32 as I read it was more flexible and uses space more efficiently. The rest of the settings I left as default.
Finally, I was ready to install Linux.


Top comments (0)