Introduction to Django
Django is a web-framework, developed in Python. It is free, open-source and used by millions of developers every year. Python Django development is very robust and can handle heavy websites easily. Some of the websites using Django are - Instagram, Pinterest, Bitbucket, etc.
Why Django
- Extremely Fast - It was designed to help developers take applications from the ideation phase to the pilot project as quickly as possible.
- Secure - Django takes security on priority and is designed to avoid concerns that developers generally miss.
- Scalable - Few of the busiest sites on the internet are built on Django like - Disqus, Instagram, NASA, Spotify, Pinterest, etc.
- All in One - It contains many extra features that can handle common Web-development tasks. It comes loaded with User authentication, RSS feed, sitemaps, etc.
- Versatile - We can build many different types of web-application using Django like - Content Management Systems, Social networking, just-browsing websites, etc.
Now, let’s start with setting up Django in our system.
-
Installing Django
Considering, Python 3.x.x and pip are already installed, run the following command to install Django.
To check if version and if Django is properly installed, run the following command -pip install django
If any error is logged, check if Django is properly installed.
- Creating a Virtual environment and starting the first app To keep our code and required libraries isolated, we will create a virtual environment. I have created an environment named venv. Run the following command to install the virtual environment.
sudo apt-get install virtualenv -yOnce it is installed, let’s create a virtual environment named venv.
virtualenv venvAfter this, let’s start with the Django project.
We will run the following command to set up skeleton for django -
django-admin startproject mysiteHere, mysite is the name of my project. You will see that there is a directory created by the name of your project. Go into the directory and you must see a file named manage.py. This file will serve as the entry point to our server and all the commands will be sent through it.
Now, let’s check if the files are working correctly. Run the following command -
python manage.py run serverYour terminal will show that the server has started running your localhost on port number 8000.
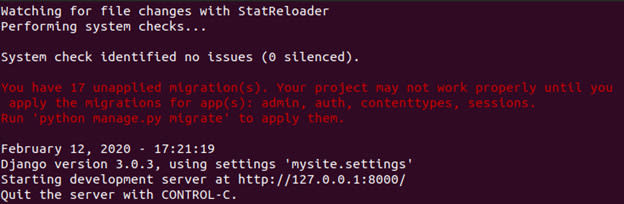
Ignore the warning in red color for now and let’s check if the server actually started or not. Open your browser and open the URL - 127.0.0.1:8000.
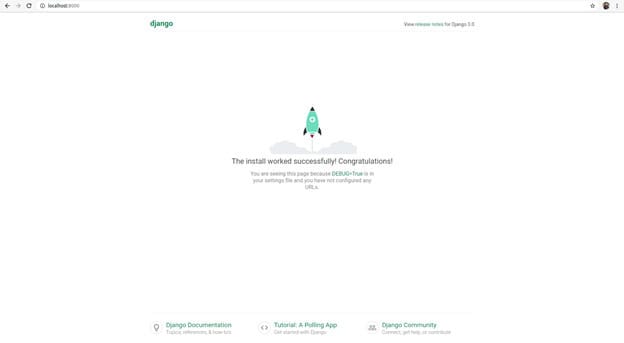
Hurray! We just started a Django server.
- Setting up a database and playing with migration
Now, in the previous command that we run, we saw the warning in red color regarding the migrations.
Just run the following command and see the magic -
python manage.py makemigrationsThe terminal shows - “No changes detected”.
This means that there were no changes detected from the previous save. So let’s run the following command to send all the saved changes to the database.
python manage.py migrate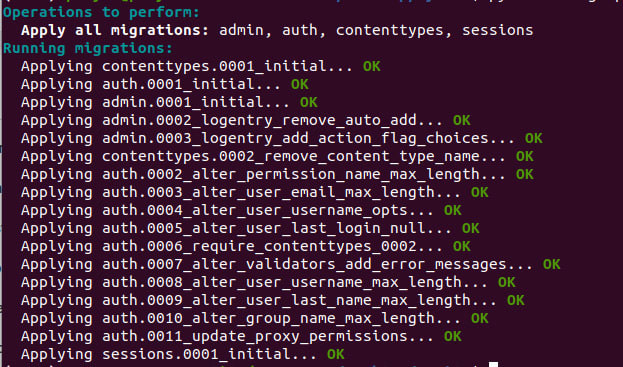
You must have got something similar to the above picture on your terminal. This means that your database just got set up and you must now see a file named db.sqlite3 in the folder.
- Create an app in a project
Well, our project is now set and we can create apps within our project. I will create an app named demo for demo purposes.
python manage.py startapp demoWe will now be able to see a directory named demo in our folder.
Open the file named views.py in the demo folder and let’s add the following code to it.
from django.http import HttpResponse

def index(request):
    return HttpResponse("Hello, world. Your app is now ready.")
Now, as we have written a function, we need to map it to a URL to run it. So, we will now create a file named urls.py in the demo directory and write the following code there.
from django.urls import path
from . import views

urlpatterns = [
   path('', views.index, name='index'),
]
Now, our project does not know that some URL is defined for our app, so we need to create a URL pattern in our project directory as well. Copy-paste the following code in the urls.py file in the mysite directory.
from django.contrib import admin
from django.urls import include path

urlpatterns = [
    path('demo/', include('demo.urls')),
    path('admin/', admin.site.urls),
]
Now run the server to check if the app is running.
Open the following URL -

Voila! We just created a small Django app to start building a new project.
Read more -
How to set up a REST Service or a Web Application in Django


Top comments (0)