Posting data to API's has never been easy. But have you ever used React to post form data to Google Sheets? If not, then this tutorial is for you.
Today, we are going to talk about how to POST form data from React to Google Sheets like REST APIs.
First, Create Your React App.
Just type the below command to setup the project directory.
npx create-react-app react-googlesheets

How to Install Semantic UI
Semantic UI is a framework used to design and develop beautiful and responsive layouts. It has components for Buttons, Containers, Lists, Inputs, and much more.
To install Semantic UI in your React application, use the following command:
npm install semantic-ui-react semantic-ui-css
After it has done installing, open the index.js file and import the following at the top:
import 'semantic-ui-css/semantic.min.css'
Now, run the app using the command npm start.
Let's create some input boxes
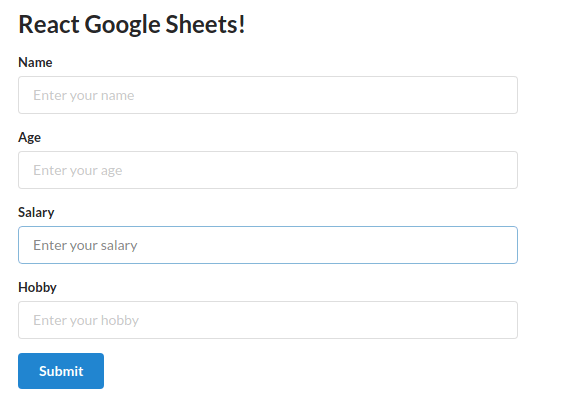
Let's create a form and input boxes to get our inputs like name, age, salary, and hobbies from our React App.
Here, we are importing Buttons, Form, Container, and Header from the semantic-ui-react library and creating form fields.
//App.js

import React, { Component } from 'react'
import { Button, Form, Container, Header } from 'semantic-ui-react'
import './App.css';

export default class App extends Component {
  render() {
    return (
      <Container fluid className="container">
        <Header as='h2'>React Google Sheets!</Header>
        <Form className="form">
          <Form.Field>
            <label>Name</label>
            <input placeholder='Enter your name' />
          </Form.Field>
          <Form.Field>
            <label>Age</label>
            <input placeholder='Enter your age' />
          </Form.Field>
          <Form.Field>
            <label>Salary</label>
            <input placeholder='Enter your salary' />
          </Form.Field>
          <Form.Field>
            <label>Hobby</label>
            <input placeholder='Enter your hobby' />
          </Form.Field>

          <Button color="blue" type='submit'>Submit</Button>
        </Form>
      </Container>
    )
  }
}
/*App.css*/
.form{
  width: 500px;
}

.container{
  padding:20px
}
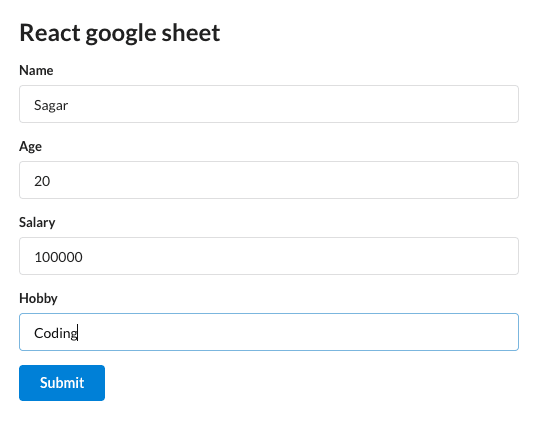
This is what it'll look like:
Now, we are done with the UI. Let's add some functionality.
First of all, let's create states for our four form fields in the constructor.
import React, { Component } from 'react'
import { Button, Form, Container, Header } from 'semantic-ui-react'
import './App.css';

export default class App extends Component {
  constructor(props) {
    super(props)

    this.state = {
       name: '',
       age: '',
       salary: '',
       hobby: ''
    }
  }

  changeHandler = (e) => {
    this.setState({[http://e.target.name] : http://e.target.value})
  }

  submitHandler = e => {
    e.preventDefault();
    console.log(this.state);
  }

  render() {
    const { name, age, salary, hobby } = this.state;    (*)
    return (
      <Container fluid className="container">
        <Header as='h2'>React Google Sheets!</Header>
        <Form className="form" onSubmit={this.submitHandler}>
          <Form.Field>
            <label>Name</label>
            <input placeholder='Enter your name' type="text" name = "name" value = {name} onChange={this.changeHandler}/>
          </Form.Field>
          <Form.Field>
            <label>Age</label>
            <input placeholder='Enter your age' type="number" name = "age" value = {age} onChange={this.changeHandler}/>
          </Form.Field>
          <Form.Field>
            <label>Salary</label>
            <input placeholder='Enter your salary' type="number" name = "salary" value = {salary} onChange={this.changeHandler}/>
          </Form.Field>
          <Form.Field>
            <label>Hobby</label>
            <input placeholder='Enter your hobby' type="text" name = "hobby" value = {hobby} onChange={this.changeHandler}/>
          </Form.Field>

          <Button color="blue" type='submit'>Submit</Button>
        </Form>
      </Container>
    )
  }
}
Here, we have four form fields and their respective states. We also have a changeHandler method to track the change in the input values.
Let's destructure the states in the render method and add their values into the value attribute of the inputs (line *).
The last thing we need is an onSubmit handler. On the form tag, add the onSubmit event and assign the submitHandler method.
Fill out the form and click submit. You will the inputted data in the console.
And that's it – we have a form that takes name, age, salary, and hobby and logs them into the console.

How to Post the data to Google Sheets
Let's change our Google sheets into a REST API.
We will be posting data to Google Sheets as a REST API, and for that, we need to install Axios. It is a library that you can use for sending requests to APIs, just like fetch.
Open a new Spreadsheet by clicking File, then New, and then Spreadsheet.

Name the sheet to name of your choice and save.
Click the share button on the top right of your screen, and edit the permission to public.

Copy the link and go to http://sheet.best and create your free account.
Create a new connection and paste your copied URL from the Google Sheets in the connection URL box.
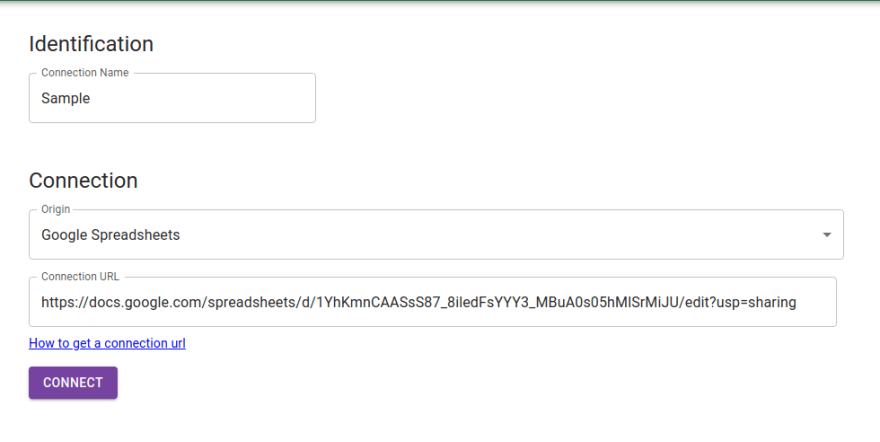
Click on connect. You'll be redirected to your connections page. Here, you can see all your connections. Click on the details of your new connection.
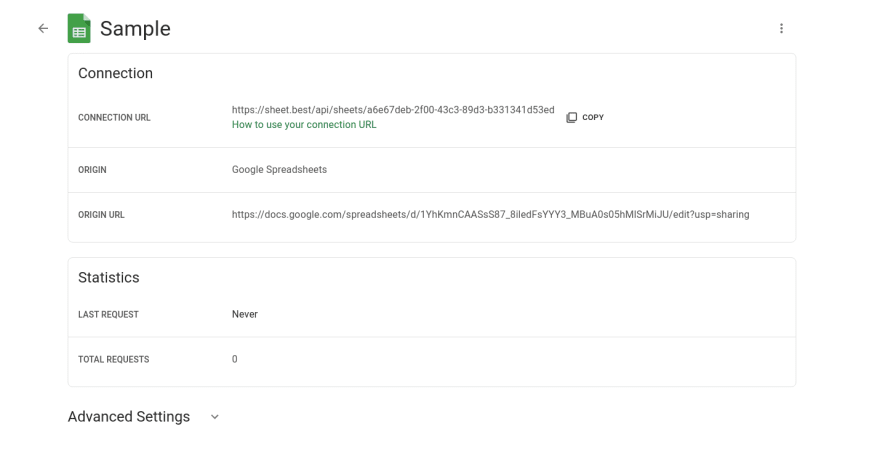
Copy the CONNECTION URL. This URL will be used as the endpoint for sending POST Requests.
Now, let's install Axios. Type
npm install axios
in your terminal to install the package.
After it has been installed, import it at the top of your file. We will make the POST Request in the submitHandler function.
//Submit Handler Method
submitHandler = e => {
    e.preventDefault();
    console.log(this.state);

    http://axios.post('url', this.state)
    .then(response => {
      console.log(response);
    })
  }
Replace the submitHandler function with the code above. Here, we are using Axios to post the data to the URL and get back the response in the console using the .then keyword.
Paste the copied CONNECTION URL endpoint from http://sheet.best and replace it with the URL in http://axios.post('url').
// Submit Handler Function
submitHandler = e => {
    e.preventDefault();
    console.log(this.state);

    http://axios.post('https://sheet.best/api/sheets/a6e67deb-2f00-43c3-89d3-b331341d53ed', this.state)
    .then(response => {
      console.log(response);
    })
  }
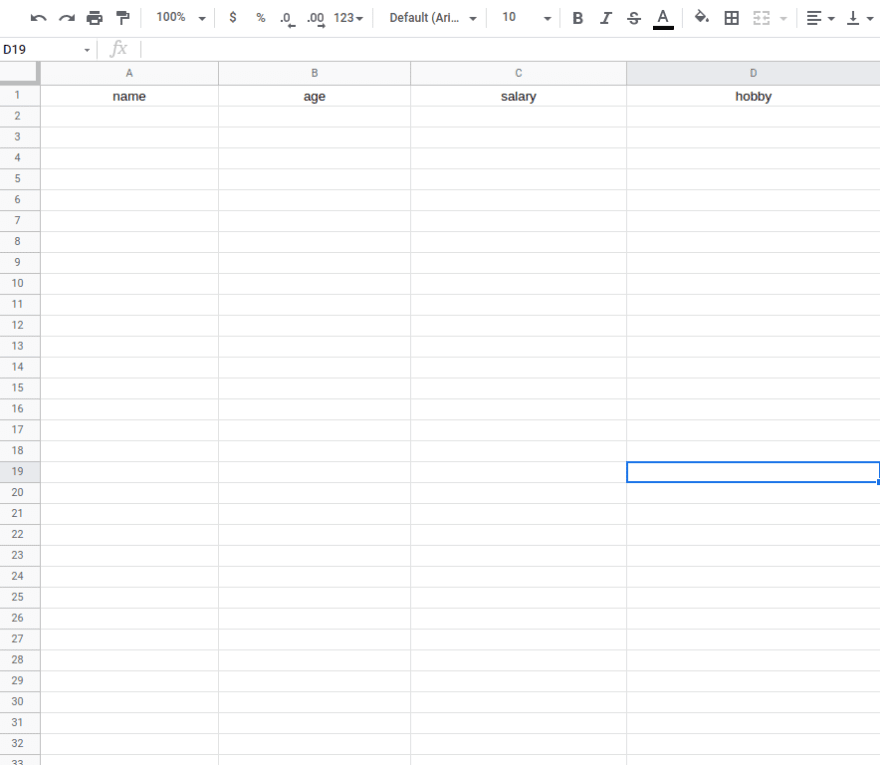
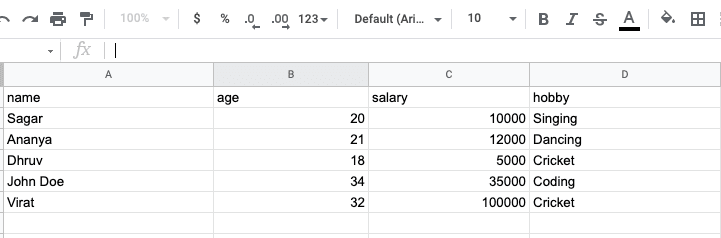
Now, open up Google Sheets and fill up the first columns, that is name, age, salary, and hobby. Please fill them out carefully, or else it will not work. It should be case sensitive.
Now, run your React app and fill in the input fields. You'll see that the data is getting populated into your Google Sheets one by one.
That's all folks. Now you know how to turn Google Sheets into a REST API. Now, you store your data in Google Sheets with a React application.
Here's the github repo for the entire code - https://github.com/sagar-barapatre/React-to-Google-Spreadsheets


Top comments (0)