IBM Watson Chatbot is a conversational AI platform that helps you answer customer’s queries with fast and accurate answers. It is built over the powerful AI engine of IBM Watson, which powers complicated conversational AI problems at leading companies such as KPMG, Crédit Mutuel, and KONE.
Watson has been one of the go-to platforms for building conversational interfaces and chatbots. This article will help you integrate your IBM Watson chatbot (officially called IBM Watson Assistant) into your website.
Step by Step Guide to Integrate IBM Watson Chatbot Into Your Website
Step 1: Sign up for Kommunicate
First, you need a platform that helps you integrate the chatbot and provides the UI (chat widget) to render your bot responses on the website and mobile apps. Kommunicate is a platform that can help you deploy the chatbot into your website and mobile apps.
Sign up here for Kommunicate (it is free to get started with). Once you are done with the signup process, navigate to the Bot integration section, and click on IBM Watson to integrate the bot.
Kommunicate's IBM Watson Chatbot integration
As soon as you tap on IBM Watson, a modal will open with the instructions to integrate IBM Watson Chatbot with Kommunicate.

Step 2: Get your IBM Watson Chatbot Credentials
The best part about this is that you can integrate IBM Watson chatbot in Kommunicate without any code. You can see the instructions to get your credentials. The following steps will help you in finding the API key, Assistant ID, and Service URL.
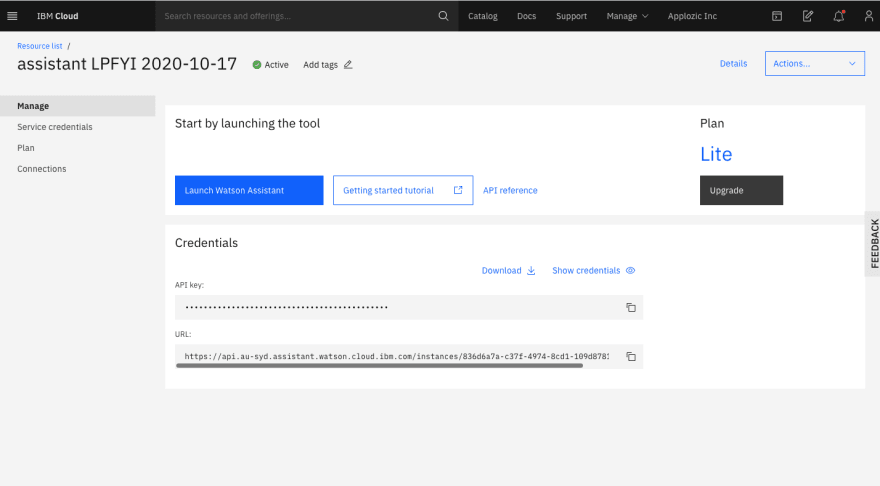
1. Log in to your IBM Waston assistant console and click on the Resouces List from the left side menu

2. Find the Services option and click on the Assistant listed inside the Services

3. Copy the API key, Service URL, and paste it on the Kommunicate chatbot integration section.
4. Now, we will have to find the Assistant ID. To get the Assistant ID, follow these steps:
Click on Launch Watson Assistant

Tap on 3 dots given on the left side of the Assistant and click on the Settings option
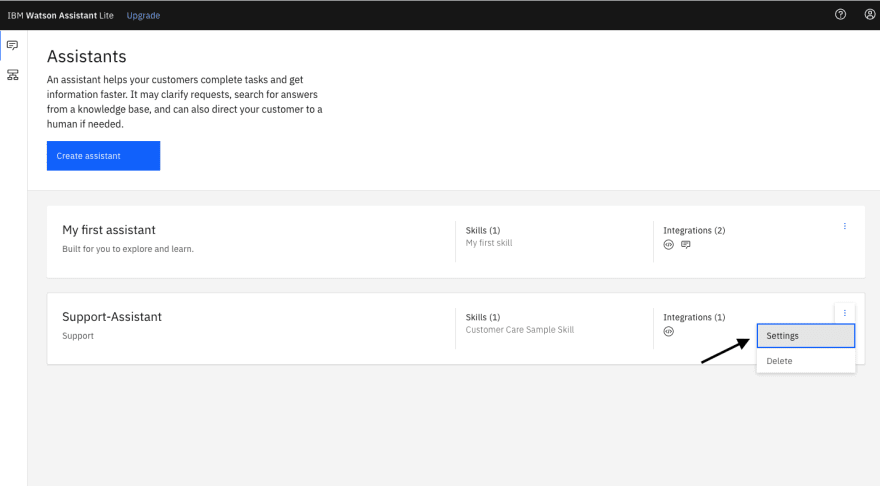
Navigate to API details and copy the Assistant ID and mention it on the Kommunicate bot integration page
Step 3: Finish your bot setup
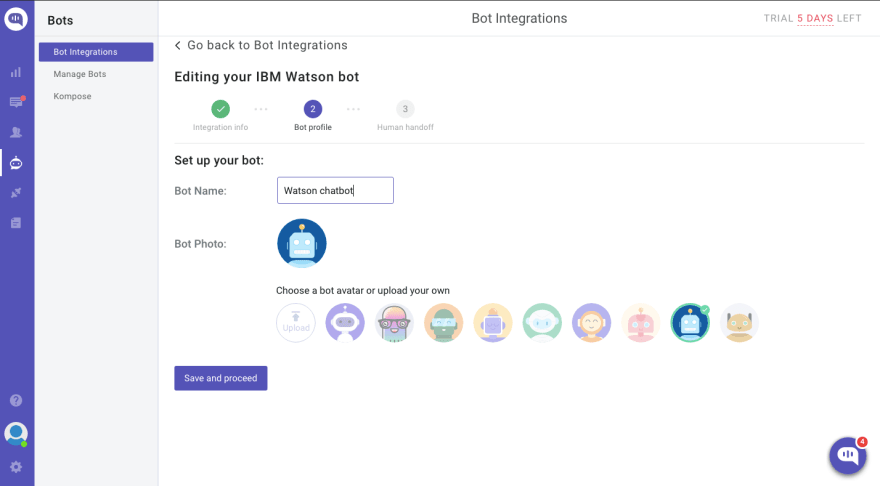
Once you copy and paste all the details on the Kommunicate chatbot integration page, click SAVE and Proceed.
In the next step, give your chatbot a name and add the profile photo (or choose from the existing gallery of chatbot profile images). Click on Save and Proceed.
You can enable or disable the bot to human handoff as per your requirement, and you can change this setting later as well. Bot to human handoff automatically transfers the conversation from your chatbot to a human and notifies them.
Once you finish the integration, please navigate to the Manage bot section and hover on the newly integrated IBM Watson chatbot to test it. Here is how it is going to look:

Step 4: Add the Kommunicate chat widget and IBM Watson Chatbot to your website
Now you are in the final step. To add this bot to your website, visit the Install section on the Kommunicate dashboard. Here you will find the script for rendering the chat widget on your website. Copy the web script and add it to your website, as explained in the Install section.
Now your chatbot is ready on your website to help your user with their queries.
For integrating IBM Watson on mobile apps, refer here
Youtube tutorial for IBM Watson Integration: https://youtu.be/_Azr3rk-P7w
If you have any questions about the integration, feel free to reach out to support@kommunicate.io.
This blog is originally published here.

Top comments (0)