
A virtual machine (VM) is simply a digital version of a physical computer. As a virtualized instance of a computer, a virtual machine can execute almost all tasks a physical computer can, including running operating systems and applications.
Azure Virtual Machines are scalable, on-demand computing resources offered by Microsoft.
A data disk is a managed disk that's attached to a virtual machine to store application data, or other data you need to keep. Data disks are registered as SCSI drives and are labeled with a letter that you choose. Each data disk has a maximum capacity of 32,767 gibibytes (GiB). The size of the virtual machine determines how many data disks you can attach to it and the type of storage you can use to host the disks.
In this guide we will be creating a Windows Virtual Machine, RDP into it, install a Webserver, add a Data disk and initialise the disk and make it usable
Creating a Windows Virtual Machine
Step 1:
Visit portal.azure.com, login or sign up if you don't have an account, you can get a free account at azure.microsoft.com/en-us/free/
Step 2:
On the Azure portal page click the search box and enter Virtual Machine, then click Virtual Machine

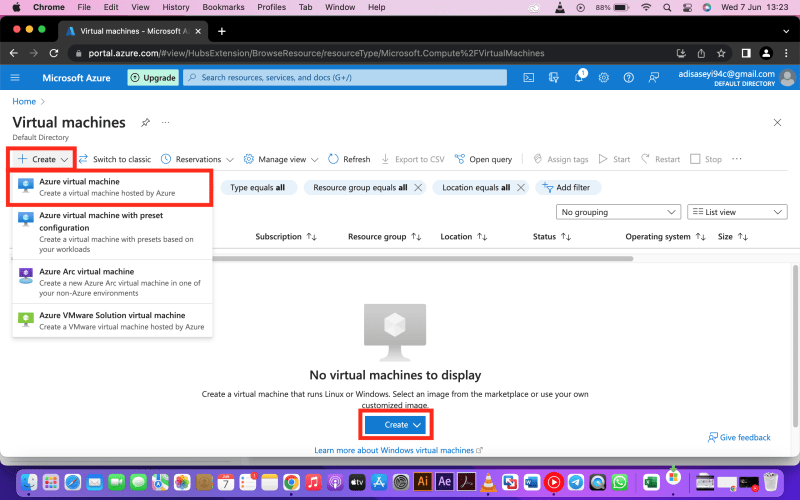
Step 3:
On the virtual machine page click create button and select azure virtual machine
Step 4:
Resource Group
Select a resource group or create a new one by clicking create new option shown below the input bar
Virtual Machine Name
Input the Virtual Machine name of your choice, in this example i will be using thismyvm
Region
Select a region where the virtual machine will be located, in this example i will be using East US
Availability Option
Select No infrastructure redundancy required
Security type
Select Standard
Image
Select an operating system (which is image) of your choice, in this example i will be using Windows Server 2019 Datacenter x64 Gen2
VM Architecture
Select x64

Step 5:
Enter a username which must be between 1 and 20 characters long, in this example i will be using azureuser as my username.
Set a password that the value is between 12 and 123 characters long in this example i will be using Password123* as my password.

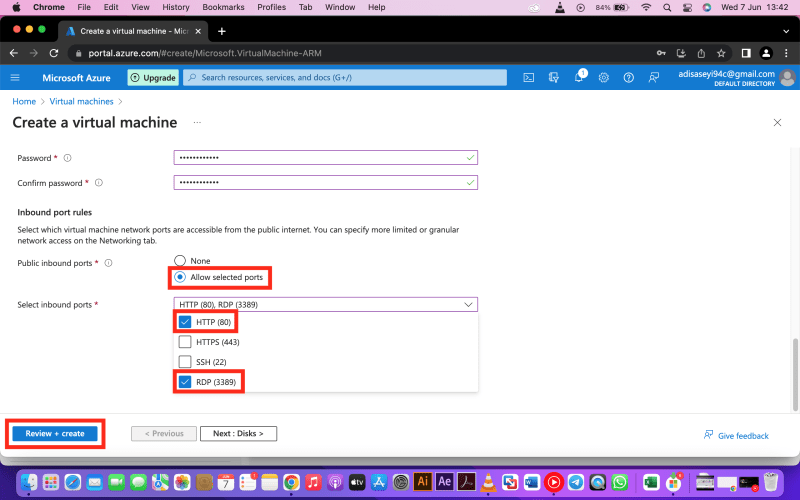
Step 6:
Set public inbound ports as Allow selected ports.
For select inbound ports tick HTTP and RDP.
Then click review + create button
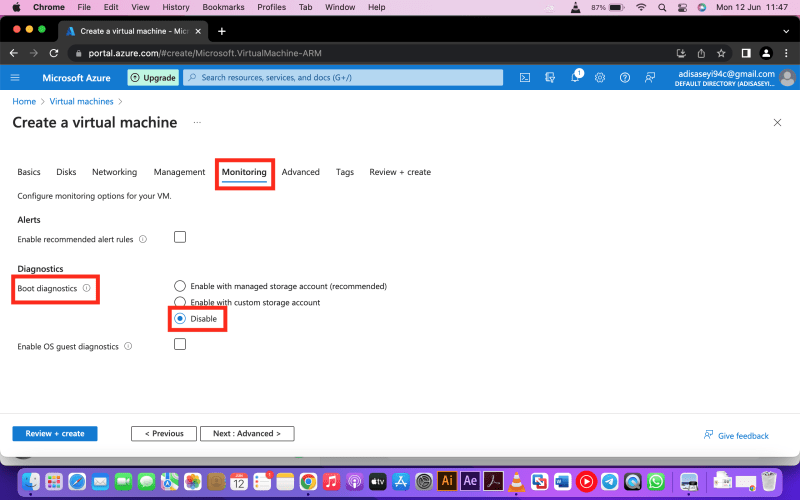
Step 7:
Goto monitoring and disable Boot diagnostics
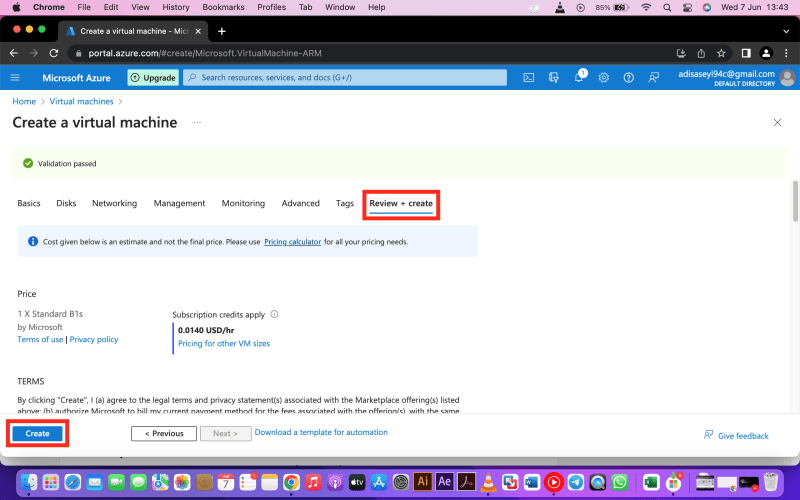
Step 8:
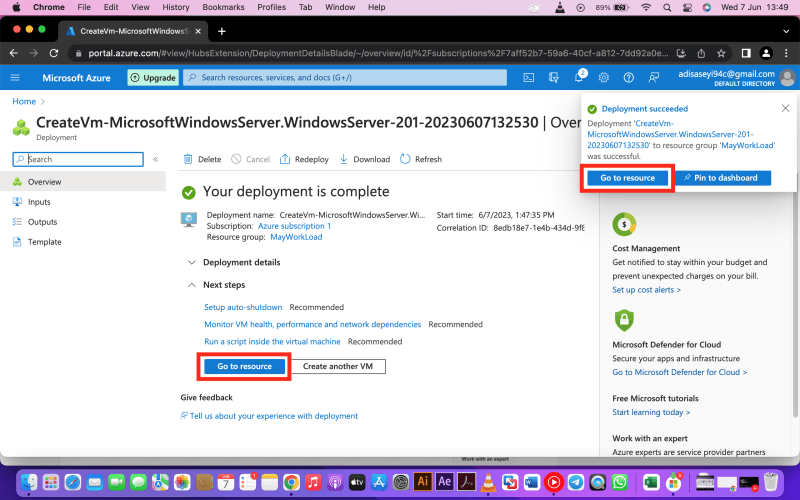
Go back to review+create tab and click the create button. After clicking create the portal will start your virtual machine deployment process.
RDP into the Virtual Machine
Step 1:
After the deployment process is complete click the Goto Resource button
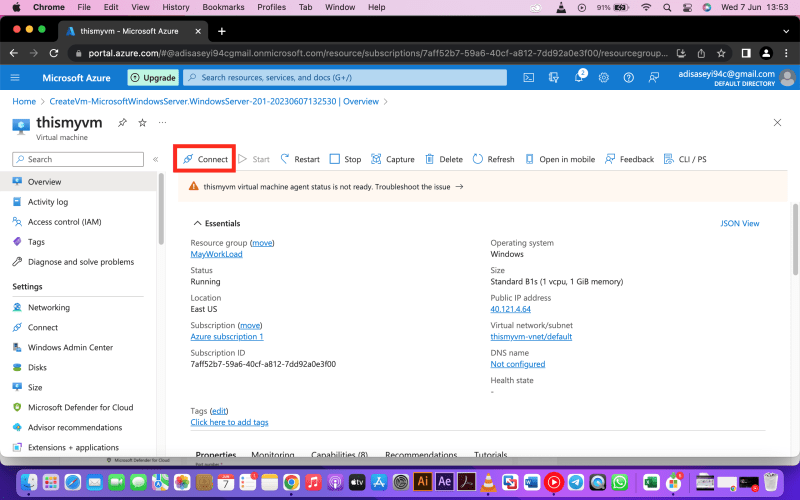
Step 2:
On the Virtual Machine page click connect button
Step 3:
Click Download RDP file and your Virtual Machine RDP file will be downloaded

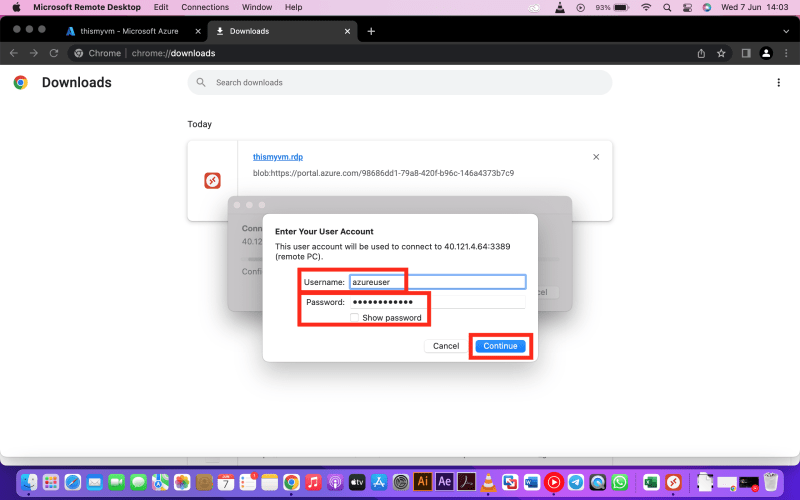
Step 4:
Goto your download folder and open the RDP file, for mac users make sure you have microsoft remote desktop application installed, download and install it here: apps.apple.com/us/app/microsoft-remote-desktop/id1295203466?mt=12
Step 5:
Open the RDP file and input your username and password you set while creating your Virtual Machine, then click continue.
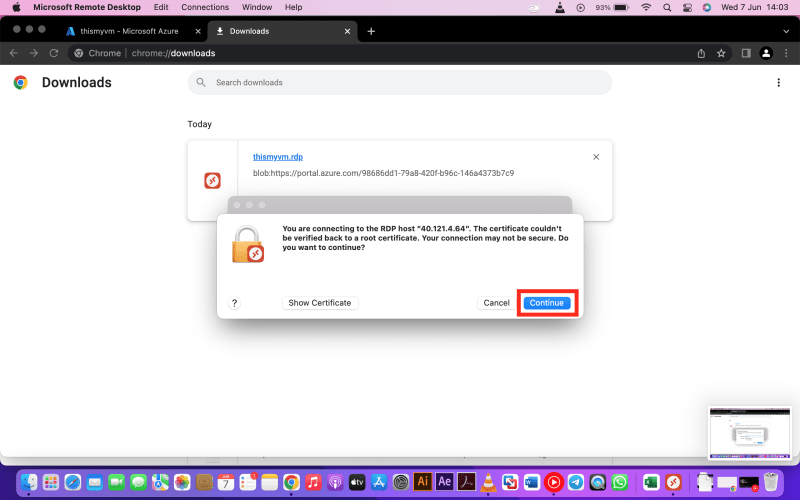
Step 6:
A prompt window will pop up click continue
Step 7:
Our Windows Virtual Machine is live.
Installing a Web Server to the Virtual Machine
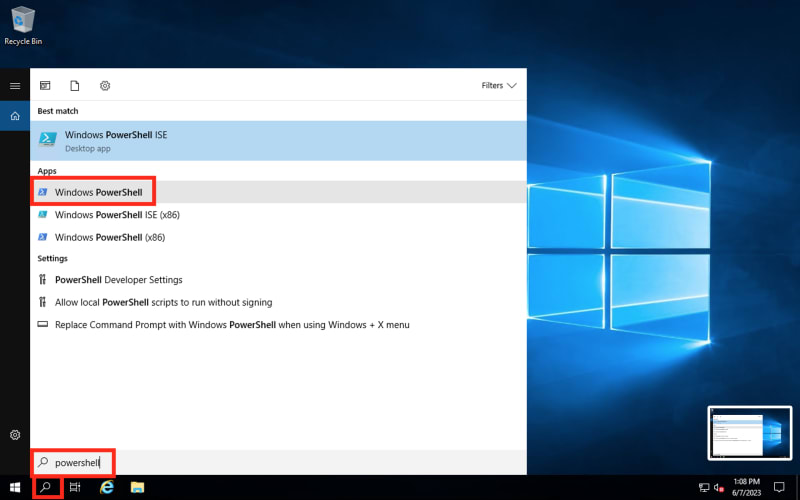
Step 1:
On your virtual machine go to windows search and type powershell, then select powershell and run as administrator
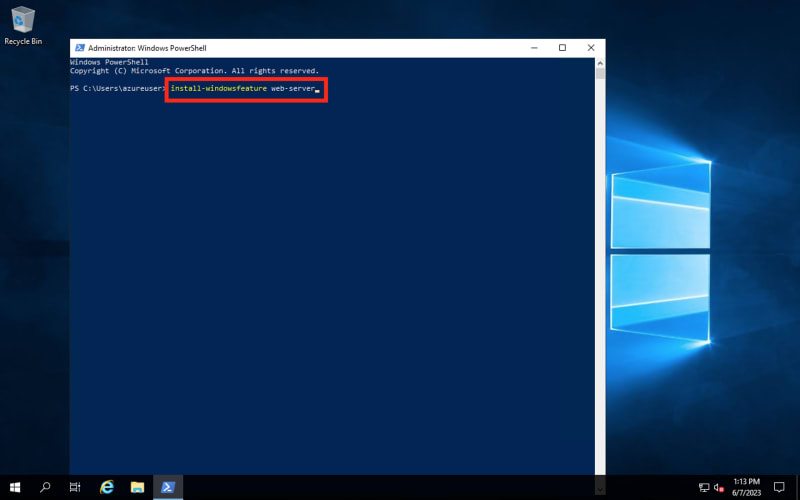
Step 2:
On powershell type this command:
install-windowsfeature web-server
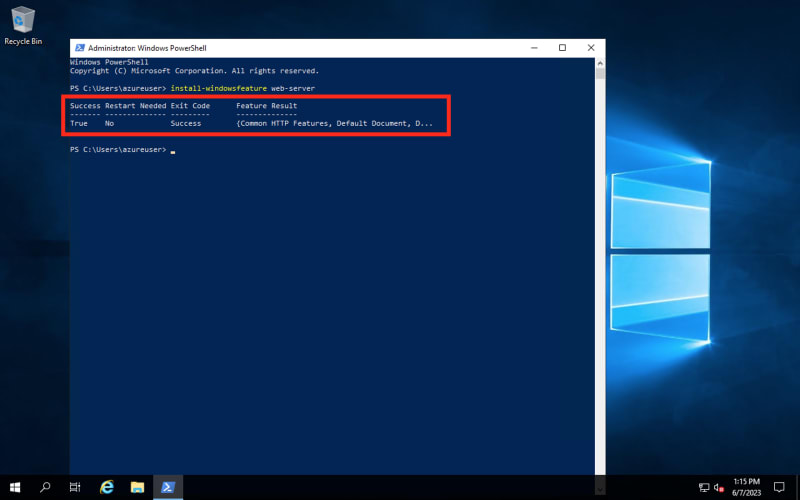
Step 3:
You should see this screen if you have successfully install a web server to the virtual machine
Step 4:
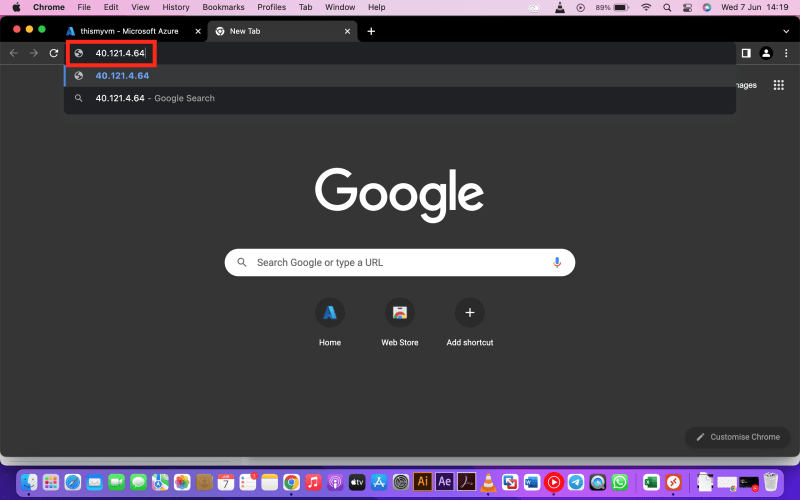
Go to the overview page of the virtual machine we created, then copy the public IP address

Step 5:
Open a new tab in your browser and paste the IP address we copy then hit enter
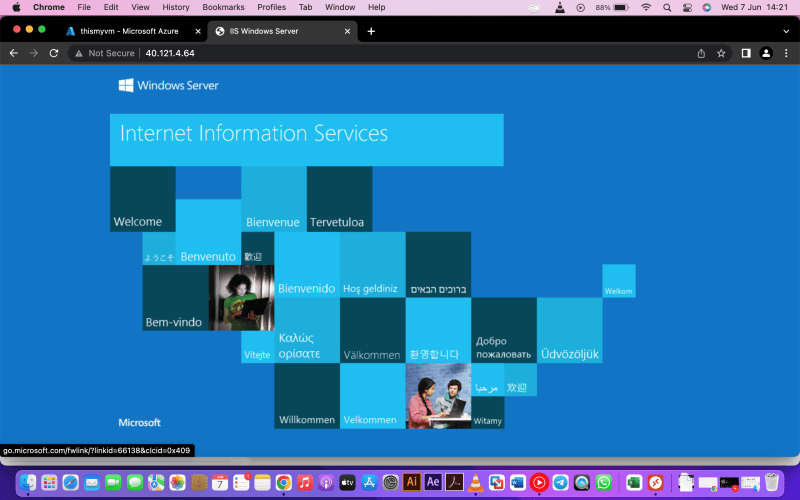
Step 6:
As you can see we have successful install a web server to our Virtual Machine
Adding a Data disk to our Virtual Machine
Step 1:
Goto the overview page of your virtual machine we created, then click disk on the left

Step 2:
Click create and attach a new disk

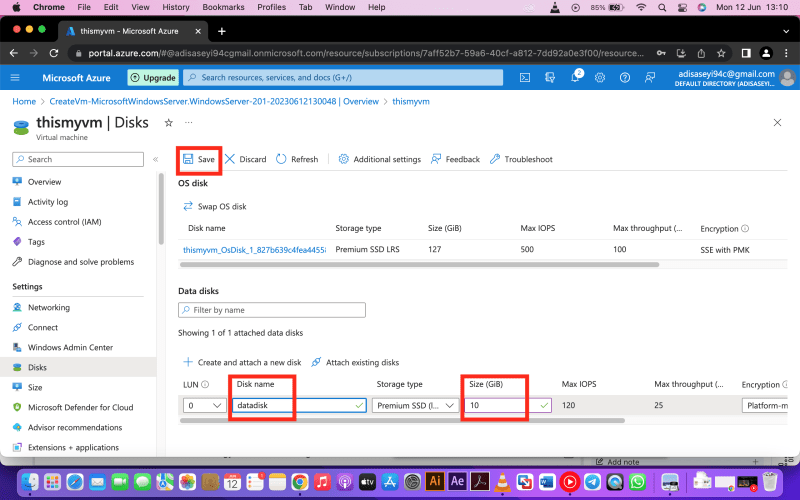
Step 3:
Enter a data disk name of your choice, in this example i will be using datadisk as my data disk name, then enter the data disk size of your choice, in this example i will be using 10GiB as my data disk size, then click save.
Initialising the Data disk and making it Usable
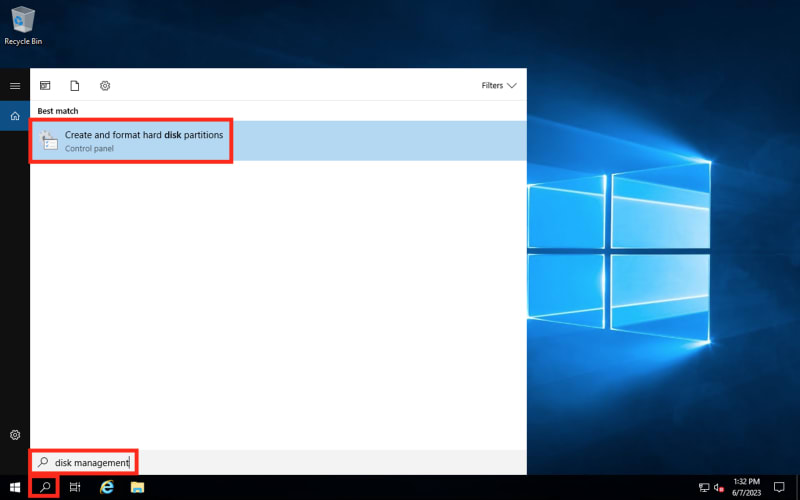
Step 1:
Go back into your Virtual Machine, then on your windows search bar search for disk management, then click create and format hard disk partitions
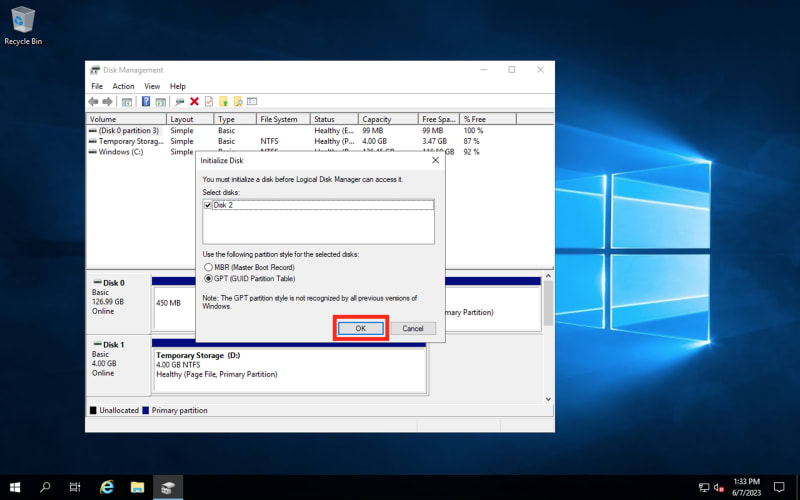
Step 2:
You will see an initialise disk pop up, click ok
Step 3:
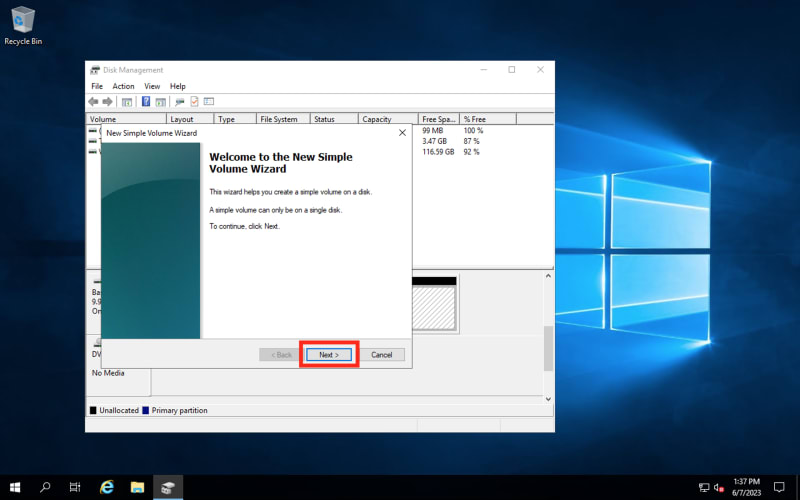
Scroll down to disk 2, then right click on it and click New Simple Volume

Step 4:
Click Next
Step 5:
Click Next

Step 6:
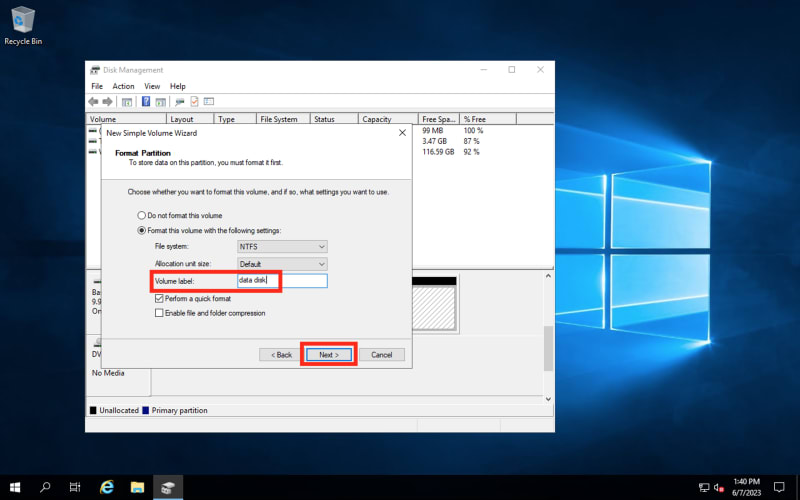
Enter a volume label of your choice in this guide i will be using datadisk as my volume label, then click next
Step 7:
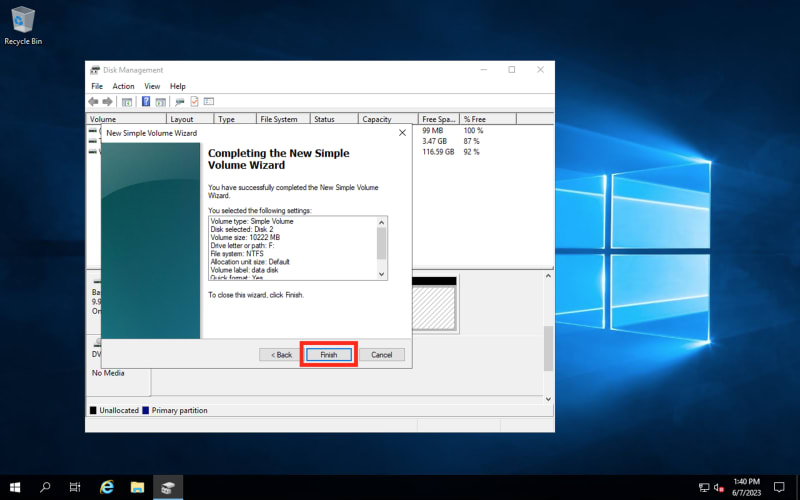
Click finish
That will be all for this guide, thank you for reading!!!

Top comments (1)
well done